What do you need for lamination at home?
If you are worried that you won’t succeed, we will dispel your doubts, because there is nothing complicated about it.
You will need:
- special film, which can be easily found on the Internet or in specialized stores;
- an iron, everything is quite simple here, because this thing is available in every home;
- a piece of fabric that will protect your film.
Now that we've sorted out the materials, let's move on to choosing the film. High-quality, correctly selected material will allow you to quickly laminate a document. The sizes of laminated film come in different sizes. It is better to buy the material in A4 format. The film should be thin, 70 microns, it will be cheaper and there will be no difference in quality. It looks like a small pocket connected to one of four sides (vertically or horizontally). The inside of the material is treated with an adhesive base. During heating, the base layer softens and connects the sides. If your document is smaller than a landscape sheet, cut the film according to the size of the documents, leaving a small allowance on all sides.
LiveInternetLiveInternet
—Categories
- Cooking (713)
- Baking (128)
- Snacks (102)
- To my meat eaters (82)
- Salads (81)
- pantry (76)
- Desserts (70)
- Cooking in the oven (51)
- SUMMER: for every day (49)
- Fish (43)
- Borscht, soups, hot dishes (38)
- Bread (29)
- AUTUMN: for every day (17)
- WINTER: for every day (7)
- drinks, tea (6)
- Glass (4)
- Proper nutrition (4)
- Tips (4)
- Handicrafts (637)
- little things for the home (151)
- textile toys (99)
- Scrap for rework (92)
- weaving + newspaper (79)
- Beads, beads, bijou (73)
- boxes and boxes (62)
- sculpt (60)
- Kanzashi, textile flowers (46)
- My wants (9)
- Amulets and their meanings (6)
- MasterClasses (2)
- My works (1)
- Children's (580)
- let's play (165)
- Fun (81)
- learning (66)
- knitted new clothes (63)
- educational program for a young mother (60)
- food (57)
- Reading room (36)
- sew (26)
- hats and other accessories (24)
- bed and stroller (13)
- Early development (12)
- First dowry (11)
- order in the nursery (8)
- topotulki for lapulki (7)
- For Vera (5)
- 5-6 learning is not boring (4)
- Usefulness. (510)
- for health (135)
- for yourself beloved (126)
- I am a sculptor of my body (93)
- Traditional medicine (51)
- Relationships (35)
- soapy (32)
- Hairstyles (14)
- everything for hair (1)
- Embroidery (476)
- Schemes (398)
- Decoration (37)
- rules, signs, lessons (27)
- assistants (10)
- Libraries, abstracts (462)
- Bookshelf (211)
- Scans, photos, drawings (170)
- Sewing and cutting (351)
- clothes (136)
- for home, blankets, pillows, toys (81)
- bags, accessories (58)
- Curtains (29)
- Patchwork (22)
- Knitting (320)
- Dachnoe (260)
- DIY crafts (67)
- A collection of ideas for a future dacha (50)
- growing rules (49)
- Sharing secrets (41)
- Pests (26)
- My pets (13)
- Design and decor (176)
- ideas (79)
- all about plaster, putty (48)
- Interior (26)
- Furniture (14)
- Crochet (129)
- Knitting (99)
- Lessons (26)
- mohair (12)
- Home renovation (87)
- e (74)
- Advice from experienced people (45)
- KotoDom (9)
- Fashion and style (9)
- Entertainment (8)
- Everyday affairs (6)
- ..granddaughters (3)
- ..things happened (1)
- Irish, Burgese, Romanian. (6)
- Orthodoxy (3)
- . for teapots (3)
- Household appliances (2)
-Music
—Subscription by e-mail
-Friends
How to laminate paper at home?
Laminating plain paper is a responsible and important process. If you're wondering whether it's worth spending the extra money on this design, the answer is yes. After all, your children’s valuable multiplication or division tablets, as well as your dear recipe for delicious buns that pleases your husband, can become wrinkled and frayed. Laminated paper gives us much more benefits in everyday life.
To work at home we will need:
- iron;
- laminating film;
- sheet.
If your A4 size handout is fine, the job will be done easily. Take the document you will be working on and place it in the middle of the film. Place sheets of paper on top and bottom and iron with a hot iron. If the size is slightly smaller, cut along the contour, leaving a small allowance. Is it possible to do this trick if the document is larger than film and is on whatman paper? Unfortunately no. In this case, it is better to contact specialists.
How to laminate a document at home?
The process of laminating a passport, ID, or pass at home is very painstaking. If you are doing this for the first time, then be very careful, here you need to laminate each side in turn. Place the document cover side up and laminate one side and then the other.
How to laminate photos at home?
You don't need to do anything special, just be careful. Photos, some cards with pictures, children’s drawings are very important things for parents, as well as for the kids themselves, because they serve as memories of wonderful moments. If we talk about business cards, they should be of high quality and durable.
Perhaps you value puzzles featuring your favorite cartoon character? They can also be laminated and stored for a long time.
Self-adhesive films
© RecallInformatica
Buy self-adhesive lamination film. Such films are sold in sets of 20–100 pieces, and are quite inexpensive. It is recommended to buy films with a grid on the back side - it will help to correctly position the sheet of paper.
Self-adhesive film is a sheet of polypropylene coated with glue on one side. Such films are intended for manual lamination, which is done as follows:
- Separate the top of the film from the backing by prying it up with your fingernail. Do not touch the adhesive side of the film to avoid leaving fingerprints.
- Glue the top of the sheet onto the adhesive surface of the film. Be careful, glue the sheet so that at the end of the procedure its entire surface is on the film.
- Gradually peel the film from the backing while sticking it onto the sheet, constantly aligning the film using a ruler (or credit card).
- In the same way, stick the second film on the back side of the sheet.
- Trim off any excess film around the edges. Done, the sheet is laminated!
Of course, you can make everything simpler - completely peel off the film from the backing and immediately stick it to the sheet, smoothing it with your hand. But then you risk getting air bubbles between the film and paper, which will have to be pierced with a needle, and this can worsen the appearance of the sheet.
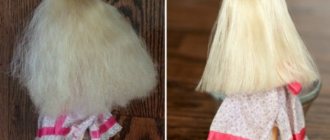
How to laminate hair at home?
What do the fairer sex value? Of course, with your hair. Long, shiny, silky hair is the pride of any girl. A process such as hair lamination will help you with this. This procedure is expensive in a salon, so we will learn how to do it at home. The main ingredient that this procedure cannot do without is gelatin.
It is important to prepare your hair for such procedures in advance. The first thing you can do during the week is change your diet. Eat a balanced and proper diet. Consume fish oil daily. Don't forget, our hair always speaks about our health and how we eat. When hair is dull and pale, this is the first sign that the body is deficient in vitamins and minerals.
Try to get more rest. Stick to your daily routine. Go to bed no later than 10 pm. If you follow all the rules, then the effect of lamination will be more noticeable. After all, when the hair is “alive”, the mask only strengthens it.
Magic mask recipe. Ingredients:
- gelatin - 2 tbsp;
- warm water - 6 tbsp;
- hair balm;
- plastic bag;
- towel.
Place gelatin in a bowl and add water. Mix, add hair balm in a ratio of 3:1, where 1
- gelatin and 3 - balm. Before use, wash your hair and apply a mask to damp hair. Wrap your hair in a bag and put a towel on top. After 20 minutes, rinse with running water and dry your hair naturally (without a hair dryer).
The laminating mask is perhaps one of the most popular recently. It works as follows: gelatin penetrates the hair roots, fills them and makes them smooth. The mask is harmless and completely natural. You can use it once a week, as over time your hair gets used to it, which prevents you from achieving the desired effect. Wash your hair less often, then the results will last for a long time.
How to laminate eyelashes at home?
Every woman dreams of thick and lush eyelashes. Unfortunately, nature was not able to reward all representatives of the fairer sex with such wealth. In pursuit of perfection, girls spend huge amounts of money without thinking about the consequences.
Nails have long been extended, now it’s time for eyelashes. Now they are being extended, glued, laminated. If the first two methods are harmful to eyelashes, then the third is gentle. The result is natural. Eyelashes become longer, thicker and blacker. This procedure is expensive, so thrifty fashionistas learn to do lamination at home.
Recipe:
- gelatin - 1 tbsp. l;
- warm water - 3 tbsp. l;
- vitamins A and B;
- fish fat.
Pour gelatin, add water, leave for 20 minutes for the mixture to swell. Microwave for a couple of seconds. Add remaining ingredients. Apply the product with a cotton swab to a cleansed face. Leave for 30 minutes, rinse and enjoy your eyelashes. This procedure is also suitable for eyebrows. Don't forget to place cotton pads under your lower eyelid to prevent gelatin from getting on your skin. Keep your eyes closed to avoid getting caught.
How to laminate chipboard at home?
Chipboard is an alternative substitute for expensive wooden structures. With lamination you can achieve amazing results and your furniture will look like real wood. Of course, this result can be achieved with the help of professional tools.
Lamination of chipboard is called laminating; the process occurs using an adhesive film. Take the plywood, attach the film to it with the adhesive side and go over it with a roller. Everything is very simple and convenient. This also applies to MDF panels (linings). Do the work in the same way. If bubbles suddenly appear, use a spatula.
If you liked the article, please share it
Previously on the topic:
- How to make a children's chair: recommendations and steps for making mini-furniture
- Do-it-yourself wood antiseptic: reasonable savings, desired effect
- What and how to make a watch with your own hands: materials and methods of creating decor
- DIY decorative concrete: characteristics, proportions, instructions
- How to make a greenhouse with your own hands: types, materials and methods of creation
- Production volumes of industrial enterprises in Estonia increased by 17 percent
- DIY cucumber trellis: materials, types of structures and their manufacture
- How to remove scratches on furniture: quickly and easily
Share
How to laminate a door with your own hands?
Doors are an indispensable attribute of the home interior. High-quality doors will provide a high level of sound insulation and sound absorption. You need to choose them carefully. But what if you chose quality doors, but they deteriorated over time? In this case, take our advice and laminate them. Take a special film, apply the adhesive side to the door, and apply it with a roller. If there are still bubbles, take a spatula and go over again. Also, don’t forget about the tabletop, because this is an item that suffers every second from household damage. Hot dishes are placed on it, spicy foods are thrown in, and liquids are poured. The furniture won't last long at this rate.
Let’s not forget about the windows, which have a high level of sound insulation, do not allow heat to pass through and give us a beautiful view of the street. Wooden windows used to have the following characteristics: they were small, had a window, were difficult to clean inside and deteriorated over time.
Modern windows are of better quality, more reliable and ergonomic. They are comfortable, can be opened for ventilation and are easy to wash. Another plus is the choice of window frame. It can be white, multi-colored, with a pattern and in the form of a tree. So let's give our windows longevity! You already know what to do with them.