Keeping your bathroom clean takes a lot of effort, forcing you to spend valuable time cleaning and giving pristine shine to the faucet parts. Under the influence of dirt, dust and soapy water, faucets become dull and become covered with stains and various deposits. Cleaning bathroom faucets is quite problematic due to the complex shape and characteristics of the coating, so plumbing equipment owners should familiarize themselves with simple and effective methods for caring for and cleaning faucets.
How to clean a bathroom faucet: step-by-step disassembly and cleaning of taps
Constant contact with water contributes to rapid wear of the faucet structure.
During use, salt deposits appear on it, in other words, lime deposits. With its education, one has to forget about the original beauty and brilliance of the tap. Such white stains can appear not only outside, but also inside plumbing fixtures. Over time, due to plaque, the crane may no longer turn. It is necessary to take care of the plumbing fixtures in a timely manner so as not to lead to such a state. Moreover, cleaning the faucet yourself will not require much effort or skill. The moving mechanisms of faucets often become clogged with deposits and begin to leak, make noise, or turn poorly. I will tell you how to disassemble a two-valve type faucet in a bathroom or kitchen and its single-lever version, and also give simple recommendations for cleaning them at home.
You can clean the faucet yourself.
Precautionary measures
In no case should you try to disassemble non-separable models of watering cans. In the future, such a product simply cannot be glued together.
- In no case should you boil watering cans in a vinegar solution - many coatings cannot withstand critical temperatures and the aggressive effects of acids. As a result, you can not only remove limescale deposits on the mixer, but also partially or completely damage the surface of the watering can and its individual elements.
- You need to disassemble the watering can carefully so as not to lose (drop it into the drain) the mounting bolts, rubber gaskets, and other small parts.
- Removing limescale from a faucet involves using rubber gloves to protect your skin from chemical burns. It is also necessary to prevent the risk of vinegar or soda getting into the respiratory organs and eyes.
Types of cranes
Before you begin disassembling the crane, you should determine its type.
The most commonly used types of taps are:
- Two-valve with valve axle boxes;
Double valve faucet with shower.
- Single lever with cartridge;
Single lever faucet model.
- Ball (for switching shower/gander).
There is a ball with a hole inside.
These are the most common types of faucets. Determine which of them yours belongs to and read the corresponding section of the article.
Dismantling the crane
Double valve type
Typical two-valve mixer.
In bathrooms, two-valve faucets are most often used.
Disassembling a bathroom faucet with shower is not particularly difficult:
- We turn off the water. The shut-off valve is usually located near the pipe entry into the apartment, usually in the toilet or bathroom;
Close the inlet valve.
- Remove the mixer. To do this, use a plumbing wrench to unscrew the nuts that secure the housing to the eccentrics. Care will be required here, as the nuts can crumble with great effort;
Remove the tap from the eccentrics.
- Remove the plugs from the valves. To do this, use a screwdriver or knife to pry up the red and blue circles in the center of the valve handle.
We take out the plugs from the valves.
- There is a screw under the plug. We unscrew it and remove the valve from the valve stem;
Unscrew the fixing screw with a screwdriver;
Remove the valve from the stem.
- We unscrew the faucet axle itself and remove it from the socket in the faucet body.
Unscrew and take out the valve axle.
We remove the valve axle from the socket.
- We repeat the procedure with the second valve and move on to the shower/gander switch. Here we also take out the plug, unscrew the screw, remove the lever and unscrew the crank (ball, cylindrical mechanism);
Remove the shower switch.
- Unscrew the gooseneck from the body. To do this, carefully unscrew the union nut.
- Unscrew the shower hose from the mixer. It is better to do this by hand so as not to damage the chrome layer with a key.
Unscrew the shower hose.
- We remember the disassembly process so that we can put the product back together later.
We remember what the mixer consists of.
Once the mixer is disassembled, you can start cleaning it. First you need to remove all the rubber gaskets. This is especially important for older crane axle boxes, where the gaskets do not last long .
Unscrew the clamping screw.
Remove the gasket from the valve axle.
If the gasket is dry, cracked, or otherwise damaged, it should be replaced. Before installation, it makes sense to chamfer the gasket by cutting off the outer corner (on the side where the gasket is adjacent to the mixer body). This will eliminate the noise that old faucets often make.
Worm and half-turn (ceramic) valves.
The new cranes are equipped with a crane axle box with ceramic plates. There is no point in disassembling it; the price of a new part does not exceed 250 rubles. just replace the crane axle boxes with new ones .
We remove and inspect the remaining gaskets.
We remove the gaskets from all connections and inspect them. If they are cracked, torn, or have lost elasticity, they must be replaced. We unscrew the aerator at the tip of the gander, take out the mesh and gasket. We clean the mesh from plaque, change the gasket (if necessary).
We clean the aerator from plaque and dirt.
We clean the mixer body from lime deposits and rust . To do this, you can use a product like Cillit Bang, Comet, Mr. Muscle or Domestos. Internal surfaces must be clean and smooth.
We clean the mixer body from lime and debris.
When unscrewing union nuts and other parts with an adjustable wrench, you should carefully calculate the force, since silumin parts easily crumble and break.
Single lever
The photo shows a single lever faucet.
Now I will tell you how to disassemble a single-lever faucet in the bathroom. This type of faucet has been used for a long time, and many apartments have just such models installed.
The instructions are slightly different from disassembling a two-valve mixer:
- Before disassembling the single-lever mixer, turn off the water supply. Using a screwdriver, remove the plug from the lever handle;
We take out the plug with a screwdriver.
- Unscrew the screw that secures the lever handle to the cartridge rod;
We turn out the fixing screw.
- Remove the lever handle from the cartridge rod;
Pull the handle up and remove it.
- Unscrew the skirt that covers the cartridge;
Unscrew the decorative skirt.
- Unscrew the nut holding the cartridge;
The clamping nut must be unscrewed.
- We take out the cartridge from the mixer body;
- We remember the disassembly process in order to put the mixer back together.
Disassembly diagram for a single lever mixer.
As with a two-valve faucet, the gaskets should be inspected . They are located on the bottom of the cartridge. If there are cracks, tears, or the rubber has lost its elasticity, replacement is necessary.
The gaskets are on the bottom.
Before disassembling the cartridge, consider replacing it completely. The price of a new product is 200 - 400 rubles. Take the old cartridge with you and ask the seller to give you a similar one.
Basic mistakes
When cleaning the chrome surfaces of the faucet, you must follow certain rules so as not to damage the coating:
- Do not rub the faucet with metal sponges. Otherwise, scratches will remain on the surface.
- Do not use cleaning products that contain large amounts of abrasive particles.
- It is not recommended to use products containing hydrochloric, sulfuric or phosphoric acids. Otherwise, the surface may become covered with dark spots or rust.
- It is not advisable to mix several different compositions, as the result may be unexpected.
We suggest you familiarize yourself with How to dye jeans in an automatic washing machine
Many products can leave scratches and other damage on chrome plating, so you should only use proven cleaning methods.
Low water pressure? Cause and remedy.
- Dad, tell me, what did you do at work today? You always say that your profession is very necessary and useful, what useful things have you done today? “Okay son, lie down on your tummy, close your eyes, and I’ll scratch your back and tell you about two useful services provided to people who turned to me for help.” These people are residents of our area, but they live in different houses and are in no way connected with each other, that is, everyone has their own cause of the problem. — In the morning, I received an application from two residents, and went to the first address indicated in it. A girl of about twenty opened the door and smiled and said that she had been looking forward to it. She took me to the kitchen, complaining along the way about the weak water pressure, and she fled into the room.
Before taking any action, I needed to analyze why the water coming out of the tap was bad? A faucet, son, is what people call a device, by rotating the handles of which you open and close the water in order to wash your face or wash your hands. In our professional language, it is called a mixer, as it mixes hot and cold water to a comfortable temperature. So, this housewife had poor water pressure only in the kitchen. And I determined this simply by checking how the water flowed from the mixer installed in the bathroom; here it ran with a high flow and speed. This means the reason is a clogged kitchen faucet, and it can become clogged in three places.
The first cause of loss of water pressure and elimination.
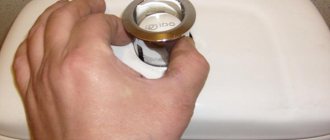
- At the end of the “gander”, the correct name is a spout, there is a mesh installed - an aerator, which breaks one large stream into many small ones. The most common problem, and easy to fix, is that this particular mesh is clogged.
— I armed myself with an adjustable wrench, unscrewed the aerator and thoroughly washed the mesh out of it. There was very little “dirt” in it, and I realized that this was not the reason for the worsening pressure.
The second reason for low water pressure and elimination.
— The kitchen faucet is installed on the sink, and is usually connected to the water supply pipes with a flexible liner, which has a smaller internal cross-section than the pipe, and is often clogged at the connection point; scale or pieces of rust rising from the basement pipes can easily be “knocked out” here. This is the second most labor-intensive job where blockage is likely. Before unscrewing the water supply nut, I shut off the water supply to the apartment wiring, this is done using taps installed at the very tie-in to the risers. Then, using the same adjustable wrench, I disassembled the connection points. Here I was also disappointed - there was no reason for the blockage. - Why disappointment? Yes, because it is necessary to start the third most labor-intensive job. - But before we start, son, we plumbers have a “cunning method” in their stash, called squeezing. It consists of the following: You screw on one of the flexible hoses, then open the shut-off valve that is on the pipe to which you screwed the hoses. You direct the hanging end of the second eyeliner into the bucket, and open the corresponding faucet to its fullest extent. You hold the spout with your palm and slowly open the faucet to which we have already supplied some water. Due to the fact that the spout is clamped by hand, the water has no choice but to run into the hanging end of the liner - into the bucket. Thus, it is water, and it itself washes out the blockage. If necessary, you perform the same “operation” in the other direction, that is, you close the previously open tap, disconnect the liner, and screw the one that was hanging into the bucket. You repeat the “cunning method” - squeezing. The benefits of these manipulations can be judged by looking inside the bucket; if there is scale and rust at the bottom, then the washing was successful. Then we screw both nuts of the connections into place, open the water and check the pressure. And oh, miracle - he is super! But soon the fairy tale is told, but the deed is not done soon! What to do if this didn’t help? Like me today.
Reasons affecting water pressure in the tap
To eliminate a malfunction that leads to a loss of pressure or its complete absence, you need to understand why the water from the tap is not flowing well.
Most often the problem lies in the following circumstances:
- Faucet clogged. A decrease in pressure and a decrease in water flow occurs due to clogging of the aerator, which is an insert and filters water. Confirmation of this theory of breakdown is such a violation as a decrease in pressure in only one mixer, when other taps in the house are working normally.
- Formation of a plug of rust, silt particles and scale in the pipe. A gradual decrease in pressure in this situation can lead to complete blocking of the throughput diameter of the connecting filter or the pipeline fittings themselves.
- Reduced water supply pressure in the water main. The problem may be at the pumping station level. Depressurization of the pipeline is also possible.
- Incorrect calculations when designing a water main. For example, during installation, pipes of a larger diameter were used than those used on neighboring branches; large length of water pipes, which does not correspond to the capabilities of pressure equipment.
A drop in pressure of both hot and cold water can be caused by factors such as the simultaneous consumption of liquid in large quantities. As a rule, under such circumstances, water does not flow well in the evening, when the bulk of the area's residents return home.
Preventive actions
Even with increased water hardness, contamination of the faucet will not be a problem if you properly care for your plumbing equipment. For example, you can use the following methods:
- install filters for water softening;
- install coarse and fine mechanical filters;
- Use suitable cleaning products;
- remove lime deposits while they are fresh;
- cover external surfaces with a special shampoo, which forms a film that protects against contamination.
Then maintaining the good condition of the equipment will not be a hassle.
Using the techniques described, any skillful owner will be able to clean the faucet. To do this, you need a screwdriver, a wrench and a special tool for removing rust and lime deposits. The main thing is to remember to turn off the hot and cold water shut-off valves before starting work. All these efforts will not be in vain. A smooth, powerful stream from the tap will help you do all your household chores quickly and easily.
Solving pressure problems
If the pressure drops or the water does not flow at all, you can try to find out the cause of the problem yourself and then fix it. It is worth noting that not all breakdowns can be repaired yourself. In case of accidents at the station, depressurization of the pipeline and similar reasons, repairs are carried out by the relevant competent services.
You can try to clean the clogged section of the pipe from the riser to the valve with a special cable. When water does not flow well from the neighbors below and above, it can be said that the riser is clogged. It is almost impossible to clean it. It must be replaced.
All repair work is carried out after the water is turned off.
If the tap itself is clogged, the mixer can be cleaned. To do this you will need an adjustable wrench. Use it to unscrew the aerator. Due to the fact that the aerator has small nozzles, it clogs quickly. To clean the aerator, you need to place it under running water and rinse it. When the problem is not in the aerator, you will need to dismantle the valve and unscrew the lock washer that holds the locking element in the housing seat, and get to the axle box and remove it. Next, the body is cleaned of scale, plaque, etc. When everything is finished, you will need to reassemble everything in the reverse order.
If the problem appears in the shower and after cleaning the faucet there is still no hot water, you will need to clean the sprayer. It is dismantled using an adjustable wrench, after which it is placed in a pan and filled with water, and then placed on the stove. You need to add vinegar or citric acid to the water. No need to boil. An acidic environment has a destructive effect on plaque and other deposits that have formed on the sprayer. After cleaning, the sprayer should be rinsed under running water and returned to its original place.
What to do if there is poor water pressure in the tap?
Weak pressure from a faucet can upset even the most level-headed homeowner. After all, the duration of filling a kettle or coffee maker and the performance of a washing machine or dishwasher depend on the pressure.
In addition, if the pressure is poor, it is almost impossible to use either the toilet, shower or bath. In a word, if there is no pressure in the tap, then there will be no comfortable living in the house.
We understand the reasons for low water pressure in the tap
What weakens the water pressure in the tap?
We have already discussed why weak water pressure in the tap can ruin even the happiest life even in the most perfect house or apartment. However, moaning will not help the grief. Moreover, this problem is not as terrible as it seems. You just have to understand what weakened the pressure, and you will get an almost ready-made recipe for eliminating this trouble.
In this case, the list of TOP 3 reasons for a drop in hot or cold water pressure is as follows:
- Faucet clogged . In this case, the intensity of the water jet is weakened by a plug of rust and scale that has clogged the aerator, filter insert (mesh) or axle box. Moreover, only one tap in the house suffers from this problem. That is, if your tap water flows poorly, for example, in the kitchen, but there are no problems in the bathroom, then you will have to disassemble and clean the problem point of consumption.
- Blockage in the pipe . In this case, the same particles of silt, rust or scale are to blame. Only now they are not blocking the faucet aerator or faucet mesh, but the filter built into the water supply. In the worst case, such deposits can block the flow diameter of the connecting fitting or the pipeline fitting itself.
If you don’t want to deal with them, order a water supply project from professionals.
Well, now that you already know the reasons for the drop in pressure in the tap, it’s time to figure out ways to eliminate this water supply defect.
What to do if cold and hot water from the tap does not flow well?
It all depends on the reason for the drop in pressure.
For example, if your faucet is clogged, you will have to do the following:
Removing the faucet aerator for cleaning
- Take an adjustable wrench and unscrew the aerator, a nozzle that foams a stream of water, from the “spout” of the faucet. This part has very small nozzles. Therefore, aerators are clogged every six months. And if we are talking about a faucet mixer with hot/cold water, then the frequency of cleaning the nozzles is reduced to 2-3 months. The dismantled aerator is washed under running water.
- If the aerator is clean and the water flows weakly, you will have to dive even deeper into the faucet design . Indeed, in this case you need to get close to the locking unit - the axle box. To do this, you need to dismantle the valve (faucet handle) and unscrew the lock washer holding the locking element in the body seat. Next, you remove the locking assembly from the body and clean off any deposits of silt or scale from its surface. In the final, you will have to assemble the crane using the reverse procedure.
Before dismantling the faucet shut-off unit, be sure to shut off the water supply by closing the water valve closest to the point of consumption. Otherwise you will flood the entire apartment.
- If the source of the problem is not the faucet, but the "spray" in the shower or bathtub, you will have to act a little differently. First, turn off the supply to the sprayer. Then remove it from the stand or metal hose using an adjustable wrench. Immerse the removed part of the sprayer in a saucepan with vinegar. Warm up this medium on the hotplate. Rinse off the scale with water. Return the nozzle to its place.
If the smell of vinegar irritates you, try a 10% citric acid solution. To prepare it, it is enough to dissolve 100 grams of dry acid powder - it is sold in any confectionery department - in a liter of water.
If you don’t want to tinker with the crane, call a mechanic from the management company. He will solve this problem right before your eyes.
We hope you already understand what to do if there is poor water pressure in the tap.
Now let's move on to the pipes:
- First, turn off the water by turning the central valve near the meter.
- Next, remove the coarse filter plug. Remove the wire cassette and wash it in a container. Then return the filter element to its place, renew the seal and screw in the plug.
- After checking the coarse filter, proceed to checking the fine cleaning system. First, disconnect it from the water supply and check the pressure in the free pipe by slightly opening the central valve. If everything is in order, change the liner, simultaneously rinsing the filter glass from particles of accumulated dirt. In the final, everything, of course, is mounted in its original place.
- If the filters are cleaned, but water still does not come out of the tap with the required force, then the reason for the drop in pressure is a blockage in the pipes themselves. Locating this problem and eliminating it is an extremely time-consuming task. Therefore, after cleaning the filters without results, you will have to call the management company and report a problem with the passage of pipes in the water supply.
If you have not changed the wiring of the water supply system in the apartment, the management company will pay for cleaning the pipes. After all, it is she who must monitor the performance of the “native” engineering communications.
You can fix almost any problems with taps and pipes on your own. But if the reason for the drop in pressure is low pressure, then you simply have no choice but to call the emergency service of the utility company. You will not be able to fix the pump and main water supply.
In case of depressurization of the household water supply, call the management company. After all, it is she who should monitor the condition of “home” utilities. Just don’t forget to turn off the water in the apartment or entrance.
Otherwise, a leaking pipe will flood both you and your neighbors.
How to clean a faucet from limescale
In every kitchen and every bathroom there is a device that mixes hot and cold water, called a mixer. On the shelves of hardware stores you can find a wide variety of these devices, differing in design, appearance and cost. Beautiful new chrome faucets give the sink, sink and bathtub an aesthetic appearance, but with regular use, the shine disappears in just a couple of months from the date of purchase. The reason for this is mineral deposits contained in tap water, which over time settle in all areas of the mixer.
In addition to loss of shine, limescale deposits can accumulate in the joints of moving elements, eventually turning into stone formations that can block the movement of valves, as well as creating gaps between parts and gaskets, thereby causing leaks and leading to a situation where the faucet is clogged. Noticing this, housewives are faced with a difficult task - how to clean the faucet from limescale and whether it is possible to get by with folk remedies.
Important! The rate of plaque deposition directly depends on the water temperature. The hotter the water, the faster plaque forms on the faucet and faucet.
Prevention of plaque formation
Even old plaque will not be able to resist household or store products. But the faucets have a complex shape and are very inconvenient to clean. To ensure that such headaches occur as rarely as possible, listen to some tips:
- Clean your faucet often, don’t wait for dirt to accumulate.
- Perform preventative cleaning by disassembling the faucet and cleaning all internal elements.
- Apply a moisture-proof coating. On sale you can find compositions that not only clean the surface, but also protect it from moisture. But they are difficult to find, and compositions from professional series are expensive. You can cover the surface with cosmetic oil or regular vegetable oil. Treat the surface with a sponge on which oil has been applied, and then polish with a napkin. This will not prevent plaque from forming, but it will be much easier to remove. Water does not linger on the oil and flows off, so there won’t be much of a deposit.
- Use wax polish. Chrome-plated parts of cars are often treated with such compounds. Not the best option, but there are benefits. The main thing is to make sure that the composition is safe.
- Install a main filter to make the water softer. You can find a variety of options for such devices, which differ not only in design, but also in cost, as well as efficiency. The most effective are ion exchange and reverse osmosis devices.
Eliminating the cause of its occurrence will solve the problem of plaque once and for all. Don't wait until stubborn limescale stains appear. Wipe down the faucet after each use. If it is possible to install a water filter, install it. With this attitude, taps and mixers will always be shiny and will do their job properly.
Analysis of the mixer
If you need to clean the inside of the faucet in order to remove deposits on the moving elements, you should first determine the type of faucet. Today mixers are divided into the following types:
- Single-lever - this type is convenient to use in the kitchen, when it is easier to lift the lever with dirty hands than to turn the knobs.
- Two-valve is a convenient option for bathrooms when more precise adjustment of the water temperature is required.
Let's figure out how to disassemble such faucets to gain access to cartridges and faucet axle boxes.
Single lever
To disassemble and clean a single-lever kitchen faucet, follow these instructions:
- Turn off hot and cold water using a faucet or lever under the sink.
- Remove the red and blue plug under the lever.
- Using a thin hex wrench, remove the screw.
- Remove the nozzle with the lever upwards.
- Unscrew the skirt covering the contents of the mixer.
- Use an adjustable wrench to unscrew the clamping nut.
- Remove the mixer cartridge upwards.
- Check the gaskets at the bottom of the mixer cartridge and, if necessary, replace them or the entire cartridge, which are available for sale in plumbing stores.
- After cleaning and replacing, reassemble the mixer in the reverse order.
Two-valve
For disassembling and cleaning a bathroom faucet with a two-valve design, instructions are given below:
- Turn off the cold and hot water taps.
- Unscrew the nuts connecting the mixer to the riser pipes (for chrome-plated parts, the nuts can be wrapped in a damp cloth to prevent scratches).
- Remove the mixer.
- Remove the plugs covering the wing screws.
- Unscrew the screw and remove the wing from the rod.
- Using an adjustable wrench, unscrew the valve axle from the mixer.
- In the same way, remove the second faucet and the switch, which is a ball mixer that transfers the flow of water from the faucet to the shower head.
- Using an adjustable wrench, unscrew the nut securing the gooseneck to the mixer.
- Unscrew the shower hose nut using an adjustable wrench.
- Unscrew the shower head by hand.
- Clean or replace gaskets on the switch, faucet axle boxes and joints of the hose, gander and shower head.
- If the mixer was leaking, replace the faucet axleboxes.
- If the shower head was leaking in the “faucet” mode, the shower switch must be replaced.
- Clean all elements from rust and deposits with detergent.
- Reassemble and reinstall the mixer in the reverse order.
Important! You should not save on faucet axle boxes and shower switches, since after repair they will last only a few months, and when replaced - years, despite the fact that they are very inexpensive.
Prevention
Thorough cleaning and purchasing high-quality faucets are suitable as preventive measures against rust. Taps must be cleaned regularly with special products and stains must be removed at the first signs of rust. Over time, when they corrode the surface, it will be almost impossible to deal with them.
It’s better not to skimp on taps, since inexpensive options quickly become unusable and also force you to spend a lot of money on household chemicals to clean them.
It is a good idea to periodically wipe the taps dry to prevent moisture from accumulating around them.
Rust is a big problem for any housewife who is used to keeping her apartment clean, but you can fight it. There are many products that can completely rid the faucet of rusty stains, but it is better to prevent these stains in order to save your time and the beauty of the faucets.
Folk remedies
For mild plaque, it is not at all necessary to purchase aggressive household chemicals. You can clean the faucet inside and out without any problems using folk remedies, most of which everyone has in their kitchen.
Coca Cola
This is not only a non-alcoholic sweet drink. Many people don’t even realize that ordinary cola can remove even stubborn stains thanks to the acids contained in this dark drink. To clean the mixer and tap axle boxes with cola, do the following:
- Wet a clean cloth with the drink.
- Apply for half an hour to the plaque-covered area of the mixer element.
- After the allotted time, remove the rag and rinse in water.
- Dry the parts with a dry cloth.
Baby oil
Ordinary baby oil will help remove mineral deposits, soap scum and traces of grease from the surface of the faucet:
- Wet a cloth in water.
- Apply oil to damp cloth.
- Rub the problematic area of the faucet with a cloth.
- Rinse the part in water.
- Rub the treated area vigorously with a suede cloth to add shine.
Laundry soap
72% laundry soap contains chemical ingredients that can dissolve limescale deposits. To clean the faucet using this method, follow the instructions below:
- Grate the soap into the shavings using a grater.
- Dissolve the shavings in hot water until a paste-like substance forms.
- Add a little soda.
- Apply the solution to a damp cloth and use gentle movements to treat the problem areas of the faucet.
- Apply the composition to the surface and leave for an hour.
- Rinse the treated elements with clean water.
Lemon acid
For this method, you can use either store-bought citric acid powder or the juice of the citrus fruits themselves:
- Apply acid or lemon juice to a rag previously soaked in warm water.
- Rub the problem areas of the faucet.
- Wait 10-15 minutes for the acid to dissolve the mineral layer.
- Rinse in clean water and dry with paper towels.
Important! It is forbidden to treat shiny surfaces with undissolved citric acid powder, as powder granules can leave scratches on chrome parts.
Table vinegar
Due to its aggressiveness, this ingredient is able to remove plaque in the shortest possible time. Procedure:
- Mix water and vinegar in equal parts.
- Apply the solution to a clean damp cloth.
- Treat the mixer parts and leave without rinsing for 5-10 minutes.
- Rinse the parts in water and dry with a dry cloth.
Baking soda
Another effective way to descale a faucet is with baking soda:
- Make a paste by mixing baking soda and warm water.
- Apply the resulting consistency to problem areas of the mixer.
- Wait 1-1.5 hours for the solution to work.
- Remove any remaining product with a damp cloth.
Important! Do not rub the surface, as soda particles can scratch the glossy surface.
Toothpaste
Apply toothpaste to an old toothbrush and gently work through the faucet. To enhance the effect, you can leave the paste on for a while and then rinse it off.
Salt
Due to the fact that salt granules can scratch chrome parts, it is better to use this method to remove plaque on internal elements - valve axle boxes, switches, etc.
Toothpicks
Using this method, you can remove plaque on the faucet gander without fear of scratching it. To do this, take a wooden toothpick by both ends and move it along the part, thereby removing a layer of plaque like a plane.
First, let's choose the material
To start cleaning your faucet, in the bathroom or kitchen, you need to find out what material it is made of. Mostly on the plumbing market, taps made of brass are presented. There are products made from other metals and alloys. They can be made of copper, bronze, stainless steel, and other chrome alloys. It would also be a good idea to clean the tub frame.
Our products made from some alloys are plated with nickel. There are faucets coated with ceramics. Nickel-plated products are not very practical; at the slightest impact, the nickel will chip. With use, nickel becomes tarnished and is difficult to restore to its original form. Copper and bronze faucets have a rich appearance and are quite practical to use. Recently, ceramic and plastic products are often used.
Plastic ones have not yet found their proper application, although they do not have all the disadvantages that metal faucets have. They do not oxidize and are not covered with various deposits. They have their big drawback. They are very fragile and break quickly.
Leading professors are conducting work in this direction. Ceramic designs have all the positive properties that metal and plastic faucets have. Their biggest drawback is their very high price. They are not available to the general consumer.
Methods for cleaning brass products
Brass is an alloy that, over time, begins to tarnish. It has such properties that it is quite easy to restore it to its original form. Let's look at some of them.
The first method is to take a clean soft cloth, moisten it with hot soapy water and gently wipe the entire faucet. Where you can't get a napkin, you can clean it with a toothbrush. Brass will shine with its pristine shine.
The second method, tomato paste contains acid. It returns brass to its former shine. To do this, cover the entire mixer with a thin layer of tomato paste. Wait about thirty minutes, and then rinse well with water.
Third method: Lemon also contains acid. The lemon is cut in half, sprinkled with a small amount of salt, then the entire surface of the tap is wiped. After this procedure, the product becomes like new.
Plaque on the aerator and shower head
When cleaning the faucet, do not forget about the mesh filter at the end of the gander, which is called an aerator. It is designed to mix the flow of water with air to increase the volume of flow. This filter most often becomes clogged from debris that passes along with the water through the water pipes. The following phenomena may be a signal that the mesh is clogged:
- Weak or completely absent water flow when valves are open.
- Uneven and non-vertical water flow.
To clean the faucet mesh you need to do the following:
- Unscrew the nozzle using pliers, after wrapping it with a damp thin rag to avoid scratches and chips.
- Apply a rag soaked in vinegar to the nozzle if it does not come off.
- Rinse the filter under running tap.
- Soak the aerator in vinegar for several hours so that the mesh rods are completely cleared of plaque.
- Rinse the vinegar strainer in water and place it back on the faucet.
The shower head is cleaned in the same way, which should be disconnected from the hose, disassembled, cleaned of large debris and soaked in heated vinegar to completely remove plaque. After all this, all that remains is to assemble it in reverse order.