Preparing boots for repair
All it takes to damage rubber shoes is a nail, a small piece of glass, or even a sharp-angled stone. One wrong step, and the boot may get cracked.
Repair shops do not accept rubber shoes. This means that damaged boots can either be thrown away or repaired yourself.
How to seal rubber boots is a common question, the answer to which lies in knowledge of some of the features of such repairs.
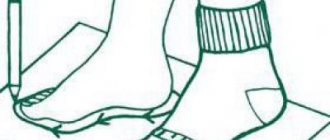
First you need to determine the location of the puncture or crack. To do this, you can take a container of water and a damaged boot. Roll up the freebie, starting from the top edge, like a tube of toothpaste. You should get a tight bundle. Next, lower the sole into the water. Air will escape from the punctured area, forming bubbles.
The next stage of preparation is the mandatory cleaning of boots from dirt and dust, degreasing and drying. It is recommended to dry shoes away from heat sources. Drying rubber boots on batteries can lead to deformation, which will ruin their appearance and complicate the restoration process. All manipulations should be carried out carefully so as not to increase the size of the damage.
Then you should accurately determine the material from which the boots are made. Modern rubber shoes for women are made not only from rubber, but also from polyurethane and ethylene vinyl acetate (EVA). Each of these materials requires a different glue.
If it is difficult to determine the material of the boots on your own, you can take them with you to the store, where a specialist can quickly determine what the shoes are made of.
How to glue boots if...
Situation No. 1: the top of the boot has come apart at the seam, the threads have frayed
There is no need to seal anything. If the material is not damaged and holes from the seam are visible, such a hole can be easily sewed up with strong, thick nylon threads. Support the lining and approach the hole from the inside out. Repeat the seam exactly along the holes. If you make more holes in the leather, it may tear.
Situation No. 2: the leather (or leatherette) is torn in a smooth place
Such a hole is the most frustrating, because the sealing mark will still be visible. How to seal boots as discreetly as possible? You need to make a patch from the inside. Pick up a piece of thin leather or thick fabric, such as raincoat fabric. Apply glue around the hole, not reaching its edges 3-5 mm. Carefully joining the edges, press the patch.
Situation No. 3: the material is torn at the seam
Glue a piece of leather to each side of the seam to repair the torn seam allowance. After the glue has completely dried, sew clearly along the original seam.
Situation No. 4: the sole came off
How to glue a boot if it “begs for porridge”? To ensure that the sole sticks firmly, sand the tear area with sandpaper and thoroughly clean it of old glue. Be sure to wipe the surfaces to be glued with acetone or alcohol before applying glue. To create stress, bandage the boot tightly.
To prevent shoes from deteriorating, it is important to wear them. It is better to save the boxes in which it was purchased and store the boots in them, then creases will not form on them and the leather of the boots will not be deformed.
When the snow melts and the ground turns to mud, the dull autumn rains come and there are puddles everywhere, there are no better shoes than rubber boots. There are only times when you step on a piece of glass or get caught on a wire, and that’s all - a puncture or cut. They seem to be good boots, but they let water through. But we are not in a hurry to throw the thing away, we will try to repair it.
To repair rubber boots you will need: rubber glue (preferably Red sun or Moment), a grater or abrasive paper, scissors, raw rubber, some gasoline. First you need to find the puncture or cut site. If the damage is not visible, then you should tighten the boot top so that the air in it is compressed under pressure.
Place the boot in a basin of water, and where the bubbles are, there will be a cut or puncture site. You can insert a pointed match into the puncture so that the place is not lost. Boot repair can be done in two ways - hot and cold. Each of them has both its advantages and disadvantages. Let's look at both.
For hot repairs you will need a vulcanizer. Repairing a boot using a vulcanizer requires some experience with it. You need to soak the raw rubber in gasoline (about 10 minutes), then put it on the hole and press it with a vulcanizing press. Turn on the vulcanizer for 25-35 minutes, then turn it off to allow it to cool to normal temperature, and then remove the press.
As a result, you will receive a high-quality repair of the defect. The cold method is simpler. Before repairing, thoroughly wash and dry your boots. This method requires the item to be clean. The damaged area must be thoroughly cleaned with abrasive paper. If the boot is torn, you can tighten the edges of the tear by stitching with thread, then proceed to the next step.
You can make the patch yourself from rubber. You need to clean it evenly from the inside, and from the outside - the edges should be thinner. You can use ready-made patches from a wheel repair kit, and you can get glue from there. Apply glue to the damaged area of the boot and to the patch. Let it dry for about ten minutes and apply the compound again, let it dry again for about twenty minutes and carefully, without touching the glue, apply the patch.
With wear, any shoe eventually becomes unusable. Since the main load falls on the sole, it is with it that there are always more problems. It can become deformed, become covered with cracks, burst, move away along the edge from the top of the shoes, or even fall off. If you can wait a while with the repair of a pair of shoes, then you will have to resort to repairing your everyday shoes immediately. The most pressing questions of all are how to glue the sole at home or repair a small defect in a hollow base.
We suggest you read: How to clean a combustion oven
You don't need any special skills to do this. It is enough to purchase suitable glue for shoe repair and follow the simple advice of professionals.
How can you seal rubber boots?
Many people immediately buy a universal strong adhesive known as “Moment” to glue cracks in rubber boots. In fact, the composition of this product not only does not glue rubber, but can also ruin it. It will not be possible to achieve a good result using ordinary glue.
Repair of rubber boots must be carried out with special adhesives. High quality products can be found in automotive and fishing stores. In this case, it is possible to purchase adhesives with a hermetic effect. They allow you to reliably glue cracks of any size and at the same time protect your shoes from leaking.
The choice of suitable glue depends on the technology of work. Today, there are several methods for restoring rubber shoes.
How to seal boots
For shoes made of ethylene vinyl acetate, a special EVA glue is used.
- The resulting adhesive seam does not allow moisture and direct flow of water to pass through;
- the composition does not spread during gluing;
- after application, the mixture acquires a yellowish tint, but over time it becomes completely transparent;
- due to the long service life of the composition, shoes will not leak for a long time;
- since the product is spread in a thin layer, it will last for a long time;
- period of use – 2 years.
For EVA, you can also use the universal composition “Moment”.
These products are not suitable for PVC. Repair kits are sold for rubber boots. They are convenient to use for quick repairs while fishing or hunting. The kit includes glue and a transparent patch film. After gluing the patch, the adhesive seam dries in no more than an hour. Hunters and fishermen often use the KU-3105 repair kit.
Anglers method
Fishing and hunting stores sell special rubber adhesives. They contain instructions that describe in detail the technology for using the product. For rubber boots, it is generally recommended to sand the damaged surface and glue a patch.
How to seal rubber boots if they are made of EVA? This material has a porous structure into which glue is absorbed. To repair such boots, patches are not needed. It is enough to apply the required amount of glue to the crack lines and press firmly. The hardening time of the product is indicated by the manufacturer on the packaging. After gluing, the boots will look like new, and the defective area will remain invisible.
Cyclists method
This method has been tested by many cycling enthusiasts who often encounter the problem of a broken tube. To repair wheels, a bicycle repair kit is mainly used, consisting of patches on protective films, special glue for rubber and sandpaper.
According to this technology, it is necessary to rub the area where the patch will be placed with sandpaper, degrease with acetone and apply glue evenly. After a few minutes, apply the patch and press firmly.
The bicycle repair method is reliable and guarantees high tightness. You can use sealed boots almost immediately.
The disadvantage of this method is the unaesthetic appearance of the repaired product. A bicycle patch remains at the place where it was glued, which is impossible not to notice. Therefore, it is better to glue boots for the garden or fishing in this way.
Automotive method
Many women ask how to tape rubber boots on the fold so that it is not noticeable. Boots made of rubber or EVA most often crack along the fold lines. A patch in such places is not always suitable and can ruin the appearance. Rubber shoes for women require more careful repair, which can be provided by an elastic adhesive-sealant. It has a colorless viscous structure and is ideal for repairing colored and clear rubber boots.
Today there are automotive adhesives on sale from different manufacturers. One of the best is the Crazy Hands sealant from Done Deal. You can purchase glue of this brand at any car enthusiast store.
Before applying the elastic bonding agent, it is necessary to treat the puncture or crack with acetone. After drying, apply glue.
Motorist method
What to do if smart women's rubber boots need repair? Like EVA boots, they are best sealed without a patch.
You can fill the hole in colored and transparent rubber boots with elastic adhesive sealant.
The “Crazy Hands” adhesive-sealant from the “Done Deal” brand has proven itself well. You can buy one in stores for car enthusiasts. In order for everything to work out as it should, do not neglect the preparatory stages. After washing, dry the shoes thoroughly and degrease the hole with acetone. The quality of gluing depends on this.
We suggest you familiarize yourself with How to get rid of dust in an apartment for a long time: why dust is dangerous and how to deal with it
Again, rubber boots also need different glue - keep in mind that all of the listed materials are not suitable for leather.
A torn boot is a great reason to buy a new pair. But this is not always possible. If the damaged shoes are expensive, very comfortable or well-loved, it would be a shame to throw them away. And here the question arises: how to seal boots securely and neatly?
It is better to take expensive boots to a workshop. Careless handling of glue can aggravate the situation. Professional shoemakers have a lot of experience, and they can make sure that not a trace remains of a hole. But if your hands are not for boredom, and curiosity outweighs the risks, then you can try it!
Features of gluing soles
Rubber shoes can be damaged in the sole area. How to seal a cut on a rubber boot? In this case, you can use any of the methods described above. Only the preparation for gluing should be a little different. First of all, it is necessary to process the cut area on a sharpening machine. The surface to be treated should become perfectly smooth. If this step is missed, the repair will not give a good result. Next, you should adhere to the technology of the chosen method.
To repair soles, it is better to use adhesive sealants. Applying a patch in this area will not provide lasting results. When walking, the patch will quickly wear out, and soon there will be a need to replace it.
Recommendations for caring for boots
In order for repaired shoes to last as long as possible, it is important to know not only how to seal rubber boots, but also how to care for them.
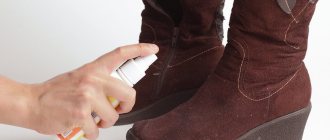
- Periodically wipe your shoes with a soft cloth soaked in a water-glycerin solution.
- Dry rubber boots at room temperature away from radiators. Hot air may cause the glued parts to become porous. As a result, the shoes may leak again.
- Clean your boots with a damp cloth every time after a walk. Dirt and dust can eat into the rubber, leaving stains. They are especially noticeable on light-colored shoes.
- It is better to store rubber boots in a cardboard box. For this purpose, it is recommended to keep the packaging in which they were sold.
How to properly care for rubber boots
If you choose the right glue and carry out the procedure carefully, you will be satisfied with the repair. And in order for your boots to last longer, you need to organize proper care for rubber shoes and repaired products. After use, thoroughly clean and wash your boots in running water.
We offer a few simple rules for the care and use of rubber shoes:
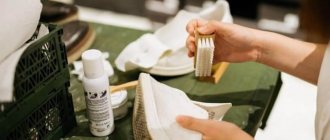
- Wipe the outside of the rubber surface with a clean cloth. For very dirty shoes, first rinse in water and then wipe dry;
- Colored boots are cleaned with Vaseline. It will retain color and shine, and the boots will not burst or become cracked;
- Be sure to use shoe insoles, preferably warm ones. Wash insoles every two to three months;
- Do not wear rubber boots in hot sunny weather, as the rubber deteriorates and fades;
- Periodically lubricate the surface of the products with oil varnish with rubber glue or glycerin. This will keep the boots shiny;
- Before long-term storage, be sure to lubricate your shoes with glycerin. Then wrap the items in newspaper or paper and place them in a cool, dry place;
- You can remove dark spots and streaks from rubber using a regular school eraser. It should be soft and clean;
- If your foot does not fit into the narrow top of the boot, lower the elastic stocking inside and put on the shoes. Then the leg will fit in without any problems, and the stocking can then be easily pulled out.
To keep your shoes shiny and attractive in appearance longer, lubricate the surface with oil varnish and rubber glue or wipe with a damp cloth containing glycerin. By the way, glycerin is an excellent product for caring for leather items. It will help smooth out a genuine leather jacket and give the product a presentable appearance. Read more about how to care for a leather jacket.
A torn boot is a great reason to buy a new pair. But this is not always possible. If the damaged shoes are expensive, very comfortable or well-loved, it would be a shame to throw them away. And here the question arises: how to seal boots securely and neatly?
It is better to take expensive boots to a workshop. Careless handling of glue can aggravate the situation. Professional shoemakers have a lot of experience, and they can make sure that not a trace remains of a hole. But if your hands are not for boredom, and curiosity outweighs the risks, then you can try it!