The completion of a renovation is always a celebration. It would seem that all the most difficult things are behind you and all you can do is enjoy the updated interior. But this joy is often overshadowed by the need to clean the apartment after replacing wall, floor and ceiling coverings. It can be difficult to do, because construction dust, as well as traces of paint, varnish and putty, are difficult to clean from surfaces. In order to achieve success in this matter, use a few simple recommendations.
Stock up on necessary equipment and cleaning products
Before cleaning your apartment after renovation, think about what equipment and household chemicals you will need for this. Here is a sample list of them:
- A washing or regular vacuum cleaner.
- Microfiber cloths and cotton napkins.
- Medium bristle brushes and mop.
- Sponges of different sizes.
- Cleaner for glass and mirrors.
- Detergent for floor coverings - laminate and tiles.
- Dishwashing liquid.
- Vinegar 9%.
- Kerosene, white spirit, acetone.
- Garbage bags.
On your own or call in professionals?
If you want to easily clean up after renovation, you can entrust the cleaning of dirt from your home to professionals. Our cleaning service employees will do the job with the highest quality and within the time frame you set.
This method has a number of significant advantages:
- A good cleaning service employs only professionals who will complete your tasks quickly and efficiently, minimizing the risk of damage to furniture and surfaces;
- The cleaners have all the necessary equipment and detergents that can cope with any type of contamination and which cannot always be found in the store;
- The cleaning company's services include construction waste removal, so you don't have to worry about this problem either.
The only drawback that may stop you from using the services of a cleaning company is the cost. Not everyone has funds left over for such expenses after the renovation is completed. Or maybe you don’t see the point in spending money on such services?
It doesn’t matter for what reason you decided to do the cleaning yourself, in any case this article will be useful to you. Next, we will look in detail at the main stages of cleaning and talk about tips for cleaning after renovation.
Preparatory stage
Construction dust easily penetrates everywhere, even into closed cabinets and bedside tables, sticks to window glass and frames, and spreads throughout rooms where no work is being done.
To reduce the volume of future cleaning, all things are removed from the premises where renovation is planned (they are put in boxes and sealed with tape), curtains, carpets and other textiles, indoor plants, and compact household appliances.
Upholstered and cabinet furniture and large household appliances are removed from the premises. If you don’t plan to change the floor covering, you don’t have to remove the furniture, but it needs to be reliably protected from dust and dirt.
To do this, use a wide construction stretch film - they wrap furniture in several layers, placing foam rubber or folded fabric on the corners so that the film does not tear. It is advisable to unscrew the handles of cabinets and bedside tables first.
During repairs, it is recommended to cover the doorways of all rooms (and not just the one in which you are supposed to drill or paint) with thick fabric or film, securing the panels so as to cover the cracks along the perimeter of the door leaf.
In the work area, the doorway is covered with a fabric curtain, which should be regularly removed and rinsed in cool water - dust settles better on a damp cloth, as a result, its concentration in the air is reduced and there is less risk that it will penetrate into neighboring rooms. If film is used, two panels are secured with an overlap of 20-25 cm.
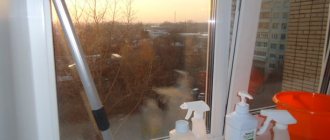
It is recommended to cover the glass windows with stretch film, otherwise it will be difficult to wash them later from settled dust. This film fits tightly to the glass without additional fastenings. Each sash is protected separately with a layer of film so that during work the windows can be opened for ventilation.
The floor is covered with a thick film to protect it from mechanical damage, contact with paint, dirt or aggressive substances. But if the repair involves “wet” processes, it is important to ensure that moisture does not accumulate under the film, which can ruin the parquet or laminate.
Materials and tools
Any cleaning begins with preparation, and when cleaning yourself after repair work, the preparation must be especially thorough so that you do not have to be distracted by small things during the process. We strongly recommend that you do not ignore this stage and prepare everything you need in advance, so as not to stretch out the cleaning for several days.
Read here: Toilet repair - step-by-step instructions for cosmetic repairs and replacement of plumbing fixtures with your own hands
So, for cleaning you will need:
Lots of thick plastic garbage bags (lots of them!).
Broom and dustpan.
A vacuum cleaner, preferably an industrial one, but if you don’t have one, then prepare replacement bags for your regular vacuum cleaner.
Mop, buckets, rags, sponges. The supply of rags and sponges must be impressive in order for the cleaning to be of the highest quality.
Household chemicals. There is no way to do without cleaning products if you want to restore order after renovation, because difficult-to-remove stains may remain on surfaces and furniture that cannot be removed mechanically without damaging the material.
In this case, the following will come to the rescue:
- dishwashing detergent, cleaning powder, window cleaner, you may need shampoo for cleaning upholstered furniture, laminate and parquet cleaner;
- Solvents: for removing hardened building materials, paint.
Prepare personal protective equipment to avoid damaging the skin, eyes, and respiratory organs: gloves, respirator, construction glasses.
Where to begin?
In order not to miss anything when thoroughly cleaning your apartment after renovation, you can make a list of what needs to be done. This will help systematize your work.
You need to start by preparing the materials that will be used for cleaning. Prepare water for washing floors, windows, and surfaces.
Do not wash windows and surfaces with floor water. Since various microbes and bacteria may remain. They also use different rags for different places.
We remove large garbage
It’s better to start by removing construction waste: leftover wallpaper, pieces of linoleum, boards, etc.
We collect everything in tight bags, moving from one corner of the room to another. At the same time, do not be distracted by other things, otherwise you will delay cleaning.
Faucet repair - installing and restoring the faucet yourself. 80 photos, diagrams and drawings of modern mixersCeiling repair: selection of materials and current methods of ceiling design. 95 photos of modern ideas
- Beige curtains: popular options for curtain shades, photos of new designs and combinations
Once all the large debris is in bags and waiting to be taken to the landfill, arm yourself with a dustpan and broom and brush off any remaining dirt from window sills and other surfaces. Finally, sweep the floor. And don't forget to take the bags to the landfill. Now you can move on to the next step.
Under no circumstances should you throw bags of garbage into a regular street container - you risk receiving a hefty fine.
Important Tips
- Tape marks can be easily removed with nail polish remover or glass cleaner.
- Rust can be easily removed with a solution of copper sulfate.
- Any soap solution will remove grease stains.
- Polyurethane foam can be removed only after hardening, using abrasive materials: scraper, sandpaper. For delicate surfaces we use a special cleaner.
- Varnish or helmet can be removed with acetone.
ATTENTION! Before using any product, be sure to test it on an inconspicuous area.
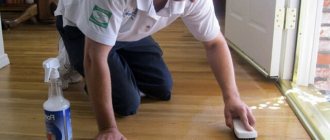
Surface cleaning
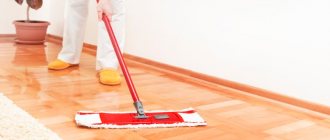
Having gotten rid of construction debris, you need to wipe construction dust from all hard surfaces of the house: floors, walls, shelving, and wipe down furniture.
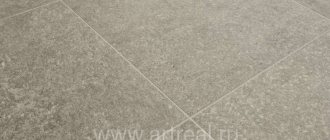
According to reviews, the best option to get rid of it is to use a washing vacuum cleaner, paying special attention to the space between the cracks on the floor and in the corners (a flat nozzle will help). The hardest thing to do is clean the floor from dirt, especially if it is made of laminate or linoleum: they can only be removed with a rag; hard brushes or other hard devices will immediately leave marks. To remove dust from the floor covering, you need to lightly moisten the floor with water (if there is a lot of water, streaks will form), when the surface dries, vacuum it with a washing vacuum cleaner; if you don’t have one, it is advisable to borrow or rent it.
Paint stains found on the floor, tiles, and plumbing at home can be cleaned with kerosene; adhesive from tape can be removed with vegetable oil; traces of glue on linoleum can be removed with White Spirit.
Tile
Particular attention should be paid to ceramic tiles, which may contain residues of cement mortar (grout). According to reviews, if the grout was not removed immediately, it is not easy to get rid of it when the cement has dried. You can remove grout from the tiles and between the seams with a smooth, sharp blade or a sharpened chisel. According to reviews, you need to act carefully, otherwise you can damage the coating.
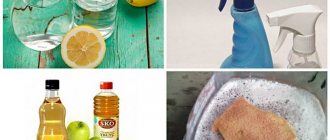
Hardened lime can be easily removed with a vinegar solution or vegetable oil: add the oil to warm water and gently wipe off the white deposits, making sure that the product does not end up between the seams. After this, wash the tiles with soapy water.
Before washing the tiles, you need to vacuum them thoroughly. It is necessary to remove dust as soon as possible so that dust and dirt do not become embedded in the tile coating. If it turns out that there are no cement stains on the tiles, ceramic tiles can be easily cleaned with special tile foam: judging by the reviews, it can easily remove traces of tile adhesive, putty, and silicone sealant.
If there is no special product, you can wash the tiles with 9% table vinegar, ammonia or soap solution, the wall with a soft rag or brush if the tiles are resistant to mechanical damage. These products have also received a lot of positive reviews.
Before starting work, apply the cleaning agent to the most inconspicuous tiles and check whether it will damage the tiles. If everything is fine, you can continue cleaning: first apply the cleaning agent, then wash the tiles with clean water and wipe dry.
In some cases, after repairs, a coating remains on the tiles, which cleaning agents cannot remove and cannot be washed off. Felt can help here: you need to glue it to a spatula with a handle and try to scrub the tiles with it, which usually helps.
The joints between the tiles can be cleaned with a toothbrush. If the grout has become embedded in the seams between the tiles,
It will not be easy to remove it using simple means: fine-grained sandpaper can help out here. After cleaning, wash the space between the tiles and treat the seams with a special agent against fungus, mold and other harmful microorganisms.
Cleaning the windows
Plastic double-glazed windows can be cleaned quite easily with glass cleaner and a sponge. But with wooden windows you will have to tinker: wooden frames are washed with dishwashing detergent diluted in water, then wiped dry with a soft cloth. The glass itself is cleaned with the product.
White plaque is removed with water and vinegar, at the rate of 2 tablespoons of vinegar per 3 liters. water.
We do the same with doors and mirrors: remove dust with a soap solution, then use cleaning products.
Why do you need dust removal from walls?
The need to get rid of dust is due to the fact that dust can be dangerous, especially construction dust. Parasites and pathogens can multiply in it. However, dust can also pose other dangers. It is important not to forget that construction dust can not only be soft, but also contain small and hard particles. They can have an extremely negative effect on things they come into contact with, for example, scratching glass or plastic surfaces.
Therefore, in most construction and renovation work, it is recommended to protect the respiratory tract using respirators.
Dust removal must be carried out not only upon completion of work, but also before applying decor, be it wallpaper, tiles, paint or flooring.
Only a specialized team with the appropriate skills and equipment can quickly and fully cope with such a task. However, some of the useful work can be done with your own hands.
What's the result?
As you can see, comprehensive cleaning of a home after renovation with your own hands is quite a labor-intensive and painstaking process. Before you start, you need to think about everything: the degree of contamination, the availability of necessary materials. It might make sense to think about calling a cleaning service.
If you decide to do the cleaning yourself, then do everything as carefully as possible and follow the steps.