Repair of wall-hung toilet
A suspended structure has many advantages compared to a traditional floor structure, but it is more difficult to install and repair. When using this model, some malfunctions may occur that you can fix yourself:
- If leaks appear, it is necessary to check all connections, and it would also be useful to improve the tightness of the joints.
- If the drain tank malfunctions, repairs are made through the inspection window; the process is described in more detail below.
- If water stagnates in the toilet, you need to check the slope of the drain (must be at least 45 degrees).
- If the structure is wobbly, it is necessary to tighten the fixing bolts.
Microlift design
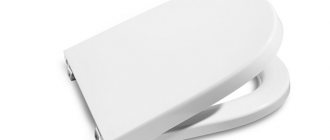
The microlift is sold together with the toilet lid. It cannot be purchased separately. Toilet lids equipped with closers are made of plastic or its modern analogue - duroplast. Although this polymer looks like plastic in appearance, its quality characteristics are closer to ceramics.
The material for the manufacture of seats equipped with a microlift is duroplast - a modified polymer that can maintain a stable temperature when exposed to heat.
Fix the device to the toilet in a rigid way. But to ensure smooth operation of the mechanism, the device can be equipped with a function that provides air shock absorption. For this purpose, the seat is supplemented with special compartments, which are filled with shock-absorbing silicone.
- A rod that securely holds the rigid plastic installation.
- A spring whose force balances the weight of the structure.
- Hinged micro-lift mechanism that allows changing the position of the lid.
- Lid and seat made of durable polymer.
In more expensive functional systems, the basis of the mechanism is not springs and rods, but pistons and cylinders. Structures of this type are classified as non-removable.
Smooth closing/opening of the mechanism and fixation of the toilet lid in the desired position is ensured by a micro-lift hinge mechanism equipped with a spring
Functional systems, in which seats and covers are supplemented with a built-in microlift, are produced by many manufacturers of sanitary equipment. If desired, you can purchase and install a universal device that can provide several functions at once:
- adjusting the temperature of incoming water;
- possibility of seat heating;
- high-quality washing, enema and massage;
- extraction of unpleasant odors followed by deodorization.
Many models are often equipped with a convenient self-cleaning function, thereby minimizing the participation of household members in the process of using a plumbing fixture.
The subtleties of repairing a microlift for a toilet lid with your own hands
There are small procedures in everyday life, unnoticed, insignificant, but capable of causing a lot of inconvenience and causing strife. These include closing the toilet lid. Therefore, models equipped with a microlift are now very popular. This mechanism is reliable, but malfunctions cannot be ruled out. Despite the complexity of the device that distinguishes the microlift for the toilet lid, repairs can be done with your own hands if you have the necessary tools and skills in working with such devices.
Advantages of a toilet lid with a microlift
A toilet lid equipped with a special microlift has several advantages:
- ensures silent lowering of the lid;
- eliminates premature damage to seat and toilet materials;
- prevents inconvenience, the spread of odors, and germs due to an open lid.
Installing such a structure does not create any problems. All toilet lids with microlifts fit perfectly into all standard models. The range of products in this category includes simple budget options and products that have presence sensors that ensure the lid is raised when a person appears and automatically lowered when the consumer moves away.
If the mechanism breaks down, you should call a qualified technician. Users who decide to carry out repairs on their own should first find out how the toilet lid microlift works in order to identify and properly correct the malfunction.
Toilet microlift design
The design of the toilet lid microlift is not particularly complex. It is similar to the mechanism that is built into doors for smooth closing. The main elements in a microlift device are a spring and a rod.
The spring resistance force is selected by the manufacturer taking into account the weight of the cover. This property ensures smooth lowering and braking of rod rotation. This fastening element connects the seat and the cover and provides these structural parts with a rigid, reliable fixation. Complex, multifunctional systems use mechanisms consisting of pistons and cylinders.
Toilet lid systems made by renowned manufacturers are of high quality. However, improper operation and natural wear of elements lead to disruptions in the operation of the microlift mechanism. Practice shows that if the toilet lid is damaged, repairing it is cheaper than buying a new product. Therefore, it is worth addressing the problem if one appears.
Reasons for the breakdown of the microlift in the toilet lid
Duroplast is used in the manufacture of lids for toilets equipped with a microlift. This material has a number of advantages:
- increased strength;
- resistance to mechanical stress;
- ease of care;
- environmental Safety
- ease of use.
These qualities ensure durability of the structure. To ensure flawless operation of the microlift, manufacturers fill shock absorbers with silicone. This guarantees a long service life of the mechanism. However, improper operation can cause damage to the microlift mechanism.
In most cases, the cause of malfunctions of this device is attempts to manually close the lid out of habit. The microlift spring is designed for gradual compression. Mechanical impact interferes with the operation of the device, causing failures and malfunctions. Such breakdowns are often fatal and cannot be corrected, requiring the purchase of a new design.
Problems with the mechanism can occur due to natural wear and tear of the elements. If the toilet lid with a microlift breaks for this reason, you can repair it by replacing the damaged parts.
Principles for choosing a toilet lid with a microlift
The cause of premature failure of the toilet lid microlift mechanism may be the wrong choice of model or errors in its installation. Therefore, before purchasing this design, you should familiarize yourself with the rules for selection and installation. When purchasing a seat with a cover you should:
- take into account the shape of the toilet;
- give preference to products from well-known manufacturers;
- focus on your own preferences.
Manufacturers of these designs focus on standard shapes and dimensions of the toilet bowl. But you need to carefully choose the model, take into account the features of the plumbing equipment, make sure that the fastenings of the seat system with a lid and its outline are suitable for your toilet.
Designs consisting of a seat, a lid and a microlift are offered by many manufacturers of sanitary equipment. But if there is a need to buy a multifunctional device that can provide high-quality washing, massage, enema, provide the ability to heat the seat, adjust the water temperature, the unique SATO products will be the best option. This South Korean company produces electronic devices that have no analogues throughout the world.
Known types of failures
Here are the most common breakdowns that you can repair yourself.
The lid is cracked
The duroplast from which these components are made gives the material rigidity and resistance to yellowing. The downside is that these lids are very fragile.
Photo 1. Installation of new fastenings for the lid and toilet seat occurs in the same way as their removal.
The toilet seat cracked
The plastic product can withstand a lot of weight. But at the same time, such material is very short-lived, because... subject to mechanical damage. However, a plastic toilet seat is cheaper than its analogues.
The toilet seat mount is broken
This part is often sold complete with the main parts. Separately, you can search for the mount on the Internet.
Photo 2. Mounts for the toilet lid are plastic, metal and complementary. Metal ones are the most common because they are more durable.
The microlift is broken
The ceramics of the toilet bowl can withstand a lot of weight, but are easily destroyed by impact forces. Often this force is the frequent fall of the toilet lid. The microlift ensures smooth closing of the lid, but sometimes the system fails.
Toilet closer repair
If the microlift breaks down, it is better to contact qualified technicians with the proper experience. They will help determine the cause and type of malfunction, and will also professionally make a replacement and fully restore the functionality of the “smart” system.
Work on self-repair of the built-in mechanism should be carried out with extreme caution, having thoroughly studied the instructions for the product before starting work.
This is especially true if you have to deal with a design that is equipped with several additional functions at once.
Replacing failed bolts
The most common malfunction that can be fixed on your own is broken fastening bolts.
Work to eliminate the defect is carried out in the following sequence:
- Dismantling the device (you can take the installation instructions and repeat the steps, but in reverse order).
- Replacing broken bolts, screwed on the reverse side with nuts, which connect the back of the cover to the elevator mechanism.
- Reassembling the system is carried out in the reverse order with strict adherence to the installation of each part in its original place.
The nuts are screwed onto the plastic bolts from the underside of the toilet
The work is carried out carefully so as not to damage the fasteners
If you have to screw in brass parts to prevent damage to the surface, you should use intermediate plastic or rubber washers that soften the pressure of the fastener
If it is necessary to dismantle the seat, it is convenient to unscrew the holders manually or using pliers.
Tightening up loose supports
To tighten one of the metal supports securing the seat cover to the toilet body, you need to remove the caps on each leg of the fastener. They are equipped with hexagon holes, although some models do not have holes in these caps. After this, all that remains is to remove the seat and cover without making excessive efforts. To do this, when open, simply gently lift it up.
The metal fasteners move freely in the holes, so to adjust the position of the lid relative to the tank, you just need to move them slightly forward or back, and then carefully tighten the caps or fastening nuts. In this case, the microlifts themselves do not need to be disassembled.
Elimination of other breakdowns
There are situations when, for some reason, the toilet lid itself breaks. If you wish, you can try to glue it together. “Liquid nails” do an excellent job with this task. If cracks have formed on the plastic seat, they can be eliminated using dichloroethane or acetone. To do this, drop a little liquid onto the accident site and join the edges, fixing the lid in a stationary position for several minutes.
If the cause of the failure is the accumulation of lubricant, which is a viscous and transparent substance, then to eliminate the defect you need to carefully remove it.
If, when closing/opening, the lid makes a prolonged creaking sound, this indicates that the lubricating gel-like materials have been used up
Is the problem caused by a broken spring? In this case, it will not be possible to repair it so that the device works fully. Most microlifts are non-separable structures, and it is almost impossible to select a spring that is suitable in length and diameter.
Problems with the stock are also unlikely to be corrected on your own. It would be great if you can find a similar failed mechanism in which the rod is functioning properly. In other cases, the only correct way out of the situation is to replace the structure with a new one.
Toilet lid repair: how to repair a microlift and seat
Plumbing fixtures today are often equipped with technically advanced devices that simplify operation and increase comfort. These include a toilet lid with a built-in microlift. Is not it?
But due to natural wear and tear of parts and incorrect operation, the system tends to fail. Of course, you can entrust the repair of the toilet lid to plumbers, but in order to save time and money, you can do it yourself. Moreover, in practice it is quite simple to implement.
In this article we will understand the operating principle of a microlift, consider the main types of breakdowns and tell you what is needed to fix them. For clarity, the article contains photo and video materials that reflect the essence of the issue.
Microlift - what kind of device?
The main purpose of the mirolift is to ensure smooth lowering of the lid to prevent it from falling onto the glazed surface of the sanitaryware with a loud popping sound. Such devices appeared on the market a long time ago and have already gained popularity among connoisseurs of comfort.
The seat cover, supplemented with a microlift, is convenient in that it rises and falls smoothly, and the user does not need to hold it from impact
The operating principle of a microlift is functionally very similar to a door closer, but only made in miniature, which is why it is often called a “smooth lowering device.”
The installed device helps solve three problems at once:
- prevents the lid from falling;
- prevents the spread of unpleasant odors;
- eliminates the formation of cracks and chips on the decorative coating of plumbing fixtures.
This seemingly simple product contains a solution that significantly simplifies the use of plumbing fixtures and increases comfort. Due to the fact that the mechanism operates silently, it is not audible when using plumbing fixtures even at night, when everyone in the household is sleeping.
When you sharply lower the toilet seat onto the toilet, the lid makes a sharp, abrupt popping sound, but with the microlift installed, you definitely won’t hear it
There are both budget options on sale and more expensive ones installed on smart toilets with electronic control. Mechanisms from the expensive category are equipped with a presence sensor, which automatically lifts the lid when a person approaches, and returns it to its original position after using the toilet.
Design features of the device
The microlift is sold together with the toilet lid, but it can also be purchased separately. Covers equipped with closers are made of plastic or its modern version - duroplast. Although this polymer looks like plastic in appearance, its quality characteristics are closer to ceramics.
The material for the manufacture of seats equipped with a microlift is duroplast - a modified polymer that can maintain a stable temperature when exposed to heat.
Fix the device to the toilet in a rigid way. The main structural elements of the microlift:
- Rod that reliably fixes a rigid plastic installation.
- Spring to balance the weight of the structure.
- Hinged micro-lift mechanism , providing a change in the position of the lid.
- adjusting the temperature of incoming water;
- possibility of seat heating;
- high-quality washing, enema and massage;
- extraction of unpleasant odors followed by deodorization.
In more expensive functional systems, the basis of the mechanism is not springs and rods, but pistons and cylinders. Structures of this type are classified as non-removable.
Smooth closing/opening of the mechanism and fixation of the toilet lid in the desired position is ensured by a micro-lift hinge mechanism equipped with a spring
Functional systems, in which seats and covers are supplemented with a built-in microlift, are produced by many manufacturers of sanitary equipment. If desired, you can purchase and install a universal system, which includes, in addition to the microlift, other devices.
They are capable of providing several functions at once:
Many models are often equipped with a convenient self-cleaning function, thereby minimizing the participation of household members in the process of using the plumbing fixture. The presence of a microlift is just one way to make your living conditions more comfortable.
Main causes of breakdowns
Closer systems produced by leading manufacturers are renowned for their high quality. But natural wear and tear of functional elements and incorrect operation of a “smart” device lead to disruptions in the operation of the system.
The main sign of failure of the mechanism is the appearance of a loud sound that occurs when the lid is lowered due to its falling
The causes of malfunctions in most cases are attempts to manually close the lid “out of habit.” The mechanism's built-in spring is designed for gradual compression. If physical force is used, the mechanical impact disables the device.
The easiest way to solve the problem is to completely replace the cover with a new one, since reinstalling damaged mechanisms is not always advisable. But still, in order to save on expenses, you can repair a broken toilet lid microlift on your own, by trying to disassemble the device and replace its failed elements.
Image gallery Photo from The most common cause of microlift failure is its sudden slamming with a characteristic impact on the seat. Before parting with a convenient plumbing fixture, you should examine its condition and try to correct the situation. Disassembling a microlift is not difficult. To do this, just use the tip of a knife or a thin slotted screwdriver to pry up the bushing. In the example in the photo, the device is hopelessly damaged, because... the gel connection of the moving parts mating to each other is damaged. Replacing soft closing devices in most cases is pointless, because a cover with a microlift installed at the factory costs almost the same as a kit for replacing devices. closingToilet closer repair
If the microlift breaks down, it is better to contact specialists with the proper experience. They will help determine the cause and type of malfunction, and will also professionally make a replacement and fully restore the functionality of the “smart” system.
Work on self-repair of the built-in mechanism should be carried out with extreme caution, having thoroughly studied the instructions for the product before starting work.
This is especially true if you have to deal with a design that is equipped with several additional functions at once.
Replacing failed bolts
The most common malfunction that can be fixed on your own is broken fastening bolts.
Work to eliminate the defect is carried out in the following sequence:
The nuts are screwed onto the plastic bolts from the underside of the toilet. The work is carried out carefully so as not to damage the fasteners.
If you have to screw in brass parts to prevent damage to the surface, you should use intermediate plastic or rubber washers that soften the pressure of the fastener
If it is necessary to dismantle the seat, it is convenient to unscrew the holders manually or using pliers.
Tightening up loose supports
To tighten one of the metal supports securing the seat cover to the toilet body, you need to remove the caps on each leg of the fastener. They are equipped with hexagon holes, although some models do not have holes in these caps.
After this, all that remains is to remove the seat and cover without making excessive efforts. To do this, when open, simply gently lift it up.
The metal fasteners move freely in the holes, so to adjust the position of the lid relative to the tank, you just need to move them slightly forward or back, and then carefully tighten the caps or fastening nuts. In this case, the microlifts themselves do not need to be disassembled.
Elimination of other breakdowns
There are situations when, for some reason, the toilet lid itself breaks. If you wish, you can try to glue it together. “Liquid nails” do an excellent job with this task. If cracks have formed on the plastic seat, they can be eliminated using dichloroethane or acetone.
To do this, drop a little liquid onto the accident site and join the edges, fixing the lid in a stationary position for several minutes. If the cause of the failure is the accumulation of lubricant, which is a viscous and transparent substance, then to eliminate the defect you need to carefully remove it.
If, when closing/opening, the lid makes a prolonged creaking sound, this indicates that the lubricating gel-like materials have been used up
Is the problem caused by a broken spring? In this case, it will not be possible to repair it so that the device works fully. Most microlifts are non-separable structures, and it is almost impossible to select a spring that is suitable in length and diameter.
Problems with the stock are also unlikely to be corrected on your own. It would be great if you can find a similar failed mechanism in which the rod is functioning properly. In other cases, the only correct way out of the situation is to replace the structure with a new one.
Option for lid reanimation with microlift
In most cases, it will not be possible to restore the functionality of a seat microlift with a lid, but the plumbing fixture itself can still serve. True, it will not close smoothly. The following photo selection will help you get acquainted with the repair operations:
Image galleryPhoto from Let's inspect the plumbing fixture with an additional child seat and a microlift, and evaluate the condition of the device. If it cannot be restored, we will make devices to hold the lid and attach the seat to the toilet. We stock up on a piece of polypropylene pipe. In our example, a pipe with a diameter of 20 mm is suitable. Let's check whether it is suitable for making a bushing. To make fasteners, we need two M8 bolts 30-40 mm long. They are needed to fix the cover. Take two long M8 nuts. They will be rigidly fixed in the sleeve; they are needed to fix the cover. Step 1: Inspect and identify damage to the microlift. Step 2: Preparation of a PP pipe with a diameter of 20 mm. Step 3: Preparation of a pair of M8 bolts for fastening. Step 4: Preparation of long spacer nuts.
We've stocked up on everything we need to carry out the repair, now let's take a hair dryer, a drilling machine and a screwdriver to get to work:
Image gallery Photo from We insert a piece of polypropylene pipe into the hinge hole, connecting the adult and child seats. We mark the actual size of the future bushing after the fact. Turn on a hair dryer and heat the nut with hot air for 5 - 10 minutes. Insert the heated nut into the pipe up to the mark made before and quickly cool the contact area under running cold water. In the same way, we make a second blank for the bushing. The cooled pipe should firmly clamp the nuts. As a result, you will get two sections of pipe, partially filled with the nuts installed in them. Having assembled the adult and child seats and inserting the blanks into their hinge joint, we check how they move relative to each other. Installing both blanks in the hinge joint so that the sides with the nuts “look” outward. , mark the points for drilling holes for the metal rods with which the device is fixed to the toilet. We drill holes with a 6 drill for the metal rods, with the help of which the seat with the lid is screwed to the toilet. In the drilled hole we insert a holder - a metal rod onto which a fixing nut is screwed from the bottom of the plumbing. Step 5: Marking a pipe for making a bushingStep 6: Heating a long nut with a hair dryerStep 7: Inserting a heated nut into a PP pipeStep 8: Making two blanks for bushingsStep 9: Checking the action of the made blanksStep 10: Marking points for installing holdersStep 11: Drilling holes for holdersStep 12: Bushing ready for installation and fastening
Now you can safely begin the final assembly and fastening of the convenient device to the toilet:
Image galleryPhoto from We install the manufactured bushings in their seats, check the action of the hinge mechanism and the movement of the two seats relative to each other. We install holders with the help of which the device of two seats and a lid is attached to the plumbing through the holes in it. We make it through pre-drilled holes on the side of the lid. fastening to the seats We again check how the hinge joints work, how easily the parts of the device move. If everything is fine, put it in place by tightening the plastic fixing nuts from the bottom of the toilet Step 13: Pre-assembly and checking the operation Step 14: Installing the device holders Step 15: Fastening the cover to the seat with M8 screws Step 16: Checking the operation of the cover and preparing for installation
You can read about how to install a bidet pad or an electronic cover with bidet and microlift functions in one of the popular articles on our website.
Replacing the seat cover
One of the significant reasons for fatal mechanism failure is the wrong choice of model and errors during its installation.
Therefore, when purchasing a new cover, you should be guided by the following rules:
- take into account the dimensions of the plumbing fixtures;
- pay attention to the shape and configuration of the toilet;
- give preference to products from trusted manufacturers.
The seats on sale with a lid are suitable for toilets of any design: floor-standing, side-mounted, wall-hung. Work on installing a new device is carried out in the standard manner.
When choosing a new model, it is important to take into account the features of the plumbing fixture and pay attention to ensuring that the distances between the system fasteners coincide with the seat fastening locations
To replace a broken cover with a closer with a new one, you will need a set of tools:
- hacksaw;
- pliers;
- socket wrench.
The materials you will also need are silicone or oil to process dried elements. Ideally, it is better to use a special lubricant that, penetrating into the cracks, freezes the rust.
Traditionally, the lid with the toilet seat is secured with two bolts. But in some models a metal pin may be used instead. To dismantle you just need to lower/raise the cover and then unscrew the pins.
If the cover has been used for quite a long period, there is a high probability that the bolts have become clogged, and the fastening points have become coated and “fused” to the body.
To ensure easier unscrewing and simplify your task, the bolts will have to be pre-coated with oil or silicone, but this is not always effective
Using pliers, carefully, trying not to damage the decorative surface of the toilet, unscrew the clamp and bolts. To protect your plumbing from possible damage when working with pliers, it is better to cover the surface with rags or pieces of cardboard.
You should not neglect this recommendation, otherwise if you make the slightest mistake you will have to change not only the lid, but also the toilet. The following article will introduce you to the rules for installing this plumbing fixture, the contents of which we recommend that you familiarize yourself with.
As a last resort, if the processing did not give the desired result and the plastic bolts do not give in, they can be sawed with a hacksaw or cut off with a hot knife blade. There is no need to worry that melted plastic will stain your plumbing fixtures. After hardening, it will not be difficult to remove from the surface.
Having dismantled the old lid, the remnants of dirt, accumulation of rust and limescale are removed from the grooves on the toilet, after which bolts are inserted into the fastening points and the structure is fixed.
Installation of the new cover is carried out in the following sequence:
Since the key reason for mechanism failure may be the incorrect position of the lid and seat, it is important to accurately adjust the lid when installing the structure
An important point: adjustment and alignment are carried out at the stage when the fixing nuts are just attached, but not yet firmly tightened.
If installing a lid with a microlift is somewhat alarming due to the complexity and often impossibility of repair, we recommend that you familiarize yourself with the nuances of choosing a regular toilet seat. It is possible that the advantages of the traditional option will outweigh the disadvantages of the new product.
Conclusions and useful video on the topic
To consolidate your knowledge and better imagine the process of repairing and installing a toilet lid, we offer useful and interesting videos.
Video #1. Toilet mounting repair:
Video #2. How to install the system correctly:
In the future, in order to reduce the risk of premature failure, it is important to periodically check the position of the device and adjust it during operation. And remember: a seat with an elevator device is a “smart” mechanism that requires careful handling.
If you have any questions or want to share your own experience in repairing or altering a seat with a microlift, please write comments. You can leave a post with your opinion and post a photo on the topic of the article in the block below.
Source sovet-ingenera.com
Advantages and disadvantages
Many people do not understand the need to install a toilet with a microlift. In fact, this equipment has many advantages, which makes such an element, if not indispensable, then desirable.
In fact, this design has no disadvantages. The only negative is the inability to quickly lower the seat and lid on your own. If you try and make an effort, the microlift will simply break, as a result of which you will have to buy new equipment.
In most cases, such products are sold for certain types of toilets, although individual plumbing equipment is also available for sale. To choose it, you need to consider several points.
Repair work
It is worth saying that the microlift system is characterized by faster wear compared to conventional systems. In addition, when you close the lid of the toilet cistern, which has a microlift system, manually, you reduce its service life. Of course, in this case the system can continue to be used, but it is best to make repairs so that it does not creak. To properly repair such a system, it is necessary to correctly determine the cause of the problem and only then carry out repairs. Quite often a problem occurs that the base with the lift mechanism is disconnected directly from the toilet. You can fix this damage either yourself or with the help of specialists. If you decide to repair such a cover yourself, then first of all you will need to unscrew the nuts that are screwed to the bolts connecting the back of the cover near the tank and the elevator mechanism. If these nuts are damaged, then they must be replaced with new ones.
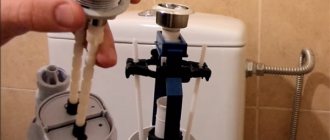
If you cannot reach the nuts, then you cannot do without removing the tank and the toilet itself. In this case, you will need to disconnect the toilet from the drain and disconnect it from the floor, then install the lid in the right place and reinstall the toilet. After such a procedure, problems may arise related to the operation of the tank.
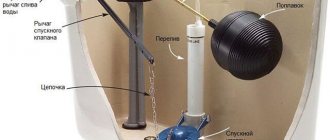
For example, water can continuously flow into the tank or, conversely, it leaves from there all the time. The solution is that the float located inside the tank will need to be installed in the optimal position for you, approximately 2.5 cm below the inlet of the underwater pipe. In addition, other problems associated with the operation of the tank are quite common. For example, a faulty release valve. In this case, valve repair is most likely the last resort, short of completely replacing the valve.
https://youtube.com/watch?v=34_EhH10M8w
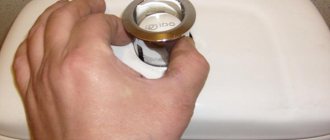
To solve this problem, the water must be released so that the valve moves and then leaks. If the movement of the valve was recorded, but no water flowed, then the problem is the float, which is most likely already worn out, which means it needs to be replaced with a new one. If advancing the valve and replacing the float did not help solve the immediate problem, then most likely the cause of the breakdown is something else, which means replacing the valve or float will not help you.
Causes of breakdowns
Naturally, no matter what kind of lid you have, it can be broken for various reasons: from time, defects, etc. If you use a regular lid, without a microlift, without a bidet, then you can only get by by replacing the old lid with a new one - this will be the case both cheaper and simpler. Otherwise, repairs will be necessary.
If you use a lid with a microlift, it will be more difficult to repair. It is worth taking a closer look at the device itself. A microlift is a system that allows the lid to lower smoothly. That is, when you lower the lid, this process ends with its smooth braking, and then it finally lowers onto the seat.
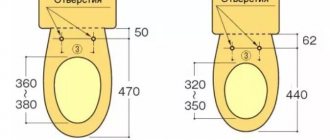
Before you go to the store for a new lid, write down the dimensions of your toilet, or better yet, take a photo of it. Decide on the shape of the element: for example, on an oval toilet there is an oval lid.
When buying a seat with a similar mechanism, you need to pay attention to the following factors: firstly, your financial condition. Secondly, you need to choose a model that fits perfectly into your interior.
Thirdly, it is important to pay attention to how comfortable it is for you to be on it, and also do not forget about the material from which it is made. Let's move on directly to the process of repairing and installing the cover using a microlift
At first, installing such a lid is practically no different from installing an ordinary toilet lid. In order to install it, you need to insert four rubber inserts into the cast holes of the toilet bowl, then install the plastic bushing and mounting bolt. After this, you need to screw the adjusting cup onto the mounting bolt and place a rubber gasket on top. Then connect this structure to the body of the plumbing fixture and then tighten the plastic nuts on top
Let's move on directly to the process of repairing and installing the cover using a microlift. At first, installing such a lid is practically no different from installing an ordinary toilet lid. In order to install it, you need to insert four rubber inserts into the cast holes of the toilet bowl, then install the plastic bushing and mounting bolt. After this, you need to screw the adjusting cup onto the mounting bolt and place a rubber gasket on top. Then connect this structure to the body of the plumbing fixture and then tighten the plastic nuts on top.
How to properly install a toilet lid with a microlift
Installing a cover with a smooth lowering mechanism takes place in several steps:
- Compare the types of fastenings on the toilet and the selected product to make sure they match each other.
- Insert two rubber inserts into the recesses at the bottom of the seat.
- Connect the seat to the toilet body using a bolt and bushing.
- Adjust height.
- Secure the rubber gasket.
- Insert the mounting bolts and tighten them with nuts from the bottom.
Installation
Despite the more complex design, the fastening of the toilet lid with a microlift is the same as in traditional products. Therefore, all that needs to be done is to remove the old seat and install a new one. First, you should put rubber rings on it, which can ensure a soft fit of the product to the surface of the plumbing.
The only difference from a conventional seat with a panel is that a product with a microlift may require additional adjustment. This is due to the fact that even a slight misalignment or loose fit can lead to damage to the device.
Using the adjusting cups, the seat can be leveled, thereby preventing its failure. Thus, the task of adjustment is to ensure uniform fit of the cover over the entire surface of the plumbing fixture.
The main causes of breakdowns and methods for solving the problem
Despite the simplicity of the microlift, its parts often fail, forcing owners to take prompt action to eliminate the malfunction. Among the common causes of microlift failure are:
- breakdown of the automatic closer;
- wear of the bolts securing the microlift to the surface of the toilet;
- loosening of supports;
- problems with the toilet lid;
- exhaustion of the spring's safety margin.
How to fix a door closer
Repairing most door closer models is not possible, since they are manufactured as a monolithic structure. Some devices require repair, but this can only be carried out in a special service center, since it will require special equipment and skills to work with it.
Few owners are willing to pay money for such services, especially since the price is comparable to the price of a new, similar product. If such a problem arises, you should accept the inevitable and simply purchase a fresh, functional part.
Replacing bolts
The bolts that hold the two devices together are made of soft metals. This leads to accelerated wear and the need to purchase new fasteners. The problem occurs frequently, and it is necessary to prepare for it in advance.
Repair is carried out according to the following algorithm:
- unscrew the nuts at the bottom of the toilet, with which the lid is attached to its base;
- We remove the mounting bolts, after which we install new parts. Tighten the new fasteners carefully, as with strong force the ceramics of the toilet bowl will begin to crack;
This is not necessary, but working with fasteners will be much more convenient.
Pulling up the supports
The microlift is fixed using metal supports, which are closed with special protective caps. Over time, they tend to become loose, causing the entire structure to become shaky. Pulling up the microlift supports is implemented as follows:
- remove the protective caps;
- we tighten the fastenings until the lid is aligned with the toilet cistern;
- We check the reliability of fixation and return the protective caps to their place.
Remember to tighten the fasteners carefully so as not to damage the fragile ceramics.
How to glue a lid
Users of toilet microlifts complain about systematic failures of the lid. They arise due to the carelessness of the owners themselves, when they forget themselves and try to lower the lid on their own.
If you find yourself in such a situation, there are several possible ways for further developments:
- The lid broke into several pieces. The worst option is when there is no point in restoring the damaged part. It will no longer have its former strength, and its appearance will change for the worse. It’s easier to throw away such a part and replace it with a new one.
- A small crack appeared on the lid. This defect can be corrected with light cosmetic repairs. Liquid nails are suitable for this, the use of which will not leave a trace of breakage. It is enough to apply them to the damaged surface, then hold under pressure for several minutes. Excess glue is removed and the lid is ready for use again.
How to repair a spring
Repair of the microlift spring is impossible for the following reasons:
- most manufacturers of microlifts make their structures non-removable;
- in the case where the structure is collapsible, a problem arises with selecting a spring. They are very specific, and finding the required part will not be easy.
It’s easier to buy a new product and not waste your nerves.
Replacing the cover
Replacing a tired cover with a new one is easy. Enough:
- unscrew the fasteners;
- dismantle the part;
If the fasteners are stuck and do not give in, cut them off using a hacksaw. When purchasing a new cover, be sure to consider the following things:
- toilet design features;
- features of the restroom interior.
How to fix a toilet lid closer?
It all depends on what exactly in the closer “ordered to live long.” The simple, but closed, non-demountable design does not provide much space for activity.
What to do if problems arise?
If the breakdown occurred inside the microlift, then the easiest solution would be to go to the store for a new product. The design is a kind of monolith, so a failed spring or a cracked rod requires a complete replacement of the closer.
Independent actions in this case are not always justified. If the microlift fails, it is better (and easier) to contact a specialist who has experience in such work. The specialist will quickly determine the cause of the breakdown; if possible, he will purchase and replace the faulty part with a new one. This option becomes the only option if the door closer has several additional functions.
The downside of this solution for standard, “semi-smart” models is the cost of repairs, which can be more expensive than buying a new toilet lid with a microlift. In this case, it becomes easier, more profitable and faster to purchase a new product, rather than “bother” with repairs.
How to replace fasteners?
One of the common failures is burst bolts that could not withstand careless handling. The reason is the soft material from which they are made: as a rule, it is plastic or brass. Such repairs are quite within the capabilities of a master owner. To replace faulty elements, perform the following steps:
- First, the product is dismantled. The nuts are unscrewed from below by hand or with pliers, then the bolts are pulled out of the holes.
- Broken bolts are replaced with new elements, then the nuts are tightened again. Make sure not to allow the slightest distortion of the product.
Tightening is done carefully. For metal parts, rubberized or plastic washers are provided. The reason is the fragility of “toilet” materials, which can be easily damaged.
How to adjust the lid?
As a rule, this operation is required if the metal supports holding the lid on the toilet have become loose. In this case, first remove the protective caps from the mounting legs. Most models have hex key holes for this purpose.
Then the seat is carefully lifted up by the lid. Since the fasteners rotate freely inside, they are twisted in one direction or another, leveling the surface of the lid, focusing on the toilet tank. Once the adjustment is complete, the caps are replaced and carefully tightened.
Removing the old cover and installing a new one
Sometimes the answer to the question of how to fix a toilet lid closer involves a complete replacement of this element. Breakdowns of the closer mechanism occur for several reasons. Among them are incorrect choice of model and incorrect installation.
To avoid replacement or potential repairs, you need to consider the dimensions of the plumbing fixture when purchasing a cover. It is better to look not at the beauty of the new model, but to focus on the dimensions of the old device, which suited the equipment perfectly. Be sure to pay attention to the shape of the toilet, the distance between the holes for fixing the element. It is recommended to choose seats among products from popular manufacturers.
Dismantling the old product
In addition to conventional tools, the technician will need silicone or a special lubricant to prevent friction and to protect against corrosion if there are metal parts in the system. Usually the element is connected to the toilet with two bolts, but in some models this role is played by metal studs. To dismantle the product, the lid is lowered or raised, then they are removed.
Sometimes a problem happens: a cover that has not been removed for a long time flatly refuses to come off. The first way to solve the problem is to treat the fasteners with oil or silicone grease. If this procedure does not help, then use pliers. However, they act very carefully, remembering that the material of the toilet bowl is quite vulnerable.
When the problem of a stubborn connection cannot be solved, they act differently. Bolts made of metal are cut with an appropriate hacksaw. In this case, earthenware is protected from dangerous proximity with rags or cardboard.
An alternative for more pliable plastic pieces is to use a hot knife. The holes on the toilet are cleaned of dirt. After this, they move on to the second stage.
Installing a new seat with cover
Installing the cover is unlikely to be a problem for any craftsman.
- First, rubber (plastic) gaskets are inserted into the new structure, which ensure soft and safe contact of the seat with the edges of the toilet.
- Fasteners are inserted into the holes, not forgetting the rubber seals, then the cover is attached using plastic or metal bolts.
The last stages of installation are adjusting the structure in height, centering it, tightening the nuts, and checking the strength and reliability of the fasteners.
What to do with other faults?
Plastic is a material that cannot be called flawless, so sometimes emergencies of a different kind occur. The first example is the breakdown of the toilet lid itself. The reasons are different: it is a strong blow, or it is used as a chair or footrest. In this case, owners can first try to glue it together. The optimal adhesive composition for this type of work is liquid nails.
Glue is applied to the surface, the edges of the parts are carefully joined, then fixed in this position for several minutes. It should be noted that such an operation is not a solution if the product has split into several parts at once. Cracks that appear on the plastic seat are eliminated using acetone or dichloroethane.
How to fix a toilet lid closer if any internal part has failed. As already noted, not all of them can be repaired, since the microlift is a non-demountable structure. A burst or stretched spring cannot be repaired: the device will not allow you to remove and replace this element. Another potential obstacle is the inability to select a part with the same characteristics (length, diameter).
An almost similar situation in most cases arises if the rod suddenly refuses to function. However, in case of such a breakdown, there is another option to solve the problem. For example, you can try to find a used mechanism, this element of which is in order. If this is not possible, then the only way is to buy a new microlift.
Abundance or lack of lubrication are other reasons why the closer may also refuse to work normally. The first option involves removing its excess with a rag; in the second, you need to carefully carry out maintenance. A special (silicone) lubricant will help with this. The most famous “savior” against rust is “liquid key”. This is what they call WD-40. The composition is applied to the parts, left for a while, then they try to unscrew the nuts again.
Features of the mechanism
Despite the fact that the cost of plumbing products with a microclimate is slightly higher compared to conventional ones, they have a number of positive qualities, among which the following can be noted:
- Closing and lifting the lid is silent.
- Extends the life of the plumbing fixture, as it prevents the appearance of microcracks on its surface due to constant impacts. Accordingly, the service life of the plastic structure itself increases, since plastic is a rather fragile material, also prone to cracking.
- Easy to install, making it easy to install the seat yourself. Moreover, if necessary, the lid can be easily removed, for example, to wash.
- More expensive models can work automatically, that is, they raise the lid when a person appears, and also close it if no one is in the room.
Features of the microlift
A microlift is equipment that allows you to control the lowering of the lid so that it does not fall too sharply. The fact is that the toilet, despite all its apparent strength, is often made of ceramics. And under strong physical impact it can crack and split.
Of course, if the lid is made of lightweight plastic, then even if it falls hard, it will not harm the bowl in any way. But it may well crack itself. In addition, even lightweight material makes a loud sound when dropped, which is especially unpleasant in the silence of the night.
However, the functionality of the microlift is not limited to this. It all depends on the specific cover model. In some varieties, microlifts are equipped with an additional element, due to which the lid independently rises and falls when a person appears and leaves. In general, the result is maximum comfort.
At the same time, installation of even the most “sophisticated” model is quite easy. And the lid is no less easy to remove, which greatly simplifies the care of both it and the toilet. The only drawback is that the microlift takes full control of the raising and lowering procedure. That is, you cannot put pressure on such a lid with your hands in order to close it quickly - in this case the mechanism will simply break.
Microlift - what kind of device?
The main purpose of the mirolift is to ensure smooth lowering of the lid to prevent it from falling onto the glazed surface of the sanitaryware with a loud popping sound. Such devices appeared on the market a long time ago and have already gained popularity among connoisseurs of comfort.
The operating principle of a microlift is functionally very similar to a door closer, but only made in miniature, which is why it is often called a “smooth lowering device.”
The installed device helps solve three problems at once:
- prevents the lid from falling;
- prevents the spread of unpleasant odors;
- eliminates the formation of cracks and chips on the decorative coating of plumbing fixtures.
This seemingly simple product contains a solution that significantly simplifies the use of plumbing fixtures and increases comfort. Due to the fact that the mechanism operates silently, it is not audible when using plumbing fixtures even at night, when everyone in the household is sleeping.
There are both budget options on sale and more expensive ones installed on smart toilets with electronic control. Mechanisms from the expensive category are equipped with a presence sensor, which automatically lifts the lid when a person approaches, and returns it to its original position after using the toilet.
Quick toilet lid repair
Sometimes the toilet seat or lid gets damaged suddenly. The reason for this is either simply an old, worn-out design, or careless handling of the product, or a blow from something heavy. Someone, for example, thinks of standing with their feet on the lid, assuming that nothing bad will happen.
How to repair a crack? In the case of a plastic seat, dichloroethane or acetone will help. Just drop a little liquid onto the crack, press the edges together tightly, and then let the area dry thoroughly. The broken areas can be carefully melted until soft, and then connected and allowed to cool. Then light sanding is required.
How to repair a broken “eared” structure:
- Clean the damaged area from dirt;
- Dry thoroughly (you can use a hairdryer);
- Completely degrease the product with acetone;
- Mix hardener and epoxy resin;
- Apply this mixture to the chipped areas; excess mixture can and should be removed immediately;
- Connect the edges of the chips evenly and press them firmly together.
Put everything back in place when the material has completely hardened. But no longer accept the reason why you had to fix (and sometimes replace) the lid
Not only should it be attached carefully, but it should also be used carefully in the future.
Toilet lid repair and the main causes of breakdowns
No matter what material the lid is made of, it may break. Today lids are made from:
- plastic;
- plywood;
- duroplast;
- wood;
- foam rubber.
This item may break after use as a result of mechanical damage, improper installation or manufacturing defects. If this is an ordinary cover that does not have a bidet or microlift installed, it is easier to replace it with a new one; if this is an expensive design, you need to start repairing it.
Before considering repairing a lid with a microlift, you must first understand the specifics of the device. Microlift is a system that prevents the lid from falling onto the seat. That is, when you close it, it does not fall sharply, making an unpleasant popping sound, but as if it slows down before closing, and then falls into place.
If you need to buy a new rim, you should write down the dimensions of the toilet in detail, indicate the shape or photograph the design. For proper fastening, you need to select the appropriate tools and materials.
You cannot take the toilet bowl or lid with you to the store, so draw the rim at its actual size and measure the distance between the two mounting holes. The easiest way to do this is to use a sheet of newspaper. If you have such a sketch, the plumbing department will easily select the right model and accessories. You can take a photo of the headband itself, but you should not forget about the measurements, since you will have to return home more than once to clarify.
Dismantling the structure
If the cover is broken, first of all you need to dismantle it. The old structure needs to be unscrewed. This is not difficult to do, only if the design features of the model make it easy to do.
It is possible to remove the toilet with your own hands: to do this, you need to unscrew the plastic bolts, which are unscrewed counterclockwise. If the product has been used for more than ten years, the fasteners may not come off or the threads may break.
If the plastic bolt cannot be unscrewed, it is cut off with a hot knife. This method is the simplest, it will not damage the toilet (it can also be glued together) and will not spoil the coating.
Steel fasteners are more difficult to remove. Plumbers do not recommend using them in rooms with high humidity, as this will cause the product to rust and the dismantling process can become very complicated.
To facilitate the process, lubricant is applied on all sides and left for 10-15 minutes. During this time, it will penetrate into the cracks and corrode the old rust. Brass fasteners are easier to remove because you can treat the rust with ordinary kerosene. Wet a cloth and wrap it around the bolt. After 15 minutes, easily unscrew it.
The simplest fastening is plastic. It is easy to install without any tools. It is easy to remove for cleaning and can be easily put back in place.
If the structure is damaged
The seat or the cover itself is split, cracked, or out of order - it needs to be repaired. It doesn’t matter whether it was a blow from a heavy object, improper use of the product, or the design simply failed due to the fact that a person thought of standing with his feet on the surface of the toilet without lifting the lid, believing that nothing bad would happen from this. Before starting repairs, you need to thoroughly clean the surface and prepare tools for replacement.
Crack repair
If the plastic base is cracked, acetone or dichloroethane can help. This liquid is applied to the place where the crack has formed, left for 5-10 minutes, and after the chip is soldered with a hot metal object and the two parts are joined together. You need to act carefully so as not to damage the surface around the crack, and then do a little grinding of the material.
Another option is how to repair a broken structure. The damaged area is thoroughly cleaned of plaque and dirt. The area is dried using a hair dryer or simply leaving it for 20-30 minutes. Degreasing is carried out with acetone.
After this, the epoxy resin and hardener are mixed in a separate container. The resulting mixture is used to lubricate the areas where the chip has formed, and the residue is immediately removed with a sharp knife or blade. If you do not do this, after a few minutes the composition will harden and it will be impossible to remove it.
Dismantling: how to remove the toilet lid
There is nothing difficult about unscrewing the old cap. True, there are cases when the lid is difficult to unscrew, this is due to the features of the model. In general, this is not difficult to do.
You can remove the toilet lid with your own hands if you approach this process correctly.
How to remove the toilet lid:
- The plastic mount is easy to remove - the bolts usually unscrew quickly. But if the product is already old and dirty, then the fastener is unscrewed with some effort. If the plastic bolts do not want to be removed, they must be removed with a hot knife blade. At the same time, the material will not stain the toilet - it is not difficult to remove hardened plastic.
- Steel fasteners from the seat are more difficult to remove. Such parts, by the way, are not at all recommended to be installed in places where high humidity occurs. You can purchase a special lubricant that penetrates into the cracks between materials and freezes the rust.
- The brass fastener is easier to remove, but if something doesn’t work out, the problem will be solved with the help of ordinary kerosene.
If you are choosing which fastener to install, plastic is the best option. Such fasteners are not only easy to install and unscrew without special tools, but if they become dirty, they are also very easy to remove. And you can install all this alone, with your own hands.
Replacing the seat cover
One of the significant reasons for fatal mechanism failure is the wrong choice of model and errors during its installation.
Therefore, when purchasing a new cover, you should be guided by the following rules:
- take into account the dimensions of the plumbing fixtures;
- pay attention to the shape and configuration of the toilet;
- give preference to products from trusted manufacturers.
The seats on sale with a lid are suitable for toilets of any design: floor-standing, side-mounted, wall-hung. Work on installing a new device is carried out in the standard manner.
To replace a broken cover with a closer with a new one, you will need a set of tools:
The materials you will also need are silicone or oil to process dried elements. Ideally, it is better to use a special lubricant that, penetrating into the cracks, freezes the rust.
Traditionally, the lid with the toilet seat is secured with two bolts. But in some models a metal pin may be used instead. To dismantle you just need to lower/raise the cover and then unscrew the pins.
If the cover has been used for quite a long period, there is a high probability that the bolts have become clogged, and the fastening points have become coated and “fused” to the body.
Using pliers, carefully, trying not to damage the decorative surface of the toilet, unscrew the clamp and bolts. To protect your plumbing from possible damage when working with pliers, it is better to cover the surface with rags or pieces of cardboard.
You should not neglect this recommendation, otherwise if you make the slightest mistake you will have to change not only the lid, but also the toilet. The following article will introduce you to the rules for installing this plumbing fixture, the contents of which we recommend that you familiarize yourself with.
As a last resort, if the processing did not give the desired result and the plastic bolts do not give in, they can be sawed with a hacksaw or cut off with a hot knife blade. There is no need to worry that melted plastic will stain your plumbing fixtures. After hardening, it will not be difficult to remove from the surface.
Installation of the new cover is carried out in the following sequence:
- Rubber inserts are inserted into the new seat cover. They provide a soft fit of the product to the seat.
- Fasteners are installed in the holes on the toilet. They are screwed using rubberized seals.
- Fix the cover to the seat using metal or plastic bolts.
- The structure is centered and the seat is checked for fixation strength.
Since the key reason for mechanism failure may be the incorrect position of the lid and seat, it is important to accurately adjust the lid when installing the structure
An important point: adjustment and alignment are carried out at the stage when the fixing nuts are just attached, but not yet firmly tightened.
If installing a lid with a microlift is somewhat alarming due to the complexity and often impossibility of repair, we recommend that you familiarize yourself with the nuances of choosing a regular toilet seat. It is possible that the advantages of the traditional option will outweigh the disadvantages of the new product.
Main causes of failure
Product design
How to repair a toilet lid microlift and whether they can be repaired are perhaps one of the most common questions when purchasing. Of course, it is easier to prevent a breakdown than to repair a part.
If, after prolonged use, the lid with microlift stops working, then you should begin repairing it as soon as possible. And the point is not only about comfort, but also about the fact that for a long time, being in this state, the structure can completely fail.
Before repairing a toilet, you should become familiar with the operating mechanism. The cover with microlift consists of the following spare parts:
- toilet lid and seat;
- a rod that serves as a fastener for the lid;
- the main microlift mechanism, visually representing the hinge mechanism;
- a weak spring that keeps the plastic structure in balance.