Before refinishing the ceiling, the old coating must be completely cleaned off. A ceiling made of foam tiles is easy to clean with a regular spatula or a sharp knife, but getting rid of glue residue is more difficult. In this regard, the person doing the repairs has a question about how to clean the ceiling from the adhesive of the ceiling tiles. First, you need to make sure that this really needs to be done, because a new ceiling covering may not require such thorough preparation of the base. If you decide to decorate the ceiling with wallpaper or paint it, you will have to not only tear off the tiles, but also clean the base thoroughly. We will tell you how to clean the ceiling from foam tiles, as well as how to get rid of glue residues.
What you need to remove tiles
To remove foam trim and glue from the ceiling, you will have to stock up on special tools. The most important of them: a spatula, which is used to clean off the remaining mixture, and a stationery knife for cutting tiles. If a heavy-duty adhesive composition was used for fixation purposes, then special solvents will be needed.
To remove foam tiles use:
- wide and narrow spatula (three types from 8 cm to 50 cm);
- stepladder and small bucket of water;
- stationery knife;
- grinder;
- brush-brush;
- garbage bags and film (to cover furniture);
- work gloves, goggles or mask, respirator.
An easier way to remove glue from the ceiling after dismantling the ceiling tiles is to stretch a PVC sheet. This measure is resorted to in particularly difficult cases, when it was not possible to tear off the tiles or there are surface defects that cannot be hidden in any other way.
You can also replace the entire ceiling tile with a new one. In this case, carefully clean the surface of the old material so that the material lies evenly. There is a large selection of foam ceiling coverings on sale, which are significantly different for the better from what was sold 10-15 years ago.
IMPORTANT! Fresh tile adhesive can be removed quite easily. Old mixtures are much more difficult to clean off, but even in this case, dismantling foam tiles is quite possible.
How to remove traces of glue
Removing dried adhesive from surfaces is a painstaking undertaking, which is complicated by the presence of high-quality components in its composition. Anyone who knows how to dissolve glue can get rid of the problem. Chemically active solvent materials of natural or synthetic origin can help in solving this problem.
The most accessible solvents
Another popular product that can be used to dissolve glue has proven itself to be sunflower and baby oils. Each of them needs to grease the dried residue several times and wait a while. It will gradually lose its adhesive properties, and the solvent will mix with it, since many types of adhesive mixtures are oil-based. Upon completion of the procedure, the remaining marks are easily erased, and the surface is rinsed with water. Vaseline has a similar property; its high fat content promotes the rapid breakdown of molecules.
Among natural solvents, ordinary vinegar can be distinguished. You should wipe the stained area with it and wait half an hour. During this time, the stain will begin to lose strength, dissolve in acid, and the residue will need to be wiped off.
A mixture of baking soda and water in a 2:1 ratio is very effective in this matter. This paste-like substance is applied to the contaminated area, wait until the clot is completely dissolved and rinse with water.
Alcohol is considered an effective solvent, capable of decomposing many adhesive compositions. When applying this drug to the stained area after 5-10 minutes. the strong clot will soften. Next, the residues are freely removed during the process of wet wiping. Acetone has a similar effect, but should be used carefully when cleaning synthetic surfaces. Other known solvents are: gasoline, turpentine, white spirit, ammonia. When using them, for greater efficiency, the adhesive clot is preheated with a hairdryer. Thus, the process of its removal is accelerated.
How to remove PVA?
- 1. hot soapy solution – when treating with this material, the surface should be washed with 9% acetic acid or 96% alcohol;
- 2. baking soda perfectly softens hardened residues; to get the result, you need to walk a hard sponge with soda over the PVA layer - it will be wiped off in a minute;
- 3. water softens the dried PVA clot, its soluble elements are separated from the emulsified suspension, the remains can be wiped off with a rag moistened with acetone, methanol, isobenzene or ethyl acetate.
How to get rid of traces of Super Glue and Moment glue?
- • how long ago the adhesive was used,
- • the type of surface on which it is located,
- • purity of the expected result.
The main thing is not to miss the time of its hardening. Otherwise, the work will become significantly more complicated; most often, the stained surface will lose its attractiveness irrevocably.
Among the effective methods for dissolving Super Glue, as well as its analogue Moment, acetone should be highlighted. However, it has a negative effect on varnished materials and may cause more harm than good. This should be taken into account before starting cleaning work. It is possible to remove a fresh stain in a couple of hours using dimethyl sulfoxide, which is freely available in any pharmacy.
https://www.youtube.com/watch?v=XO5ST-bYDq0
No matter how strange it may seem, water is the longest-lasting, but at the same time safest means of dissolving hardened Moment glue. To do this, apply a damp cloth to the contaminated area and cover with polyethylene for a day. Within 24 hours, the clot will gain moisture and can be easily wiped off with an abrasive sponge.
How to dissolve stubborn adhesives?
When choosing a method for dissolving epoxy glue, you should remember that this will have a significant impact on the performance properties of the final polymer. The addition of solvents helps reduce viscosity, and the strength and water resistance characteristics of the product deteriorate. Suitable for dilution are acetone and denatured alcohol, which can evaporate quickly without remaining in the resin.
When choosing a product to dissolve rubber or 88 glue in case of drying, you can choose gasoline, since it is included in their composition. Dilute the adhesive composition to the consistency of liquid sour cream so that it does not drain from the roller.
Key factors to consider when breeding:
- 1. Adding a solvent significantly reduces the viscosity and strength of the polymer.
- 2. The service life of the adhesive and its curing period are increased.
- 3. Dilution causes the resin to shrink, which increases microcracks.
- 4. The color of the polymer changes.
- 5. Increases fluidity on verticals.
| The use of a special tile adhesive for heated floors with a manufacturer’s note that it is heat-resistant and elastic allows you to avoid deformation of the screed and peeling of the tiles during operation. Among the most popular compositions, the following should be highlighted...... |
How to remove foam ceiling tiles
If you decide to get rid of the old ceiling, then you need to be prepared for the fact that the work will take at least one day. Dismantling ceiling tiles takes place in several stages. The first one is preparatory. We remove paintings, equipment and all fragile things from the room and cover the furniture with plastic wrap or an old sheet. While working, open the windows (this will reduce dust in the room).
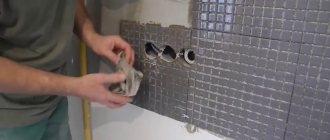
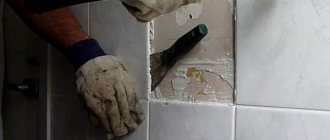
Next, place a stepladder or table with a solid base. Armed with a spatula, we try to tear off the foam from the ceiling. Most likely it will fall off in parts and in those places where there was more glue, the pieces will not fall off. It is better to first clean everything that goes away easily, and only then proceed to more complex actions. During operation, the tool is held vertically, and diagonal movements are made in relation to the material being cleaned.
After the ceiling has been cleared of tiles and glue, it can be additionally leveled with a layer of plaster. Before doing this, it is advisable to sand the surface and prime it several times. Then we paint or whitewash in another way (for example, using superfinish putty).
IMPORTANT! It is advisable to cover not only furniture and floors with plastic film, but also walls. If there is a lot of dried glue on the ceiling, you will have to use a grinder or sandpaper, which means everything around will be covered with fine dust.
How to remove glue residue from the ceiling
Usually, after removing the tiles, 3-4 or even more areas of dried glue remain on the ceiling.
The surface is cleaned with an acetone-based solvent or ordinary nine percent vinegar. Professional products are also suitable, for example, Mellerud, Keranet, Atlas Szop or pharmaceutical dimethyl sulfoxide, which perfectly dissolves the adhesive composition.
To remove the glue you will need:
- Coat dried marks with solvent.
- Use a spatula to clean the “islands” with pieces of tiles.
- If the solvent does not help, use a grinder and a grinder.
After applying chemicals, you must wait a few minutes. The liquid is applied using a sponge, brush or old toothbrush. When the solvent starts working, carefully scrape off the softened mixture with a spatula. Repeat as many times as necessary.
To soften dried glue, use a dishwashing detergent such as Fairy (made by Procter & Gamble), which almost always includes sodium laureth sulfate, polypropylene glycol, and other solvents. 1-2 caps of product per 1.5-2 liters of water is enough. After this, we remove the old glue using a hammer and chisel.
If all else fails, you will have to use a grinder, sandpaper or brush. In this case, a mask and a respirator will come in handy, as there will be a lot of dust. Before starting work, wet the ceiling with water using a spray bottle. It will be much easier to tear off the remaining tiles.
You should not set fire to dried glue, thinking that this will soften it faster. This is dangerous and will not lead to the desired result. Be patient and treat the glue with water or solvent and gradually it will begin to yield. The softened pieces are scraped off with a spatula, and then the surface is cleaned with other means.
What products dissolve glue?
Not only professional products, but also folk recipes will help you remove glue from the ceiling with your own hands.
For example, suitable for dissolving:
- technical alcohol;
- sunflower oil;
- gasoline, turpentine, ammonia;
- a mixture of soda and water;
- hot soapy solution;
- table vinegar.
These products are applied to the remaining glue and wait from a couple of minutes to half an hour. As soon as the substance begins to soften, it is cleaned from the ceiling with a spatula. Sometimes, for faster removal, the treated area is covered with plastic wrap and waited for several hours. Soda paste, oil, vinegar last the longest, but these options are considered one of the most effective.
It is possible to clean the ceiling from glue using the methods described above only if the mixture is not very old. In more complex cases, professional products and serious mechanical cleaning will be required. But if there are only a few problem areas on the surface, then you can really deal with them with water and vinegar or regular oil.
How to remove tiles from the ceiling?
During home renovations, many people need to dismantle old ceiling tiles. In order to do this quickly and with minimal effort, you need to familiarize yourself with how to remove tiles from the ceiling. This process cannot be called complicated, it can be done with your own hands, but if the basic rules are not followed, it can cause the owners of an apartment or house a lot of trouble and hassle. All work on removing old tiles must be carried out in several successive stages.
Since the tiles are attached to the ceiling surface using a special adhesive, it is best to remove them using a tile cutter.
Since it is attached to the ceiling surface using special glue, it cannot be torn off by hand. To remove it you will need certain tools.
Dismantling
Any work related to ceiling repairs must be carried out before the walls and floor are repaired, otherwise the new wallpaper and laminate will be irrevocably damaged. But you can replace windows and doors in a room under renovation at any time, both before and after removing the ceiling tiles. Do not forget about the safety rules to avoid short circuits or accidents during work: the electrical wiring in the room must be de-energized while the tiles are being dismantled.
It will not be possible to do without dust during the process of cleaning the ceiling, so the master needs to carefully cover the furniture, chandelier and floor with thick plastic film or other waterproof material in advance. After finishing the work, it will need to be carefully removed along with all the dirt and thrown away. The whole process must take place in a room with the door tightly closed, otherwise the dust will spread throughout the apartment.
It is very important to take care of your own safety: to protect the eyes and respiratory organs from dust, the person who will remove tiles from the ceiling surface must use special safety glasses used in construction and a respirator. Gloves and a hat will not be superfluous - they will protect the hands and head of the master.
The tiles in the bathroom from the ceiling can be beaten off with a hammer or chipper.
Before removing the ceiling tiles, you need to prepare all the tools and materials that the master will need for this purpose. Their list is as follows:
- putty knife;
- chisel with hammer;
- a grinder equipped with a grinding wheel, or a grinding machine;
- container with clean water;
- a spray bottle or brush for applying water to the ceiling.
In addition you will need:
- strong, large-capacity garbage bags;
- stable stepladder;
- a wet rag that should be laid down when leaving the room (you need to wipe your feet on it when leaving the room being repaired, so as not to spread dirt throughout the apartment).
Deletion rules
Having prepared all the necessary tools and equipment, you can begin to remove the old ceiling tiles. You need to start dismantling from the corner of the room.
Removing tiles from the ceiling should begin from the corner of the room. Use a spatula to hook and lift the edge of the tile.
- Very often, tiles can be removed using only a spatula. The edge of each plate is pryed with a tool, after which it should easily completely detach from the surface. In this case, there is no need to try to immediately remove traces of glue that will remain in place of the removed plates. It is best to scrape them off after the ceiling has been completely cleared of tiles.
- If the ceiling tile is firmly glued to the base and breaks off in parts when trying to dismantle it, then instead of a spatula you should use a chisel and a hammer. Once all the tiles have been removed, you need to begin removing the dried adhesive that held them in place.
- Ceiling adhesive is removed along with the plaster layer, chips and irregularities using a grinder or grinder equipped with a sanding attachment. If these tools are not found on the farm, then you can get by with a simple spatula, but in this case the process will take much longer and require considerable effort. Cleaning the ceiling from tile adhesive residues is a very dusty undertaking, so before starting, experts recommend moistening the work surface with warm water. This little trick will reduce the amount of dust and make your work easier.
- If there is a need to replace only one or several plates, then this is done as follows: using a spatula, carefully pry up the deteriorated ceiling tile from all sides and remove it from the surface. The ceiling underneath is cleaned of dried glue and sanded. A new tile is glued to the vacant space and pressed firmly.
- Often, after old tiles have been removed from the ceiling, moldy areas are found underneath them, indicating that the ceiling is affected by fungus (this is especially true in the bathroom, kitchen and other rooms with high levels of humidity). You can’t just leave mold like that; it must be treated with some kind of antifungal agent, which can be freely purchased in stores.
After the ceiling is completely cleared of tiles, adhesive residues and treated with an antifungal agent, it must be coated with a primer and puttied (this should be done in cases where in the future they want to wallpaper it, whitewash it, paint it, or cover it with new ceiling tiles). If the apartment owner plans to install a suspended or suspended ceiling after dismantling the tiles, then there is no need to prime and putty the cleaned surface.
If the ceiling tiles are firmly fixed to the ceiling and you cannot remove them with your own hands, then the best way out of the situation is to contact a professional technician who will dismantle them in a matter of hours.
The services of a specialist will cost homeowners a certain amount, but this will save them from having to do dusty work.
Let's get started
You put on work clothes, gloves, a hat and safety glasses.
Did you forget about the gloves? Great, we can get started! If you start tiling the ceiling from the center of the room, then it is better to remove the ceiling tiles starting from the corner of the room. Armed with a spatula, carefully lift the edge of the plate and, as it were, pick it up. Sometimes these simple steps are enough: the tiles come off easily and quickly.
If pieces break off from the plate, and the process promises to be monotonous and sad, take a chisel and a hammer: things will go faster. The principle is the same: we “pick it up”, “help” with a hammer and thus remove the tile. The advantage of this method is that these tools are durable and inflexible, unlike a spatula.
If the tiles are tightly fused together, like Siamese twins, and a hammer, chisel and spatula are powerless in dealing with the seams between the tiles, a hammer drill will help. If you don't have the latter in your arsenal, an impact drill will be a worthy replacement. Sometimes it is enough to drill a few holes, and the fasteners can be easily separated. It is especially convenient to use this method if you need to remove ceiling skirting boards: a hammer drill allows you to do this as carefully as possible, minimizing the risk of accidental damage to the ceiling or wall.
How to remove ceiling tiles?
Does a casual glance at the tiled bathroom ceiling in the morning ruin your mood for the whole day?
Is the tile dirty, peeled off somewhere, was accidentally damaged, looks unsightly, or is it just boring? Are you going to renovate and the tiles don’t fit into the concept of the new interior? Therefore, the question on the agenda is how to remove ceiling tiles and prepare the surface for a new coating? It is unlikely that you will be able to remove old ceiling tiles “without noise and dust,” but it is still possible to make this process as simple as possible. With the right approach, the work of dismantling old tiles will not take much time: you can do it in one day.
Replacing individual tiles
If something bad happens - the neighbors above flooded, a champagne cork got stuck in the tile, or poorly glued sections sagged - replacing the damaged fragment in the foam ceiling is quite simple. To work you will need:
- putty knife;
- stationery knife;
- glue;
- primer;
- and, of course, new tiles.
First of all, the old section is deleted. The main thing here is not to spoil the neighboring good tiles. An incision is made with a stationery knife or spatula in the center of the fragment and carefully torn off.
The foam will come off in pieces. You need to move from the center to the edges. You can additionally play it safe by inserting a ruler between the tiles; in this case, the spatula will bump into it and will not damage the adjacent fragment.
Having cleaned the foam, we move on to removing the glue. Here again a metal spatula is used. To ensure that new tiles adhere well, the surface must be carefully prepared. After removing the remaining glue, the dust is removed, and if there is a primer, at least one layer must be applied.
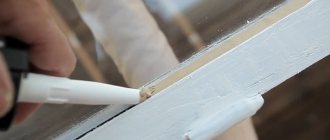
Now we glue the tiles. Glue is applied around the perimeter of the fragment and slightly in the center. The ideal option is to use white sealant. You can not only place an element on it, but also carefully cover up the flaws between the sections, naturally, if white tiles were used.
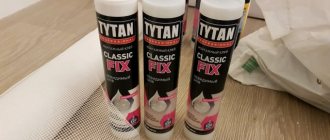
For sealant you will need a plunger gun. If you don’t have it, you can buy adhesives from the following brands:
- Moment;
- Titanium;
- Eco-naset.
After gluing the tile, you should make sure that it does not fall off or move. For additional reliability, you can prop it up a little at night, for example, place a stepladder under the tiles and install a stick of the required size. But this is already reinsurance. It's better to just choose an adhesive that's labeled "quick-drying."
Let's summarize. Foam finishing, and especially old glue, is difficult to remove from the surface. The work can take days if done with bare hands without a grinder or sander.
When the time comes to change the ceiling, it is better to make a tension one. The cloth will cover all defects after removing the foam and eliminate complex dirty work.
Does a casual glance at the tiled bathroom ceiling in the morning ruin your mood for the whole day? Is the tile dirty, peeled off somewhere, was accidentally damaged, looks unsightly, or is it just boring? Are you going to renovate and the tiles don’t fit into the concept of the new interior? Therefore, the question on the agenda is how to remove ceiling tiles and prepare the surface for a new coating?
It is unlikely that you will be able to remove old ceiling tiles “without noise and dust,” but it is still possible to make this process as simple as possible. With the right approach, the work of dismantling old tiles will not take much time: you can do it in one day.
Task: how to remove ceiling tiles
Where to begin?
Proper preparation and availability of the necessary tools is already half the success. Removing ceiling tiles yourself is much easier than gluing them. At the preliminary stage you should:
- remove all furniture from the room, and what is difficult to remove (due to size or other features) - carefully cover with protective film;
- cover the floor with thick cloth or plastic film;
- dismantle lighting fixtures;
- de-energize the electrical wiring to avoid short circuit;
- prepare work clothes, a hat and a respirator, also take care of gloves and safety glasses (construction dust can get into the eyes and respiratory tract if these precautions are not followed);
- Close the doors to other rooms tightly: dismantling ceiling tiles is a dusty business.
What can't you do without?
The easiest way to remove ceiling tiles is to use a putty knife or a chisel and hammer. In particularly difficult cases, an impact drill or hammer drill will come to the rescue. Before starting work, make sure that you have all the following “devices” at hand:
- metal spatula;
- chisel and hammer;
- a stepladder or construction trestles, in other words, a stable surface that allows you to reach the ceiling and work comfortably;
- a bucket or any other large container with water;
- building mixture or primer (needed to prepare the ceiling for a new finish);
- a solution with antifungal properties (useful for treating surfaces that have been cleared of tiles);
- large bags for construction waste.
It is possible that you will also need a hammer drill, especially if the seams between the tiles turn out to be very strong.
Let's get started
You put on work clothes, gloves, a hat and safety glasses.
Did you forget about the gloves? Great, we can get started! If you start tiling the ceiling from the center of the room, then it is better to remove the ceiling tiles starting from the corner of the room. Armed with a spatula, carefully lift the edge of the plate and, as it were, pick it up. Sometimes these simple steps are enough: the tiles come off easily and quickly. If pieces break off from the plate, and the process promises to be monotonous and sad, take a chisel and a hammer: things will go faster. The principle is the same: we “pick it up”, “help” with a hammer and thus remove the tile. The advantage of this method is that these tools are durable and inflexible, unlike a spatula.
Preparing the premises
Before you start removing tile adhesive from the ceiling, it is important to prepare the room for work. Cleaning up glue drips, stains and dirt inevitably involves generating a large amount of dust. To prevent damage to things, the latter must be taken out of the room - we are talking about bed linen, carpets, bedspreads, pillows and other things. Next, it is important to remove or cover sofas, armchairs, and other upholstered furniture. Other stages of preparation:
- Close the cabinets tightly and cover them with plastic wrap;
- also cover the tables with oilcloth and film;
- take the equipment to another room;
- Sprinkle the ceiling with water to remove some of the dust and wet the adhesive;
- open windows for timely ventilation of the room.
Wetting the ceiling is usually done several times, since the coating dries quickly. You can spray only a certain area at one time, then repeat the procedure. After completing the work, it is important to thoroughly clean the room.
What's next?
Congratulations, “how to remove ceiling tiles?” - no longer a question for you! The tiles have been dismantled, the construction waste is packed in bags, the ceiling. sparkling with newness? Not at all. Usually, after removing the tiles, roughness, unevenness, and traces of glue remain on the surface.
It is relatively easy to get rid of traces of glue if you wet the ceiling with water and then clean it with a spatula. The final step in preparing the ceiling for a new finish will be sanding it (this step is necessary if you are just going to paint the ceiling, otherwise you can skip it).
Don’t forget to treat the ceiling with a liquid with antifungal properties, and you can safely begin the new finish.
Using a spatula
Mechanical cleaning of the ceiling will have to be done if power tools are not available. The easiest way to clean the ceiling is with a spatula. A spatula with a short handle is very inconvenient to use; the work will be labor-intensive. It is better to purchase a tool with a long handle, or attach an existing spatula to a stick. This way you can work without a ladder, the work will go faster.
The procedure is as follows:
- Moisten the ceiling well with water.
- Wait 15–30 minutes.
- Clean the surface.
- If necessary, add water by sprinkling onto dry areas.
After using the spatula, you should use putty or primer, after which you can glue a new tile or perform another coating. You can also remove dried glue using a construction float. It is held at an angle of 90 degrees to the ceiling, movements are made diagonally.
Simple Ways to Fix Horrible Ceiling Tiles
You can restore the beauty of the ceiling without major repairs, if the flaws are minor. Stains and stains on the polymer coating are removed using detergents. In some cases, painting can help fix terrible ceiling tiles. If individual elements of the composition are deformed, it is recommended to update them by replacing them with new foam samples, although this option cannot always be called simple.
Painting as a simple way to correct defects
Painting foam tiles allows you to hide stains and marks with minimal effort. To do this you will need the following set of tools and materials:
- roller with a long handle;
- paint tray;
- brush;
- masking tape;
- water-based paint.
Important! In order not to be disappointed with the results of painting, you should first experiment on the rest of the tiles or paint a small area from the edge of the ceiling. If necessary, you can tint the composition by adding the desired pigment.
Sequence of work:
- You should prepare the surface by removing dust from the tiles using a cloth or vacuum cleaner. The walls around the perimeter must be protected by applying masking tape.
- The perimeter of the ceiling, baseboard, areas near the chandelier and other hard-to-reach areas are painted first. The work is done with a brush.
- Next, begin painting the main surface using a roller.
Important! An interesting result is obtained when painting ceiling tiles with a sponge, highlighting the relief pattern. However, a coating with a 3D effect looks good only in spacious rooms with high ceilings.
It is necessary to prepare personal protective equipment, including glasses, taking into account the specifics of the upcoming work.
Fixing Horrible Ceiling Tiles with Washing
This method is accessible and simple, does not involve additional costs, but takes a lot of time and requires physical effort.
The nuances of washing a foam ceiling:
- The tiles are washed with warm soapy water using a soft sponge or brush;
- do not use abrasive products;
- complex stains need to be treated in several approaches;
- It should be taken into account that with strong mechanical impact, the formation of dents and other deformations is possible.
Advice! If it is difficult to clean the seams between the tiles, after the surface has dried, you can touch up the problem areas with a water-based composition using a paint brush.
How to remove warped tiles?
If you need to remove part of the ceiling trim to replace it with new sheets, you will have to carefully remove the damaged elements. Glue solvents and removers will help here, you can work with a spatula and a knife, sometimes you need to use a power tool.
- if the edges of the sheet move away, remove the pieces with a wide spatula. Poorly yielding fragments should be removed with a narrow spatula or knife;
- Sometimes you can't do without a solvent. Apply the product in small portions to the corners of the sheet, wait until the glue softens and carefully peel off the decor from the base;
- Remains of foam finishing and glue are removed using sandpaper, a metal brush and a grater. You can also treat the surface with a grinder and a grinding disc.
Important! To choose an effective wash option, you need to know the composition of the adhesive mixture. In other cases, universal means are used.
After the deformed decorative elements are removed, the installation of new copies begins. If desired, you can create a symmetrical pattern or an asymmetrical composition, or paint the ceiling after restoration to ensure a uniform tone over the entire surface.
PAINTING old CEILING TILES (1 video)
How to remove ceiling tiles and clean the ceiling from glue
If the ceiling was previously decorated with foam tiles, then before installing a new finishing material, the old coating must be completely removed. Expanded polystyrene panels can be easily cleaned with a spatula. But the remnants of the adhesive mixture are more difficult to remove. Before you clean the ceiling from ceiling tile adhesive, you need to make sure that it is really necessary. So, if you plan to install a suspended, suspended or suspended ceiling, then it is not necessary to clean off the tile adhesive.
But if you chose wallpaper or painting as a new finish, then the base must be thoroughly cleaned of any remaining tile adhesive. We will tell you in detail how to remove tiles from the ceiling and how to clean the surface from any remaining adhesive mixture.
Stages of removing glue from the ceiling
The glue can be removed from the ceiling with ordinary sandpaper. To make the work go faster, use a special attachment for a drill.
It should be noted that the work of cleaning the ceiling from glue is a rather labor-intensive process, which consists of the following steps:
- Prepare a grinder for work and attach a special disk to it (you can also use a grinder with sandpaper).
- Using a sprayer or roller, sponge and brush, moisten the ceiling with warm water (if necessary, repeat several times after 10-15 minutes).
- Using a primer, level the surface of the ceiling; if you plan to glue new tiles, then additional putty is not required.
- If there is no grinder and other necessary tools, the ceiling surface can be cleaned with a metal brush, iron spatula, or chisel.
- Removing tile adhesive from the ceiling is quite inconvenient, so it is recommended to attach a long handle to the spatula. If you use this trick, you won’t need to use a stepladder while working.
- You can use a chisel to clean hard-to-reach places. It will be most convenient to get rid of small pieces of glue.
- If the glue layer is thick enough, then you can use a special device - a hair dryer. Use it to heat layers of glue on a small area of the ceiling. Under the influence of heat, they will crack and move away from the slabs. Remove any remaining glue using an iron spatula.
- Inspect the ceiling and clean up any remaining glue using sandpaper or a wire brush.
When to remove old foam tiles
Before removing the ceiling tiles, it is worth figuring out whether this is necessary. You don’t have to dismantle the old ceiling covering at all if suspended ceilings, suspended systems made of plasterboard, plastic PVC panels or Armstrong suspended ceilings are installed in the room. The peculiarity of these coatings is that they hide any defects in the base and do not require preparation of the base surface.
The only case when, when using hanging systems, poorly fastened foam panels will have to be removed is when installing a stretch PVC film. If a piece of the old covering falls off, it may damage the tension fabric. It will not be difficult to tear off the peeling tiles; you just need to pry them off with a spatula.
Complete dismantling of ceiling tiles is carried out in the following cases:
- If whitewashing or painting is used as a new ceiling covering, the finishing will have to be dismantled. Since the paint and whitewash layer are applied to a perfectly flat and smooth base, you will have to figure out how to level the ceiling after tiling. In this case, after dismantling the finish and removing the old glue, the surface is puttied.
- If you wallpaper the base, you will also have to learn how to clean the ceiling from foam tiles. The base will have to be thoroughly cleaned and leveled when using thin vinyl or paper wallpaper. Relief coatings for painting, thick non-woven and liquid wallpaper, as well as roll finishes made of bamboo or cork do not require such careful leveling. However, it only hides minor defects in the base, so thick pieces of glue will also have to be cleaned off.
- You cannot lay a ceramic coating on old foam tiles or glue new polystyrene foam panels. If you are installing tiles, you will not have to clean off the adhesive, because the thick adhesive line of the new finish will hide the remnants of the old adhesive. But new foam tiles should only be glued to a flat base, so particles of the old adhesive joint can become a hindrance.
- Careful removal of previous finishing, adhesive and leveling of the surface will also be required if self-adhesive film is used as new ceiling coverings.
Cleaning methods
After all cleaning procedures, a soapy water solution will help to finally tidy up the treated surface, which should be used to wipe the surface well. After this, you need to dry it thoroughly and make it smoother using sandpaper. The main advice when removing glue from the ceiling is to carry out leisurely, gradual movements. You should also be prepared for the fact that the glue residue will not be removed the first time and the procedure will have to be repeated again. To facilitate this process, you can gradually remove glue from small areas of the ceiling, covering more and more of its area every day.
Clean the ceiling from glue yourself
What will you need?
The easiest way to work is with PVA - after the tiles are removed, dry adhesive residues are cleaned off with the same spatula or grinder. In particularly difficult cases, PVA is washed away with water. For persistent compounds, removers or solvents are suitable. The products can be universal, but most often they are sold specifically for the type of glue that needs to be removed. Therefore, knowledge about the components of the mixture will not be superfluous. The use of removers and solvents is not difficult - apply to the path, wait until softened, and remove with a spatula. If the finish is old, the composition of the glue is unknown, you can use two options on how to clean the ceiling from glue:
- Try to remove the tracks with a grinding wheel, chisel, or grater with emery. Most likely, with this method, chips and defects will appear on the surface, you will have to plaster again, but the cleaning will be of high quality. This option is especially useful when using epoxy-based compounds - the resin layer cannot be removed from the ceiling so easily.
- Plaster or putty the ceilings. This option is only suitable for glue tracks whose height is no more than 0.3 cm. Too thick a layer of plaster can be applied when decorating with a textured mixture; in other cases, a maximum layer of leveling compound of more than 0.5 cm is not allowed.
We suggest you familiarize yourself with How to wash polyurethane sealant from your hands. Removing sealant from skin It is easiest to plaster the ceiling if the tiles are glued to the concrete base slabs. In this case, there will be no problem removing foam tiles from the ceiling, and the surface for finishing will have to be leveled in any case.
Knowing how to clean the ceiling from foam tiles, you need to figure out how to level the plane after removing the decor.
The operating algorithm is as follows:
- rinse the surface thoroughly to remove dust and dry;
- treat the surface with an antiseptic and let it dry;
- if the ceilings are wooden, a fire retardant is useful - this is a means of protection against fire; the ceilings are also impregnated with it, followed by drying;
- prime the dried surface in 2 layers, allowing the first layer to dry, and only then applying the second;
- level the surface with starting putty or plaster - if the defects are large, you need plaster; for scratches and small chips, putty is enough;
- the layer of leveling mixture should not be more than 0.3-0.4 cm;
- treat the dried ceiling with a primer and dry again;
- Apply finishing putty, stretching the composition to a thickness of up to 0.2 cm - after drying, the ceilings acquire the desired smoothness and evenness.
If there are significant surface defects, after repairing chips and seams, the area must be sanded, and only then layers of putty must be applied. After dismantling the decor, it would be useful to sand the surface to reveal even small potholes, and methods for leveling the ceiling after tiling for finishing with any other decor will help to cope with any defects.
Extrusion
This is the thinnest type of tile. Its thickness is about three millimeters. At the same time, the material has good strength characteristics, because it is produced by extrusion. The surface can be painted or laminated.
Injection
This is created when the granules are baked. The result is a product with a relief pattern with a thickness of 9 to 14 mm, size - 50x50 cm. Since the thickness does not require great care when handling, it is comfortable to work with the tiles. At the same time, it is convenient to cut the material with a knife. This is an excellent sound insulator.
Pressed
Sometimes it is also called stamped. It has a thickness of 6 to 8 mm. It is created from sheets of foam plastic using the stamping method. Thanks to the “correctness” of the shape, the tiles can be laid symmetrically, which is sometimes very important for a certain room design. Added to this is the ability to create various patterns on the material.
Such tiles are of high quality and fairly low price. The formation of stains and stains occurs due to external influences
This means that it is important to correctly select detergent compositions and cleaning methods. The ceiling should be washed using a soft rag or sponge.
In this case, there is no accumulation of liquid in the recesses, which means there will be no harm from this. When cleaning tiles, it is important to take into account its pattern: if there is a deep pattern, it will not be possible to achieve 100% cleanliness during surface cleaning. You will need to use a brush and act very carefully to remove stubborn dirt. Only then proceed to wet cleaning.
If the contamination of your ceiling has not reached large volumes, there is no mechanical damage on it, you can do without washing the tiles. In order to remove dust and small dirt, it is enough to clean with a vacuum cleaner, thus you will save both effort and money that would be spent on detergents. Also, a brush with bristles and a soft surface is excellent for cleaning the ceiling; it can remove dust in hard-to-reach recesses.
Thus, it should be noted that when asking the question: how to wash a foam tile ceiling? You will not spend much effort and time, since this process goes through without any particular difficulties, you just need to have in your arsenal a detergent, a soft cloth and your own desire to make your ceiling clean and visually pleasing to the eye. The construction products market today offers a huge selection of ceilings. One of these options is ceiling tiles, which have become most popular recently due to their cost-effectiveness and quick installation. With its help, you can give the desired look to your office, apartment or house. But what to do when a seemingly intact and good-quality tile is covered with a layer of dust or stains? Due to the fact that there are several types of tiles, each of them requires a certain type of care.
Tools and materials necessary for work
Before removing the foam tiles from the ceiling and cleaning the surface from the remaining adhesive mixture, you need to prepare the necessary tools and materials:
- hammer;
- chisel;
- metal spatula (with a wide and narrow strong spatula);
- to work at height you will need a scaffold or stepladder;
- a container for water that will be used to wash the ceiling;
- plastic film is needed to protect furniture, floors and walls from contamination;
- Large trash bags can be used to store torn foam sheeting;
- a drill or hammer drill will be needed in particularly difficult cases;
- gloves and glasses will protect against damage from fragments of tiles and glue;
- grinder with a special grinding attachment;
- To remove the moisture-resistant adhesive mixture, you will have to buy solvents or special cleaning solutions.
Advice! Try to remember what adhesive was used to glue the ceiling tiles previously. This will allow you to choose the optimal method of cleaning the surface or select a suitable remover.
Solvent washing
How to clean the ceiling if there are only isolated stains of glue on it? A solvent with certain characteristics is suitable for this purpose. Titan glue and other “strong” compounds can be easily removed with solvents for acrylic enamels, which also contain acrylic in the composition. Before work, put on gloves, wet a rag, and wipe the glue stain. Remains of undissolved substance must be removed with a spatula; they will come off easily.
Some people use vinegar as a solvent. You should wet the sponge with 9% vinegar and then apply it to the stains. They will quickly leave. Another way to clean the ceiling:
- Pour hot water into the container.
- Add tile cleaner.
- Wet the brush and sponge in the liquid.
- Wipe the ceiling with the solution using pressure.
- After some time, wash off the stains with water along with the glue.
Methods for dismantling old coating
At the initial stage, you need to completely dismantle the old coating. If the panels were glued with water-based glue, the finish can be removed using a regular spatula.
The work is carried out in the following sequence:
- First of all, prepare the room. Cover all furniture with plastic wrap. It is advisable to cover the floor as well, so that dust and moisture after washing the ceiling do not spoil the floor covering. In addition, you can simply throw away the garbage along with the film, in which case you do not have to sweep and thoroughly wash the floor.
- We dismantle the ceiling plinths, if there were any.
- Now you can start peeling off the coating. To do this we use a metal spatula. Use the tool to pry up the first tile in the corner of the room. Moreover, a spatula with a narrow blade is convenient to use in hard-to-reach places, and a wide tool is suitable for working on the main area.
- The tiles will break during removal, because the foam is very fragile. To prevent pieces of material from getting into your eyes, use safety glasses. To avoid injuring your hands on the sharp edges of old glue, use protective gloves.
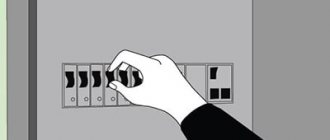
- If the coating is stuck very firmly and a spatula does not help, try working with a chisel and hammer. To remove hard glue from the seam, use a drill or hammer drill to drill several small holes nearby. After cleaning the seam, you can easily insert a chisel into it and remove the panels with hammer blows.
What you need
To begin with, you will need to clean the ceiling as much as possible from the tiles themselves. If you didn’t use the most durable glue, then everything will go quickly enough and you won’t need any special tools or products. Most often used:
- Spatula wide and narrow
- Ladder
- Container with water
- Polyethylene or other material to cover furnishings and floors
- Garbage bags
- Work gloves
In especially false cases, additional action may be required on traces of glue that remain on the surface of the ceiling after removing the foam panels. Removing them can be very difficult. Usually, special removers and solvents for adhesives are used to get rid of stains. It is necessary to choose one that can cope with the glue that was used to fix the tiles.
Methods for removing adhesive residue from foam tiles
Now let's talk about how to clean the ceiling from tile adhesive that remains on the surface in some places. Since the adhesive mixture adheres firmly to the dense base, it will be more difficult to tear off than foam panels.
If you remember what kind of glue you used to glue the ceiling covering, then the easiest way is to use a suitable solvent to remove the remaining adhesive mixture. Wet the adhesive stains with a special remover and wait for the time indicated on the solvent container. After a few minutes, the glue softens and is easily removed with a spatula. A smooth, cleaned surface can be coated with a primer and painted with interior paint.
If you have forgotten or do not know what mixture the foam coating is glued to, you can use one of the following two methods:
- The adhesive stain can be cleaned off using a chisel, a sharp knife, a grinder with a special attachment, or a grinder. Of course, some areas of plaster or concrete will come off along with the glue, so after such radical cleaning methods, the ceiling will have to be puttyed and sanded again to obtain a flat and smooth surface.
- If the remaining adhesive mixture cannot be cleaned off, you can leave it on the surface. To level the ceiling and hide glue particles, the surface is re-plastered with a thin layer of cement mortar. This method is especially suitable if the base was already planned to be leveled by puttying or plastering, so the laboriousness of removing the glue is not justified in this case.
Important! Covering adhesive stains with a new layer of plaster is only suitable if there is no thick layer of plaster on the ceiling. A new layer can greatly weigh down the leveling coating and lead to its peeling and falling off.
Now you know how to remove tiles from the ceiling and clean the surface from the adhesive mixture. After removing the old finish and adhesive residues, the surface is thoroughly washed, allowed to dry and coated with a deeply penetrating primer. After this, the surface is puttied to remove small irregularities. When the putty has dried, the coating is sanded and covered with another layer of primer. The ceiling is now ready for the new finish to be applied.
Separately, it is worth mentioning antiseptic treatment, which is especially important in places with high humidity and if the ceiling has previously been affected by mold. To protect against such negative phenomena in the future, the surface is covered with several layers of antifungal primer.
Removing polystyrene foam tiles
It is impossible to remove it carefully without damaging the coating; you will have to remove the coating with force, breaking down the elements. To avoid unnecessary dirt, the furniture should be taken out and other items should be covered with film. It won't hurt to curtain the doorway, so dust won't go into another room. But it’s better to open the windows so as not to breathe in dust and dirty particles. The floors are also covered with film and paper - then it’s easier to collect everything in a heap and throw it away.
Advice! At the first stage, only dismantling the ceiling tiles; cleaning the ceiling from glue is the next stage of work. It is not recommended to do everything at once.
And now a step-by-step work plan on how to remove tiles from the ceiling:
- It is better to start dismantling from the corner of the room.
- Using a hard spatula, try to lift the edge of the sheet and pick it up.
- If the process has started, then removal will not cause any trouble - the tile snaps off on its own; if the lamella bends or breaks off in pieces, a chisel and hammer will help. The tools do not bend like a spatula, so dismantling will be easier and faster.
- In the case of a particularly strong fixation, you will have to divide the tiles into pieces with a drill or hammer drill, then tear them off from the ceiling. Using a drill, several point through marks are made on the sheet in a random order, and holes are also drilled in the seams - after this it is quite easy to remove the fragments.
- Ceiling plinths are dismantled in the same way; they must be removed with extreme caution. The plinth is attached at the junction of the wall and the ceiling; a careless failure can lead to chips on the base, which will then have to be repaired.
Advice! If the glue layer is thick, you will have to use a knife. Using a sharp blade, gradually trim the glue or foam and remove the element. You should not tear off the cut pieces - this will take more time.
Removing glue tracks
Knowing how to remove tiles from the ceiling, it is not difficult to quickly complete all the work. And now, how to clean the ceiling from tile adhesive:
How to remove ceiling tiles and how to clean the ceiling from glue
- You will have to work with the same spatula, picking up the tracks and cleaning them from the ceiling, trying not to damage the plaster.
- If a spatula is not enough, a sharp stationery knife will be used - carefully cut the remaining adhesive mixture with it, then remove it. Cleaning will take a lot of time, especially if the PVC tile was coated around the entire perimeter;
- If the strong composition does not come off, you need to clean the ceiling of glue along with the plaster - you cannot leave glue on the ceiling. When further leveling the base, it is much easier to fill small potholes than to level the entire area due to glue residues.
Advice! Sometimes small and short drops remain, which are extremely difficult to remove. Emery with abrasive No. 40 will help - they sand the path until the unevenness is completely eliminated.
In exceptional cases, adhesive wash (solvent, water) helps. It will take a long time to wash off the PVC glue from the ceiling, but this way there will be no chips or gouges. It all depends on how quickly you clean the ceiling after removing the tiles: if faster, then with a spatula, more carefully, with water or glue wash.