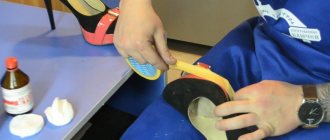
Preparing for coloring
Before you begin the dyeing process, you need to clean the item. This will allow you to paint the product evenly without leaving pale areas on it. A solution prepared from the following ingredients will allow you to carry out this procedure well:
- salt (2 tbsp);
- ammonia (1 tbsp);
- baking soda (2 tablespoons);
- washing powder (1 tbsp);
- warm water in the amount of two liters.
The components are thoroughly mixed, then the mixture is applied to the fur with a brush, evenly distributing it over the entire surface. For effective cleaning, use a damp cloth or clean cloth to rinse the soap solution several times. In order for the core (skin) on the back side of the product not to shrink, it must be moist, so it should be wetted.
Interesting! You can clean the item with regular shampoo intended for hair or dishwashing detergent.
Some use aggressive substances: kerosene or lighter refill. With this method, you must always remember that their use can significantly worsen the appearance of the products.
Dry a fur collar or fur coat on hangers in natural conditions, away from heating devices and sunlight, on the street or in a room with good ventilation.
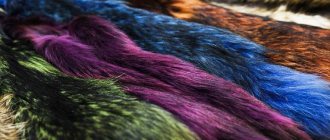
Types of fur
Before you paint this or that thing at home, you need to understand the characteristics of the material. Only in this case can you achieve the desired result and get the desired color or shade. The easiest items to dye are those made from rabbit, mink, and chinchilla. But the procedure should be carried out carefully, since these materials, especially rabbit fur, are highly sensitive to chemicals.
Important! Dying thick fur will require a lot of paint and time. But the result will please the owner of the wardrobe item with a good color that will last for quite a long time.
If the fur coat is made from beaver, you should not even try to lighten it, as it will acquire a yellow tint. The muskrat can behave very unpredictably, since not everyone may like the pinkish shades with whitish areas. After some time, the paint will fade and the product will take on a completely different appearance.
Sheepskin fur
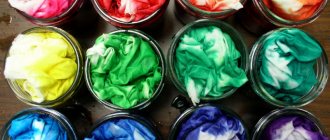
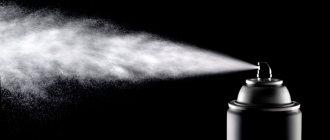
Unlike previous methods, dyeing sheepskin at home is a little different. To distribute the paint evenly over the surface, the product is placed in a solution consisting of aniline dye and chemicals and heated at 40-50 degrees until the material acquires the desired color. But due to certain difficulties, this method is not very popular among ordinary people. Fortunately, nowadays people who want to dye sheepskin are offered an alternative in the form of aerosol dyes.
The process is carried out outdoors. Do not neglect personal protective equipment, because... in some cases, the coloring matter contains elements that can cause harm to human health (after drying, under the influence of UV rays, their harmful effects are neutralized).
Arctic fox coloring
You can paint the arctic fox product in specialized workshops. The cost of such a service is quite high, and not every person can afford to pay a certain amount. There is a way out - you can perform the procedure at home yourself. To do this you need to do the following:
- Choose the right paint. It is sold in hardware stores. If you can’t find a suitable color, there is another option - dyeing the fur at home with hair dye. Similar dyes are sold in a wide range of colors: black, red, golden, brown, red and other shades; choosing them will not be a problem.
- Strictly following the instructions, dilute the dye.
- Put a mask or respirator on your face and gloves on your hands.
- It is recommended to treat the flesh with Vaseline, baby cream or glycerin. This will prevent the skin from getting too wet and protect it from drying out.
- Dyeing can be done on both wet and dry arctic fox fur. In the first case, the paint lays on the surface quite softly. Apply the substance quickly using a hairdressing brush. This should be done carefully so that there are no unpainted areas left.
- If you want to get a leopard color, use a stencil and several colored paints. Holes of different diameters are cut out of thick cardboard, applied to the surface of the product and painted with black and brown paints.
- The Arctic fox can get a beautiful, rich shade if only the ends of the pile are painted. Typically, light-colored coloring compounds are used for this.
- You can refresh a fur wardrobe item with a spray, painting only the ends. You need to purchase paint intended for suede, which comes in an aerosol. Holding the can at a great distance, you need to make uniform movements. This is a simple and fast way.
After completing the procedure, the arctic fox fur is left for several minutes to obtain the desired shade. The time is indicated on the package. Now you should treat the product by preparing the following solution: dilute 5 tbsp in 2 liters of water. spoons of vinegar. As soon as it is ready, immerse the item in it.
Vinegar perfectly fixes the color, gives the fur additional shine and softness, greatly improving the appearance of a fox fur coat or collar. To prevent the item from becoming deformed, the mesh is stretched on the table, secured with clothespins.
To give the Arctic fox a lighter tone, use a hair lightener, which is diluted in accordance with the instructions. You can use hydrogen peroxide, diluting it with water in a ratio of 1 to 3. The prepared product is applied to the product and left for no more than 15-20 minutes, otherwise the villi will become brittle. After the time has passed, the fur is rinsed and sent to dry.
Instructions for dyeing fur at home
Since the fur is thick and long, you may need 2 packs of paint. This is especially true for the Arctic fox and mink. It is better not to buy the first coloring product you come across, but to prefer proven brands. Having prepared the workplace, you can begin painting using a two-step method.
Stage 1 - preparation
Necessary for removing grease and dust for high-quality and uniform painting.
- Prepare a cleaning solution: soda, salt, washing powder, a teaspoon per liter of water.
- Clean the lint with a brush.
- Rinse under warm running water.
- Leave until dry.
Stage 2 - painting
- Wear protective plastic or rubber gloves on your hands.
- Prepare the coloring mixture according to the instructions.
- Before you start staining, you need to treat the skin with glycerin (you can replace it with any fatty cream). This will prevent the skin from drying out.
- Apply the mixture as quickly as possible, combing the pile in the direction of natural growth.
- Roll up and place in a plastic bag.
- The paint must be kept on for as long as indicated in the instructions. Compliance with the recommendations is mandatory, otherwise you risk spoiling the material.
- Rinse in warm water with any shampoo.
- Treat with any hair balm for shine and silkiness.
- Rinse off all products with warm running water.
- Rinse in warm water with vinegar added: 1 tablespoon per liter of water. You can use any table vinegar.
- Dry gently with a towel.
- Lubricate the inside again with a thin layer of glycerin. Gently knead it.
We recommend: Available options for painting light bulbs in different colors
The drying process should take place under natural conditions - at room temperature, without the use of heaters, hair dryers and air conditioners. Drying time can be up to 3 days depending on the length and thickness of the fur. Speeding up the process can lead to damage to the fibers.
Advice
After drying, the product may shrink. To avoid this, pin it to any hard surface with the inside down. For example, push pins or sewing pins to a wooden board.
Blonde and red shades are difficult to cover with any hair dye, no matter how much it costs. Therefore, you can repeat the procedure 2-3 times, especially if you want to get a rich black color.
It’s easiest when you just want to enhance the tone or make it darker. In order to properly dye the fur of an arctic fox, which is white or another light color, at home, you need to very carefully paint the pile down to the very roots and the core itself. This can be done with a regular toothbrush and then combed in different directions with a comb. It is worth keeping in mind that chemical exposure to the skin does not go unnoticed. To change its color with minimal risk, use a regular marker.
When dyeing dark items in lighter colors, you need to be prepared for an unexpected result. Of course, like hair, fur with dark pigment must first be bleached. To avoid surprises, cut a small piece of material and work on it. You can experiment by mixing colors in different proportions to achieve the desired result.
Advice
You should not try to change the color of an entire fur coat or other large items on your own. Such a surface cannot be painted by hand evenly and quickly. The described methods are suitable for relatively small items, for example, a fur collar on a sheepskin coat or jacket.
You don't have to worry about the color fading. Dyed hair retains its color even with regular contact with water and detergents for many weeks on end, and clothes get wet much less often. Results are guaranteed for 7-8 months. After this, the staining procedure can be repeated. The most durable color is red.
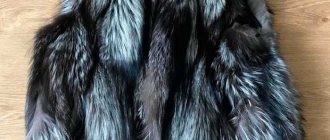
Dyeing a mink coat
Faded mink fur spoils the appearance of a fur coat. In order to restore color and shine, a simple procedure is performed - painting a mink coat. It is necessary to purchase in advance the desired shade of paint, a spray bottle, a comb with thick teeth, rich cream or glycerin, shampoo and hair conditioner. Now you need to do the following steps:
- clean the item from dust, dirt, grease;
- treat the skin (inner space) with a greasy substance;
- prepare the coloring composition in accordance with the instructions;
- moisten the surface of the product;
- apply a dye to the pile using a spray bottle;
- comb hairs;
- wash off the paint with shampoo diluted with water;
- treat the surface with balm.
The procedure is completed, all that remains is to dry the product, after applying the cream to the inside and combing the hairs.
In the same way you can dye silver fox fur, products made from mouton and any other material. For silver fox, the paint chosen is mainly black or brown. For a mouton fur coat, dark reddish shades and chestnut color are best suited.
Dyeing a fur collar
It is not always necessary to completely paint an item. In some cases, it is enough to dye a fur collar at home. This is quite easy to do using regular hair dye. First, the collar is cleaned of dust and dirt, dried, and then the dyeing process begins:
- Using the instructions, you need to dilute the paint.
- For uniform coloring, the collar is slightly moistened with water.
- The coloring composition is applied by hand (you should first put on gloves). The process should be done quickly, distributing the paint well throughout the pile.
After completing the procedure, the collar is washed well with water and rinsed in a vinegar solution or hair conditioner. It should be dried on a flat surface, stretched and pinned to the base with needles.
What is needed for work
Only heavily damaged items require full painting. If small faded spots appear here and there on the fur coat, you can do spot painting using an aerosol spray. There are two ways to dye a fur coat:
- Apply oxidative paint to the fur;
- Spray spray paint on the fur item.
In order for dyeing a mink coat to meet your expectations, you must adhere to the following dyeing rules:
- It is necessary to choose a paint that is several tones darker than the mink product.
- During dyeing, you must ensure that no water gets on the skin of your fur coat.
- It is strictly prohibited to paint new items.
- Small faded areas on a dark fur coat can be perfectly covered with an aerosol for suede products.
- A 9% vinegar solution diluted in water will perfectly fix the color.
- To clean the pile from dirt, you need to use a sponge and dishwashing detergent.
Artificial fur
Some people prefer to buy faux fur products. In many characteristics it is not inferior to natural raw materials and sometimes even surpasses them. It can also be colored using hair dye. First you need to select the tone of the dye, clean the product, removing dirt, dust, and grease from it, using a soap solution. After this, remove the remaining soap solution with a damp swab.
Treatment should be carried out one day before staining.
However, you should know that faux fur is dyed in dark colors. You should buy high-quality paint, so as not to spoil the thing.
The coloring composition is obtained by strictly following the instructions. After this, it is applied to the artificial fur with a brush, making movements in the direction of the pile, evenly distributing it. The brush should be pressed so that it touches the fabric base. The paint is left for the time recommended in the instructions, then the material is washed with water, and if necessary, excess paint is removed with cotton swabs. After this, the still damp fibers are combed with a sparse comb and the product is sent to dry.
Any fur item looks very beautiful and expensive on any girl, and you can wear it for many years. However, such things have a huge drawback - after long wear, the fibers begin to fade and lose their original appearance. From this article you will learn how to dye arctic fox fur at home, so that you can continue to enjoy showing off in a warm, beautiful thing.
How to dye fur with hair dye?
Hair dyes are suitable for dyeing an arctic fox or a mink on your own. This method has been tested in practice and always gives positive results when painting not too old things. It is better to first test the effect of even high-quality products on a small, inconspicuous area of the product.
To dye fur at home, you will need to follow these steps:
- Straightening the strands of natural fur, apply a thin layer of fatty cream or glycerin to the flesh.
- Gently moisturize the entire fur surface.
- Apply the product as carefully as when coloring your hair.
- Leave it for a while. Duration of dyeing - according to the instructions on the packaging with the dye.
- To enhance the effect of the paint, apply a saline solution evenly over the entire surface.
- Wash off the paint under the flow of water from the shower.
- Remove excess with rags or blotting paper.
After drying, the fur is combed, observing the natural direction of the pile. This dye lasts on a fur item for up to six months, and this is often enough to make the item look renewed.
A simplified option for saturating the tone is to color it with a tinting shampoo (according to the instructions on the package).
Homemade stencils are used for painting with multi-colored paints. The spots are painted one at a time.
Faux fur is easier to dye. You can use tinting shampoo and hair dye. The sequence of actions is as follows:
- Before dyeing begins, the product is fixed.
- Apply the product in the direction of the fibers.
- Leave the paint to soak in. The time must match the instructions in the instructions.
- After the procedure, the fur is washed, dried and combed.
Experts do not recommend experimenting with coloring new things.
Home or professional dyeing extends the life of a fur product for a short time. After some time, the pigment comes off and the item becomes faded again.
After some time, any product (especially clothing) loses its attractive original appearance, and fur products are no exception, in particular, fur coats from such a fur-bearing animal as the Arctic fox. I would like to note that fur, upon visual inspection, can of course look like new, but a change in color completely changes the appearance of the product, and not for the better. Let us note that quickly and effectively solving this problem will not cause any difficulties; to do this, you can use such a popular method today - dyeing the fur of the Arctic fox. Moreover, almost anyone can do this on their own.
Preliminary preparation
Before you start painting a fur product, you need to prepare it, namely, get rid of all dust and dirt on the fibers. Otherwise, after the painting procedure, unpleasant stains and stains may form on the product, causing it to lose its former attractiveness even more.
So, for the cleaning procedure of a fur garment, you need to prepare an alkaline solution. For a liter of water, the following proportion must be observed:
- 1 tsp. dishwasher or laundry detergent;
- 5 g of ammonia;
- 12 g table salt;
- 10 g soda.
Important! If you don’t have ammonia and soda at home, prepare a solution that requires other ingredients in equal proportions:
- Alcohol.
- Vinegar.
The cleaning process is as follows:
- Mix all ingredients.
- Apply the resulting liquid mixture to the entire area of the fur product using a brush.
- Rinse the product with clean water.
Important! To avoid drying out, lubricate the inside of the product with some rich hand cream.
Let's move on to painting
Although any fur is a delicate material, you can dye arctic fox fur at home, and in different ways. Now we will talk about them.
Universal method
Since animal fur is very similar in structure to human hair, it is better to use good hair dyes to dye fur at home. This method is suitable for dyeing the fur of arctic fox, mink and rabbit.
Important! Don't forget to pay attention to the structure of the villi. For example, mink fur and arctic fox fur have stiffer hairs, which cannot be said about rabbit or silver fox. For this reason, two packages of dye may be needed.
The first step is to make sure that the desired shade is selected. For this reason, before starting to dye the entire garment, test the effectiveness of the substance on an inconspicuous area of the garment. Further:
- Apply paint using a brush.
- Spread the mixture over the surface with your own hands.
Important! For this it is better to use gloves.
- Leave the substance on the product for as long as it is written on the packaging.
- Rinse the item thoroughly with clean warm water.
- Leave it to dry.
Important! When drying, it is better not to use fans or hair dryers - this will only harm the pile.
- After the product has dried, you need to place it in a solution of warm water and vinegar - this will help fix the paint on the pile and extend the wear period.
Important! To add extra shine to mink, rabbit or arctic fox fur, you can use hair conditioner. To do this, apply a solution of water and balm to the fur, leave for several minutes and rinse it off.
It is better to dye fur at home with hair dye in natural, basic colors. Otherwise, the fur may not behave as you wish. Eg:
- Mink fur may turn yellow due to being dyed a light color and lose its expensive appearance forever.
- On the contrary, you can experiment with white rabbit fur, giving it different shades, however, it is strictly forbidden to lighten it.
Important! If you doubt your abilities and are afraid to carry out the dyeing procedure yourself, it is better to take the fur product to a special workshop where professionals will undertake this procedure.
Painting a mink
A mink fur coat is distinguished by its expensive appearance and durability to wear. In order to dye mink fur at home, you need to stock up on the following materials:
- Color-matching hair dye.
- Spray.
- Comb with frequent teeth.
- Shampoo and hair conditioner.
- Fat cream.
To dye a mink coat or hat, you must follow the given algorithm:
- Pre-clean the item from grease and dust.
- Treat the inside with rich hand cream.
- Prepare hair dye according to the instructions on the package.
- Lightly moisten the fur surface using the prepared spray bottle.
- Now you can move on to the main procedure - start dyeing a mink coat at home. To do this, you need to apply the dye using the same spray bottle. The distance should be approximately 55 cm.
- Even out the tone by going over the surface with a comb.
- Wash off the dye with warm water and shampoo, rinse the product with a solution of water and hair balm.
- Apply cream or glycerin to the flesh again.
- Place the product on a flat surface and wait for it to dry.
- Comb the pile in the direction of its growth.
Dyeing an arctic fox fur coat
The arctic fox coat lends itself most well to artificial dyeing. In order to paint it in the desired color, you need to prepare the following materials:
- Hair dye that matches the shade of the fur product.
- Glycerin or fatty cream.
- Balm.
- Gloves.
- Brush for applying paint.
- Vinegar.
To carry out artificial coloring of fur at home, you must follow the given algorithm:
- Lubricate the inside with fatty cream or glycerin.
- Stretch the material on a flat horizontal surface.
- Wear protective gloves and begin applying the coloring composition, simultaneously smoothing out the lint with your hand.
- Wait for the time indicated on the paint packaging.
- Rinse the product in warm water.
- Wash it in vinegar solution.
- Treat your fur coat or hat with balm diluted in water, rinse off the solution after a couple of minutes.
- Lubricate the inside with fatty cream a second time, stretch it and let it dry on its own.
Synthetics are penetrating deeper and deeper into our lives, and everyday materials are acquiring unprecedented value. And first of all, this applies to the things that we put on ourselves. They have beauty, durability and convenience on their side. True, over time they lose their qualities, which is why there is a need to learn how to dye arctic fox fur at home. It is not at all necessary to spend money on the services of a professional.
Where to start painting
Before starting work, you need to carefully inspect the product. If there are traces of moth activity, other mechanical damage, or “bald patches,” painting will not save the situation. It’s better to take the item to a studio where it can be given a second life. The fur needs to be combed, debris, dust, and all impurities must be cleared so that the paint is light as evenly as possible. Next, you should choose the appropriate option for working with fur products.
How to dye fur: artificial and natural
Experts advise using professional compounds designed specifically for dyeing fur skins for this purpose. Such products are especially recommended if the hairs are thick and long. You can use hair dye, but you will have to buy several packs, which can be quite expensive. There is an option to coat fur products with spray paint for suede, which is sold in hardware and shoe stores. This product can refresh only the ends of the fur. An aerosol cannot paint the entire thickness of the material. For full coloring you will have to buy a special product or hair dye.
Before work, you need to conduct a test to determine the degree of aggressiveness of the paint:
- dilute a small amount of the product (if it is powder);
- lubricate the material in an inconspicuous area;
- maintain the time specified in the instructions;
- wash off the paint;
- assess the condition of the material;
- proceed with full dyeing if the fur has retained its quality and has not changed its structure within 2 days.
When you want to make your fur 1-3 shades lighter, you can use a lightener rather than paint. The most commonly used products are “Supra” and “Blondan” based on ammonia. It is better to paint artificial products only with specialized compounds with a mark indicating this possibility. Hair dye will immediately ruin this material, so it’s not worth the risk.
We recommend: Advantages and features of liquid plastic paint
Coloring with hair dye
The structure of fur resembles human hair, so its color can be changed with a means familiar to every woman - hair dye. Similar products are sold in any supermarket or household chemicals store, and the choice in terms of prices and shades is very diverse. When purchasing, you should consider the following mandatory requirements for paint:
- durability (usually buy products that can cover gray hair);
- the tone is at least one shade darker than the hair color;
- gentle composition, no caustic substances.
If you want to lighten a dark material, you will first have to bleach it using the appropriate paint. Next, re-dyeing is carried out in the desired shade. It happens that white fur turns yellow from long wear. It will also have to be bleached before staining, otherwise the yellowness will distort the chosen shade. For arctic fox fur you need to purchase more paint than for mink or rabbit. A long fur coat may require up to 5-6 packs of paint.
Spray for coloring fur
If thick fur has sun-bleached ends, it is not necessary to dye it completely. Sometimes it’s enough just to paint the discolored part, and the thing will shine like new. To renew your fur, you need to purchase a suede spray in a can, but you shouldn’t skimp on its quality. A low-quality product can stain hands, things, and human skin for a long time.
Using spray paint is very easy. You need to hang the fur item on a hanger on the balcony, terrace, or cover all surrounding surfaces with cellophane. Then spray paint from a distance of 40-50 cm, working on each area. After finishing the work, you need to comb the fur and let it dry thoroughly. It is permissible to use a hair dryer for drying. Usually the result is enough for one season, then the item will need to be painted again.
Selection of shades for different fur colors
Coloring without prior bleaching should always be done in a tone darker than the original. For example, to update classic brown mink fur, you need to buy dark brown dye. If the fur is new, has not been worn, and has not faded at all, it will be difficult to dye it, since the pigments do not adhere well to such material. You will have to add not only more product, but also take a darker shade. This is not difficult to do: you need to pour a little black paint into the brown paint.
Gray and blue mink are usually dyed the same color, choosing the appropriate tone for the hair. The material will not change shade, but will become brighter and more saturated. Long-haired fur should also be dyed in a tone close to natural, because to dye the hairs well, you will have to put in a lot of effort and buy several packages of the product.
What is needed for work
Before starting the process, you need to prepare water, hair dye or a specialized product, a bleaching agent (if necessary). Also, to wash fur you will need baking soda, ammonia, salt, and a mild detergent.
We recommend: What is the difference between water-emulsion and water-dispersion
Features of the polar fox's hair
The arctic fox has relatively small dimensions: it is about half a meter long and weighs about three kilograms. This coat makes it possible to safely withstand temperatures below -50 °C. And all thanks to its such wonderful properties:
- Cover varies significantly depending on the season. In summer it is dark brown, which allows it to remain undetected in its environment;
- In winter, it changes color to pearl white and increases in size and density. Some species dress in beige or gray tones in the cold season;
- The surface wool layer is not rigid and has a considerable length. The down is dense enough to withstand strong gusts of wind.
Even after the death of the animal, its fur serves a useful service - only to humans. It has long been valued by clothing manufacturers for its excellent thermal insulation. In addition, products made from it are highly reliable and serve their owners for almost a decade. And the aesthetic characteristics make a polar fox wardrobe a tasty morsel for fashionistas all over the world.
How to clean an Arctic fox collar at home?
“If you love to ride, love to carry a sleigh,” says a famous Russian proverb. Such an attribute of luxury as an arctic fox collar requires special care. And this concerns not least cleaning.
Fortunately, everyone has everything for this:
- Fatty deposits can be easily removed using an aqueous solution of ammonium hydroxide. To do this, dilute it in regular tap water. The result will be an almost perfect stain remover;
- Dog shampoo or even household detergent (dissolved in a small volume of tap water) will also do the job well. The main thing is not to use soap-based chemicals, since they are very difficult to wash off;
- Hydrogen peroxide, available in every first aid kit, will effectively remove any stains if sprayed through a spray bottle;
- An unusual but effective method is to use... gasoline. This fuel has proven its excellent cleaning properties. In addition, there is no need to wash it off: it quickly evaporates on its own
.
How to clean arctic fox from yellowness at home?
The worst thing that can happen to an expensive purchase is the loss of its original aesthetics. Gradually this happens even with the most expensive wardrobe items. But proper care will prevent the appearance of destructive yellowness:
- Heat an empty frying pan over medium heat and pour a couple of tablespoons of regular flour into it. As soon as it gets hot, you should immediately sprinkle it on the stains. After a few hours, you can shake the product and it will be as good as new;
- Instead of flour, use starch or purified rye bran. The cleaning technology is the same as in the previous case;
- Another indispensable housewife's assistant in the fight against old stains is vinegar. A small piece of cotton wool is moistened with the liquid and problem points are treated with it.
It is important to avoid strong mechanical impact. Thus, it is strictly forbidden to forcefully rub or use a household hair dryer to dry the fur.
Dyeing Arctic fox fur: preparation
You can change the natural color of a wardrobe item either in a specialized studio or yourself. The last method is several times cheaper, so let’s pay special attention to it.
First, the material is processed so that the dye spreads evenly on it. This is relatively easy to do. You just need to prepare a solution from available substances:
- 40 grams of table salt;
- Sodium bicarbonate - 40 ml;
- 20 ml of ammonia;
- Two liters of tap water at a temperature of 30-40 degrees.
All of the above ingredients should be mixed and left for half an hour. Then you should apply the mixture to your clothes. To achieve the best effect, it is recommended to arm yourself with a brush (however, be extremely careful). Then remove the slurry with a damp cloth.
The next stage of preparation is drying. It should be done in a well-ventilated room or outside in warm sunny weather.
Carrying out painting work
Let's list the main stages:
- Choose a dye. Ordinary hair dye will do (preferably choose brown tones);
- If you're lucky, you might come across a special paint for this type of surface. It is diluted in the required concentration (all instructions are on the package);
- Treat the skin with glycerin or petroleum jelly to reduce the likelihood of skin drying;
- Staining is carried out immediately after cleaning. An excellent working tool is a hair brush, which can be found in any cosmetics store;
- As a rule, deep processing is carried out, down to the very base of the hairs. But nothing prevents you from showing your imagination and painting according to your own ideas of beauty. So, you can cover only the surface part.
We told you in detail about how to dye arctic fox fur at home. Any housewife can cope with this task. The sequence of work is extremely simple: preparation, drying, application. This way, old things will find a new life and will delight their owners for many years to come.
Things made from natural fur are not cheap, so they are bought not for one season, but for several years. During prolonged wear, the appearance of the product suffers: the fur wears out and becomes dull. How to restore your favorite fur coat to its former glory? Of course, you can take it to the dry cleaner, which means spending money, or you can dye the fur at home, thereby breathing new life into the fur item.
During prolonged wear, the appearance of the fur coat suffers: the fur wears out and becomes dull. One possible solution to the problem is to dye the fur of the fur coat in a different color.
Caring for dyed fur
If the product is dyed with ordinary hair dye, the fur coat will be resistant to high humidity. But it is better to wear a dyed fur coat in dry weather and avoid exposure to rain or snow. If it turns out that the pile is wet, then you need to dry it as quickly as possible with a hairdryer with cold air and go through it with a soft comb. If dirt gets on the fur, it must be removed immediately after detection, and do not wait for complete sedimentation in the villi. Regular wet wipes will do the job well. The damaged area must then be thoroughly dried. In order for the fur coat to last a long time, it is better to store it in a special bag, protect it from the effects of moths, as well as from bright light.
After dyeing, careful care is important
Preparing for painting
To dye fur, you must first prepare it. During wear, dirt accumulates on the surface of the product: particles of dust and grease. You cannot wash fur items using conventional methods, but before painting you need to thoroughly clean the surface to be treated so that the paint lays evenly and penetrates well into the fibers. What to do? Carefully treat the fur with an alkaline solution
, which will dissolve grease and remove dust particles.
It’s easy to prepare the mixture: add 3 tsp to 1 liter of water. salt, 2 tsp. soda, 1 tbsp. l. dishwashing detergent and 5 g of ammonia. But here is another option: water, vinegar and alcohol are taken in equal proportions. All components of the solution must be thoroughly mixed, the dry components must be completely dissolved.
You can clean a variety of types of fur with this liquid, for example, mink, silver fox, arctic fox, fox or rabbit. It is possible that after such simple cleaning the appearance of the product will improve and the need for painting will simply disappear.
Perhaps after cleaning the appearance of the fur coat will improve and you will change your mind about dyeing it.
Before applying the resulting solution to the fur, you need to treat its underside - the inner side. The fact is that skins can crack or become deformed after getting wet. Therefore, after the color is restored, you may be in for an unpleasant surprise - the product will decrease in size or simply lose its shape. To prevent this from happening, it is best to properly treat the flesh with glycerin or any nourishing and fatty cream
, for which you will need to carefully rip the lining.
After processing the skin, the fur is carefully laid out on a flat surface and an alkaline solution is applied. It is best to distribute it over the surface of the product using a brush. With this treatment, the liquid will be distributed along the entire length of the villi. Then the product must be thoroughly rinsed from the fur and proceed directly to dyeing.
Paint the house
This way you can evaluate the appearance of the product after the procedure. Don’t risk resorting to changing the whole thing at once. All paint manufacturers write that the final result may differ from that indicated. Especially if the fur is initially very dark. So, how to dye fur at home? Protect your hands with gloves and apply quickly. See if all areas have been treated. You need to soak the paint for as long as indicated in the instructions. After the procedure, rinse the dyed fur with water.
Fur dyeing at home
You can make a solution from water and vinegar. Just like after coloring your hair, you need to apply a balm. This addition will give a beautiful shine and shine to the fur. And rinse again with water. Dry gently using a towel. You can make the color completely unique by using the method used for highlighting. More precisely, paint only some areas and wrap them in foil. The result is specks of a different color against the background of the main one. Your clothes will be unusual, original and eye-catching.
After painting the color will be irresistible
The product treated in this way must be cared for as before. The effect after the procedure lasts about 8 months. Further color depends on both the type of fur and the product that was used. So the procedure will have to be repeated again. But with the experience gained, it will be much easier. And you can easily choose the appropriate color, practice and create something completely extraordinary.
Fur dyeing
Hair dye
Fur fibers are very similar in structure to hair, so hair dye is often used to color them. When buying paint, you should not save money - it is better to choose a durable product, for example, for effectively covering gray hair. The paint should be gentle on hair, in our case, on fur fibers. You should approach the choice of dye with the same care as when dyeing your hair.
Fur fibers are very similar in structure to hair, so hair dye is often used to color them. The choice of dye should be approached with the same care as when dyeing hair
So, the product has been chosen, all that remains is to choose the right shade. In no case should it be lighter than the color of the fur. In order to dye fur with high quality and the color lasts longer, it is better to choose a shade that is a shade darker than the existing one. On black or brown products, errors in color selection are not so noticeable, but white fur can take on an unpleasant yellow color.
The shade of the selected paint color should in no case be lighter than the color of the fur.
Owners of white fur coats and hats should know that you can say goodbye to unsightly yellowness if you first bleach the fibers with hydrogen peroxide and then dye the fur the desired color with regular hair dye.
The thickness of the fur will determine how many packages of paint you will need. For example, the fur coat of an arctic fox or a mink is denser and thicker than that of a rabbit. To dye mink fur at home, one package of paint may not be enough; it is better to immediately purchase two, or even three if you have to dye a long fur coat.
Depending on the instructions in the instructions, paint is applied to dry or wet pile. This is best done with a brush or a special paint brush.
To make sure that the fur will react well to the dyeing solution and that the color is chosen correctly, it is better to conduct a test on an inconspicuous area of the product before dyeing. It is especially important to carry out the procedure before dyeing rabbit fur, since it is one of the most vulnerable. If the resulting shade meets your expectations and the fibers do not fall out or break, you can safely begin dyeing the entire product.
To dye natural fur at home with hair dye, you need to follow the instructions on the package. Depending on the instructions, paint is applied to dry or wet pile. This is best done with a brush or a special paint brush, then spread over the entire surface of the fur with massaging movements. The exposure time should also match the manufacturer's recommendations. The video below shows how to apply the paint correctly.
High-quality paints often come with special balms. They can also be used for fur after washing off the paint. Such care will give the fur of a fur coat, collar or hat shine and silkiness. Additionally, you can fix the pigment by spraying a solution of water and vinegar on the painted product (250 ml of water per 1 tsp of 9% vinegar).
Drying a fur item on a radiator, using a fan or hair dryer is strictly prohibited. In addition, there is a little secret that will help protect the product from deformation. Before leaving real fur to dry, you need to stretch it and carefully secure it to some hard surface with pins.
Other means
To dye arctic fox fur at home, you can use spray paint. The fact is that the villi of such fur are long and first of all their tips burn out and become discolored. To restore the original appearance of a product, it is not necessary to paint it completely. You can simply spray the surface with suede paint, which is sold in aerosol cans.
You can dye fur in this way quickly, without unnecessary effort and risk to the quality of the fur. But the result will not last as long as after hair dye. One season the item will be like new, but before the next season you will have to dye the fur again.
It is better to hang the product and spray paint from a distance of at least 40-50 cm. In order for the paint to be distributed evenly, you need to work on each section of the product, and then comb the fur. There is no need to wash off the paint.
To dye faux fur, you can use both hair dye and suede dye in an aerosol can. At the same time, the risk that the product will become deformed is minimal, so it can be dried using a hairdryer or naturally.
Dyeing fur is not difficult if you choose high-quality paint and follow simple rules. By refreshing your fur coat at home, you will be able to save money on dry cleaning and at the same time return it to the appearance of a new thing.
Found a mistake? Select the text with the mouse and click:
Do you know that:
Stretch ceilings made of PVC film can withstand from 70 to 120 liters of water per 1 m2 of their area (depending on the size of the ceiling, the degree of its tension and the quality of the film). So you don’t have to worry about leaks from neighbors above.
Threads made of gold and silver, which were used to embroider clothes in the old days, are called gimp. To obtain them, the metal wire was pulled for a long time with pliers to the required fineness. This is where the expression “to drag out the rigmarole” came from - “to do long, monotonous work” or “to delay the completion of a task.”
Fresh lemon is not only suitable for tea: clean dirt from the surface of an acrylic bath by rubbing with half a cut citrus, or quickly wash the microwave by placing a container of water and lemon slices in it for 8-10 minutes at maximum power. The softened dirt can simply be wiped off with a sponge.
The habit of using an automatic washing machine “sparingly” can lead to the appearance of an unpleasant odor in it. Washing at temperatures below 60℃ and short rinses allow fungi and bacteria from dirty clothes to remain on internal surfaces and actively multiply.
If your favorite things show the first signs of gestation in the form of untidy pellets, you can get rid of them using a special machine - a shaver. It quickly and effectively shaves off clumps of fabric fibers and returns things to their proper appearance.
The easiest way to remove scale and carbon deposits from the soleplate of the iron is with table salt. Pour a thick layer of salt onto the paper, heat the iron to maximum and run the iron over the salt bed several times, applying light pressure.
The dishwasher cleans more than just plates and cups. You can load it with plastic toys, glass lamp shades and even dirty vegetables, such as potatoes, but only without using detergents.
Marusya 03/28/2018 14:28
Often a favorite fur coat or vest loses its appearance, although other characteristics are still quite excellent. The fibers fade, become dull and give the product a very worn look. If you want to enjoy the warmth and comfort of your favorite thing, then you can shade it a little. But not everyone knows how to dye arctic fox fur at home.
You don’t have to bother with painting it yourself, but rather take the product to a special workshop, where everything will be done quickly and professionally. But the cost of such a service is often prohibitively high. It will be much cheaper to learn how to dye natural fur at home and do this work yourself.
Important: Please note that if the product is still new, it is strictly not recommended to dye it simply to change the color, since any dyeing of fur shortens its service life.
Each type of fur is beautiful and original in its own way. The painting of each of them also has its own characteristics:
- White rabbit, chinchilla or mink fur is the easiest and simplest to dye, because it does not require pre-lightening. You can use any color that can cover the yellowness that appears.
Tip: Keep in mind that rabbit fur is very sensitive to chemicals, so it must be dyed with extreme caution.
Coloring stages
In order to dye a fur coat with high quality, it is necessary to go through all the stages of dyeing.
Preparing the product for painting
The main stage of preparing a product for dyeing is to remove all settled dust from the fibers of the fur coat.
Important! Only clean items should be dyed. The main thing is to cover the underside of the fur coat with Vaseline or ordinary baby cream before cleaning it.
So, to clean your fur coat from dirt, you need to:
- Combine water and any soapy product in one container. Use a washcloth to go through the fur and remove accumulated dirt.
- Using a solution of hydrogen peroxide and ordinary water. It is necessary to wipe the fur coat with a cloth soaked in the resulting solution.
- In a deep bowl, mix a little baking soda, hydrogen peroxide, a handful of salt and a little shampoo. Apply the resulting liquid mixture using a soft brush over the surface of the pile and rinse gently.
Please note: Technology for painting concrete ceilings
All of the above work must be carried out wearing protective gloves. So that while wearing an updated fur coat, you don’t have to treat damaged skin on your hands. All cleaning operations must be carried out carefully, allowing as little liquids and water as possible to get into the inside of the fur coat. If the skin is damaged, the entire fur bag will become unusable. To make a newly dyed fur coat dry faster, you can lightly dry it with a hairdryer. The main thing is to turn on not hot, but cold air. After the product has dried, you need to carefully walk over it with a soft brush. The combed and washed fur coat is ready for dyeing.
Before dyeing, it is important to thoroughly clean your fur coat.
Coloring
Before dyeing a mink coat, to be sure of a positive result, you need to test the effect of the dye on a small piece of fur. Sometimes when purchasing a fur coat, one is included. If you are satisfied with the end result, then you need to stock up on the following components: rubber or plastic gloves, as well as a convenient brush for applying paint (you can put aside any that was left over after regular hair coloring). Before you dye a fur coat that is no longer new, you need to make sure the integrity and density of the inner layer. If in doubt, it is better to cancel the painting; during operation, the fur coat will simply fall apart. Stages of fur dyeing:
- coat the skin of the fur coat with Vaseline or baby cream;
- apply any selected type of paint over the pile with a hair coloring brush;
- make sure that each section of the fur coat or fur collar is evenly covered with the prepared paint;
- to achieve the desired effect, wrap it in a large plastic bag;
- leave the product hanging on a wide hanger for about half an hour;
- After this, carefully rinse the fur product.
Painting can be done with spray paint at home
Lock color
In order for a mink coat dyed in the required color to really last a long time, and for the color to last longer than after the first rain or snow, it is necessary to carry out simple manipulations to fix the shade. A weak vinegar solution will fix the color. To do this, mix 2 tablespoons of vinegar in a liter of water in a separate container. You can improve the condition of your fur coat using an ordinary balm after dyeing. It usually comes with hair dye. After applying the balm or vinegar solution, lightly blot the dyed coat with a dry towel.
Fixing the color of a dyed fur coat
Drying
To prevent the fur coat from quickly becoming unusable after dyeing, it must be dried well. It is better to hang it on a wide hanger in a well-ventilated area or on the balcony. Or, if this is not possible, then you can dry it with a hairdryer with cold air. The main thing is not to expose the fur to hot air, otherwise you may end up with overdried fur, which means the product will be damaged.
Please note: Sole painting: surface cleaning and black or white coloring technology
Preparation
In order for you to get a very good effect, the fur product must be prepared for painting. Then the paint will apply much more evenly and there will be no bald spots. The most important thing is to thoroughly clean your fur coat or vest. To do this, you need to prepare a mixture of the following substances:
- 2 tbsp. l. salt;
- 1 tbsp. l. ammonia;
- 2 tbsp. l. soda;
- 1 tbsp. l. washing powder;
- 2 liters of warm (not hot) water.
All components must be mixed and the resulting mixture carefully applied to the fur. Lightly brush the bristles so that not only the top, but also the bottom part is cleaned. Then moisten a clean cloth with water and wipe the fur from the composition.
After such cleaning, the fur must be dried naturally, without using heaters or a hair dryer. It is also not recommended to leave the product exposed to direct sunlight.
How to paint?
How can you dye fur? This is a completely natural question that arises among many people who are puzzled by the question of how to dye mink, rabbit or arctic fox fur at home. Of course, there are several very realistic home dyeing technologies.
Professional product
You can use special paint for fur, which is sold in hardware stores. It lies very naturally on the fibers, as it is designed taking into account the characteristics of animal fur.
Hair dye
A more affordable option is hair dye. This is also the most popular coloring method, because you can choose any color from a huge palette.
Important: Keep in mind that fur should always be dyed in a darker shade. Over time, the fiery red color will turn to “rusty” or red, and the black color will fade to a dirty brown.
So, how to dye fur at home using hair dye:
- mix all paint components according to instructions.
- put on gloves.
- treat the inner skin (skin) with baby cream, glycerin or petroleum jelly to prevent it from drying out;
- wet the fur so that the paint is distributed more evenly;
- apply paint with a brush to the entire fur surface;
- remember the fur a little with your hands;
- wait 35-45 minutes;
- wash off the paint with water;
- lay the item on a horizontal plane, squeeze out excess moisture with your hands, and leave to dry;
- After drying, comb the fur.
You can not dye the entire fur, but only the tips of the fibers. Typically, they are lightened to give the product a richer appearance.
Methods for cleaning fur
Types of damage to fur coat
Before deciding how to dye fur at home, you need to clean it properly. After all, during daily wear, city dust and fumes settle on the wool, the pile sticks together or falls into unsightly lumps on some types of wool. All this needs to be properly cleaned.
You can clean the fur with chemicals - high-quality dishwashing detergent or shampoo. You can use more “serious” products, such as special purified gasoline or lighter fluid. But in any case, you need to remember that chemistry can act very aggressively and worsen the appearance of the fur.
For cleaning, you can prepare your own alkaline solution from the following components:
- dishwashing detergent - 1 tsp;
- ammonia - 5 g;
- salt - 15 g;
- soda - 10 g.
Fur Cleanser Ingredients:
Mix all ingredients thoroughly. Lay the fur coat on the table or hang it on a hanger. Apply the resulting mixture evenly over the entire surface of the fur, leave for a while, and then rinse with clean water, trying to prevent water from getting on the bottom layer.