Features and subtleties of filing
The process of hemming cannot be called difficult; it is rather energy-consuming; it will require a lot of free time to complete; you should not rush in such a situation.
There are some recommendations from experts that will help you get the job done faster and more accurately, and most importantly beautifully:
- Before shortening, you should allow time for the curtains to hang. As a rule, this takes about 3 days. Thanks to these actions, the curtains may pull back slightly, and then they will need to be cut off even more;
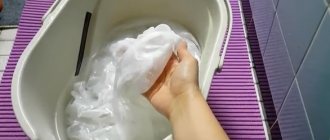
- Before hanging the curtains on the hood, you should hold them in water and do not wring them out. This will make the matter heavier and help it develop;
- If the fabrics are thin and airy, then the threads for hemming should be selected lightweight, unnoticeable, in the color of the material itself; the stitching at the bottom will be almost invisible;
- To prevent the edges of thick fabric from bending after shortening, a weight, for example, a metal plate, is placed in the middle of the bend. It should not be noticeable to outsiders;
- You should not tighten the threads at the end and at the beginning of the stitching, the fabric will change and it will look careless;
- Sometimes organza or thin tulle is not shortened, but singed, as if sealing the edges of the material. This will require dexterity and dexterity - otherwise the fabric can burn in just seconds;
- Instead of a fold, you can sew a lace ribbon to the edge - it looks original and very impressive;
- Curtain braid is sewn on by machine or by hand; glued braid will not withstand this load;
- Any oversight can be decorated with braid - for this they use bright products and make assemblies.
Methods for processing curtains
To understand how to properly hem curtains, you must first decide on the hemming method. It happens:
The manual method is the most difficult and time-consuming. But to implement it you only need a thread and a needle. And also - a reserve of time, maximum patience and a willingness to be pricked. Before starting the procedure, you need to at least remember what seams and stitches are. The simplest ones are called:
- estimate;
- machine;
- old;
- overcast;
- in a twist;
- looped;
- secret.
To hem curtains you will need a basting, machine or overcasting machine. There is no need for others.
The manual filing method is the most difficult; it requires patience and skill.
The mechanical method is carried out using a sewing machine. Modern units include several dozen useful functions, including one that allows you to simply and easily make curtains of the desired size and precisely hem the bottom.
If you don’t have a sewing machine in your house, it’s hardly worth buying one just for the curtains alone. Especially when further use of the unit is not expected. A good, high-quality “mechanical seamstress” costs from 5 thousand rubles, but in a salon, curtains can be hemmed for 500 rubles. The difference is obvious.
The mechanical method is suitable for those whose sewing machine does not gather dust in the far corner, but periodically performs its “professional duties.”
If you don’t have a machine in your house, then buying one just for curtains is too expensive.
A quick way to shorten curtains is to buy a special adhesive tape. It comes in different sizes from 1 to 10 centimeters. There are 2 types of such devices:
- the end of the curtain is inserted into a kind of pocket made of ribbon - for this, the ribbon is folded in half along its length;
- The end of the tulle is folded, and an adhesive ribbon is inserted inside the fold.
Which is preferable? It's hard to say. Each type of curtain has its own method. Sadly, adhesive tape does have some disadvantages. Over time it comes off. The drier or humid, colder the room, the faster the ribbon will become unusable. To return the curtain to its previous state, you will have to remove the ribbon completely, buy a new one in the store and “install” it again.
Some housewives claim that you can iron the part that has come unglued again - it will be as good as new. In fact, if the glue has dried, it will be almost impossible to restore the previous abilities.
Let's look at the material
To process the top edge, you need to hem the curtain to the curtain tape with fasteners. Today there are quite a few varieties of them. In addition to the material of manufacture (transparent or white), the tape for hemming curtains has a number of characteristics:
- The width and number of rows for fastening (loops for hooks). This is convenient, since the fastening strips located in parallel, with a difference of several centimeters, make it possible to additionally adjust the length of the finished hemmed product.
- Depending on the number of gathering threads, a pattern of folds is formed in the upper part of the curtain, on the opposite side of the tape.
- Factor and type of assembly. Using ribbons, you can adjust the richness of the drapery, while the width of the curtain can be reduced from 1.5 to 3 times.
In the upper part of the curtain, with the help of tape, folds can be formed like an accordion, in a checkerboard pattern, there is a bow type of assembly, radial, etc.
Step-by-step instructions for hemming
To hem curtains at home you will need:
- Braid (curtain).
- Curtains.
- Threads (to match the color of the curtain fabric), scissors.
Do-it-yourself curtain hemming is done in the following sequence:
The edge needs to be cut. Do not try to save time and effort on processing the edge - a dense strip of edge tightens and deforms the canvas.
Cutting off the edge
- First of all, we process the side edges. We bend it, fix the fabric in the folded position with an iron, then baste and attach. Remove the temporary overlock threads with a needle.
- We proceed to the upper cut of the fabric and fastening the braid. To make hemming the curtains with tape look even and neat, fold the fabric two and a half centimeters and iron it.
- Before attaching it to the curtain, we also bend the curtain braid a couple of centimeters at both ends and remove the gathering threads from the folded strips. Then we apply the tape to the wrong side of the curtain, baste it and finally secure it with 2 seams: first the top, then the bottom. To properly fold the curtains, the seams are laid from one point, in one direction, otherwise the material may wrinkle.
The number of lines can be more than two, depending on the width of the selected tape:
- For tape up to 5 cm wide, two seams are sufficient.
- A 10-meter braid will require three lines for a secure and neat fixation.
- Ribbons wider than 10 cm are sewn with four seams, after each row of fastenings.
The minimum space between the upper edges of the tape and the curtain fabric is half a centimeter.
- We take out the gathering threads from the stitched tape and tie the pairs of ends together on both sides so that they do not evaporate from the tape.
- The bottom edge (in fabrics without lining) is processed with a double fold: we form the first fold and iron it. Then we fold the fabric again, iron it again and baste it. We secure the hem with a machine seam and remove the overcasting threads.
- The curtain hemming is complete. The final stage is one of the most enjoyable, the formation of the drapery. To make it easier to distribute the folds across the entire width, pull the threads on both sides.
Do not cut the cords, carefully roll them up and disguise them under the curtain tape. These ends will be needed when you need to unravel the curtains for washing and ironing.
In the studio, the price for hemming curtains is 500-600 rubles per linear meter. But no one will do the job as diligently and pedantically as you yourself, adjusting the length of the product, the richness of the drapery, or the type of folding.
Hemming rules
Having decided to buy a canvas for curtains, you need to measure the parameters of the window opening, decide what the finished version will look like - whether the curtains will reach the middle of the window, to the floor, what density the fabric will be, the color and features of the material. Proper planning and a clear understanding of the overall interior will help you remain satisfied with the result for a long time. During the article, we will look at ways to hem curtains and sew curtain tape.
- When purchasing natural fabrics, remember that they often shrink in length and width after washing. Before making hems, it is recommended to wash and iron the fabric thoroughly after drying.
- It is better to attach heavy types of fabrics to the cornice and leave them sagging for 2-3 days. In this simple way, you can measure the width of the fabric for the hem, taking into account its stretch.
- Before cutting off an unnecessary piece of fabric, the fold must be ironed to maintain a clear and even fold line. On natural fabrics, such as calico and chintz, it is permissible to tear off extra centimeters without destroying the entire fabric.
- To add weight to light fabrics and add an additional decorative accent to the curtains, a wide hem is used. Thick curtains are also best decorated with a wide hem line.
- Initially, you need to lay out the finished canvas to measure the indents and hems. Having measured the required height of the fabric from the top, taking into account the curtain tape, to the bottom edge, you need to make a control mark on the wrong side.
In the classic version of measurements, a double hem of 6 centimeters is placed at the bottom. The width of the hem is not critical; if the length of the fabric does not allow a hem of 6 centimeters, then the width can be reduced to 5 centimeters.
Pulling out the cross thread
If you want to get a clear and even cutting line without using rulers, weft pulling will help you. To do this you need:
- Spread the canvas on a flat and clean surface.
- Measure the required length according to the size of the window.
- A small incision is made with scissors along the resulting mark, from which a transverse thread is carefully pulled out.
- Next to the resulting strip, several more transverse threads are pulled out. After this, you can safely cut off the excess fabric without fear of ending up with a crooked piece.
Trimming
This method is used if the fabric has a large number of interlacing threads that create complex patterns. To use this method you need:
- The fabric must be spread on a hard, flat surface in such a way that the entire length of the fabric, folded in half widthwise, fits.
- After folding the fabric widthwise, you need to carefully and carefully align the edges of the material. After smoothing out the folds and adjusting the edges, it is recommended to fasten the joined parts with sewing pins.
- After measuring the length, make a cut. Then fold the fabric in half again.
This is done along the entire length of the canvas. After unrolling the fabric along the resulting series of cuts, you can separate the desired amount of fabric.
Ideas: how to shorten curtains curly
Different housewives have different tricks regarding how to trim or hem curtains, and the choice of method depends on: the width and length of the canvas, the type of material and the experience of the needlewoman. It is worth noting that the cut of curtains does not always have to be even, since curly edges have recently become very popular. You shouldn’t think at all that only a professional seamstress can make such a decorative undercut, since it is also possible for not very experienced needlewomen, subject to recommendations from specialists of the highest category.
Popular articles Beautiful poems for Maslenitsa
Recommendations:
- You need to hang the curtains in their permanent place for several days, preferably after washing. To hang curtains, you can use braid, border or a special tape that is sewn to the top edge.
- After a few days, the material will straighten out under its own weight and be perfectly smooth.
- Next, use thick paper and scissors to make stencils. A cardboard box is suitable for this. The choice of line depends solely on personal preferences or design ideas.
- The stencil is applied to the curtains, for which it is better to use additional help.
- The excess length is carefully trimmed.
What to do with the cut edge and how exactly to process it so that it does not crumble? There are several methods by which serious consequences can be avoided. Previously, to fix the edge of materials such as tulle and organza, they used a lighter or a candle, which was used to singe the edge.
An acceptable and safer option is to tint the edge of the canvas with nail polish without color. It will not allow the fabric to unravel, and will also remain intact even after washing the material. The best option is to fold and sew the edge or sew on bias tape. This way the canvas will be beautiful and retain its aesthetics. Depending on the type of fabric, you need to select cutting methods.
How to hem double-sided curtains
The difficulty of shortening such curtains is that you don’t always want to make a hem in order to spoil the appearance of the curtain with a different, contrasting color on the back side. But as we have already found out, there is always a way out, and this situation is no exception. First, the curtains need to hang down on the curtain rod to take the desired shape. Then, remove them from the curtain rod and hem them to the desired length using the hem method. And after that, sew braid, ribbon or lace to the edges, which will match all two sides of the curtain in color.
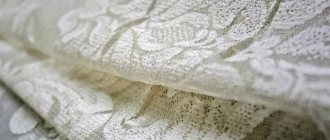
Many curtain fabrics are offered with embossed edges. For this material, the side seams are not processed.
First, measure the braid, lace or ribbon to the required length. The tape is folded over the curtain and ironed through paper or thin fabric so that the fold is as smooth and neat as possible. Then the braid, ribbon or lace is secured with needles and stitched for convenience. It's simple!
The method depends on the type of fabric and the presence of lining.
Assembling with a “forward needle” seam
The “forward needle” seam is most often done manually. The advantage of this method is that you don't have to remove the long curtains from the window. The craftsmen also make stitches on a sewing machine, setting the maximum step width.
At the bottom of the product, mark the expected number of gathers, retreating about 5 cm on the sides. Next, determine the height of the folds, marking the seam with a vertical line. Use hand stitches to sew along the basting, tying knots at the top and bottom (there is no need to sew them to the curtain), and then pull the threads. You should get folds that are carefully aligned with your hands and secured from the inside out.
The “needle forward” method is recommended for light and smooth fabrics. Hand stitches simply will not be able to hold heavy material or the folds will be difficult to gather
Wash the product carefully so that the seams do not unravel.
Curtain folding methods
Changing the length of curtains is easy in several ways:
- hem using a sewing machine or by hand;
- apply adhesive tape;
- use magnets;
- make folds;
- fold over the top.
How to hem tulle and sew curtain tape with your own hands
Selection of braid
When selecting, it is important to consider two points
- For a heavy curtain, choose a thick braid. For easy ones it’s the other way around.
- The number of draped drapery laces depends on the width of the braid. The more there are, the more complex the drapery can be assembled.
The more drapery laces in the tulle, the more complex and frequent the drapery can be created. For easy gathering, two laces are enough. For translucent fabrics (including tulle), use a ribbon made from strong fishing line. “Heavy” fabric will not shine through very nicely through light fabric
A narrow one will attract less attention. Wide ones are intended for denser curtain fabrics. For light tulle, choose narrow transparent ribbons
Sewing process
If you have a sewing machine at home, hemming and sewing curtain tape can be done fairly quickly.
You can sew the ribbon to the tulle using a machine very easily and quickly. Here are step-by-step instructions on how to sew curtain tape to tulle:
- Take measurements, prepare tulle and braid of the required length. For lush folds of fabric you will need more. Please note that after the first wash the braid material may shrink and it will become too short. The only way to fix this is by peeling it off and sewing a new one. This can be avoided by initially adding 4-8 cm for shrinkage.
- Fold the top of the tulle. If the fabric frays a lot, then you need to tuck it twice, otherwise once is enough. Baste with large stitches along the entire length, iron so that the hem is even. Stitch and remove basting. Do the same with the sides and bottom.
- Cut the curtain tape. Attach the braid to the top edge of the curtain from the wrong side with a margin of 1.5 cm and baste it to the fabric (or pin it). The edges of the braid must be carefully tucked in.
The hook loops located on the tape should be facing you. Having sewn it “inside out”, you will not be able to use ready-made loops for hanging the curtain on the hooks of the curtain rod.
When sewing, the hooks from the tape should be facing you. Carefully stitch the curtain tape to the material, including along the sides. Remove pins and running stitches.
At the end, don't forget to remove all the pins and bastings.
The lines should not touch the threaded ropes. Make sure that the new line does not touch or intersect the threaded ropes. Otherwise, you will not be able to collect the folds.
Some ways to fix the length of your drapes
You can correct the length of the curtains manually or using a machine using thread and a needle or adhesive tape. There are also alternative options, for example, making folds or securing the bottom with magnets. How to hem curtains correctly?
Hemming by hand
This is a rather long process that will require attention and concentration. The fact is that when sewing by hand, the seamstress will need to adjust the length of the stitch, the distance between them and the straightness of the seam.
You can even shorten curtains by hand
The step-by-step procedure is as follows:
- It is necessary to lay the fabric on a flat surface and straighten it;
- Apply all necessary marks with special chalk or a dry piece of soap;
- Cut off excess fabric or immediately fold it, securing with thin pins;
- Carefully, slowly, hem, leaving small pieces of thread (2-3 cm each) along the edges;
- When finished, you need to tie knots using the remaining threads.
We use the machine
A sewing machine makes sewing much faster and easier, since you don’t have to watch the seam. If the work is not performed by a master, but by a beginner, it is worth watching several lessons in advance in order to better understand the process.
You might be interested in Simple patterns for women's summer overalls with shorts
It is best to use a seam length of 0.3-0.7 cm; a straight stitch or a small zigzag stitch will do. The second one will be invisible on the front side, but sewing with it is a little more difficult than with a straight seam.
Working with the machine is simpler and faster
- The fabric must be folded and secured with pins or a large stitch;
- Place under the foot and stitch, leaving a few threads around the edges;
- Tie the remaining threads with knots.
If the fabric frays a lot, its edge must first be overlocked and secured, then folded and stitched.
Housewives' tricks: how to shorten, trim and hem curtains
A few tips from experienced craftswomen will help you avoid unpleasant mistakes and get the job done as quickly, efficiently and beautifully as possible.
The seam can be single or double hemmed.
- Before working with curtains, treat them, that is, decate them.
- For thin fabrics, the cobweb method is not always suitable, so it is better to stitch them or secure them with magnets.
- Tulle and organza often come with weight at the bottom, so this material is usually shortened at the top.
- It's not always a good idea to cut curtains. Pin them 10-14 centimeters from the bottom and see from a distance how they look. If it's good, it's better to put them on adhesive tape or stitch them.
- Thick curtains should be folded once, otherwise unnecessary heaviness will be created at the bottom, which will spoil the draperies and the entire appearance, and light curtains can be safely folded two or three times.
Every housewife or craftswoman is able to come up with something of her own.
How to hem tulle correctly
How to hem tulle correctly - this question arises before every housewife after choosing the fabric she likes in the store. In this article I will give detailed instructions with photos on how to hem tulle correctly. There's really nothing complicated here. Knowing the sequence of actions, having a little patience and perseverance, you can hem the tulle yourself no worse than in a salon.
So let's get started!
1. In order to sew tulle, we need: the actual fabric for the tulle, taken approximately 2 times larger than the width of the cornice; the threads are white and match the tulle; pins for pinning; scissors; sewing machine; curtain tape, equal in width to the width of the tulle, tape measure.
2. If, when buying tulle, you did not cut it, but tore it off, then the edges will be smooth, but as if rolled into a roll. Such edges must be trimmed, otherwise they will be pulled together after sewing. If the edges of the tulle are cut unevenly, then they also need to be trimmed before sewing. How to do this correctly? First, we iron the edges to see how smooth they are or not. Then, at a distance of approximately 0.5-1 cm from the edge, pull out the thread and evenly cut the pulling edge along it. If your fabric for sewing is organza, then you won’t be able to pull out the thread, because... They are very thin and will tear quickly. Here you just need to trim the edges evenly.
3. Our sides are aligned, now we need to cut the tulle correctly, taking into account the allowances, to the required height. In this case, the bottom does not require processing, so we do not put allowances on it. On top of the allowance under the curtain tape you need to put as many cm as the width of the curtain tape. We have a narrow ribbon 2.5 cm wide. The height of the finished tulle in our case should be 2.5 m (250 cm). It turns out 250 cm + 2.5 cm = 252.5 cm. We measure 252.5 cm using a tape measure and make a cut. Pull out the thread and cut off the excess part of the fabric along the resulting path.
4. We begin processing the sides. Place the fabric with the wrong side up and iron it to the wrong side (approximately 1.5-2 cm). Then we wrap the sides again by 1.5-2 cm, so that the cut of the fabric is inside. We pin it with pins.
5.Insert thread into the machine to match the color of the tulle. We sew the sides on the machine at a distance of 1-2 mm from the inner fold.
6. After we have stitched both sides, we place the fabric with the right side up. We take the curtain tape and place it on the front side of the fabric, also face up (the loops on the tape should be on top). We combine the upper raw edge of the fabric and the curtain tape so that the fabric lies under the tape for the entire width of the tape (2.5 cm). We bend the side sections of the curtain tape inward by 1.5-2 cm. We pin the tape to the fabric.
Popular articles Knitted rug in the shape of a heart
7. Attach the curtain tape at a distance of 1 mm from the inner edge of the tape. The lower and upper threads should be white.
8. Take out the pins. Bend the curtain tape back to the wrong side and pin it again.
9. Change the lower (shuttle) thread in the machine to a colored one (to match the color of the tulle). We attach the tape starting from the side edge, first releasing the threads on the curtain tape so that they do not fall under the machine stitching. Having reached the edge of the curtain tape, turn the machine and lay a stitch along the length of the curtain tape.
10. Having reached the edge, turn the machine again and attach the second side of the curtain tape.
Here you go! Our tulle is ready! All that remains is to stroke it, pull off the curtain tape, hang it on the cornice and enjoy the comfort in the house you created with your own hands.
I would also like to offer you an alternative method of sewing tulle - using a hand fold. This method is more complex than the first, but many people, including me, like hand-sewn tulle more. Watch the master class in the video below. Good luck in sewing and see you in new articles and videos!
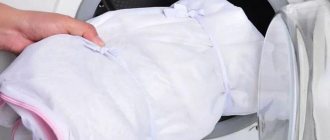
Machine washing occurs in several simple steps:
Remove the curtains from the window. Remove the clips and rings from the curtains, soak separately in soapy water for 60-90 minutes, then rinse under running water and dry thoroughly. You need to wipe dry, especially metal parts, so that there are no streaks left on them.
Also pay attention to details made from other materials - after all, dust will settle on wet fasteners and they will quickly lose their appearance.
IMPORTANT! Before washing, test curtains for color fastness. To do this, dilute a little of the product you are going to wash with in water and drop it on the curtains
Wait a couple of minutes, then rinse off the product and let the curtains dry. If there are no traces left at the point of contact with the product, you can safely proceed to washing.
Load the curtains into the machine. Select a mode with a temperature of up to 40C and a spin speed of no more than 700 rpm (preferably less). Wash the curtains. Immediately after washing, return the curtains to the window so that they hang down - otherwise the fabric may wrinkle.
IMPORTANT! It is best to wash blackout curtains with liquid detergents, as they are more delicate to the fabric and color. IMPORTANT! Be sure to first wash the window and cornice, and only then hang the washed curtains - otherwise they will collect dirt and dust
Side edges
There are several ways to process the sides of curtains:
Regular hem. Only its width will change. For fabric that frays a lot, it is necessary to choose the maximum parameter - from 3 to 5 cm, since a narrower hem will cause curling, which, in turn, will not look aesthetically pleasing. For example, for organza it is recommended to measure at least 4 - 5 cm. Use a zigzag seam. The hem is attached on a sewing machine using the same mode. This method is also appropriate for additionally securing the edges of loose fabric for curtains. Moscow seam. Making it yourself is quite simple. The edge of the fabric is folded once and a seam is made at a distance of 2 mm from the edge of the hem
Next, the free part of the fabric to the left of the seam is carefully cut off, the seam should not be touched. The seam is turned right side down
The second hem is also attached 2 mm from the edge. Beikoy. This is a special decorative tape that is used to frame the edges of clothing and various textile items. The easiest way to sew bias tape with your own hands is to the curtain, since for this you only need to make a straight stitch without turns. Experienced seamstresses attach it to the product with just one seam. You must first fold the ribbon in half and iron it together with the tulle, and then sew it on.
First we process the side edges of the curtain.
- The edge should be trimmed evenly and smoothed.
- We place the tulle with the wrong side up, fold the hem 1-2 cm. Smooth it with an iron.
- Then fold the edge again by 1-2 cm and iron it. This way we get a double hem.
- To make the material slip less, you can fix it with pins before ironing.
- We sew the seam on the machine at a distance of approximately 1-2 mm from the edge of the hem.
We process the second side edge of the curtain in the same way.
If we do not adjust the length of ready-made curtains, but sew them from scratch, we first process the sides with a double hem. The procedure is as follows:
- Before hemming the tulle on the sides, you need to cut it evenly and iron it. If the fabric is cotton, we use the “thread pulling” method. If the synthetic one will have to tinker longer. Measure the length carefully, draw a line along the ruler and cut straight. Place the curtain on a flat surface with the wrong side up, fold it in 1-2 cm and iron it.
- We fold the ironed edge again by 1-2 cm and iron it again. To make the fabric slip less, we fix it with tailor's pins each time.
- We machine stitch at a distance of approximately 1-2 mm from the inner edge of the hem.
We repeat the entire procedure for the other side.
How to hem curtains from the bottom at home: step-by-step instructions describing the process
There are two ways to shorten curtains - trimming and folding. In the first case, you should measure the fabric correctly and cut the fabric to the required length. Before starting work you must:
- Wet the curtains and hang them on the curtain rod without squeezing them. Leave the textiles for 3 days. This will allow the fabric to sag and allow more accurate measurements to be taken.
- Select threads for curtains. They must match the shade of the material.
- Prepare suitable pins. Do not use thick tools as they leave holes in the fabric.
The shortening method and type of seam are chosen depending on the type of material:
- Tulle, organza, and other thin fabric can be set on fire. This will seal the threads and prevent them from unraveling. The main thing is to perform the procedure carefully so as not to set fire to the canvas.
- Dense material may bend after hemming. This problem often occurs with blackout fabric. To prevent the night curtain from losing its shape, a weighting agent is inserted into the bend. Usually a wooden plank is used. If the products were originally sold with a load, the length should be cut not from the bottom, but from the top. To prevent the curtain from losing its shape, curtain tape is sewn on.
- If the material crumbles, the edge is additionally treated with a zigzag seam. This will fix the threads and increase the service life of the fabric.
- Double-sided curtains cannot be hemmed in the usual way, as this disrupts the design of the canvas. Such curtains do not have a front or back side. In this situation, the textiles are cut, the edges are folded inward, and sewn with a hidden seam.
To shorten curtains, the following types of processing are distinguished:
- Classic seam. This is a straight stitch that is suitable for both light curtains and heavy curtains. The fabric is simply folded and stitched. If the material crumbles, make 2-5 bends.
- Blind seam. These are hidden stitches that are used to seamlessly join two warps together. They do not pierce the fabric with a needle, but make a small grab of the thread. This results in a neat hem.
- Using edging. When the curtain fabric is thick, it is not folded. If you fold the material and sew a seam, the edge will be too thick. He looks unattractive. In such a situation, excess fabric is removed, that is, the bottom is cut to the desired length. No allowance is left. The braid is sewn on with a hidden seam.
- Gusset. This is the most difficult way to shorten curtains, but after the procedure the products look aesthetically pleasing. The angle turns out to be neat, not too tight, and not puffy. This method can only be used by experienced dressmakers.
Processing the bottom of the curtain with a corner
Before starting the hemming process, you need to take measurements of the fabric. To carry out the procedure correctly, adhere to the following algorithm:
- Textiles are laid out on a flat surface. It's better to work on the floor.
- If the material is very wrinkled, it will be ironed.
- Use a centimeter or tape measure to measure the desired size.
Fabric trimming is performed only if the fabric is too long. If the size of the canvas is 10 cm larger than the required value, the textiles are simply folded and hemmed. This will allow the curtains to be returned to their original dimensions if necessary.
When the measurement has been made and the modeling method has been selected, they proceed directly to the procedure. This can be done in several ways.
Manually
This is the longest method of hemming curtains. It is usually used if you need to reduce the length of the curtains without removing them from the curtain rod.
Procedure:
- The curtains are measured. On the wrong side, use chalk to mark to what length the curtains need to be folded. If necessary, trim off the excess.
- They make a bend. The fabric is folded flat and ironed. Fasten with pins. For thick curtains, the material is folded only once. Tulle can be folded in 2-3 layers.
- Perform hemming. The main condition of this method is to leave a thread 2 cm long at the ends, and not thread it to the end, so as not to form a crease.
On a sewing machine
This is the fastest way to hem curtains. Algorithm:
- The fabric is folded and trimmed. Fasten with pins.
- Perform estimates.
- Textiles are sewn on a sewing machine.
- Remove the mark.
- The threads are tied into a knot at the ends.
Using adhesive tape
To bend curtains using this strip, proceed as follows:
- Measure the width of the canvas. This value must correspond to the length of the adhesive strip. If the indicators do not match, the procedure will not work.
- The curtain is folded. To fix the material, heat treatment of the canvas is performed.
- Adhesive tape is inserted into the crack. The top of the fabric is treated with a hot iron.
This method of shortening the length of curtains can only be used for light fabrics. The sticky strip will not support the weight of the dense material.
How to hem tulle to length?
Some tulle models have decorative trim at the bottom - an original pattern, flounces, lace, hemstitching, scallops or weights - weights or a special cord. In these cases, length adjustment can only be done by processing the top. If the bottom of the curtain is ordinary, it can be hemmed in several ways to choose from.
Double hem
This is what tulle looks like, hemmed with a double hem.
This method is the easiest and can be done even by novice craftswomen. It is completely identical to the processing of the sides. The only difference is that the width of the hem in this case is slightly larger. Its value depends on the characteristics of the paintings:
- The standard width of the bottom hem is 5+5 cm.
- In hard fabrics (organza, nylon) it should be at least 3 cm.
- For soft curtains (made of voile, silk, light tulle, cotton), a hem of 2 cm is allowed.
- It is recommended to hem plastic curtains (made of mesh, with stretch thread) by 0.5-1 cm.
If you decide to shorten the curtains manually, without a sewing machine, use a blind seam, when only one thread of the warp is picked up with a needle. It is completely invisible and looks very neat, but is only suitable for a “double hem”.
The next two methods are more difficult to implement. But their result also looks more presentable.
Moscow seam
Tulle processed with Moscow seam (American) and bias tape.
The second name for this seam is American. It is ideal for light, thin materials, looks great on straight cuts and becomes an ideal option for curved cuts, for example, along an arc.
The basic principle of American weaving is a very narrow double hem and seam-to-seam stitching. The finished scar is thin (no more than 2-3mm) and the curtain looks even more airy. The secret lies in special technology. The procedure is as follows:
- The curtain is folded 0.5-1 cm and a line is laid along it as close to the edge as possible. We set the seam pitch to a minimum, no more than 2 mm.
- The excess is carefully trimmed with very sharp scissors. You need to cut as close to the stitch as possible without damaging the seam.
- After the excess fabric is trimmed, the tulle is again turned over to the wrong side and stitched, trying to fit into the already laid line. The first seam remains inside.
Thanks to the Moscow seam, a minimal amount of fabric is spent on the hem, and the bottom of the tulle is light and airy.
How to hem organza tulle if the stitching spoils all their beauty? Very simple. Try a seamless finish using double-sided non-woven adhesive tape: place it in the hem and iron it using the synthetic setting. The tape will stick to the canvas and “seal” it.
Bias tape
Bias tape can be purchased at any sewing supply store. It is usually used for mesh tulle or with embroidery. To sew it neatly, it is better to use a special foot or snail foot. They can also be purchased at the store. In addition, they come included with most sewing machines.
This option is not as complicated as it might seem, since it has been thought out and tested by more than one generation of craftswomen. For clarity, the photo shows thick fabric and a ribbon in a contrasting color. The procedure is as follows:
- The material is cut evenly, ironed, and the processed section is inserted into the bias tape. Experienced craftswomen can do it without basting. Beginner dressmakers are advised to pin the ribbon to the pins every 4-5 cm.
- The stitch is chosen straight in increments of 3-4 mm. The quality of the joints is periodically checked on both sides.
- The product is supported by hands during the sewing process.
Popular articles Garage made from eurofence
The result is a presentable, aesthetic bottom.
Features of cutting and tailoring
Scheme of allowances for bending curtains.
The first step is to inspect the fabric for defects. By doing this right away, you can place the damaged areas where they will not be visible, or completely eliminate them from the cut. If the fabric has creases or wrinkles, you need to iron it. Natural materials must be decatified. To do this, the fabric can be steamed or soaked in water at the temperature recommended for washing this material, and ironed. Be sure to cut the edges of the fabric, they can pull it down.
Then you can cut the fabric. To do this, you need to trim the side sections of the curtains and shorten them to the desired height. You can only cut along longitudinal and transverse threads. You cannot cut out elements of embroidery or rapport. In order to make even cuts, you can use the thread pulling method. That is, make a cut at the required distance from the edge and pull out the thread, and then cut the fabric evenly along the resulting path. This method is not suitable for materials with very thin threads.
Related article: Polystyrene foam or polystyrene foam: which is better, what is the difference
We hem the side sections first. Having measured the required allowance, you must first carefully bend it and then iron it inside out. Then we bend it in half, make a double fold and stitch as close to the edge as possible. After this, you need to iron the sides of the curtain and cool the seam as quickly as possible after the iron with a piece of glass or a board. This is necessary so that the stitching does not tighten the fabric.
Pattern of curtains for the kitchen with eyelets.
At the next stage, we attach the mounting tape. It is usually sewn in two lines; a wide one may require more. If you don't know whether the braid shrinks, you need to steam it first. The first line is to sew the ribbon along the bottom edge to the right side of the fabric. In this case, the upper edge of the braid coincides with the edge of the curtain.
The stitch is laid from the wrong side of the fabric (the tape is under it), maintaining a constant indentation from the cut of the fabric to the foot. There will be no problems with transparent fabric; for opaque fabric, you should make markings using chalk or soap. The stitching is not laid along the braid, but along the fabric due to the fact that many sewing machines sew the material from the bottom. If you sew along the braid, the fabric will bunch up unsightly.
Having stitched to the end, fasten the thread and cut off the mounting tape with an allowance of 1.5 - 2 cm. Carefully bend the tape allowance. We turn it inside out along the bottom edge so that the first line from the outside is not visible. The fold can be ironed. We secure the tape with a stitch on the front side, making markings again.
Next you need to hem the bottom of the curtain. To do this, measure and iron the selected hem allowance. This can be done using a stencil made of thick paper about 30 cm long and the width of the allowance. Fold it in half and iron it again. We attach along the edge of the gateway.
Related article: Do-it-yourself compost pit: options for making a pile, how to make it, photo
Useful tips for hemming curtains
Regardless of the chosen method of folding the curtains, you first need to let them hang freely for several days. This will help the fabric take its natural shape vertically and horizontally. After completing the work of hemming the curtain, do not immediately cut off the excess material. It’s better not to be lazy and sew on the remaining fabric using a hidden seam. This trick will help you adjust the length of the curtains as accurately as possible after washing, since there is a risk that the material may shrink slightly.
Advice. Thin curtain material requires a special approach. It is better to fold it only with adhesive tape, so as not to spoil its presentable appearance. This method is available even to housewives who have no experience in sewing.
After washing, the curtains will finally take their shape, and the hemmed excess can be safely cut off. Professional seamstresses measure the required height from the cornice, securing the material with a basting stitch or using sewing pins. Next, the curtain is removed and the excess fabric strip is cut off from it. It is recommended to iron the seam area well, and only then proceed to hemming.
Using adhesive tape and iron
One of the simplest, and most importantly fastest, ways to shorten curtains is with adhesive tape. It is also called cobweb.
In addition to the curtains themselves, the “gossamer” adhesive tape and the iron, you will also need two pins or needles, a sheet of A4 paper, an ironing board and a damp foam sponge.
Remember that the curtain must hang on the curtain rod overnight, or better yet, for a day, in order to obtain the desired shape.
Take a fabric that best matches the density of the curtains. A piece of 20 by 20 centimeters will be enough. This is necessary in order to make sure that the cobweb sticks and not inadvertently ruin the curtains. When you are sure that the web has completely dried and stuck, sharply tug the edges of the fabric.
If the adhesive tape has peeled off in some places, use several layers of it.
Now let's start shortening the curtains.
- Make sure the fabric is dry and straighten it out. Place duct tape between fold layers. Use pins to secure the folds for convenience.
- To glue the web to the tulle, iron it through a piece of paper for about forty seconds.
- Heat the edges of the seams twice as long.
If you buy a low-quality web, it may come off after a few washes, remember this when choosing a manufacturer.
Important! There should be no water in the iron!
Processing side cuts
If the side edges need processing, then it is better to do a double hem. The edge of the cut is bent by 1.5-2 cm and secured with a straight stitch or a hidden seam. Given the variety of materials, the bend size may vary, either increasing or decreasing.
The procedure was described earlier.
The difficulty of hemming along the grain thread lies in the possible stretching of the fabric. The layer underneath the fold tends to shrink and move when stitched. Therefore, while working, you need to monitor this and adjust the position of the layers in time, as well as slightly stretch the bottom sheet. Fixing the folds along the entire length with pins helps to simplify the work.
The sides can also be finished with edging.
Tips for choosing and sewing curtain tape
Hemming begins with determining the length of the finished product. To measure it more accurately, before cutting the tulle, it is recommended to hang it above the window and leave it for a while so that it takes its final shape.
Threads for all types of tulle are selected thin, No. 40 or less. It is desirable that they match the fabric composition: synthetic, silk, cotton.
The needles must be very sharp, since dull needles pull and tear the delicate fabric.
To properly hem curtains and tulle, before sewing a stitch on a sewing machine, experiment on a small piece of fabric: adjust the thread tension and stitch length. Please note that the seams are laid with a straight stitch with an average stitch length of 2-4 mm.
While sewing, try not to tighten the thread too much, otherwise the thin, delicate fabric may warp.
To ensure an even stitch, hem the tulle with paper. Cut a strip with a width equal to the width of the hem and, placing one side of it against the fold, stitch along the other side.
It is convenient to hem very thin or mesh curtains on tissue paper. After stitching, the paper comes off easily.
The wider the curtain extrafor and the more cords it has, the better the drapery done using tape.
Light translucent fabrics are usually draped 1 to 3, that is, for a 2 m cornice you will need 6 m of tulle and the same amount of curtain tape.
Hemming curtains from voile, tulle or organza yourself is not difficult. This can be done either by machine or by hand. Whatever method you choose, curtains into which you put at least a little personal effort will charge you with energy and fill the atmosphere of your home with beauty and comfort.
How to hem curtains made of light fabrics?
Thin fabrics – chiffon, organza, nylon, which are popularly called “tulle” – create the impression of weightlessness of the window composition. It seems that there is nothing easier than cutting and hemming such a light curtain. However, this work also poses many difficulties.
The nylon fabric slides, so cutting a straight edge is very difficult. It’s good if the tulle is decorated with a simple symmetrical pattern. In this case, you need to fold the curtain in half, matching the fragments of the pattern, and secure it with pins. If the curtain is wider than 3 m, you can fold the fabric into 4 layers and also secure with pins. After this, measure the required length and cut the fabric with sharp scissors, leaving only 1–1.5 cm for hemming.
A curtain without a specific pattern is more difficult to cut. The length is measured in several places, notches are made with chalk or pins, and only after that the excess material is carefully cut off. This is exactly the case when “measure twice, cut once.”
For hemming, two types of seams are used: “Moscow” and “zigzag”.
"Moscow"
The Moscow seam, or “American” in other words, is used for hemming thin fabrics cut along an oblique line. To get this finish, you need to do the following work:
- bend the edge of the fabric by 5 mm and iron it;
- sew the hem, retreating from the edge of the fabric no more than 3 mm;
- cut off excess fabric as close to the stitching as possible;
- bend the material inward one more time by 5 mm;
- lay a line so that it coincides with the already made seam.
If you carry out this processing of the material correctly and carefully, one machine seam will be visible on the front side, and two lines will be visible on the back side.
Zigzag
The zigzag stitch is found on all modern sewing machines; it is usually used to process internal seams. This stitch is also useful when shortening a light curtain.
- Before starting work, you need to determine the optimal width and length of the stitch so that the hem is smooth, beautiful, and the connection is strong.
- The edge of the fabric is folded 1 cm and the fold is fixed with an iron.
- The fold of the fabric is processed with a zigzag.
- Excess tulle is trimmed with small sharp scissors.
Every housewife with minimal experience in sewing can shorten and hem a thick curtain or thin tulle at home. To do this, you don’t need to have a sewing machine; you can do the job by hand. The main thing is desire and patience.
How to hem curtains by hand and by machine?
When hemming curtains, it is better to use a sewing machine. The work will be done much faster and more accurately than by hand. However, you can do without this device and bend the fabric using a regular needle.
To work you need to prepare:
- sharp needle;
- sewing machine;
- scissors;
- measuring tape;
- ruler;
- chalk;
- pins;
- threads in the color of the material.
The first step is to determine how long the new curtains will be. To do this, use a measuring tape to measure the distance from the end of the hinges on the eaves to the floor or window sill and write down the resulting value.
Then you can follow the following instructions:
- The canvas is laid out on a flat hard surface with the wrong side up. It is better to place a cotton sheet under silk or satin fabric to prevent it from slipping.
- Measure the length of the curtain, making chalk marks in three places: on the sides and in the middle of the canvas. Connect the marks made with a straight line using a ruler. The drawn line is the bottom edge of the curtain.
- Step back from the line by the width of the hem and cut off excess material. To hem curtains made of dense fabrics, you need to leave at least 15 cm. When hemming organza or nylon, it is enough to set aside 5–6 cm.
- The fabric is folded along the bottom edge and ironed to secure it. Then the hem is folded inward by 2-3 cm and stitched with a basting stitch or pinned and ironed again from the inside out.
We recommend: How to properly starch knitted and regular napkins?
If you decide to sew by hand, you need to take a needle and threads that match the color, get comfortable, since this task will take more than one hour, and start working. You can use a blind stitch or machine stitch. In the first case, neither the seam nor the threads will be visible. But when doing machine stitching by hand, you need to make sure that the stitches are of equal length and the seam runs in a straight line. Careless work will ruin the appearance of the finished product.
Hemming curtains using a sewing machine is, of course, much faster. Moreover, you can use both a regular machine stitch and various decorative stitches. If the hem is high (more than 5 cm), first sew the side part from the bottom edge of the fabric to the end of the hem. Then turn the fabric 90° and sew the hem, departing 2-3 mm from the top edge. At the end, the material is unrolled again and the side part of the hem is sewn.
The threads remaining at the beginning and end of the line must be tied in pairs with a double knot and cut off, leaving tails of 2–3 mm.
Now all that remains is to steam the bottom of the finished product and hang the new curtain on the cornice.
How to hem to length?
Some curtains have beautiful trim at the bottom - lace, scallops, original patterns. Sometimes weights are inserted into the tulle - a special cord or weights. In this case, the curtain length is adjusted only when processing the upper edge.
If the bottom of the fabric is simple, then it can be hemmed in several ways. The simplest is a double hem, the same as on the sides of the canvas.
The width of the hem is slightly larger than on the sides, and depends on the material of the curtain.
- In rigid fabrics (nylon, organza), the fold width should be at least 3 cm.
- The veil and light tulle can be folded up to 2 cm.
- It is recommended to hem plastic mesh to a width of 1 cm.
More difficult to perform are the Moscow seam (American) or bias tape.
Moscow seam
How to hem organza tulle? A good way is the so-called Moscow seam.
It is performed as follows.
- Fold the edges of the curtains 0.5-1 cm and iron them.
- Perform a straight stitch at a distance of 2-3 mm from the edge of the hem.
- Excess fabric of the hem is cut off at a distance of 2-3 mm from the stitching. The material should not crumble.
- Fold the fabric over again, iron it and stitch it. They try to get into the first line or make a seam at a distance of 1-2 mm from it. In this case, the first seam remains inside the hem.
In this way, a light, airy curtain edge is obtained with minimal material consumption for the hem.
Bias tape
This method is most often used to process embroidered fabric or mesh tulle.
For this you will need a special foot, which comes with your sewing machine. It can also be purchased at sewing stores. A snail foot would also work. The bottom of the curtain is trimmed evenly, ironed and folded when sewing (the edge of the fabric is tucked into the foot).
Bias tape can be purchased at the store. This is an applied tape with pre-fitted allowances; it can serve a decorative function (for example, satin trim). It's easy to sew on.
- Pin the binding to the bottom edge of the tulle with sewing pins.
- Check the joints.
- Sew with a straight stitch.
Bias trim
You can hem the curtain using bias tape or tape cut from a material in a color contrasting with the main fabric. This finishing will emphasize the exclusivity of the product; the main thing is to choose the appropriate edging material.
To process the edge of the fabric with bias tape, you will need a sewing machine and a special foot, which can be bought in stores with sewing equipment. Having measured the required length of the curtain, cut off the excess material along the line, leaving only 5 mm. The edge of the fabric is inserted inside the bias tape and carefully stitched, trying to place the seam as close to the edge of the tape as possible.
Treat the edge of the curtain with edging material as follows:
- An edging strip is cut out from a contrasting color material. The width of the strip depends on the artistic imagination of the craftswoman, but you should not make the edging too wide, otherwise the product will look tasteless.
- The strip of material is folded in half and ironed to secure the fold.
- The upper and lower edges of the strip are folded inward by 1 cm and ironed again.
- The edge of the curtain is inserted between the two layers of edging so that at least 1 cm of the main fabric is inside. Baste and then sew with a machine seam or zigzag.
We recommend: Is it possible to keep artificial flowers at home?
To make the finished product look harmonious, the sides are also trimmed with finishing material.