Published October 23, 2011 at 9:26 pm.
Copyright for the text and photos of this site belongs to the administrator of the site lambrecen.ru.
If you liked the article or master class, you can post part of it on your website subject to the conditions specified on the page: COPYING CONDITIONS.
In this lesson we will talk about installing eyelets on curtains with your own hands.
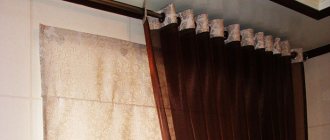
There is no difficulty in installing eyelets as such, and the curtain itself can turn out very nice:
However, novice craftswomen, and even more so customers, do not know that eyelets can be easily installed by hand. And curtain salons do not try to reveal this secret.
The variety of eyelets is very large. They differ in the material from which they are made, in shape, color, and the diameter of the internal hole.
Typically, the eyelets are set to match the tone of the cornice or the material from which the curtains themselves are sewn. Eyelets in the shape of a helm or a dolphin are used for children's curtains in a marine style.
The diameter of the grommet hole should be 1.5-2 cm larger than the diameter of the cornice pipe. This is so that the curtain can move freely along the cornice.
The number of eyelets on the curtain must be even. If the number of eyelets is not even, then its side edges will be directed in different directions from the window, which does not look beautiful.
Before installing the eyelets on the curtain, we sew the curtain itself (curtain, curtain).
The drapery coefficient of curtains on eyelets is 2 - 2.5. In this case there will be beautiful, voluminous folds. This must be taken into account when calculating the required amount of fabric.
We sew the sides of the curtain with a hem seam .
We process the top edge of our curtain as follows: we duplicate the top edge of the curtain with tape under the eyelets, tucking it and the tape twice onto the wrong side, as if making a hem seam, only with the tape inside the seam. Sew along the edge along the length and sides. Iron it. Instead of a grommet tape, you can insert a curtain tape, having first pulled out the tightening laces from it (we don’t need them here).
eyelets
grommets
The distance between the centers of the grommets should be from 15 cm to 22 cm. From the side edge of the curtain to the center of the first grommet, the distance should be 5 - 7 cm. This distance must be made so that the grommet does not fall on the side hem. You should not make a very large distance, otherwise the free end of the curtain will dangle unsightly.
We retreat 2-4 cm from the top edge of the curtain.
How to install eyelets: tools and materials
Eyelets are made of metal and plastic. Metal eyelets are most often used for working with fabrics and leather, while plastic ones are used when working with paper and cardboard.
Each eyelet consists of two parts: the bushing itself and a washer around which the edges of the bushing are clamped during installation.
The grommet size is usually calculated by the internal diameter, i.e. hole diameter. The holes in the material should correspond to this size (or 1-2 mm less for elastic fabrics) and the size of the matrix for installation. The height of the eyelet (height of the leg) is also important. For strong fixation, the height of the legs should be 1-2 mm greater than the thickness of the material.
Large eyelets (above in the photo), fixed with clips, are usually used when sewing light curtains and textile accessories. They consist of two parts: one part has “antennae” - clamps, which can be straightened with simple pliers and a hammer.
How to install grommets using a tool?
To install most eyelets, you will definitely need a tool, which can be either manual or semi-automatic. If you rarely use eyelets and small round eyelets are enough for you, then a hand tool will be quite sufficient. You will need a punch to make a hole in the material and a matrix, which is inserted into the eyelet hole and using a hammer to flare (bend and press) the edge of the eyelet around the flat washer.
You can also purchase special pliers for installing eyelets in sewing accessories stores. The kit usually also includes punches of several sizes.
eyelets, installation
eyelets, installation
You also need to know that the eyelet has an outer and inner diameter:
And so, we mark the holes for the eyelets on the curtain, for this:
Lay out the finished curtain on a flat surface. Marking should be done when the curtain has already been ironed and lies on the cutting table or ironing board, smoothly ironed, without dents or folds.
Mark the position of the outer eyelets. To do this, take the grommet and place it at the desired distance from the top and side edges of the curtain. We make sure that it does not go into the seams. Place a dot exactly in the center of the grommet hole with a simple pencil or fabric marker. We do the same for the other side of the curtain. Please note: the distance that we set back from the top for the first eyelet must be maintained for all other eyelets so that all holes are at the same level.
We calculate the distance between the centers of the eyelets and the number of eyelets we need. To do this, measure the distance between the centers of the marked outer eyelets. In my curtain, the distance between the centers of the outer eyelets was 186 cm. Let's try to make the distance between the eyelets 15 cm.
186 cm: 15 cm=12.4 (eyelets)
That is, we need 12.4 eyelets. We round up to 12 eyelets and calculate the distance between them in this case:
186 cm: 12 (eyelets) = 15.5 cm.
So, we calculated that we need 12 eyelets for our curtain and the distance between them will be 15.5 cm.
Having laid out all the eyelets on our curtain, outlined the inner diameter of each eyelet with a pencil or fabric marker, and cut out the circles we have drawn.
You can cut circles 2-3mm larger than the drawn circle:
<<<SUBSCRIBE TO NEW ARTICLES OF THE SITE>>>
Then we place one part of the eyelet under the curtain, aligning its inner diameter with the cut hole. Cover the other part of the eyelet on top of the fabric and press firmly until it clicks:
<<<SUBSCRIBE TO NEW ARTICLES OF THE SITE>>>
How to choose a mounting option
Much depends on the material from which the fasteners are made:
- Plastic eyelets are easier to install, but can only withstand light loads. If necessary, the inserted plastic fastener can be removed and reused in the future, but it does not secure the material being fastened well and does not prevent the fabric from fraying or deforming.
- Fastenings made of non-ferrous metals are more reliable.
- Fabric, leather or other material made of steel will fix it even better. However, installing steel eyelets with your own hands is the most difficult thing.
Installation of fastenings in the form of eyelets on curtains and curtains is very popular. In this case, a special eyelet tape is used, which is glued to the fabric of the product, making it more rigid. The mounts themselves come in different colors and shapes. These can be stars, hearts, animals, which is especially important when decorating a children's room. A curtain with such decorations can divide a room, for example, into a play area and a work area.
The universal nature of such curtains allows you to attach them either to rings or by threading the curtain rod pipe directly through the eyelets. Curtain eyelets in this online store help create attractive and uniform curtain folds. Moving such curtains along the eaves will not require significant effort even from a child. Moving the curtain gently will increase the lifespan of the fabric: the easier it is to move the curtain, the longer it will last.
When choosing fasteners, pay attention to their sizes. In product markings, the designation L corresponds to the length of the leg, and D to the diameter of the sleeve and ring. The length should be chosen 1-2 mm greater than the thickness of the folded and tightly compressed layers of material that need to be fastened. In addition, you need to take into account the height of the ring. The shorter the bushing and the smaller its diameter, the easier the installation. If you are choosing eyelets for curtains, except for very heavy ones, opt for plastic. Plastic eyelets are also convenient because they glide well over both metal and rope. They can be installed without the use of special tools.
You may also be interested in: Choosing curtains: curtains with grommets
Metal eyelets are widely used as fastening elements or as decoration on various items of clothing and shoes, on belts, bags and many other products. There are special tools and devices that can be used to secure eyelets, but for the most part these are quite expensive devices for factory conditions. For manual installation of eyelets at home, special kits are sold. However, this kit is only suitable for one ring diameter.
Nevertheless, you can install eyelets at home, you just need to be patient and perform the operations carefully. If you are starting to work for the first time, do not rush and be sure to practice on unnecessary pieces of fabric or paper before making the first fastening.
eyelets
Eyelets
That's it, we have installed the eyelets. Now we will hem the bottom edge of the curtain. To do this: measure the height of the curtain from the cornice to the length we need. We set aside this size on our curtain from the upper edge of the inner diameter of the eyelets and add 3-5 cm (more is possible) for processing the bottom of the curtain in the hem .
Iron and hang the curtain on the cornice:
Sometimes the top of the curtain, on which the eyelets are placed, is treated with a different color of fabric. It turns out very beautiful. This is especially true when we do not have enough fabric for the desired curtain height.
Marking and preparing holes
Before installing fasteners, you should mark the product. The eyelets should be installed at intervals to prevent sagging of the material between them. Having placed the inserted grommet in the right place, circle it (the sleeve along the outer edge or the ring along the inner edge).
You may also be interested in: What types of Velcro curtains are there?
Then the holes are prepared. If their diameter is small, the holes can be pierced with an awl. Sometimes a hole punch is used for piercing. To prepare larger holes, punches are used. If there is no suitable tool, you can use a specially made homemade one. To do this, you need to select a tube of a suitable diameter and sharpen one of its edges. The hole should be such that the grommet bushing is inserted tightly, but does not cause tears or deformation of the material. It is convenient to punch holes on a piece of thin rubber or linoleum.
If the holes need to be large, make a cross-shaped cut with scissors and then cut out the excess material. The bushings should be inserted from the front side, and the rings should be put on from the back. The installation of plastic fasteners ends here.
Video of installing plastic eyelets with your own hands:
How to install iron eyelets at home?
Required materials:
- grommet;
- punch (scissors);
- bearing ball (bolt or screw with a rounded head);
- hammer.
At home, a lot of patience and perseverance is required if you want to achieve an ideal result. Installation work is carried out on a wooden surface. If the surface is too hard, the part may become deformed upon impact. To accurately and accurately punch holes, use a punch. If it is smaller than necessary, make several holes to obtain the desired hole. If you don’t have a punch, you can sharpen a metal tube of a suitable diameter yourself. As a last resort, cut the holes with scissors.
Having made the necessary holes, we install the eyelets. To do this, you need to take a bearing whose diameter will be slightly larger than the tubular part of the part. If there is none, look at a bolt or screw with a round head. After inserting the block and closing it with a ring, we place the bearing on top. To ensure that the part does not change shape upon impact, hold the hammer at 90º and apply a little force. We make a couple of small blows and see the result.
Adviсe:
- metal eyelets with a low leg are easier to install than with a high one;
- eyelets made of stainless non-ferrous metals are more convenient to install; they are softer;
- when installed on an iron surface, there is a risk of deformation of the grommet surface;
- can be installed on a lead plate; if it becomes deformed, treat the surface with a gas torch, and it will again become perfectly flat.
