If you are a member of the community of retro gamers or retro computer enthusiasts, then you probably have vintage devices that have faded and began to turn yellow under the yoke of age. You may also have heard about the Retr0bright technique or even watched various videos from the 8-bit Guy on this topic. But the essence still remains hidden for most people. Why does plastic turn yellow, and what exactly happens during the Retr0bright process? And in general, is it safe to use this technique for collectible items?
Translator's note:
the possibility of bleaching yellowed plastic products with a solution of hydrogen peroxide was accidentally discovered at the German CBM Museum in 2008. Subsequently, based on this discovery, British chemists developed a more effective whitening composition, the original recipe of which is given at the end of the article along with a link to the source and additional information.
I consulted Professor James E. Pickett, a chemist working in the field of polymer degradation, who provided me with chemical reaction schemes. To understand the Retr0bright process, you first need to understand exactly how plastic breaks down and why it turns yellow. If the chemical background does not interest you, then you can immediately turn to the conclusions in the final part.
Part I. Malicious butadiene
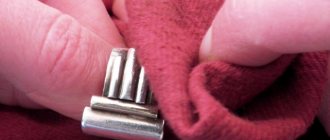
The plastic most often used in the production of old computers was ABS, which is known for its tendency to yellow over just a few years.
Most plastics, including ABS, degrade when exposed to heat and light in the presence of oxygen. This effect is called thermal oxidation and photo-oxidation, respectively. Therefore, it is recommended to store plastic products in a cool, dark place. But this is not a salvation, and later I will explain why. ABS plastic is made up of three main components: acrylonitrile, butadiene and styrene (see Figure 1). We are interested in butadiene and styrene, since acrylonitrile does not actively participate in yellowing or the Retr0bright process.
Rice.
1. Basic structure of ABS. The hexagon is a benzene molecule. Source: [1] In the presence of heat or high-energy light, oxygen molecules attack ABS plastic.
This process is shown in Fig. 2 below. Fig.2 Oxidation of the butadiene molecule.
The wavy lines indicate the rest of the chain. From carbon atoms located next to double bonds, hydrogen is separated more easily, so oxygen penetrates here [8].
As a result, an unstable chemical compound, hydroperoxide, is formed (also shown in Fig. 2). One of the oxygen atoms in the hydroperoxide molecule decides that it is too crowded here and pushes out the neighboring oxygen and hydrogen atoms (Fig. 3). Fig.3
The freed -OH group is called a radical. At the moment, he is not tied to anything and is in free flight - a free radical. Further, to find shelter, it acts as a parasite in the styrene group [5,7]. This long, malicious process of introduction into a poor styrene molecule occurs in several stages, which are shown in Fig. 4.
Fig. 4
After the introduction of the radical, the styrene group is cleaved, forming a nondescript yellow compound called 2-hydroxymuconic acid or simply muconic acid. The yellow color is formed due to the so-called conjugation bonds. A conjugated system is any material with an alternating set of single and double bonds (Fig. 5).
Rice.
5. Pairing example. Conjugated bonds are highlighted in red. Source: [3] In Fig.
4 we see that in muconic acid many double bonds alternate with single ones. Without conjugation, the chemical component does not absorb visible light well enough and appears white to us because all colors are reflected. If conjugation is present, then the chemical component absorbs several colors of the visible spectrum. In the case we are considering, muconic acid absorbs blue and violet light, reflecting the yellow and red spectrum, which presents this nondescript shade of yellow to our eyes. But that's not all!
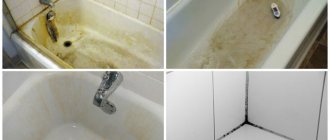
How and with what to clean the refrigerator from yellowness inside and outside
Everyone knows that one of the most important household appliances in the kitchen is undoubtedly the refrigerator. This electrical appliance must always be perfectly clean, since it is in it that all the food products consumed by your family every day are stored. It is very important not only to thoroughly clean the unit inside and out, but also to protect the products from exposure to various chemicals.
Learn from this article with video simple secrets on how to clean the refrigerator from unpleasant yellowness using available folk remedies effectively, quickly, and most importantly - safely.
Part II. Transformers
Muconic acid molecules are like insidious shape-shifting Decepticons.
They can exist in many forms, but for this process the two most important are the cis, cis form and the trans, trans form (Fig. 5). Rice. 6. Two forms of muconic acid: cis, cis-on the left and trans, trans-on the right
As you may remember from your biology curriculum, the cis and trans forms are isomers of each other. This means that they have the same chemical formula but different structures. Under certain conditions, muconic acid isomers can change from one form to another. This is very important, since the trans forms are more thermally stable and participate more actively in the yellowing process [4,7].
The tendency of muconic acid to change shape causes the plastic to gradually turn yellow, even in dark places. For example, a plastic box under the bed or a container in the closet. To reverse this yellowing process, you can simply place such a container on a sunny windowsill for a few hours. In this case, it is advisable to protect it from direct rays with glass in order to exclude UV exposure, which will cause additional damage to the structure. The essence of this method is that sunlight promotes the active conversion of the trans form back to the cis form [6, 10].
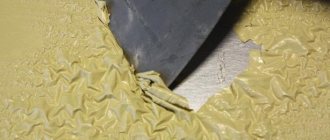
Dish detergent or laundry soap
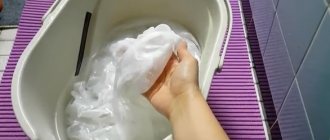
Yellowness from grease and soot can be washed off with dishwashing detergents or laundry soap.
This method will help get rid of yellowness caused by old fatty deposits or soot. To do this, just lather a sponge, soft brush or napkin with detergent or laundry soap and thoroughly rub the yellowed surface. Let stand for 10-15 minutes, rinse thoroughly and wipe with a dry towel.
Such cleaning of fatty deposits and dirt must be carried out before all subsequent bleaching methods!
Part III. Nintendo history?
The question has been raised in the retro computer community about whether flame retardants, particularly BFRs (brominated flame retardants), cause yellowing.
There is a possibility that this assumption originated at Nintendo, but I was unable to confirm this. The short answer is, “Yes, BFRs cause yellowing.” Brominated flame retardants can be cleaved to form conjugated chains with double bonds that are involved in the yellowing process. However, the amount of BFR relative to the total volume of plastic is small and the effect is therefore very small.
Rice.
7. Example of brominated flame retardant and its structure But BFRs can cause yellowing through another mechanism. Similar to butadiene, BFRs are also attacked by oxygen to produce free radicals, which then attack the styrene chains, causing the breakdown of styrene. This confirms that BFRs contribute to yellowing, but not in the way many assume.
Cleaning plastic windows and window sills
Window sills and windows have a strong structure and are not related to food products. They can be cleaned using any of the above methods. However, when treating surfaces in the nursery or bedroom, open the windows wide, take the child away while cleaning and be sure to ventilate the room.
Cleaning plastic windows
Part IV. Loss of strength and brittleness
UV light weakens ABS and other similar types of plastic, as stated in many scientific works [5,8,9]. Oxidation and destruction of butadiene groups plays a major role in this process, and oxidation of styrene contributes to even greater weakening. Butadiene groups undergo two processes: cross-conjugation and scission [2]. Breaking is the direct separation of the butadiene bond - like cutting a string - which naturally weakens the strength of the plastic. Cross-conjugation (Figure 6) increases the molecular density and rigidity of the plastic because it bonds the butadiene groups together. This, in turn, makes the plastic more fragile, which is used intentionally in some other varieties [8]. Oddly enough, such hard plastic is also fragile and breaks easily. (ABS assumes a certain flexibility, which, like rubber, is given by butadiene).
Rice.
8 Cross-conjugation of butadiene groups In Fig. Figure 8 shows three series of different cross-coupling reactions. The same thing happens in all of them: the binding of butadiene groups.
The good news is that only the top layers of plastic should be damaged by UV light. The inner layers remain unaffected, unless technological errors were made during the production of plastic. In this case, the oxidation process can spread everywhere.
Part V. Retrobright
I think many of you are already waiting for the most important thing - a description of the Retr0bright technique.
I won’t languish any longer. There are many examples online of bleaching plastic using hydrogen peroxide and heat or UV light, and sometimes ozone. If you know how oxidizing agents and peroxide work (hint: they add oxygen), you might be thinking, “Wait a minute! The Retr0bright procedure is eerily similar to the process of breaking down plastic - it causes oxidation!” You are absolutely right, but that's not all. The Retr0bright technique involves an additional oxidation step. Contrary to popular belief, Retr0bright does not correct plastic, but simply whitens it. There is even a video where plastic is bleached using chlorine. Just don't try to repeat this at home!
The action of most bleaches involves attacking double bonds and their oxidation to single ones [3]. In Fig. Figure 9 shows how this happens.
Rice.
9. This is how bleach works, in this case chlorine. Source: [3] Here, double bonds are “stolen” by -OH groups (oxygen and hydrogen) and -Cl groups (chlorine). The same principle can be applied to our culprit of all the action: muconic acid. This way we will understand how Retr0bright helps to whiten it: it removes yellowing-causing double bonds by oxidizing them and simplifying them to single bonds. In this case, only -OH groups are involved in the Retr0bright process, because chlorine does not contain hydrogen peroxide. However, the overall chemical reaction is not entirely clear, since peroxide can break down muconic acid into several smaller chemical compounds.
Another hotly debated question is: “Is it worth using Retr0bright at all?” Many have repeatedly written on forums that Retr0bright makes plastic more fragile. I note that its composition should only affect the top layer of ABS plastic, that is, it will not cause much harm to undamaged plastic. But if there are cracks or chips, peroxide can get into them and cause internal damage to the plastic structure. This means that using Retr0bright on a material with poor surface integrity will only make the situation worse.
Preparation for bleaching surfaces
You should not immediately start work without learning the nuances of cleaning, otherwise you may not get a good result. First you need to prepare the yellowed surface. How to effectively bleach plastic from yellowness:
- Household chemicals. First you need to clean the areas from old grease, dust and other contaminants. It is better to do this with a mild detergent, such as dishwashing gel.
- Sponges and rags. You cannot use any brushes (especially metal ones) to remove stains on the handles of a refrigerator, stove, or microwave oven, otherwise the surface will be severely scratched. You should give preference to a melamine or regular sponge.
- Special napkins. In household chemical stores, you can find wipes that are already impregnated with a gentle whitening agent. You can even use them for electronics without fear of damage.
Note! Before you remove yellowness and dirt from plastic, you will have to remove the curtains, remove indoor flowers and decor that interfere with cleaning. You need to work only in protective equipment to avoid an allergic reaction.
Recipe Retr0bright
WARNING!!!
Please note that hydrogen peroxide is a corrosive agent and, if handled carelessly, can cause serious chemical burns to the skin, as well as blinding if it gets into the eyes. If you decide to do this experiment, it is highly recommended to use glasses and gloves.
Merlin's original recipe
To prepare the magic mixture “Retr0bright” you will need:
- 500 ml of hydrogen peroxide with a concentration of 10 to 15%;
- 2 heaped tablespoons xanthan gum (available in health food stores and online);
- 1 teaspoon glycerin (sold at the pharmacy);
- 1/4 teaspoon Oxy laundry booster.
Add the hydrogen peroxide and gum to the blender and blend on high speed for 5 seconds. Add glycerin and stir for another 5 seconds. Let the mixture sit for about a minute, then stir again for 5 seconds. The result should be a thick gel that can be placed in a dark container (such as a coffee can covered with dark film) for storage. Just DO NOT add Oxy until you are ready to use this gel.
To use the mixture, mix the final component into it and apply it to the part, then place the part in sunlight for several hours. This procedure can be repeated.
Here is the experimental result of whitening a Commodore 64. The process was carried out in several stages and took a total of 8 hours:
Translator's note:
The original recipe is described here, for which there are two alternative options given on the main site. The authors separately warn that the responsibility for using your own ingredients and introducing technological improvements to the process falls entirely on you.
PS from the editors of RUVDS
This article came to us in an unusual way, and one might even say that it found us on its own.
When translating a series of two articles (Restoring and Upgrading the BBC Micro and Upgrading the BBC Master) dedicated to the restoration of retro electronics, we contacted the author and asked him some questions, including from user comments. In response to one of these comments, the author kindly sent us a pdf file with the original article that you read today. And since many are interested not so much in the chemical background of all these processes, but in the recipe for the miracle cure itself, it was decided to refine and supplement the material. List of sources
[1] ABS suppliers. (2021). Acrylonitrile Butadiene Styrene; Chemical Retrieval on the Web. polymerdatabase.com/Polymer%20Brands/ASB.html [2] Adeniyi, J. B. (1984). Clarification and discussion of chemical transformations involved in thermal and photo-oxidative degradation of ABS. European Polymer Journal, 20(3), 291–299. doi.org/10.1016/0014-3057(84)90050-8 [3] Ashenhurst, J. (2016, September 8). Conjugation and color(+ how bleach works). Master Organic Chemistry. www.masterorganicchemistry.com/2016/09/08/conjugation_and_color [4] Khalil, I., Quintens, G., Junkers, T., & Dusselier, M. (2020). Muconic acid isomers as platform chemicals and monomers in the biobased economy. Green Chemistry, 22(5), 1517–1541. doi.org/10.1039/C9GC04161C [5] Kulich, D. M., & Gaggar, S. K. (1996). Weathering of acrylonitrile-butadiene-styrene plastics: Compositional effects on impact and color. In Polymer Durability (Vol. 249, pp. 483–501). American Chemical Society. doi.org/10.1021/ba-1996-0249.ch031 [6] Pickett, J. E. (2004). Reversible post-exposure yellowing of weathered polymers. Polymer Degradation and Stability, 85(1), 681–687. doi.org/10.1016/j.polymdegradstab.2004.03.008 [7] Searle, N. D., Maecker, N. L., & Crewdson, L. F. E. (1989). Wavelength sensitivity of acrylonitrile–butadiene–styrene. Journal of Polymer Science Part A: Polymer Chemistry, 27(4), 1341–1357. doi.org/10.1002/pola.1989.080270418 [8] Tiganis, B. E., Burn, L. S., Davis, P., & Hill, A. J. (2002). Thermal degradation of acrylonitrile–butadiene–styrene (Abs) blends. Polymer Degradation and Stability, 76(3), 425–434. doi.org/10.1016/S0141-3910(02)00045-9 [9] Tiganis, B., Davis, P., Burn, L., & Gotama, J. (2002). The Mechanism Of Photo-Oxidative Degradation Of Acrylonitrile-Butadiene-Styrene (Abs) Resins Used In Pipes. www.irbnet.de/daten/iconda/CIB9222.pdf [10] Wyzgoski, M. G. (1976). Effects of oven aging on ABS, poly(Acrylonitrile-butadiene-styrene). Polymer Engineering & Science, 16(4), 265–269. doi.org/10.1002/pen.760160408
How to clean a refrigerator from yellowness
Yellowed household appliances cause aesthetic inconvenience to any housewife, so you have to look for ways and means to clean the inside of the refrigerator from yellowness, and what means to clean it from the outside.
This problem appears as a result of irregular maintenance of the device, and timely preventive cleaning is the easiest and most correct way to combat yellowness. However, if signs of discoloration have already appeared, do not despair - just use one of the tips below and wash your device white.
Important: under no circumstances use hard sponges, brushes or scrapers when cleaning the refrigerator - they can leave abrasions and scratches on the elements of the electrical appliance.
Dish gel
You can wash off yellow stains caused by grease deposits using a simple dishwashing liquid that you always have on hand. To do this, dilute a sufficient amount of detergent in a bowl of hot water, lather it and carefully wipe all surfaces inside the refrigerator, as well as those outside. Then go over them several times with a damp, clean sponge to remove any soap residue. Do not close the door until completely dry.
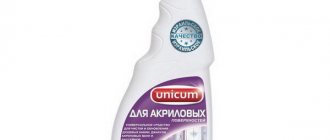
Special product for cleaning the surface of the stove
You can wash the outside of a steel refrigerator with a special liquid cleaner for stoves. To do this, first soak old stains of grease and dirt on the surface of the device with soapy water and give them time to dry off. After this, apply a little stove detergent to a soft sponge and gently wipe all dirty areas of the appliance with it. Then remove any remaining chemicals with a microfiber cloth soaked in warm water and wipe the unit dry with paper towels.
Soap solution
A mixture of liquid soap diluted in sufficiently hot water will help to effectively clean the inside of the refrigerator. Using a washcloth soaked in the prepared solution, treat the entire internal surface of the unit, paying special attention to the corners and folds of the seal. After finishing cleaning, rinse the plastic from soap and wipe it dry with a cloth.
Baking soda
Dilute the substance powder with clean filtered water to the consistency of thick fermented baked milk. Soak a piece of gauze cloth folded several times in this solution, and then apply it to the yellowed stain for about half an hour so that the product has time to act. After the specified period of time, carefully wipe the contaminated areas and then rinse them clean with water.
Apple cider
Surprisingly, you can scrub off yellowness with this apple drink. To do this, in a small basin, combine one liter of filtered liquid heated to a warm state with a glass of cider and, after moistening a rag in the mixture, thoroughly wipe all surfaces and shelves inside the refrigerator with it. Following this, rinse the household appliance with clean water and then wipe it dry.
Laundry soap
Laundry soap is perhaps one of the most gentle ways to combat yellowing of plastic surfaces, but it will only help if the cause of the yellowness is a greasy coating.
Grate half of the entire piece on a coarse grater, dissolve the resulting shavings in warm water, and apply the resulting composition to the entire internal surface of the device with a soft brush. Leave it for at least thirty minutes for best results. After half an hour, rinse off the soap with clean liquid and wipe the device dry with a terry cloth.
Toothpaste
Ordinary toothpaste will help in removing yellowing from the inside of plastic; due to its abrasive properties, it does an excellent job of cleaning various surfaces without causing cracks or scratches. The principle of its use is simple - squeeze a little product from the tube onto a washcloth and wipe the plastic elements of the refrigerator. Then you need to rinse everything with clean water. After completing this procedure, you will notice that the internal walls of the unit, its trays and containers have not only become much whiter, but also acquired a pleasant smell and shine.
Ammonia
This substance perfectly removes yellowness and mold in the refrigerator. It is necessary to moisten the stains generously with alcohol and leave for half an hour. Then rinse the plastic elements thoroughly with water. If the result is not satisfactory, repeat the procedure again.
Tip: for the best effect, try using ammonia along with toothpaste, adding a few drops of alcohol to the cleaning agent. The surface should be treated with the composition, washed and dried.
Medical alcohol
Ethanol is a very powerful agent for removing yellow stains from interior surfaces, so it should be handled with extreme caution. Take a cotton pad, soak it generously in medical alcohol and wipe all contaminated areas. Then rinse the refrigerator clean with water and blot dry with a cloth or paper towels.
Important: when working with ethanol, be sure to wear latex gloves, which can be bought at any pharmacy, and open a window in the kitchen to ventilate the room well.
Vinegar essence
Vinegar can also remove the yellowness on the inside of the device, but not the usual 9%, but 70-80% essence. To do this, soak a clean cotton rag or soft sponge in acid and wipe the yellowed areas. Give the product a couple of minutes to work, and then wash all surfaces with plain water.
Hydrogen peroxide
If the pollution turns out to be neglected, then a more aggressive remedy will come to the rescue, namely hydrogen peroxide. Wet a cotton pad with this substance, apply it to the surface prepared for cleaning at least three times, constantly changing pads, then rinse the plastic area with clean water. Wipe the inside of the refrigerator until it is crystal white, wipe it dry, and then let it air for a while.
Tip: if the stain is very yellow, you can dilute a small amount of any stain remover in peroxide.
Lemon juice or citric acid
To remove yellowing from the inside of an electrical appliance, take advantage of the cleaning properties of the popular citrus fruit. To do this, dilute the juice of half a lemon or two tablespoons of lemon powder in 0.5 liters of warm water. Dampen a soft sponge in the solution and treat all internal surfaces, as well as shelves. Then wipe everything dry with a clean cloth and lightly ventilate the unit.
With these easy-to-follow instructions, you can ensure that your refrigerator always shines white and crystal clean. But the main thing in caring for such an important household appliance is periodic light cleaning with washing of the internal and external surfaces. This will be an excellent prevention of unsightly yellowing of its elements.
Did you like the article? Save it to your Pinterest! Hover over the image and click “Save.”