What are the options for attaching a canopy to a crib?
There are several options for attaching a canopy to a crib:
- Wall mounted. Using a special device, the canopy is attached directly to the wall above the crib. The advantage of this option is the ability to choose a canopy of any length, but the disadvantage is the difficulty of further moving the crib to a new location.
- Floor-standing. The structure is mounted and installed on the floor. The advantage is the ability to move the fastening to any place, but the disadvantage is the relative instability of the structure.
- Ceiling. It looks very nice, but if necessary, it is quite problematic to move it to a new place.
- Bed. The most optimal option, such a canopy mount is very convenient to install, and if necessary, moving the crib to a new place does not cause any additional problems.
How to attach a canopy to a wall
Thanks to this look, you can arrange a canopy of any length. We connect all the parts of the structure and install the necessary fasteners on it. Then adjust the height and mount it into the wall. Straighten the fabric so that it evenly covers the crib.
How to Install a Floor Mount Canopy
If the location of your child’s crib can change, then it is better to choose this lightweight option, since the structure can be easily moved if necessary. Installing such a mount will not be difficult. It is necessary to lay out all the parts carefully on the floor and connect them together according to the instructions. Fasten the two parts of the rod and insert it into the armhole on the stand (it acts as a base), then fasten the supporting part and the oval or round holder. Determine and set the height of the mechanism. Now hang the canopy and straighten the folds beautifully.
How to hang a canopy with a ceiling mount
The canopy attached to the ceiling is distinguished by its originality and beauty. Parents very often choose this type of fastener for their children’s rooms. This idea often appeals to older children who want to be inspired by the heroes of fairy tales. The support is securely fixed to the ceiling with special bolts, to which access will be limited and a child will not be able to loosen them.
Installation procedure
- Choose a place where the bed will be placed.
- Then, make a mark on the ceiling where the holder will be. The cornice can be a metal strip secured with screws.
- The canopy can be secured in different ways: with hooks, braid or Velcro.
- To cover the attachment point, use ribbons, additional fabric, or make other fashionable and exclusive decor.
With this type of attachment, the length of the curtain is quite large; it can be adjusted using various bows, ribbons, etc. The child will be very happy with such a canopy, because it will resemble a magic house.
The metal strip should be attached so that it touches the wall.
How to attach a canopy with a bed bracket
Before assembling the canopy mount, you should decide on its installation location. Then everything is done in the following sequence:
- The tripod tubes are attached to one another if necessary.
- The fastening ring is separated (if provided for by the design) and the fabric of the product is threaded onto it. If the ring is solid, then the fabric is attached using Velcro or tape.
- The ends of the top of the holder are then attached to the tripod.
- The tripod is fixed in the desired place on the crib using special fasteners, all screws are firmly tightened.
- All connections are closed with special plugs.
- The fabric curtain is spread out along the edges of the crib.
- All elements are tested for strength to avoid the structure falling on a sleeping baby.
Decorative design
For decoration, choose ribbons, beads, and make bows from contrasting fabric. Soft children's toys are often sewn on to entertain the baby. You can often find canopies with lighting and beautiful garlands, reminiscent of a house.
It is important not to sew beads or buttons low so that the child cannot reach them. Do not forget that the cover on the cradle should be, first of all, safe
Canopy Features
The products presented in the store do not always meet the necessary requirements, so mothers decide to sew a canopy themselves.
Decorative decoration is made from ribbons and bows.
A few highlights:
- It is better to buy material with a reserve to make beautiful folds;
- It is not necessary to use expensive fabric with a print - you can even decorate a canopy made of white organza by embroidering it with lace and frills.
The crib cover should match the interior, but what is more important is how the baby feels. Older children tend to help their parents choose materials - this cannot be ignored.
Design nuances for different types of furniture
Canopies are built over various pieces of furniture - single, single, double, bunk beds, sofa, house crib.
For a bunk bed
The canopy for a “two-story” structure, an attic, is usually attached to the sides of the upper tier. The drapery hides only the lower “floor”. Less common are canopies from the ceiling to the floor - then both the upper and lower bunks are covered with fabric.
Such canvases are distinguished by their tenderness, diffuse light well, but at the same time give a feeling of privacy.
For a double bed
For a double bed, a very voluminous canopy is made. Usually it is mounted on a frame that is integral with the bed. Options for a round or square ceiling cornice look good - the material seems to “flow” from the ceiling itself.
An elegant round bed with a transparent canopy looks especially gentle in the interior.
On a bed-house
A kind of “house” is obtained if you build a frame of the appropriate shape - when viewed from the end, it is pentagonal. Most often, the fabric is simply thrown over it or secured to the central crossbar. Less commonly, the upper part is sewn separately; four separate draperies are attached to its lower edge, tied with cords to the corner supports.
Chic Bedroom Interior Design Ideas
Furniture with a canopy will transform any interior, give it originality and will definitely attract the attention of guests. Since the bedroom is intended for relaxation, it is recommended to decorate it in light colors that are pleasing to the eye and help normalize the mental background
A snow-white room will become a stronghold of purity, harmony and tranquility. To prevent decoration and furniture from merging with each other, you should combine different shades and dilute them with gray tones. Black details, such as pillows on the bed, are suitable for adding color accents.
The round model, located in the center of the room, is a luxurious option for large rooms. It can be placed on the carpet or directly on the floor covering. To effectively fit a piece of furniture into the interior, it is recommended to select bedspreads, curtains and other elements with similar patterns and colors, and the best solution would be a plain canopy. Otherwise, there will be too many details in the design of the room.
Despite the popular belief that a canopy is appropriate only in large apartments, it is also suitable for a small room. A typical example is a narrow children's room. Placing the bed against the wall saves space; curtains are attached to the wall or ceiling; they can cover the sleeping area either completely or halfway. For canopies, choose bright fabrics decorated with checks, patterns or contrasting details - this will make the nursery look bright and lively.
A canopy made of individual flaps falling at a considerable distance from the piece of furniture will create the feeling of a sphere, a separately fenced off room. The light from the night light, leaking through the curtains, will be scattered in an original way, and the visible silhouette of the bed will create an atmosphere of mystery and mystery. This option is suitable for a bedroom in the Art Nouveau style and other modern interiors. Preference is given to plain surfaces, bedspreads and coverings; contrasting details may be present.
A frame made from logs will complement a room in Provence or country style. A reference to rustic motifs is associated with coziness and comfort, making being in the room more pleasant. Textile bedspreads and pillows are made in neutral colors, wooden elements remain untreated.
Features of fastening the canopy
A canopy can be attached in a variety of ways. Everyone has the right to determine what is most convenient for themselves by presenting the final result. The choice is made with an emphasis on where the crib is located, what function the product performs, its size, the need to move it and how to implement this, and so on. Those. There are a lot of factors that need to be taken into account. Below we will consider which mounting options are the most popular.
There are several options for attaching a canopy.
At the head of the bed
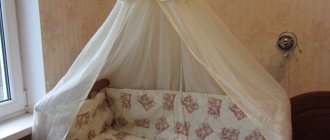
A popular method because it takes into account the ability to move the child's bed. The holder is attached to a special bracket at the headboard. The body of the crib acts as a place for fixing the base of the holder. During sleep, the curtains can be moved, let them run along the opposite side (towards the feet). While awake, do the opposite - push it apart.
Mounting at the head allows you to vary the location of the canopy.
Centered
This method assumes the presence of a holder and the ability to fix it to the cornice. Allows you to place the canopy in the shape of a dome, enveloping the entire crib gracefully. Holders can vary, as can the methods for attaching the edges of the canopy (for example, clothespins, rings, loops, hooks, etc.).
All around the perimeter
An equally popular method, sometimes more practical, but to implement it you will need to bother with the placement of the holder. Let's look at the two options that are available when choosing this method:
Fixing the supports to the crib body
Externally it looks like 4 slats placed in the corners. At the top, 4 more horizontal slats are attached between them, forming a rectangular holder frame.
Slats are attached to the bed frame, forming a rectangle.
To the ceiling
The scheme is similar to the previous one, but this fastening does not require the presence of supports. Those. The holder frame is suspended from the ceiling above the crib. On the one hand, it looks more elegant, on the other hand, it complicates the process of moving the bed.
Support rails are rectangular, square, round. And the jumpers are even curly.
On a stand
This is a popular way to hang a canopy. It consists in the fact that the support of the holder is not attached to the bed, but is held in place by a footrest. This simplifies the installation process, minimizing any time wasted. If necessary, the stand can be moved freely to wherever it is needed.
Under the clouds
You don’t even have to stick to any one stylistic decision, but play with designs and colors, creating something original. So, you can take a risk by taking a canopy from one style and adding it to another. Eclecticism is a great way to bring everything together in an interesting way. There are also many ways to hang curtains. They do not need to be covered on all sides and they do not have to hang in any particular way. There is no better sight than the thin but noticeable cloud before one's eyes before one falls asleep. A tempting and romantic idea that is easy to implement.
We put the canopy on the holder
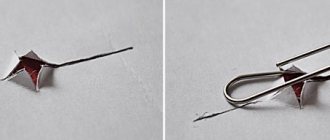
The already sewn canopy has special pockets in its canopies for the tendrils of the aluminum loop. Usually there are two of them and there is a small distance between them. Carefully placing the canopy fabric over the tendrils of the loop will create beautifully cascading waves. Only now the resulting structure is fixed to the holder with a screw, which must be tightened tightly. If you did everything in accordance with the attached instructions, the curtains will decorate the playpen and perform all the functions assigned to them.
DIY canopy holder
Classic on four legs
Making a canopy consists of several stages: calculating fabric and other materials, sewing the cape, assembling the frame, securing the frame and fixing the canopy itself. The classic version is considered the most common, but not the easiest to manufacture. A few nuances of homemade device creation:
- for work you will need 4 racks in the height of the ceiling, blanks for the frame frame, fasteners, wood glue, dowels, fabric, as well as decor for hiding corners;
- the parts of the frame and racks are connected according to the principle of the tenons entering the grooves;
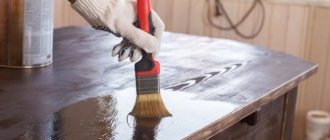
- if the structure is made of wood, it is coated with protective varnish;
- when installing the product, the racks must be in contact with the corners of the bed;
- the fabrics are thrown over the crossbars and draped beautifully.
The canopy can be sewn in one piece and secured over the entire frame frame, or it can also be made separate: sew a separate cape for each side of the frame.
On a horizontal bar
This fastening method is considered one of the simplest, because only one piece of metal pipe is taken as the basis. It is fixed horizontally in the center of the bed so that a wide strip of fabric can be threaded through the rod. The simplicity of the design does not in any way reduce its aesthetic and practical performance. Several rules for making such a canopy:
- at a height of 2 meters from the bed near the ceiling, a rod is screwed into the wall - it must be secured with reliable fasteners: screws, hangers or self-tapping screws with dowels;
- the length of the rod should be equal to the width of the bed;
- Decorative tips are placed on the free edges of the rod: this is done not only for decoration, but also to ensure that the curtain does not slip out of the pipe;
- By pulling the cord through the bar, the length of two wide strips is measured. After this, calculations are made: 5 cm is added to the resulting length, as well as another 3 cm for the drawstring;
- the width of the strip should be twice the width of the rod to create a beautiful drapery;
- two strips are sewn into one and stretched over a horizontal bar or hung on it by loops.
How to attach a ceiling cornice to a mounted stretch ceiling
Often, in order to make changes to the finished structure, installers insist on dismantling and reinstalling the canvas. Sometimes they require replacing it completely. Depending on the product configuration, such work costs customers from several thousand to several tens of thousands.
For those who want to save money, we will tell you how to do everything yourself, without damaging the film and with a minimum budget.
Wall mounting with brackets
This option is suitable if you need to attach a baguette at a distance of 10-15 cm from the wall. You can use ready-made fasteners or make it yourself. Factory products are used for installing massive heavy curtains. Due to the stiffening ribs, they can withstand heavy loads. If local stores do not offer such products, you can make them yourself. But it’s better to hang light tulles on homemade corners. We will tell you in detail how to screw a cornice to a suspended ceiling using them.
The brackets can be made from steel strip 4x30 or 4x40:
- Cut strips of the same size. To calculate their length, you need to add 15 cm to the distance from the wall to the far edge of the baguette.
- Use a grinder or sharpening machine to round off the sharp edges.
- We clamp the workpiece in a vice to a depth of 15 cm and with energetic blows of a hammer at the jaws of the vice we bend it 90 degrees.
- We drill a hole in the long shelf for a screw at a distance from the edge equal to half the width of the baguette. We countersink it into a countersunk hole.
- In the short shelf of the corner we drill one hole for self-tapping screws, at a distance of 4 cm from the free edge and fold.
- We degrease the finished product and coat it with paint that matches the color of the interior.
First, we fasten the brackets to the cornice with countersunk screws so that the nuts are on the bottom side. Depending on the weight of the curtain, we install the corners at a distance of 30-50 cm from each other. We check that there are no protruding sharp edges that could damage the canvas.
We place the finished structure against the ceiling and make marks on the wall for the brackets. We drill holes with a hammer drill and fasten the assembled product. This approach allows you to hang curtains without damaging the film. This makes it possible to maintain the manufacturer's warranty.
Fastening to the floor slab
When curtains need to be hung far from the wall, the corners sag. Therefore, direct fastening is used, which is performed in the following sequence:
- We mark the axis and attachment points of the baguette on the canvas with a simple pencil.
- Glue thermal rings in the designated places. Their diameter should be slightly less than the width of the baguette tire. It is important to avoid getting glue on your fingers. It will prevent the ring from being glued smoothly and will leave marks on the surface. If your hands are dirty, it is better to wash them and take a new thermal ring.
- When the glue dries, cut a hole in the canvas along the inner diameter.
- We are preparing mortgages for the cornice in the suspended ceiling. Their role is played by plastic sewer or polypropylene water pipes. It is better to choose the maximum diameter that will fit freely into the hole of the thermal ring. The length of such a sleeve is equal to the distance from the overlap to the front surface of the film. Please note that due to unevenness of the slabs, their size may vary.
- We fasten the baguette to the ceiling with anchors or long self-tapping screws. We insert the dowel-sleeve into the pre-drilled hole, put a pipe embedding on it, press the guide and screw the entire structure with a dowel-nail. We select the length of the dowel so that it passes through the ceiling space and goes 3-4 cm deep into the ceiling.
Read also Description of nozzles for pastry bag
You will find visual instructions for the process in the video.
It is important to understand that with such an installation you violate the integrity of the product. Therefore, in the future, the installer may deny you a warranty.
We have listed methods using which you can attach a ceiling cornice to a stretch ceiling without compromising its strength. Now you know what to focus on before installation and how to correct the situation if you did not provide for mortgages for the future.
One of the most exciting and long-awaited events in a family’s life is the birth of a child. Parents tremblingly prepare to meet the baby, buying clothes, first rattles and, of course, a crib. For the baby to sleep, mom and dad arrange not only a beautiful, but also a safe place.
An interesting piece of furniture for a child's bedroom is a canopy - an almost weightless curtain attached in various ways to the bed or above it.
Assembly Recommendations
- Before purchasing a curtain holder for a playpen, be sure to read the instructions for assembling it.
- Choose a ceiling canopy only if you are confident in your abilities and skills. This is undoubtedly a beautiful and reliable option, because the folds of such a canopy will completely cover the playpen.
- If you doubt the first option, purchase a simpler tripod that is screwed to the side of the crib. Every young dad can easily assemble and disassemble such a structure without any problems. At your discretion, it can be installed on any of the four backrests of the playpen.
The main rule that should be followed is high-quality and reliable installation, because every month the child becomes more active and inquisitive, and can easily pull the curtain. A canopy that falls off its mountings can frighten or even injure a child.
There are many options for mounting protective children's curtains: the canopy is tied to the holder with ribbons, thrown over the fastening ring and secured with special elastic bands. Children's goods stores offer a wide range of tripods and frames. You can mount and hang a children's canopy by following the pictures in the included instructions or by watching a video on the Internet.
Choosing textiles: how not to harm your health
Along with the many benefits that a beautifully designed canopy provides, there is one compelling point against such a curtain - its airtightness and tendency to accumulate dust.
In this regard, the textiles used to create the canopy have some requirements:
- The fabric must be natural.
- The structure of the textile is preferably looser (the weaving of the threads is free).
- It is necessary to use a sufficient amount of fabric, but avoid creating multiple layers.
- It is better if the textiles for the canopy are light shades or kept in the same color scheme as the main tones of the bedroom.
For a good canopy that will bring exceptional benefits, the following types of fabrics are suitable:
- natural silk;
- light cambric;
- weightless satin;
- elegant cotton types of fabrics;
- tulle (subject to use as a light decorative element).