Proper cleaning of the vacuum cleaner brush
Modern models of vacuum cleaners are multifunctional and, as a rule, have many attachments included. Each of them has a different purpose and requires proper care. Before cleaning the vacuum cleaner brush of hair and other debris, be sure to disconnect it from the device.
The basic brush will have to be cleaned manually; for this you can use any sharp object that can easily capture lint, hairs and other stuck debris.
The algorithm for cleaning a vacuum cleaner brush is simple:
- Disconnect the nozzle from the device hose.
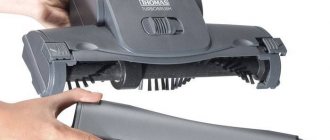
- If the brush is collapsible, then the manufacturer provides a way to open the top cover by pressing a special latch to gain access inside. Otherwise, you will have to clean from the side where the nozzle comes into contact with the floor.
- Armed with a needle or toothpick, remove stuck lint and hairs one by one.
- If necessary, rinse the nozzle with water and dry. Some models of washing vacuum cleaners provide a cleaning mode in which the brush can be washed with water at idle speed.
There are also models of cleaning equipment whose attachments require complete disassembly. Before cleaning the vacuum cleaner brush of hair and lint, it is important to read the instructions.
An excellent alternative to a simple sewing needle or toothpick can be regular thin tweezers or a seam ripper. Both “tools” allow you to grab small fibers and pull them out of the nozzle. You can use them by turning on the device at low speed, in which case the hairs, after removal, will immediately fall into the dust collector of the vacuum cleaner, without polluting the floor.
The main problems of the Samsung 2000w vacuum cleaner
Vacuum vacuum cleaners are equipped with electric motors, which are prevented from overheating by the air passing through the filters. When filters become clogged, dust or foreign objects can enter the engine, and the engine can overheat and shut down. Timely detection and correction of problems will help maintain the health of the engine for a long time.
Among the main malfunctions that owners of models of this type encounter are:
- Change in traction power. Appears due to mechanical damage to the hose and the places where the hose and tube are connected, as well as foreign objects stuck in the passage.
- Worn-out filters that have not been replaced for a long time Many models are equipped with a special sensor that indicates blockages, but in its absence, you can understand that the filter requires replacement by the characteristic dull sound of the motor, as well as by a decrease in suction power.
- No power when turned on or periodic loss of current. With such a malfunction, the sound of the operating device becomes intermittent, you may smell burning dust or wires, and in extreme cases, sparks and smoke will appear. Check the vacuum cleaner by connecting it to several outlets one by one, and if the situation is the same everywhere, the cause of the malfunction is located under the body. If there are sparks and short circuits, the device must be immediately disconnected from the network and handed over to a specialist.
How to clean the turbo brush of a vacuum cleaner
The turbo brush is a very convenient attachment option for those who have pets at home. It is no secret that most animals are subject to seasonal molting; as a result, not only floors, but also upholstered furniture are covered in wool. The turbo brush carefully and effectively removes hairs from the surface of carpets and sofas, capturing them thanks to the spiral design of bristles rotating on a rotor.
However, in order for the quality of cleaning to remain at a high level, it is important to clean the useful nozzle in a timely manner. The procedure is not required after each use; it is enough to “maintain” the turbo brush once every 2-3 weeks.
Algorithm for how to clean hair from a vacuum cleaner brush:
- Disconnect the nozzle from the device.
- Most turbo brushes are removable; to do this, you need to lightly press the handle to open the lid.
- Wipe the contaminated surface with a damp cloth to remove a layer of dust and dirt.
- Using tweezers, a steamer or a simple sewing needle, remove any stuck hairs and lint from the bristles on the rotating rotor.
- Close the lid.
Such events will be quite enough to make the turbo brush work with renewed vigor. Once every few months, it is advisable to completely disassemble the nozzle and thoroughly clean all components using a damp rag. Most manufacturers do not recommend flushing as it may impair functionality.
Features of disassembling the vacuum cleaner
First recommendation: if you have not previously repaired such devices, perhaps you should entrust the repair of your equipment to specialists. External filters can be removed and cleaned without problems, but not everyone can disassemble the housing itself, much less assemble it themselves.
Why does the Samsung washing machine not fill with water and what to do?
If you decide to make the repair yourself, you will need special tools such as flat-head and Phillips screwdrivers, pliers and sandpaper. Record each step with a photo or video - this will help you in the future to correctly assemble the device without unnecessary or missing parts.
Cleaning the side brushes of the robot vacuum cleaner
The modern market of household appliances offers improved models - robotic vacuum cleaners, whose high-quality house cleaning work occurs without human intervention. Such designs include side brushes, which also require periodic cleaning.
The algorithm is as follows:
- Turn off the device and disconnect it from the charging station.
- Remove the side brush from the device, following the instructions for the specific model.
- There are special combs for cleaning the brushes of a robot vacuum cleaner. If you don’t have such a device, you can use regular tweezers or a steamer to remove lint and stuck hairs.
- If necessary, the side brushes can be washed, but after this it is necessary to dry the attachments before reinstalling them on the body of the robot vacuum cleaner.
- Clean the attachment points of the side brushes on the device body from dirt.
Any vacuum cleaner requires high-quality maintenance; only in this case can you count on its proper operation for a long time. It is important not only to wash the filters and empty the dust collectors of accumulated debris, but also to maintain the nozzles. Before cleaning the vacuum cleaner brush, it is important to study the disassembly instructions for your specific model.
Likes for the post!
Minor faults and their elimination
If the vacuum cleaner begins to act strangely - to perform its functions incorrectly, to make loud noise, to vibrate - it needs help.
Most often, the cause of the malfunction is the cleaning process itself: the dust bag is completely filled or one of the filters is clogged with debris.
Some vacuum cleaners are easy to disassemble, while others require certain knowledge. To avoid mistakes, we recommend that you often look at the instructions, which are equipped with diagrams and tips.
You can often repair a vacuum cleaner on your own, but if you are not good at repairing equipment, it is better to take the device to a service center or specialists.
Problem #1 - suction power has dropped sharply
If you notice that dust is poorly absorbed, and small debris remains completely untouched on the floor, you will have to find out the reason through partial disassembly. First you need to make sure that everything is in order with the pipe, hose and brush.
- disconnect the hose from the vacuum cleaner;
- separate the pipe from the hose;
- remove the nozzle;
- carefully inspect each part;
- try to blow out the pipe and hose.
If a large object (a plastic bag, a sock, a sheet of paper) gets into one of the elements, you need to carefully remove it, then reassemble it in the reverse order and try to start the device.
Sometimes the traction weakens simply because you accidentally touched the power regulator and set it to minimum. Be sure to check it before any disassembly. Another reason for weakening traction is a broken hose.
Problem #2 - the vacuum cleaner filters are clogged
Unusual sound, weak traction, stoppage of operation - the consequences of clogged filters. For devices with a fill indicator, this can also be determined by the red light coming on. Modern devices provide everything to ensure that filters can be accessed quickly and easily.
Usually there are two main elements that need to be cleaned - a plastic cyclone filter (a transparent reservoir with compartments) and a sponge enclosed in a plastic container. But sometimes it is necessary to replace the HEPA filter, and for washing units - additional engine protection.
Photo tips for disassembly, cleaning and replacement:
As you can see, disassembling a Samsung vacuum cleaner to clean the filters is simple and quick. The elements are washed in warm water with a non-aggressive detergent. Then they need to be dried and reassembled.
Problem #3 - the device does not turn on
The standard test when the device is not working is to plug it into the network. Make sure the power cord is plugged into the outlet and the power control button is set to the correct setting.
If the indication does not work and the vacuum cleaner does not make noise, most likely the motor will have to be repaired or replaced. But problems with the board are also possible, so disassembling the case is necessary in any case.
Exploitation
Remember that an Electrolux brand vacuum cleaner is a high-quality equipment made to last. The units are durable and wear-resistant, but only if used correctly.
- Use equipment correctly, for example, do not vacuum in the garage or on the stairs where there are a lot of stones - this can damage any device.
- Do not let the device overheat; it should “rest” every 15 minutes. As soon as it cools down, the vacuum cleaner can continue working. Many Electrolux brand vacuum cleaners have a built-in overheating regulator and turn off automatically.
- You need to systematically care for the components of the vacuum cleaner. The dust bag should be cleaned after each use. Check all filters, gaskets and hoses regularly and also clean them of dust.
For information on repairing the Electrolux Cyclonic vacuum cleaner, watch the following video.
We continue to disassemble
Once you've removed the dust collector, that's only half the job done. To completely disassemble the vacuum cleaner, you need to perform several more operations:
- First of all, the special filter gasket is replaced, which is located at the inlet of the receiving hose. It is also necessary to disconnect the wires leading to the engine that ensure its operation. They are often fastened with screw clamps, which are quite easy to unscrew.
- Next, the engine itself is disassembled. Initially, the casing is dismantled, which can be done using a thin metal ruler or a screwdriver.
- The impeller is fixed to the engine immediately with nuts and a special adhesive. Therefore, you will have to use special solvents to remove this element.
- After this, several bolts are unscrewed that secure the engine cover. Then you can begin to directly inspect this mechanism and carry out repair work.
It should be said that if you are not sure that you can handle it on your own or do not have experience, then it is advisable to entrust such procedures to specialists from service centers.
Sensors
Depending on the design, the robot vacuum cleaner uses different groups of sensors for orientation in space:
- height difference sensors - usually located around the perimeter of the bottom;
- IR obstacle detection sensors - under the bumper glass;
- Ultrasound sensors – windows in the bumper;
- edge sensor – a window on the side surface of the case;
- overview video camera – on the front panel;
- laser rangefinder - a washer with slots on the robot cover.
The main task of cleaning orientation aids is to remove dust that has settled on them, which may interfere with their correct operation. Therefore, it is enough to wipe each of the sensors with a dry cloth.
Stanislav Marchenko
I am 29 years old, for the last 8 years I have been working as a equipment salesperson in a large retail chain mvideo. Extensive experience in product selection and customer consultation. Two years ago I came across robotic vacuum cleaners and I really liked this direction. One day I realized that I wanted to create a personal website where I would help readers with the choice of robotic vacuum cleaners. This is my hobby. All materials on this site were written by me personally. For advice, please visit my VKontakte page.
( 2 ratings, average 5 out of 5 )
We begin dismantling
The process of disassembling a standard Electrolux vacuum cleaner can be described in several successive steps:
- Initially, open the dust collector compartment and unscrew the screws to remove the plastic grill. It, in turn, can be attached using various threaded fasteners, such as screws, etc.
- After this, the dust container cover and control buttons, which are located in one unit, are dismantled. When this procedure is completed, you should remove the dust container itself. It can be mounted either on latches or on threaded fasteners, depending on the type of device.
- The next step is to separate the body from the base. This can be done by unscrewing several bolts that are located under the dismantled dust collector. Please note that these parts can also be additionally fastened with other bolts, so be careful and study the entire structure.
pros
- Effective removal of large accumulations of waste;
- the intensity of roller rotation and cleaning mode are adjusted automatically;
- the nozzle is indispensable if there are animals in the house, after renovation, under special room conditions (for example, a sewing workshop);
- cleans difficult areas of the room;
- light weight and dimensions make cleaning the apartment easier;
- volumetric lid for quick cleaning of dirt;
- saving effort and time.
We suggest you familiarize yourself with How to wash off soot in a bath


