The vehicle coating provides not only a presentable appearance, but also additional protection. But, like other materials, the paint surface has a limited service life. Under the influence of loads, minor damage gradually appears on it. Therefore, it will be useful for car owners to know how to paint over a scratch on a damaged car with their own hands.
Different ways to remove grooves
Small cobwebs on a car's paintwork can be removed without touching up the defect, but using the polishing method. To do this, use abrasive or wax polishes. The first type of composition removes a very thin layer of varnish until the scratch disappears, so it cannot be used frequently so as not to remove the entire protective layer from the undamaged area. Wax polishes fill the cobwebs, but after two or three washes the procedure will have to be repeated again and again.
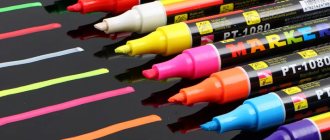
If the protection in the form of a varnish layer or enamel is damaged, then the grooves can be covered with a wax or gel pencil; in this case, touch-up is not required. Special products in tubes or in the form of pencils are also used in cases where it is necessary to mask scuffs of the paintwork.
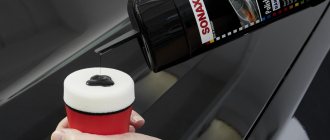
There is an anti-scratch product on sale in the form of special brushes for removing coating defects, which can be used to cover fairly deep grooves. The composition contains fiberglass, so its use does not require preliminary priming.
Remember that this product can only be used once, as the paint dries very quickly after opening the tube.
If the depth of the groove reaches the ground or metal, then in order to remove it, a more complex repair of the damaged area is necessary - painting over the scratches on the car. To do this, prepare the following tools and materials:
- sandpaper P1500, P2000;
- polishing paste;
- a grinding machine or drill with a set of discs;
- putty;
- rubber or plastic spatulas;
- primer;
- auto enamel color of your car;
- protective varnish;
- surface degreasing composition;
- brush, spray gun or roller.
Let's figure out how to paint over a scratch on a car with your own hands using these tools. By following step-by-step instructions, you can remove defects in your car's paintwork yourself, saving significant money.
LCP structure
A standard coating consists of several layers: metal, phosphate, primer, base enamel, varnish and a finishing layer of polish. If the damage is minor and the depth of the crack only reaches the phosphate layer or primer, then a similar problem can be solved by using car polish.
If the damage is more serious and the scratch has reached the steel sheet, then a number of measures will be required to restore the structure (ordinary polishing compounds will be “powerless”). If you simply touched up the damage, then corrosion will still develop and affect larger and larger areas of the body. Therefore, before using any “magic” remedy, be sure to clarify the nature of the damage.
The answer to the question “Why is polishing needed?” obvious - to restore the structure of the paintwork and prevent the formation of new cracks.
It is also worth considering in what situations you can prevent scratches on your car.
Body polishing is a cosmetic operation for a car.
First, let's look at the simplest case, when the scratches are very small and insignificant, damaging only the top layer of paint. As a rule, these damages can result from contact with pebbles or small branches.
In this case, you just need to properly polish the damaged area. Based on the tasks to be solved and the functions performed, there are two main types of cosmetic polishing of the machine:
- Abrasive polishing is the simplest method aimed not only at restoring the body, but also giving it its original beautiful appearance. The polish itself is of great importance, because preference should be given only to high-quality products. Otherwise, you can neutralize both the scratches themselves and the protective layer of paint. If you polish your car too much, you will have to perform more complex restoration work.
- Protective polishing - unlike cosmetic polishing, this category of work is aimed exclusively at restoring the paint layer of the car body. In addition to standard polishes and similar compounds, numerous mastics and special car waxes can be added here. The principle of operation of such compositions is that after application to the surface of the car, a film is formed that corrects damage, while perfectly masking it.
Polishing is carried out after applying polish to the body. Specialists usually use special equipment, for example, a grinding machine or similar equipment. But you can completely do without these devices by using fine-grained sandpaper or even a usually thick napkin if the scratch is very small and unnoticeable.
After applying the composition to the metal, you need to grind the surface using gentle circular movements. The paste must be constantly moistened, since a dry composition when rubbed into the top layer can cause additional damage. Once there is no trace left of the scratch, polishing can be completed. These actions must be performed only in warm, dry rooms where there is no exposure to external factors, including moisture, precipitation or dust.
How to remove small and deep defects with your own hands
Small and shallow scratches can be removed using regular polish. Circular lines and stains visible on the surface of the metal indicate low-quality and improperly carried out polishing. Eliminating such defects is as easy as shelling pears - an abrasive polish does not harm the paintwork and allows you to obtain a perfectly smooth and even surface.
A low-abrasive polish can handle more serious defects. With its help, you can eliminate visually invisible scratches that are easily tactilely felt.
The car body after treatment with an abrasive polish looks more presentable, but it is easy for a beginner to overdo it with pressure or choose the density of the composition
In case of serious cuts and damage, use varnish, paint and wax. They allow you to level the surface, hiding scratches. The varnish applied over the paint fixes it.
If the scratch is deep and rust appears inside it, you must first remove it cleanly, and this is mandatory! Conventional repair methods will not help here, and soon the damage will be visible again. You can find out how to treat rust and traces of corrosion in this article.
Varnishes and paints used to process individual body elements are presented in the form of small bottles with a brush. The product is applied in a thin layer to the damaged area and perfectly seals the defects. However, it is worth knowing that varnishes and waxes are temporary means that hide scratches and do not eliminate them.
We recommend: Do-it-yourself replacement of the pump on a VAZ 2107
How to remove scratches by polishing by hand or with a machine
Minor scratches, visible only on a freshly washed and dry car, can be removed by regular surface polishing. Deeper defects that did not touch the primer layer are corrected using abrasive polishing. Such pastes remove the top layer of the coating, which makes defects invisible against the general background. These products are applied either manually using intense circular movements or using polishing machines.
If there is no tool, do all the work yourself
Restorative polishes are colorless and do not leave marks on the surface. The main requirement when processing the body is that the paste should not dry out, otherwise it will scratch the paintwork.
The polishing machine that will be used to eliminate body defects can be anything - the most important thing is that it can change the speed. Instead of such a tool, you can use a screwdriver or drill with a special attachment. The following foam pads should be used with the polishing machine:
- white is used together with coarse abrasive pastes for rough polishing;
- orange has medium hardness and is used with fine abrasive pastes;
- black is the softest, used mainly with protective abrasive pastes.
The circles can be of other colors; usually the approximate hardness is written on their body
In addition to a polishing machine and special wheels, you need to stock up on sandpaper and pastes.
Before polishing the car body, the foam circles are wetted - they must be damp. The paste is applied to the car body, not to a polishing wheel. After this, you need to polish the car body with a machine. It is better to move the tool in a horizontal direction with a slight approach to already treated areas. Scratches from the body can only be removed after heating the varnish.
When heating the surface, the polishing wheel should operate at medium speed - otherwise you can completely burn the paintwork.
Other DIY options
Polishing a car body helps to cope only with minor defects. If the damage has affected the primer layer, then it is removed using special pencils. They form a film on the damage and come in two types: wax and gel.
- Wax crayons are a lot like drawing crayons. They simply paint over the body defect, and wipe off excess wax with a soft cloth. This method of removing scratches is the cheapest and most short-lived.
- Gel pencils are more like pens or felt-tip pens. When using them, the composition is “pumped up” to the writing tip and applied to the chip or scratch. Excess product may begin to flow down the surface. The defect elimination procedure is carried out several times until the scratch completely disappears.
Pencils are not suitable for deep scratches
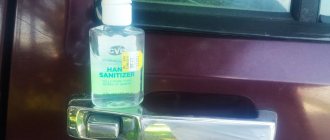
- Deep and wide cracks can be removed using special corrector kits. They include a bottle with a special product, car polish, several wipes and a degreaser. Such kits are manufactured by car companies, and their components can be purchased separately.
Pharmacodynamics
Ointments for diaper rash in the groin
Very often this diagnosis is given to young children. Adults consider diaper rash to be a delicate problem and rarely seek medical help. This tactic is wrong. It is necessary to identify diaper rash in time and begin its treatment.
Diaper rash correction plan. To eliminate the unpleasant symptoms of this disease, you must first observe the rules of personal hygiene. Wear clean clothes made from natural fabrics so that the skin can breathe, take a shower or bath regularly, and thoroughly dry the groin folds. For personal hygiene, neutral detergents are recommended that do not cause irritation or allergic reactions. In addition to all of the above, drug treatment is necessary:
- Disinfectants: calendula tincture, salicylic acid, boric acid solution, etc. You can also use ointments with antibiotics or sulfonamides that have good antibacterial activity (for example, syntomycin, clotrimazole, nystatin, streptocide, methyluracil, etc.).
- Drying drugs. Of the ointments, creams and pastes described above, the following ointments are suitable: salicylic and zinc, salicylic-zinc paste and others.
- Healing agents: bepanten, dexpanthenol, calendula ointment.
[18], [19], [20], [21]
Ointments for diaper rash
In this case, diaper rash mostly appears between the toes. The reasons may be: frequent and strong friction, infection of the feet with a fungus, heavy weight and profuse sweating.
Diaper rash correction plan. As mentioned above, you need to follow the rules of personal hygiene: promptly clean your feet from dirt, carefully dry your feet (especially between the toes). As for shoes and socks, they should be made of natural leather and fabrics, respectively, so that the feet can “breathe.” To eliminate unpleasant odor, you can use talc or other indifferent foot powders. Among the medications, ointments are used: streptocidal, syntomycin, Clotrimazole and other ointments for diaper rash with antibiotics to eliminate fungal infections. Salicylic ointment is used to exfoliate rough skin on the heels.
Ointments for diaper rash in newborns and children
The causes of diaper rash in babies can be clothing made of synthetic materials, wearing low-quality diapers, overheating, frequent friction, fungal infection, etc.
Diaper rash correction plan. The child should wear breathable clothing and quality diapers. The maximum wearing time for one diaper is three hours. After each diaper change, the baby should be bathed, thoroughly dried with a soft towel and lubricated with baby cream or indifferent powder.
Medicines that can be used:
- Treatment of diaper rash in newborns should be carried out under the supervision of a doctor. He may prescribe bathing in herbal baths, using various creams (for children), powders or ointments (herbal).
- To treat diaper rash in older children, you can use zinc ointment, creams (for children), herbal ointments (calendula, chamomile, string and eucalyptus, sea buckthorn, etc.).
The best ointment for diaper rash
Mothers of small children are advised to buy zinc ointment, pantestin, bepanten, dexpanthenol. These ointments for diaper rash are affordable, practically harmless, and are great for coping with diaper rash in both newborns and older children.
Adults are advised to use salicylic-zinc paste for mild forms of diaper rash, and for severe forms - Advantan cream, ointments: streptocidal, syntomycin, nystatin and others. Methyluracil ointment is very popular; most people respond well to it.
Removing scratches on a car body by polishing
Polishing is one of the most effective ways to remove scratches on a car body without painting. Depending on the depth and area of damage to the paintwork, scratches can be polished manually or using a polishing machine.
- The body is manually polished with a soft cloth using polish, which can be purchased at any auto shop. You just need to follow the instructions, which are usually found on the back of the polish bottle, to relatively quickly remove minor scratches from the car body.
- It is a completely different matter to remove scratches by polishing the body using a polishing machine. In this case, you cannot do without special knowledge and equipment.
Car body polishing can be either protective or abrasive:
- With protective polishing you give your car shine and shine, while eliminating minor scratches on the car body;
- By abrasive polishing using polishing pastes, you can remove not only scratches, but also chips, abrasions and other not very serious damage to the paintwork that can be removed without painting the car.
Since the second method of polishing is quite labor-intensive and requires some skill, we recommend that you read our instructions for polishing a car body with your own hands.
Types of polishes
Today, car body polish is available in two types:
- Abrasives (restoring polish). Such polishing compounds are used for cars older than 3 years, the body of which has a large number of small and deep scratches. It is worth considering that such deep polishing of the body requires specialized equipment. Pastes of this type completely remove the varnish layer, so after this treatment, the paintwork is necessarily covered with an additional protective layer. If you choose a composition with a large number of abrasive particles, then you should give preference to polishes with a “color enrichment” effect.
- Mixtures with a lean amount of abrasive particles (protective polish). Such compositions allow you to remove scratches on the car body without removing the top layer of paintwork. Protective pastes are recommended for use on new and freshly painted cars to remove minor scratches without painting and give the body a shine.
This is interesting: Tesla's next Chinese competitor is preparing for release
Important! Deep polishing of a car body can be done no more than 2-3 times during the entire operation of the vehicle.
If we talk about the form of release of polishing compounds, then most often the following types of scratch removers are found on sale:
- Pasty. Polishes of this type are convenient to apply to vertical surfaces, allowing for effective treatment of all car body parts. The composition of the paste polish includes special components that give the paintwork shade more saturation. This scratch remover is the most expensive.
- Liquid. Products with a liquid consistency are recommended for use on the roof, hood or trunk. The composition will simply drain from the side parts of the body. However, liquid polishes contain a minimum number of abrasive particles, so they “remove” paintwork to the least extent. The liquids are also suitable for torpedoes.
- Aerosol. Sprays are easy to use and fairly low cost. However, they are the least effective. The thing is that the liquid container contains the components necessary for spraying, because of this the volume of polishing substances is much lower.
A high-quality paste-type scratch remover polish lasts up to 6 months. If you observe the correct storage conditions and use polishing liquid 2 times a year (before spring and winter), you can preserve your car’s paintwork for a long time.
Scratch removal kits
The detailing industry has a lot of good products for successfully touching up chips and scratches. Special touch-up pens for touch-up transfer paint into chips and scratches by capillary action. They can really repair scratches and chips accurately.
Ready-made scratch removal kits are sold. For example, the set (3M Scratch & Scuff Removal Kit) contains everything you need to remove shallow scratches. The set includes sanding paper, polishing paste, sanding block and polishing pad.
Bottles of paint of the desired shade can be purchased from a dealer at an auto center of your car brand, or at a car cosmetics store or at a specialized store that sells body repair products.
How to paint over a scratch on a car
No matter how careful the driver is, scratches will still appear on the car. Damage of this type is divided into several groups depending on a number of signs:
- minor scratches of the first level that damaged the paintwork;
- medium scratches of the second level, damaging the top layer and primer;
- deep scratches of the third level, damaging all layers of the coating, including metal.
Special tools are used to paint scratches on a car. But to understand what kind of device you will need to restore the surface, you need to determine the type of scratch.
There are also several types of damage repair methods:
- spot;
- polishing;
- using a brush;
- using a can of spray paint;
- with a full renovation.
We recommend: Canister solenoid valve - where is it used?
In most cases, no labor-intensive effort is required to remove the scratch. To do this, it is not necessary to contact a service center - you can paint over the scratch on the damaged area yourself.
Spot painting
Spot painting is also known as retouching. This method involves several ways to restore the surface of a car, depending on the level of damage.
Most often, this type of painting is used to remove level 1 scratches that have damaged the paintwork. When performing spot painting, the locations of scratches are determined, after which painting is carried out. The task is completed independently using marker pencils.
If there are second-level scratches on the coating that have damaged the paintwork and primer, local agents are used. These include a polymer chalk pencil and a paint brush. It is recommended to apply the paint in several layers.
Paint a scratch only in clean and dry areas. You need to wait until the surface dries before applying the next coat of paint.
Polishing
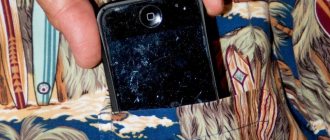
If there are scratches, painting is not always necessary. In some cases, polishing is sufficient. This method is only suitable if it is necessary to remove shallow scratches. To determine their presence, you need to wet the surface and wait until it dries. After this, the scratches will appear on their own.
You can remove the scratch by polishing it yourself or at a car wash. It requires a special wax paste. The substance fills the scratch, causing it to disappear. But it should be borne in mind that polishing provides a temporary effect. Therefore, in order to maintain the paintwork in a new condition, it is necessary to periodically repeat this action.
Car paint color selection
In cases where local touch-up of a car's paintwork is done, an important point is the correct selection of paint. It is very difficult to choose a shade so that it exactly matches the color of your car. There are no questions if you know the number of the auto enamel that your car is painted with. You simply purchase the necessary consumables at a hardware store and get to work. Otherwise, to accurately select the required color for a car body, there are several methods for determining the desired shade.
- Almost every vehicle has a label on which the VIN code is indicated. It is located on the driver's door pillar, on the inside of the hood or trunk lid, in a special window on the windshield. The VIN code is also in the car's passport. Manufacturers of car paints use a common system of standard tints used in the production of vehicles, so the selection of shade according to the code will be accurate.
- Contact a car repair shop, providing the technician with information about the make of the car, its model, and year of manufacture.
- The most accurate method is computer selection, using appropriate programs that compare the codes of car enamels with the one on the sample, and also select the optimal consistency of the material, depth and saturation of the color.
- Using a fan of colors does not guarantee a 100% match with the color of your car, but it can also be used to select car paint.
After you have chosen the desired shade of paint, it is time to proceed directly to painting the car body. Before applying auto enamel, degrease the prepared area with a solvent. Painting scratches on a car takes place in 2 layers. To do this, use a brush, roller or spray gun. If you are new to this business, it will be difficult to avoid smudges. In this case, after the layer has dried, you need to sand the surface wet and paint it again.
The best protection for paintwork is varnishing. Therefore, after painting the damaged area, apply a layer of varnish. The protection will be restored qualitatively if each new layer is applied so that it overlaps the previous one with some margin, forming an even transition.
Ointments for diaper rash
All iLive content is reviewed by medical experts to ensure it is as accurate and factual as possible.
We have strict sourcing guidelines and only link to reputable sites, academic research institutions and, where possible, proven medical studies. Please note that the numbers in parentheses ([1], [2], etc.) are clickable links to such studies.
If you believe that any of our content is inaccurate, out of date, or otherwise questionable, please select it and press Ctrl + Enter.
Diaper rash is an inflammation of the skin that occurs during prolonged friction or when the skin is over-moistened with sweat or sebum. Diaper rash occurs due to intense sweating or sebum secretion, urinary incontinence, hemorrhoids, and allergies to cosmetic products or food. Also, the causes of diaper rash can be: insufficient drying of the skin after bathing or friction of the skin on clothes (especially made of synthetic materials), diapers.
Symptoms of diaper rash are: skin redness, itching, irritation. If you do not start treatment on time, then in the future small cracks will appear on the skin, which will soon begin to bleed. Without proper care, bleeding cracks become covered with a grayish coating that has an unpleasant odor. In such cases, an infection may accompany diaper rash, and then the disease will proceed chronically, sometimes patients cannot be cured for many years. Diaper rash with associated infection has a name - infectious diaper rash, which is characterized not only by redness and itching on the affected areas of the skin, but also by pain and burning.
Therefore, diaper rash cannot be ignored. It is necessary to immediately begin to cure them as soon as they appear. To eliminate this unpleasant disease, ointments for diaper rash are often used.
[1], [2], [3], [4], [5]
Restoring the paint layer - preparation and main steps
Experienced motorists know very well that any damage to the car body can be repaired. Especially when it comes to such minor problems as scratches. Even without minimal experience in handling such damage, anyone can paint over a scratch on a car with their own hands, without visiting service stations. This saves time and, more importantly, money, since the result will be the same in any case.
Before painting a car, it is necessary to obtain some theoretical knowledge, in particular about the layers of the body surface. So, the following is the order, starting from the top:
- A layer of varnish.
- The base layer is enamel.
- Primer.
- Phosphate.
- Sheet steel is the deepest, last layer of the car body.
We recommend: How to change the cabin filter on a Chevrolet Niva?
Depending on the layer damaged by contact with foreign bodies, the technology of restoration and restoration may differ significantly. The simplest, for obvious reasons, are scratches that only damage the paintwork. In this case, the operation to remove the damage may take a couple of minutes.
If during a trip you accidentally hit the fence and made a deep enough chip that touched the steel, then you will need to put in much more effort. But, we repeat, any damage of this nature, regardless of its depth, can be corrected at home.
Treatment and healing of scratches
Last update: 02/21/2021
A scratch is a violation of the integrity of the surface layer of the skin (epidermis), resulting from contact with a thin sharp object and usually having a linear shape.
The healing time of scratches depends on the depth of the damage and the presence/absence of infection. You can get a similar injury at home, while playing with pets (especially cats), while doing gardening and repair work. To speed up the process of regeneration of a damaged area of skin and protect yourself from pathogenic microbes entering the wound cavity, you need to know how to treat scratches, what healing ointment to use and how to behave if you get a scratch.
Options for eliminating shallow and severe damage
Car body defects can be removed in different ways, many of them are used in service centers. These include:
- polishing;
- restoration of paintwork;
- use of special tools.
The listed methods of body treatment can eliminate almost any type of damage.
To polish and grout the body, various power tools are used - drills with attachments, screwdrivers and grinders. However, they are used only as a last resort, when it is necessary to deal with obvious corrosion and rust.
Not every car enthusiast can afford to purchase such a tool, so other options for polishing tools can be used, even manual polishing
To eliminate damage to the body, accessories are also used - rough rags, brushes, soft rags. All protective equipment is divided into several types:
- regular or non-abrasive polish;
- special paint;
- colored wax and pencils;
- colorless varnish.
Tips for removing scratches with partial body touch-up
If there is deep and extensive damage to the paintwork, it would be more advisable to remove scratches on the car body using paint and varnish. They are available at retail in small bottles and are designed specifically for local correction.
But in addition to some labor-intensiveness of this process, you will also need to work hard on selecting the desired color and shade of paint (see the video below).
In cases of significant damage to the paintwork, which has reached the “living” metal, before removing scratches from the car body, you need to treat the damaged surface with a rust converter or apply a protective zinc coating (for details, see the article on rust removal) - this will prevent subsequent corrosion of the metal. Only after this operation has been completed will it be possible to use paint and varnish.
If, due to the degree of damage to the paintwork, you need to use putty, do not neglect this procedure. It is advisable to entrust all complex work to qualified specialists who will competently carry out restoration work and help achieve an impeccable result.
However, if you have “straight” hands and some experience, you can independently remove almost any scratches from the car body (both without painting and with touch-up of the damaged areas). It is worth taking into account that all work must be carried out in a clean, dry and warm room with sufficient lighting. Before starting touch-up painting, it is advisable to warm up the car body.
Well, if things are really bad, then we highly recommend that you read the detailed instructions for painting a car yourself.
How to repair many scratches?
More serious damage, consisting of a whole series of scratches, may need to be touched up using a spray can (or a spray gun, if possible). If you repair several adjacent scratches using the methods described above in this article, then after repair they will be more noticeable than one repaired scratch.
Car bumpers often receive damage in the form of multiple scratches. The bumpers, especially the front ones, are shaped in such a way that the repaired damage can be touched up with a spray can and the border with the rest of the bumper will be barely noticeable.
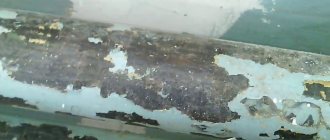
For example, if the lower side part of the bumper is damaged (as in the photo), you will need to fill the scratches with putty, sand, prime (you can use a spray can), prepare the primer and a small adjacent area by sanding and paint with a spray can. In this case, you need to seal the adjacent surfaces that are not to be painted with masking tape and newspapers (the painted part of the bumper does not need to be sealed so that there is no visible transition border).
If the original paint is varnished, then during repairs you can use paint, and varnish on top of it. If you match the paint to the color of the car (in some stores it is possible to select paint and pour it into a can), then the repair will be unnoticeable. You can read about how to spray paint correctly in the article “Spray painting a car.”
Clinical researches
A clinical study conducted by the company together with the Union of Pediatricians of Russia proves the high efficiency, safety and tolerability of products for daily skin care of children with mild and moderate forms of atopic dermatitis and during remission, accompanied by a decrease in the quality of life of patients. As a result of therapy, a decrease in the activity of the inflammatory process, a decrease in dryness, itching and flaking was noted.
It has been proven that La Cree cream for sensitive skin reduces itching and irritation, relieves redness of the skin, moisturizes and gently cares for it. The product is recommended by the Union of Pediatricians of Russia.
- Chapman M. Shane, Habiff Thomas P., Zug Catherine A., Dinoulos James G. H., Campbell James L., Dermatology. Handbook of differential diagnosis, publishing house: MEDpress-inform, 2014
- Mancini Antoni G., Krouchuk Daniel P., Pediatric dermatology. Directory, publishing house: Practical Medicine, 2018
- Pankratov Valentin Gavrilovich, Pankratov Oleg Valentinovich, Infectious dermatology in the practice of primary care physicians, New Knowledge Publishing House, 2015
Source