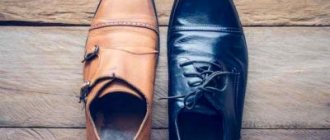
If in past years sneakers were shoes exclusively for sports, now they are worn everywhere.
Active use of the pair leads to rapid wear, the first sign of which is creases.
Read the article on how to remove creases from sneakers made of leather, leatherette and nubuck, as well as how to prevent these defects from appearing.
How to prevent education?
To prevent creases from appearing on your sneakers, you need to adhere to the following recommendations:
- There is no need to buy larger or smaller sneakers. If they are large, cracks will appear in the widest places; narrow shoes will “break” due to excessive tension.
- If your shoes get wet, you can dry them naturally. The use of a hair dryer and other devices is permissible only when dealing with creases.
- To care for a pair, you can use only specialized products and impregnations. Different compositions are used for leather and nubuck.
- Sneakers must be worn with the laces untied. Be sure to use a spoon.
- Do not tread on the heel, even if you only need to wear the shoes for a few minutes. You should not step on it to remove your sneakers.
- Shoes must be worn in the season for which they were made. In winter, it is not recommended to wear sneakers designed for summer.
- If possible, purchase two pairs. Overnight, the skin does not have time to recover and return to its previous shape. Therefore, it is better to alternate sneakers
- When washing shoes, do not wet them completely.
- If it is damp outside, your shoes should be treated with water-repellent impregnation a few hours before going out. Even if time is lost, this recommendation should not be ignored. It is better to apply the cream immediately before going out than not to do it at all.
If the top of the shoe, which is adjacent to the sole, is torn
Using a flat-head screwdriver, you need to disconnect the upper from the sole, clean and degrease everything. Prepare a patch: it should be approximately 15 mm larger than the torn area. From the inside, the patch must be cut to nothing with a single-sided sharpening knife (the cut should be about 8 mm thick).
The area on the boot where the patch will be is sanded using a flat file. The patch must be degreased and dried. Then glue the patch to the top of the shoe and dry it. Coat the lower part of the patch and the space between the sole and the shoe with glue, tuck the patch there, dry it and press it.
DIY heel repair
To glue the heel onto a rubber heel, one side of it is treated with a rasp, making it rough. The heel is straightened using a rasp. Everything needs to be degreased, the heel and heel should be coated with glue, glued and trimmed.
To change the heel on a leather heel, do the same steps, only you need to additionally pierce the heel with nails (9-10 pieces).
Repair of heels on women's shoes. Wide and not too high heels are repaired in the same way as described above. The heel is pierced with 3-5 nails.
On thin high heels (stiletto heels), the metal and metal-plastic heels are replaced. The old heel needs to be removed and a new one installed on the heel. To do this, there are mounting holes in the heel, and pins on the heels.
Thus, you can easily repair your shoes with your own hands, giving your shoes a second life.
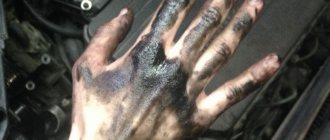
How to remove scratches from a leather product - shoes, bags, car seat covers?
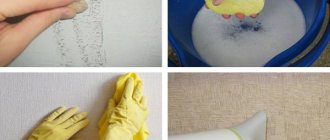
Before you try to remove scratches from a leather car cover, shoes or bag, you need to study the range of products that will help make this defect invisible, as well as the principle of their operation. “Liquid skin”, rubber glue, wax or paraffin can cope with this task. The first product can be purchased not only at a shoe and leather clothing store, but also in most supermarkets.
“Liquid leather” is a polymer substance that has a high adhesive ability and seals damage to the leather covering. It's essentially paint that fills in even deep cuts and scratches. After drying, this product forms a single, seamless coating with the skin, returning the material to its original appearance.
Shoes before and after applying liquid leather
- Apply the product to the defect using a plastic spatula. The layer should be thin enough; you should not be too zealous with the amount of polymer. If the tear or crack is significant, before application it is necessary to seal it by placing a patch on the inside.
- Treat the work area with a dry sponge, lightly pressing it against the skin. This measure will give the substance the texture of the restored material.
- After the liquid leather has completely dried, polish the area restored with its help with a soft cloth.
- Evaluate the quality of work and repeat the procedure if necessary. Sometimes it is necessary to apply 2-3 layers of the product (or more in case of significant damage).
- Wipe the restored area with a cotton pad soaked in milk or balm.
Rubber glue
Getting rid of this defect using glue is somewhat more difficult than using liquid leather. When carrying out restoration work, several important points must be taken into account:
- Use this method only to repair minor cuts and scratches;
- do not use an adhesive containing acetone - this substance has a negative effect on the condition of the skin;
- Rubber glue made from natural rubber or special glue designed to restore damaged skin can be replaced with Moment or BF-2 glue.
We suggest you familiarize yourself with How to bleach tulle at home quickly and efficiently?
The procedure for restoring a leather product using this method includes the following steps:
- Apply glue to the scratched or cut area of the material. This should be done with a small object so as not to smear the product on the surface of the item. A toothpick or match is best suited for this purpose.
- After the adhesive has completely dried, make sure that the defect has become invisible. If necessary, apply another layer of product.
- Treat the work area with a concealer cream of the appropriate shade.
Wax or paraffin
This is a very simple and affordable way to solve this problem. Beeswax, finishing wax, and candle paraffin are suitable for restoration work. The main advantage of this method is that it allows you to get rid of even deep scratches. These tools should be used as follows:
- Heat the substance in a water bath until it softens and becomes plastic. The wax or paraffin should be warm, but not hot.
- Apply the mixture to the scratched area. It is better to do this with a flat small object.
- After the substance has completely hardened, polish the work area with a soft cloth. Typically, wax and paraffin harden within 5-10 minutes.
- Apply concealer cream of the appropriate shade to the restored area. You can also camouflage the restored area of skin with a marker. The main thing is that it perfectly matches the color of the product and does not dissolve upon contact with moisture.
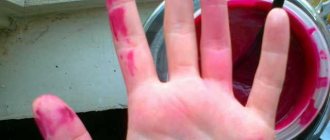
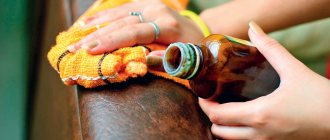
Minor scratches noticeably deteriorate the appearance of leather sports shoes.
To combat this defect, you can use beeswax or paraffin wax. It is applied in liquid form to pre-cleaned shoes in a thin layer and allowed to cool completely. Wax levels the surface. This method is especially suitable for those who wear black leather sneakers.
If the scratch is deep, then it is better to use “liquid leather” rather than wax. The product penetrates deeper into the skin pores and smoothes out unevenness and roughness.
Simple rules for caring for sneakers will help you avoid deterioration in the appearance of sports and walking shoes. However, if there are wrinkles, cracks or scratches, it is better to immediately seek advice from a professional shoe repair specialist.
We suggest you read: How to eliminate the smell inside the refrigerator after defrosting
If the seam on the boot comes apart
In this case, you won't need glue at all. You need:
- thick nylon threads;
- needle;
- awl;
- tablet;
- blade.
Important! An awl and a board are needed just in case the needle does not fit into the existing holes.
Sew up:
- There is no need to make additional holes; they reduce the strength of the product.
- Use a blade to carefully support the lining.
- Thread the thread through the needle, fold it in half and make a knot at the end.
- Insert the needle from the wrong side into the outer hole.
- Pull the thread to the right side.
- Insert the needle into the outermost hole on the opposite side of the seam.
- Stretch the thread so that the stitch on the outside becomes flat, but do not pull too hard - the nylon thread can tear the leather.
- Insert the needle from the wrong side into the second hole on the side from which you started sewing.
- Make a second stitch - into the second hole on the opposite side.
- Having finished the seam, bring the thread to the wrong side and secure it in any convenient way (you can even melt it).
Gluing the seam
Many modern models look like they are sewn, but in fact the seams on them are purely decorative, and the strength is ensured by gluing. In this case, stitching the hole is useless. It's better to do this:
- Cut 2 strips of leather 1 cm longer than the hole.
- Glue them to each side of the seam, leaving a 0.5 cm seam allowance.
- Glue the allowances together or sew them with nylon threads.
What to do if the skin at the cut site is raised?
| Elimination of abrasions | Main ingredients | Preparation of the regenerating agent | Application |
| From the skin | Orange | Remove the peel from the fruit. | Gently rub the affected area with orange peel. |
| Any rich cream (for children, for face, for hands) | Not required. | Apply the product to the work area using wool or flannel cloth. Remove the remaining cream with a paper napkin. Upon completion of the procedure, polish the treated area with a soft cloth. | |
| Low-fat milk, turpentine | Add a small amount of turpentine to the milk. | Apply the product to the worn areas, and after drying, polish the area. | |
| With suede | Milk, soda | Dilute 1 tsp. soda in 200 ml milk. | Apply the solution to the work area. After complete drying, walk over the treated area with a rubber brush. |
| Fine salt | Not required | Gently rub the salt into the worn area and then remove it with a brush. | |
| Vinegar | In one container, mix vinegar with water in a ratio of 1:4, in another - dilute 1 tsp. vinegar in 1 liter of water. | Treat the damaged area with a solution of a stronger concentration. After wiping the area with a dry cloth, apply a weaker solution to it. |
For the same purpose, you can hold the product with the pressed lint over a container of boiling water. Brush the dried suede with a rubber brush. You can also use a steam generator to remove worn areas from suede items.
The defect elimination procedure consists of the following steps:
- Apply varnish to the cut area of the skin. If the cut is very small and the brush is too bulky, it is recommended to do this with a toothpick or match. You need to act very carefully so as not to stain neighboring areas.
- Bring the edges of the cut together.
- Apply a finger, previously wrapped in a clean, dry cloth, to the treated area and hold it for 2-3 minutes. This is exactly how long it takes for the varnish to set.
- Verify that the problem has been resolved. If necessary, the procedure can be repeated.
- Apply a concealer cream of the appropriate shade to the restored area.
This method is suitable for restoring thick leather products. To restore things made of thin material, it is better to use Moment glue or BF-2 instead of varnish.