Where do you start ironing a shirt?
To save effort and time, prepare in advance everything you need:
- Iron with a perfectly clean surface. To do this, it must be washed regularly using special products purchased at hardware stores. For some surfaces, folk remedies will also be effective: salt, paraffin candles, vinegar, hydrogen peroxide, etc. In addition, modern irons have a self-cleaning function.
- Ironing board
- Container with water
- Household sprayer , in case the iron does not have a steam function.
- Gauze cloth or scrap of cotton fabric . You can do without underwear if you are sure that the iron does not leave marks on things.
What mode should you use to iron a shirt?
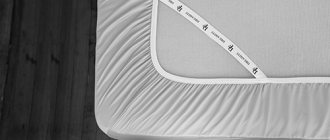
The operating temperature of the iron depends on the type of fabric the shirt is made from. To do this, examine the shirt label. It contains all the necessary information on product care and fabric composition.
| Designation | Decoding |
Dry ironing or steamingTo restore the shape and appearance of the product, it can be ironed at any temperature, with or without steam. | |
Iron at low temperatureAllowed to iron at a maximum temperature of 110°C (corresponds to the symbol in the form of a single dot on the iron’s thermostat), acceptable for synthetics, nylon, acrylic, polyester, polyamide, acetate, use a fabric pad, do not use steam | |
Iron at medium temperatureAllowed to iron at a maximum temperature of 150°C (corresponds to the symbol in the form of two dots on the thermostat of the iron), acceptable for wool and mixed fibers with polyester and viscose; Ouch; use a damp cloth | |
Iron at high temperatureAllowed to iron at a maximum temperature of 200°C (corresponds to the symbol in the form of three dots on the iron’s thermostat), acceptable for linen and cotton; You can slightly moisten the product | |
Do not steamIroning with steam will damage clothes; regular ironing at the specified temperature is recommended. | |
Do not ironThe product should not be ironed, steaming or steam treatment should not be used. |
Modern irons are equipped with a temperature sensor and have instructions for determining the heating temperature.
In more outdated models, temperature is determined by dots:
- one point - temperatures up to 110 degrees;
- two points - temperature up to 150 degrees;
- three points - temperature up to 200 degrees.
If your iron has a steam mode, you should check the purity of the steam before ironing. To do this, turn on steaming on a test fabric: gauze, handkerchief.
If there is no tag , then you need to choose a mode depending on the composition of the fabric:
| Fabric type | Ironing temperature, ℃ |
| linen | 190-230 |
| cotton products | 165-190 |
| woolen items | 140-165 |
| pure silk | 115-140 |
| things made of viscose | 85-115 |
It is easier to iron a synthetic shirt, because... it is less susceptible to creases. But with cotton you will have to suffer.
Hanging the cotton shirt flat on a hanger and letting it dry, ideally in the fresh air. This will help make ironing easier.
The cotton shirt should be slightly damp before ironing. Iron temperature should not exceed 160 degrees. If it is dry, it can be ironed through damp gauze.
How to iron a shirt correctly: step-by-step instructions with photos
Want to know how to properly iron a shirt? We will tell you about this intricate process from scratch, so that the issue of ironing a shirt does not seem like something scary and voluminous.
- The first rule of ironing clothes is to read the label. It indicates at what temperature the product can be ironed (and whether it can be ironed at all), because some shirts made of synthetic fiber cannot be ironed at all (we’ll tell you what to do with them a little later).
Giving a shirt to a girl is the easiest way for many people to iron a shirt.
- The second rule of ironing a shirt is not to overdry the product until it becomes dry. When ironing shirts, place them slightly damp. If it’s already too dry, hang it on a hanger and spray it lightly with a spray bottle and let it hang for 10 minutes and only after that you can start ironing.
- The next step is to turn the shirt inside out. This is a mandatory rule for those who want to wear a shirt for a long time and not have iron marks on it.
- Select the temperature setting on the iron as indicated on the label. Please note that you may have several shirts and each will have a different temperature rating. You must select by degrees (indicated on the iron or in the instructions for it, as well as in brackets on the label under the iron icon itself).
- Inexperienced people often make the following mistake: the label indicates two points, they select the second setting on the iron and begin ironing. In this case, the probability that the temperature conditions will coincide in this case is 50/50. But are you willing to take the risk, especially if the shirt is expensive?
- If the shirt is not new and there is no tag, set the iron to the minimum setting and iron a small area from the bottom (which is tucked into the trousers); if it does not iron, increase the temperature by one setting. But if you feel that the iron is not sliding well, this means that the fabric is melting and you need to lower the temperature. After reducing the temperature, wait 1-2 minutes and only then continue ironing.
- Steam is an indispensable tool for ironing a shirt. Set the function on the iron, and if there is none, spray a little water on the shirt and iron it. When the iron comes into contact with water, the same steam is formed.
In hardware stores you often come across small ironing boards, which many mistakenly mistake for a tourist version of a full-fledged board. Everything is a little more complicated - this is a special device for ironing small parts and shirt sleeves in particular. Buy such an assistant, and you will understand how much it facilitates the process.
Now let’s move on to the actual action, how to properly iron a shirt:
- Turning the shirt inside out, pull out the sleeves and straighten the cuffs;
Damp shirt - quick ironing!
- First of all, iron the shirt cuffs;
- We move on to ironing the sleeves. Fold the sleeve so that the seam lies closer to you and smooth it with your hand in the direction opposite to the seam; when you smooth it out with your hand, you can iron it. This way, you will iron both sides at the same time without creating unnecessary folds or unevenness;
Iron the sleeves first
- Now let's move on to the outer side of the sleeve, which many leave with a fold; it doesn't look very nice. Therefore, we recommend ironing the sleeve, leaving 1 cm on the outside, after which you need to slightly move the top layer of fabric towards you so that the part that is not quite ironed is on top, and go over it again. If there is a stand for ironing sleeves, just iron on one side, scroll and iron on the other;
Carefully iron the areas near the buttons
- The next part is the front half of the shirt where the buttons are located. Iron carefully around each button and only then iron the main part. If you place the shirt on the edge of the board (it usually tapers), it will be easy to iron the area near the shoulder and sleeve. Otherwise, you can use the above-mentioned stand;
The edge of the ironing board is the ideal place to iron the top area of a shirt.
- Iron the other half of the shirt where the loops are. This half is ironed without problems;
- Turn the shirt over and place it so that the collar hangs slightly over the edge of the board and the sleeves and front off the sides of the board. Now iron the back, pull it in one direction, iron it in the other direction. 30 seconds and the back is ironed;
All you have to do is iron the collar and the shirt is ready!
- All that remains is to iron the collar. We iron it from the wrong side so that the iron marks are not visible, then we fold the collar along the fold, apply a thin fabric (to avoid the same iron marks) and smooth the corner between the stand and the turn-down part of the shirt.
In conclusion, it is worth adding how to store ironed shirts. Each shirt is hung on a separate hanger and fastened with all buttons. Hanging it in the closet, straightening it among things. This way you can iron shirts for the whole working week!
Is it possible to iron a shirt immediately after washing?
Shirts prepared for ironing must be washed and dried.
After ironing, shirts that have been worn at least once will not look fresh.
Do not iron wet or overly dry items.
The optimal moisture content of a shirt is if no moisture is released when you press it. If you use the “crease-free” mode during washing, this will simplify the further process.
A dry shirt can be moistened with clean water from a spray bottle.
General algorithm for ironing a shirt
Ironing should begin with small elements, so novice housewives need to divide the product into zones to simplify the work:
- collar
- buttons
- cuffs
- sleeves
- back
- front side
Collar
When ironing the collar area, it is recommended to use the steam mode on the iron. If there is none, then use water and a spray bottle to moisten the collar.
Do not stretch the collar fabric, keeping it in place in a flat position.
The collar is looked at in 3 stages:
- wrong side
- front side
- giving the collar the desired shape
We smooth out the area under it well - the place of the dart, the joint, the stand. This is especially important for shirts that are worn without a tie.
Button area
Carefully iron between the buttons with the “nose” of the iron, pointing it towards the sleeve.
Iron the button area on both sides.
We avoid getting the iron on the buttons, which, if they come into contact with a hot sole, can cause damage and damage the fabric.
Cuffs
The cuffs are ironed after unrolling them. First, the cuff strip is ironed. Then the cuff itself from the inside, and then from the front side.
Carefully iron all the grooves on the cuffs.
Sleeves
We iron the sleeve up to the stitching seam, lightly touching it. You can use a sleeve - a device for an ironing board that imitates the shape of a sleeve.
Iron the sleeve without smoothing its edges - only the middle, gradually turning it.
Back of the shirt
Ironing the back of a shirt occurs in three areas:
- middle
- two side parts
We iron them each in turn, gradually moving the shirt and not touching the ironed collar and sleeves of the shirt.
Front side
Let's move on to the front side of the shirt. Ironing the right and left sides in turn, we try not to form microfolds under the iron.
Iron the front side to the yoke, collar and sleeve. We go over the iron again under the collar stand. We pay attention to the pocket flaps on the front side, if any.
Now the shirt looks perfect and you need to fold the shirt correctly or hang it on hangers.
Place the shirt on the ironing board and fasten all the buttons. If necessary, you can iron small parts or creases that formed during the ironing process.
The GQ style video encyclopedia shows how to iron a shirt:
How to iron a shirt: modern technologies to make ironing easier
In this section we will tell you about the secrets used by housewives all over the world. Expensive or cheap, interesting or pointless - you decide.
- Conditioner when washing - just a cap of a miracle product and after drying the shirts are much less wrinkled, and ironing is much easier.
- A dryer with thick tubes instead of fishing line is an excellent solution, because during drying it does not form that same crease that you usually struggle with the longest (really?).
- Dry your shirt on a metal or plastic hanger. A wooden or fabric-covered hanger can leave stains on your shirt and be damaged by moisture.
- A steam generator is a great way to steam iron your shirt. To do this, just hang the shirt on a hanger and blow it with steam. Steam is supplied under high pressure, breaking through the fibers of the fabric and thereby smoothing it out. Remember at the beginning of the article we talked about shirts that cannot be ironed? If after drying they still don’t look very aesthetically pleasing, go over them with steam.
The steam generator is the latest device for ironing clothes.
A device for drying and ironing clothes. Do you value your time and comfort, and are you willing to pay for it? Buy a newfangled device for drying and ironing items, and the question of how to iron a shirt will no longer arise! Just hang the wrung-out shirt on the device and turn it on to one of the modes. Once drying is complete, you will have a perfect shirt that you can wear right away.
A device for drying and ironing clothes is a real find for those who don’t like an iron.
We hope we have answered all your questions about how to properly iron a shirt, and now you can simplify this process in a minimum amount of time. And in conclusion, we suggest that you familiarize yourself with the video instructions for ironing a shirt.
How to iron a shirt without an iron?
Hot iron mug
A mug or any pan is suitable for ironing. The larger the diameter, the more surface it will cover at one time. A kettle that boils water on the stove is also suitable.
It is necessary to pour hot water into a metal container and run it over the fabric. This method is still suitable today, it is simple and fast. The bottom of the container must be clean, otherwise it will contaminate the shirt.
Video example of ironing using a pan of hot water:
Steam in the bathroom
For this time you need a reserve of about 20-30 minutes. Fill a bath with hot water and hang a shirt over it on hangers.
The steam will straighten the folds, the fabric will stretch and after 20 minutes it will be “ironed”.
You can't put the shirt on right away. You need to remove it from the bathroom and let it dry.
It should be taken into account that this method requires a large volume of water, which imposes additional costs.
Steam from a boiling kettle
Boil a kettle and place a wrinkled shirt under the steam from the spout. Proceed with caution to avoid getting burned.
Self-smoothing solution
- Dissolve a little vinegar and fabric softener in water. Mix and pour the resulting solution into a spray bottle. The solution does not leave stains on fabric.
- Moisten a neatly laid out shirt with the solution and wait for it to dry. The wrinkles will be smoothed out and the clothes will look neat.
Water and hairdryer
Spray the fabric with plain water and dry with a hairdryer. The effect is less noticeable than after a vinegar solution, but it will be noticeable.
Stretching and pressing
This method takes a long time.
- You need to carefully lay the shirt down and straighten out every fold.
- Place a heavy and large object on top so that its surface completely covers the clothing. For example, a mattress so that the clothes are under the sleeping person all night. The effect will be enhanced if you spray the shirt with a vinegar solution or plain water before doing this.
Wet towel
- Wet a terry towel and squeeze thoroughly.
- Spread it on a flat surface (floor, table, bed). Place the shirt on top and carefully straighten out the folds. When exposed to moisture, the fabric will smooth out.
This process requires one to two hours. The shirt will be ironed, but very damp. You will need to dry it on hangers in a well-ventilated area.
This method is suitable for clothes made of wool, cotton and synthetics.
Hair straightener
- Clean the inside of the tongs to prevent stains from appearing on the fabric.
- Heat the device to a high temperature and, holding the shirt with it, move it from top to bottom.
It is convenient if the shirt hangs on hangers, and not lie horizontally.
It is easy to iron the sleeves, collar and bottom edge of clothing, but it will be difficult to straighten other, larger and wider areas. For larger surfaces, you can use a pan of hot water. This method is suitable for smoothing out individual large folds.
How to iron with a light bulb?
Similar to using hot iron cookware. Option for using the light bulb:
Option 1
- unscrew the hot light bulb with your hand wrapped in a towel
- move it over the fabric instead of an iron
Option 2
- lift clothes to the lamp
- vigorously move the clothes over it.
The wrong side of the shirt should be in contact with the light bulb. This will protect it from stains. Before ironing, wipe the lamp with a damp cloth to remove accumulated dust.
The warmth of your body
If you put a wet item on yourself, the body heat will smooth out the creases. This is not the most pleasant method, but it is effective.
If you first spray the fabric with a vinegar solution, the result will be improved. True, you will have to inhale vinegar fumes, which is unpleasant and not very useful.
Useful video reviewing ironing without an iron:
Creative shirt ironing - some tips for the housewife
How to iron shirt sleeves and any other things if you don’t have an iron at hand or the lights suddenly go out and you need to run errands as quickly as possible? There are several options here.
So, for example, if the fabric hardly wrinkles, then the clothes can simply be washed and hung to dry, making sure to fasten all the buttons. Once dry, these shirts will not need ironing. You can simply dampen the product by hanging the shirt over the bathtub and turning on hot water. The steam from the water will act on the fabric like steam from an iron. Well, of course, you can use a steamer.
You can also prepare one solution, thanks to which all wrinkles on clothes will disappear. To do this you will need:
- fabric softener;
- vinegar;
- clean water (bottled or purified).
Mix all the ingredients in equal proportions, pour into a spray bottle and treat the shirt, hanging it on a hanger in advance. After the solution dries, the shirt will look like it has just been ironed.
We advise you to familiarize yourself with the recommendations for choosing and working with a steamer - an ideal tool for smoothing and refreshing items made from any fabric!
Want to know how to purify water at home? Read all about cleansing methods here.
Neat clothes without ironing
If you don’t want to waste time using an iron, you can use alternative ways to wear neat and ironed clothes. Knowing the composition of the fabric, you can estimate the degree of its wrinkleability.
Natural fabrics such as linen, natural silk, muslin, cambric are prone to the rapid appearance of untidy creases.
Clothing with synthetic fibers retains its shape longer and is easily smoothed out after washing if clothes made from it are dried on hangers or flattened on a flat surface.
Denim
Denim is a coarse, stiff, dense twill fabric that Levi Strauss used to sew the first classic jeans. They sew from it:
- trousers,
- shirts,
- jackets,
- dresses and other things
There are many reasons for their popularity, one of which is: you don't need to iron them! This is a dense material that is resistant to deformation and retains its shape.
Crash
This fabric has a small fold, with an initially wrinkled effect. It makes stunning shirts!
Before turning on the iron
You need to dry a clean, washed shirt flattened, hanging it on a trempel (hanger). There is no need to wait for complete drying; ironing a slightly damp product is much easier and faster. If the fabric is still dry, evenly moisten it with a home spray bottle about an hour before ironing. Or wrap your shirt in a damp towel for a few minutes.
However, this does not apply to silk shirts. They should be ironed exclusively dry through a damp cotton cloth. Spraying with water or ironing through cheesecloth may cause stains.
Do not rush to turn on the iron until you have examined the label on the shirt. The composition of the fabric is indicated there, as well as recommendations from the manufacturer regarding the ironing process. It takes very little time, but it saves you from the possibility of ruining the thing.
A high-quality iron plus a good ironing board will make the process more pleasant and comfortable. You only need to fill the iron with distilled water, but not tap water. Otherwise, salt deposits may form in the tank and stains on things during ironing cannot be avoided. In addition, do not forget to periodically clean the soleplate of the iron.