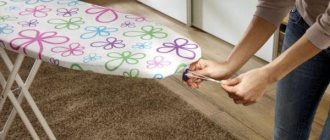
Before the birth of a baby, parents have a lot of worries, because the little person needs to buy a lot of things, and all of them are vital. For example, you cannot do without a crib, which at first is a real home for the baby. You also want to furnish it with all the comfort, so for protection they buy soft bumper sides, which are supposed to protect the baby from hard rods and drafts. Such products can be bought or ordered, but some expectant mothers go off the beaten path - they decide to sew the sides of the crib with their own hands. If you have a sewing machine, as well as minimal skills in working with it, then the idea is quite feasible.
Points for and against"
Some parents have complaints about this accessory, so it is better to evaluate their validity in advance. But first, it’s better to study the list of advantages of the sides. In addition to performing protective functions, soft products help:
- keep warm in the crib, where the newborn spends the lion's share of time;
- turn a “dwelling” that looks like a prison cell into a cozy nest;
- develop and entertain the baby thanks to thoughtful design;
- protect various small objects from falling on the floor.
The main disadvantages of fabric crib sides are dust collection and lack of visibility, but the first problem can be solved by regular washing. The second is completely far-fetched, since after the first six months, when the child’s vision becomes focused and the immune system becomes stronger, the bumpers can be used for another purpose.
Particular attention to sewing material
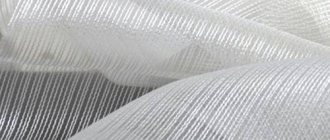
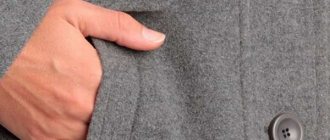
Barriers for sides that protect children from falls must be made of natural, non-allergenic, durable materials. Cotton, linen, calico, chintz or flannel are ideal. Materials with water-repellent impregnation deserve special attention. But it is better to avoid synthetic fabrics, as they can cause allergic reactions in a child.
Before sewing the product, the fabric must be washed and thoroughly ironed with steam. This should be done because natural materials tend to shrink by about 5% after the first wash. If you do not pre-treat the fabric, the finished product may shrink and become deformed after washing.
It is necessary to pay attention to the pattern on the fabric. A growing child will study the world around him with interest, so the images on the material should not be too bright and difficult to perceive. Preference should be given to pastel colors. It is recommended to choose plain fabrics, as well as materials with children's themed designs or abstract images.
Another important point that novice craftsmen often forget about during the sewing process is the direction of the threads in the fabric. All parts of the workpiece must be placed in the same direction. If one element is cut along the threads and the other across, then the finished stopper may become skewed, and unwanted folds and creases will appear on it.
Types of bumper sides
The increasing popularity has led to the emergence of a large number of different models, and their number continues to grow steadily. All crib bumpers can be divided into the following types:
- Solid bumpers are not very thick rectangular pillows, the dimensions of which correspond to the walls of the berth. Pockets are sewn onto them for various small items.
- A separate set of small pads, equal in size, covering all sides. Upholstery materials for a set often come in different colors and patterns.
- Low sides. They are made both solid and in the form of a set of pillows. There is only one difference - the small height of such a “fence”, which makes it easier for adults to “surveil”.
- Bombon sides (bonbon) are blankets that are pieces of fabric to which tiny pads are sewn. Advantages: beauty, softness along with elasticity.
- Rollers are products that resemble candy bars. They can be long, surrounding the entire perimeter, or short, intended for each side.
- Braids. The most newfangled sides. The unusual nature and relative ease of manufacture makes this variety extremely attractive.
It is not necessary to settle on just one type; a combination of several types of bumpers is possible. For example, bolsters are added to regular sides; each accessory in this case will protect a specific side of the crib.
How to make a fall protection bed with your own hands
You can easily make a do-it-yourself limiter for a children's bed of any kind at home, both from scrap materials and from inexpensive building materials, despite the fact that this attribute will serve as long and reliably as the factory one.
If the built-in limiter is a series of vertical slats, then the arms and legs of babies can get stuck between them. In this case, a soft border is also necessary.
How to make a bed restrainer from wood with your own hands
First, you need to decide on the method of attaching the limiter; the easiest way is to attach it to the side of the bed, but this may not be a very aesthetic way and will damage the structure of the crib. You can choose any convenient one from the list of mounts listed above.
For older children, who are around the age of three, you can choose low restraints to prevent them from falling while sleeping.
Decide on the future design and shape of the holder. Prepare the necessary material and tools, namely:
- Reliable wooden bars;
- Hacksaw;
- Self-tapping screws and/or bolts;
- Screwdriver;
- Ruler or tape measure;
- Paper and pencil.
To make the simplest U-shaped barrier, which will be fastened with bolts, you will need slats 55 cm long; the height is selected individually, can be from 15 to 30 cm.
For a crib measuring 70x120 cm, a side with a height of 70 cm will be optimal.
Step-by-step description of the side manufacturing process:
- Draw a schematic diagram of the proposed barrier for the crib, taking into account future dimensions;
- Cut the wooden slats according to the dimensions indicated in the diagram;
- Carefully fasten the bars together to ultimately obtain a U-shaped frame.
- Drill holes for fastening bolts on the installed barrier and the side of the bed;
- Screw the limiter to the bed using bolts.
Older children need curbs to prevent them from falling while sleeping.
Side made of material
To do this you need:
- Take measurements of the crib;
- Construct a rough plan of the building on paper;
- Purchase foam rubber or padding polyester, fabric for the cover and fasteners in the required quantity;
- Roll up rolls of material and stitch;
- Sew covers of a suitable size;
- Sew fasteners onto the covers and mattress;
- Attach the restraint to the bed.
The color scheme of the bed limiter, as well as the bed itself, depends entirely on the flight of your imagination.
Plastic side
Pipes purchased from the plumbing department of a hardware store work well here. They are easy to fasten together, the fastenings are strong, and the whole structure is quite simple.
The holder can be attached to the side of the bed, to the bottom of the bed, or under the mattress, if the age and weight of the child allows.
Removable restraints are installed, as a rule, only on part of the bed, and therefore are suitable for older children - approximately three years of age and older.
Mesh side
- Measure the bed;
- Plan the approximate size and design of the limiter;
- Purchase materials: strong mesh, slats made of wood, metal.
- Cut and fasten the frame from the slats;
- Attach the mesh in the middle;
- Cover the frame with a suitable fabric or thoroughly sand the surface of the wood and varnish it, let it dry.
- Attach to the bed in any convenient way.
Parents traditionally prefer pink for a girl and blue for a boy.
Side for newborns
How to make a side for a children's bed so that the child does not fall? Restraints on newborn cribs are necessary not only to prevent children from falling, but also to soften the hard parts of the bed.
This function can be performed by soft woven bolsters and pillows placed around the perimeter of the crib and covering sharp corners.
In cribs designed for newborns, restraints are installed along the entire length, safely limiting the space of the crib.
Natural hypoallergenic materials are suitable for making barriers. It is not advisable to use hard parts to decorate the sides, because they can scratch the delicate skin of babies, or get into the respiratory tract and cause suffocation.
For the little ones, soft models of bumpers are available. They can cover the crib on four sides, or they can only be attached to two long sides.
Preferred Materials
They are subject to quite strict requirements, since the little man is defenseless against many dangers.
The best fabrics
Therefore, artificial fabrics are taboo materials, since synthetics often provoke allergic reactions, leading to big health problems that can come back to haunt you in the future. Therefore, the naturalness of the fabric is a requirement that is fulfilled exclusively by everyone.
Durability, environmental friendliness, and the ability to “breathe” are the advantages of cotton fabrics. The range of likely contenders is calico, linen, chintz, flannel. Before cutting, washing is required, since shrinkage of the fabric is the price to pay for its naturalness.
Filling options
The first candidates for the role of filler for the sides are foam rubber and padding polyester. Both types are distinguished by their softness, ability to retain heat, and elasticity. The disadvantage of foam rubber is that it takes a long time to dry, this must be taken into account, because the products will have to be washed often.
Other options are Periotec, polyester, hollcon, holofiber. All materials retain their shape quite well, are durable, hypoallergenic, and non-toxic, so each of them will not harm the baby. Feathers and down are prohibited. The reasons are a high probability of an allergic reaction, love of mites and other similar microorganisms.
Step-by-step instruction
We calculate the number of products and their sizes
The usual size for a bumper pillow is 30-32 cm . Standard rectangular cribs for newborns are available in sizes 120x60 cm or 125x65 cm. In both cases, 4 elements are used on the long sides of the crib and 2 on the short sides. If you cover the entire perimeter of the crib, you will need 12 pillows.
One long side (outer) can be left open so that the mother can see the baby - in this case, 8 are enough. 8 of them can also be placed in a round crib, and 12 in an oval crib. Sometimes one rectangular bumper 60 cm long is made on the short sides of the crib, but it is necessary Keep in mind that they are more difficult to wash, especially if they are tightly packed and do not fold.
Required Tools
Nothing special is required. First of all, you need a sewing machine. Any one will do, because the only functions needed are straight stitch and zigzag. You will also need tailor's scissors, a ruler, a chalk or fabric marker and a lighter. If you don’t have tailor’s scissors at home, any sharp ones with long blades will do to make cutting comfortable . A lighter is needed to melt the edges of the ribbons, otherwise they will crumble. To create a pattern you will need graph paper or whatman paper.
Selection of materials
Tip : It is best to buy cotton for children's products - this fabric is natural, hypoallergenic, pleasant to the touch and easy to care for. Calico is most often used, but you can also use satin, flannel, or poplin.
It is important to pay attention to the density of the fabric - it should not be too thin, otherwise during use there is a risk of encountering a problem when the filler comes out of the product directly through the fabric. If the selected material is thin, it is recommended to sew pillows with a double cover, making the inner one from a denser fabric (most often, inexpensive white calico is used).
There are many fillers, the most popular are foam rubber, padding polyester, holofiber and holcon . For the sides, the last two are best suited. Holofiber is used to create “pot-bellied”, dense products, hollcon – for flat, soft ones. Both of these materials are excellent for children's products because they do not cause allergies, dry quickly, retain their shape, do not absorb moisture and odors, and do not harbor insects. Products with them can be machine washed and ironed.
Foam rubber and synthetic padding are also suitable, but they have drawbacks - the first takes a long time to dry, and the second generally does not like frequent washing and loses its shape.
Another important element is the ties. You can sew them, but it’s easier to buy satin or grosgrain ribbons. We recommend using ribbons 1.5-3 cm wide.
How to determine the size and quantity?
Usually the sides are made in the form of a square with a side of 30 cm . In this case, they fit well into both rectangular and round cribs. Let us immediately note that the side of the finished product should be 30 cm. To do this, the pattern should be made about 4-5 cm larger, because 1 cm needs to be left for the seams, and another 2-3 cm will go into thickness when stuffing.
We recommend cutting squares with a side of 35 cm - this will be enough for both seams and to compensate for “losses” during filling.
Most often, modern cotton fabrics are produced with a width of 150-160 cm. They are, of course, narrower or wider, from 80 cm to 2.2 m, but consider the option 1.5-1.6 m (for other fabrics it will not be difficult to calculate the consumption yourself) . The width of 1.5 m allows you to place 4 squares of 35 cm in a row, which will make 2 pillows. To sew 8, you will need 1.4 meters of fabric, for 12 - 2.1 meters.
If the fabric does not require adjustment according to the pattern, then you can take it without stock . But if you need to take into account the ornament, then there must be a supply of fabric so that there is room for maneuver.
To fill one product you need about 200 g of holofiber - then the pad will be dense and elastic. If you want to make it softer, you should reduce the amount of filler. Holcon is a rolled material, it is sold by the meter. When calculating, you need to take into account how thick the sheet itself is and how many layers you plan to make.
Tapes are used to secure the sides . They can be placed in the corners or in the center of the pillowcase. For corner ties, the length of one segment is 40 cm. With this consumption, almost 26 m of tape will be required for 8 elements, and 38.4 m for 12 elements.
The second way is to use a wide ribbon, sewing one piece to the center of those sides that will be lateral. In this case, there will be fewer ties in the crib, and the overall appearance will be more laconic. The length of the piece should be at least 50 cm, but it is better to take even more to make beautiful bows, rather than leaving the free ends of the ribbons hanging down.
If you plan to decorate the pillows with piping, you will need bias tape and cord . To calculate the quantity, you need to multiply the length of the side by 4 (number of sides) and by 8 or 12 (number of products) and add 20-30 cm in reserve. For our examples, you will need 11.5 m or 17 m of cord and tape.
Preparing and cutting fabric
Important : Before starting work, the fabric must be washed and steamed so that it shrinks. If you don't do this, your finished product may end up smaller than planned because cotton tends to shrink the first time it's washed. The steam treatment process is called decatification.
When the fabric is processed, you can start cutting. Use the pattern you made or draw the squares directly on the fabric using a ruler - both options are equally simple and will not take much time. Before you start sewing, you need to iron the fabric .
How to sew?
The easiest way to sew a pillow without a cover:
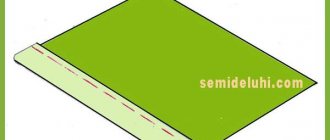
- You need to fold two pieces of fabric with the right side inward, sew three sides completely, and the fourth (which will then be the bottom - this is important if the fabric has a pattern that cannot be turned over) - 5-7 cm from each corner, leaving the central part unstitched.
- Finish the edges of the fabric with a zigzag to prevent them from unraveling.
- It is important not to forget about the tapes that attach the product to the crib. If the ties are at four points, then you need to mark the ribbons on the sides, but not in the corner itself, but by moving them 0.5-1 cm down and up from the corners. You need to sew in the ribbons right away - they are placed between the pieces of fabric in the right place, secured with pins and stitched. For reliability, we recommend additional stitching of the fastening points.
- After this, you need to turn the product right side out, place the filler in it and sew up the hole with a hidden seam. If you use holcon to fill the pillow, it is worth sewing it to the pillowcase from the inside, at least in several places - then it will not bunch up in the wash. If this does happen, then immediately after washing, just find one corner by touch and, holding it, straighten the material. There is no need to rip out the cover for this.
There are pillows with or without removable covers . If materials that can be washed and ironed are used as filling, then there is no particular need for removable covers. However, many mothers choose them. In this case, you will also need hidden zippers 30 cm long.
Making a pillowcase with a zipper is a little more difficult:
- First you need to sew the inner cover, then make a pillowcase, not forgetting to sew ribbons to it.
- Lastly, a zipper is sewn in (it is best to use a hidden one).
Difficulties may arise here because this process requires a certain skill. But there is no need to be afraid, you can master it quite quickly. To be more confident, you should practice on scraps of fabric, and then take on the product itself .
We recommend watching a video on how to sew a bumper pillow for a crib:
What is needed to sew borders?
The first step is to define the model, create a drawing or search for a ready-made diagram. Then follows the transfer of the patterns onto paper - graph paper, newspapers, wallpaper. At the same stage, they are considering a way to attach the bumpers to the walls of the crib. Frequently used options are ties or Velcro. If removable covers are provided, then in addition they purchase the required number of zippers.
Regardless of the type of collar you choose, you will need sewing tools and typical sewing materials:
- pins;
- decorative elements;
- tie ribbons;
- chalk or dry soap;
- filler;
- threads;
- scissors, knife;
- centimeter;
- textile.
To roughly calculate the amount of material, the perimeter of the crib is multiplied by the planned height of the products. The result is multiplied by 2 to obtain an approximate number, since it is necessary to add fabric for allowances and additional decorative elements (for example, frills, furniture buttons that are covered with fabric).
Which filler to choose for baby crib bumpers?
synthetic and its modern analogue holofiber , which is allowed to be used in products for newborns, can be the optimal fillers Hollow fiber holds its shape better and is more wear-resistant, but is more expensive. With a stretch, you can add batting , but it does not hold its shape and it is confusing that waste from the textile industry is used for its production. But you definitely shouldn’t choose natural fillers such as animal hair or fluff; firstly, these are strong allergens, and secondly, natural fibers can become a tasty morsel for parasites.
Thin synthetic padding that is suitable for high sides of a crib
High side bumpers
The crib in this case has standard dimensions of 60x120 cm. To sew high sides, prepare patterns:
- 4 rectangles with dimensions 43x63 cm, where the “extra” 3 cm provide seam allowances on each side - 1.5 cm;
- 4 parts for sidewalls (43x123 cm);
- strips with dimensions of 15x180 mm, if you plan to decorate the crib with frills.
From these rectangular patterns, cut out 4 pieces of filler with a knife or scissors.
Patterns for the material are transferred to washed and ironed fabric, fixed with pins, which are secured perpendicular to the future seam. Outline with chalk, leaving seam allowances, cut out, baste from the inside out, sew together 3 sides. Turning it right side out, filler is placed in the parts and the last one is stitched. If a zipper is provided, it is better to sew it in before filling it.
The last stage is to attach ties or Velcro to all sides. When they are going to decorate products with frills, they act differently. Gathered strips are sewn between two pieces of fabric on three sides. If a zipper is not needed, then the last decorative element is added after inserting the filler.
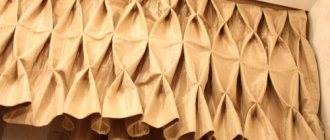
How to properly sew a frill into a side
In order to sew a frill, you need to know a few nuances. The length of the frill can be changed. At a minimum, it should be 1.5 times longer than the part. In this case, the folds will not be very lush.
When it is more than 2 times longer, the pleats will be very voluminous.
The frill can be easily assembled using a sewing machine. Assemble the ruffle by hand using a regular needle. To do this, take a thread of the required length with a needle. Then lay the material in an accordion pattern, piercing it with a needle. Now all that remains is to distribute the pleating evenly along the entire length of the thread.
In order to instantly baste a frill, you need to lay it between 2 layers of material.
Believe in your own strength. If a mother or grandmother really wants to make a bumper for her baby with her own hands, it will definitely work out.
After all, the love and energy that family members convey cannot be replaced by any factory beauty, and children especially feel it.
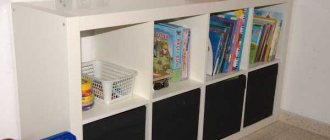
Sides - a set of pillows
These are separate elements that are not fastened to each other, but are fixed only on the slats of the crib. The following patterns are prepared for the set:
- 4 parts for pillows located at the end - 55x75 cm, with a 5 cm allowance left for seams and stuffing of pillows;
- 4 templates for large pillows designed for one of the sides of the crib, their sizes are similar;
- 6 small parts, for the other sidewall, their dimensions are 45-55 cm;
- 28 narrow strips for ties - 8x30 cm.
Cut the filling, all elements must correspond to the sizes of different pillows. The cut fabric blanks are sewn on 3 sides, pieces of soft “filling” are inserted, and the products are equipped with zippers to simplify washing. Sew on the ties. If Velcro is selected, then they are fixed both along the perimeter and diagonally.
Do-it-yourself soft baby bed restraint
For newborn children, they mainly use soft bumpers, which are filled with foam rubber or padding polyester, lined with fabric on both sides.
It is advisable to choose natural and hypoallergenic material. Such a barrier is secured with Velcro or ties sewn around the perimeter of the rectangle. The number of sides can be chosen as desired.
Many people install strips on all four sides of the bed to prevent the child from hitting the wooden bars.
Expert opinion Ksenia Petrovna Romanova Expert in the field of interior design, as well as the head of a fabric sales salon
It is very easy to sew a soft children's bed restrainer with your own hands. To do this, you need to carefully measure the length of the side and think about what height to choose for the future barrier.
It depends on the child's activity. Buy the necessary materials: cotton fabric, padding polyester, Velcro tape, piping.
Cut the padding polyester according to your measurements and attach rectangles of fabric cut to size on both sides. Do not forget to retreat 5 cm from the filler on all sides.
Sew all layers with a stitch, folding the fabric inward 1 cm. At the time of sewing on the machine, sew the piping around the perimeter of the material.
The barrier will have a dense and finished appearance. At the end of the work, all that remains is to add ribbons or Velcro at the corners to attach the barrier to the wooden rods.
Side bolsters
These are cute and not too complicated products. The shape of the sides means that constant pressure on them will lead to deformation, so the best filler for such products is holofiber, which does not lose its shape.
The length of these elements for a standard crib is similar to its dimensions - 60 and 120 cm. The preferred width is 12 cm. Based on these numbers, parts are cut out - rectangles 40x60 cm and 40x100. For the ends in both cases, circles are needed, their diameter with seam allowance is 13 cm.
The rectangles are sewn together with their long sides. The circle is sewn completely to one hole, partially to the other, to leave room for stuffing. 5-7 cm is enough. The products are turned right side out. After filling with holofiber, the holes are sewn up or equipped with a zipper of suitable sizes.
Pigtail
The sides of the “braid” are the easiest to make yourself! The costs are minimal: you only need to buy soft, good fabric (for example, velor).
No matter how good the fabric made from synthetic fibers is, it will never compare with natural ones.
The weaving technique is also quite simple. First, you should sew long fabric bags and fill them with foam rubber, padding polyester or any other filler. The last step will be tying the braids.
Density for protection from the cold and strength are important for fabrics, because small children love to touch and explore all the objects around them.
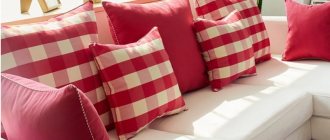
How to choose the shape and size of a pillow?
You can make cushion cushions for a sofa in many different ways. The choice of shape depends on the purpose of the product:
- decorative ones are tucked into covers of an unusual shape, in a contrasting color to the sofa, or they select a strict finish to match, decorated with appliqué, cords, frills and puffs, etc.;
- sleeping rooms (for beds) are not decorated so pretentiously; it is enough to make a cover from natural fabric that can be easily removed for washing;
- orthopedic ones can have a curved shape to hold the head in the desired position while sleeping; you can also make a bolster for the back when working in an office chair, etc.
Before developing a design, you need to determine what the pillow will be sewn for, and choose its shape and convenient size (length and diameter). In accordance with these requirements, a sketch of the external design of the cover is made and patterns are made for the base and removable part. When cutting a pillowcase, it is advisable to make a small allowance to make it easier to put it on the base.
Preparation for sewing bumpers
Before making a safety barrier, you need to measure the crib and determine the amount of fabric needed. After this, you should draw the desired design limiter on paper. Some craftsmen do without this stage; they make drawings directly on the fabric, however, such an approach can cause errors, so it is advisable to first draw the future design on paper, indicating the dimensions of all its elements in the drawing.
When the fabric has been purchased and prepared, you need to cut out the parts of the future side, connect the elements of each part to each other (leaving the underside of the safety barrier unsewn) and insert the filler into the fabric cover. When cutting out the filler, you need to remember that the cut out part should be smaller than the cover in which it will be placed by 0.5 cm on each side. If you forget about this rule, then the filler parts will be too large and will not fit into the cases.
The next step is to sew up the bottom sides of the covers (the holes through which the filling was inserted). Another popular option is to sew fasteners in these places - zippers, buttons, snaps. This allows the filler to be removed from the cover for hygienic processing or replacement. The finished product for children can be decorated with ribbons, lace or ruffles. All work is done using a sewing machine or by hand.