Normal ventilation operation is important not only for the comfort of residents and maintaining an optimal level of humidity in the apartment, but also to ensure safety if gas equipment is installed in the house.
Also, the lack of ventilation leads to the appearance of unpleasant odors in the kitchen, mold in the bathroom and toilet, and the accumulation of substances hazardous to health released during operation of the gas boiler, so it is important to periodically check the performance of the ventilation system.
How to check ventilation operation
When the hood is not working well, there are two simple ways to check the traction force:
- Open the window slightly and bring a lit candle or lighter to the ventilation grille. The flame should deflect towards the vent. If this does not happen or the flame is directed towards the room, the ventilation is faulty. The method can be used in houses not connected to the gas supply system.
- Open the window. Get a piece of paper large enough to completely cover the vent. Press it firmly against the grate and remove your hand. If the sheet remains in place, the traction is good. If you fall, you should call a specialist.
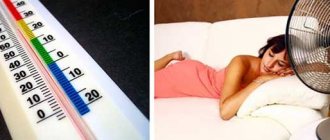
It is advisable to use both methods in cool weather, because... in the heat, the air is “heavy”, the draft weakens and it will be difficult to check its strength. Indirect signs of a malfunction may be the formation of condensation on the windows, the appearance of mold or mildew on the walls bordering the street and in the bathroom, and foreign odors coming from the entrance or from neighbors.
How should ventilation work in an apartment?
Depending on how air circulation is organized, ventilation systems are divided into two types:
- natural;
- artificial.
According to operating technology, ventilation systems are divided into:
- supply air, supplying air to the room;
- exhaust systems that remove air outside the room.
To organize natural air circulation, no additional equipment or electricity costs are required. Air exchange occurs spontaneously. The principles for creating this type of ventilation are simple and inexpensive. However, it must be borne in mind that if the regional climate is characterized by high humidity, natural ventilation will not be effective, since the concentration of moisture in the air of the apartment and the environment will be almost the same.
When it comes to artificial ventilation, we mean the presence of special equipment. The most important positive factor of such ventilation is the absence of dependence on the climatic conditions of the area. During operation of the fan, the exhaust air is quickly removed from the apartment, and in return a fresh air flow is supplied from outside. Often, for greater efficiency, an artificial exhaust system is combined with a natural one.
The construction of any housing traditionally involves the organization of a natural ventilation system. It looks like several branches of air channels extending from a common riser. Such channels can be found in any apartment. If you look closely, you can see grilles in the bathroom and toilet, in the kitchen and in the hallway - these are the decorated ends of the ventilation ducts. Due to the difference in temperature and pressure indoors and outdoors, the movement of air between housing and the external environment due to the wind, the opening of entrance doors and windows, cracks in them, what is called natural ventilation occurs.
The absence of constant natural ventilation will quickly lead to the appearance of clearly noticeable dampness and mustiness in the air. In such cases, they say that it is difficult to breathe. In order to somehow improve the situation, residents of such premises are forced to constantly have their vents and windows open. But at the same time, heat is lost and additional energy resources are required to maintain a comfortable temperature in the apartment.
Such situations can be avoided with properly functioning ventilation. It is installed at the rate of 60 m³ of air per inhabitant. If it is not possible to create conditions for air exchange of the above volume, it is necessary to equip the room with forced ventilation. It is usually installed under the ceiling or in a hanging frame.
It is better if the apartment is equipped with ventilation ducts, each of which performs its own function: one for air flow into the room, the other for removal from it. The air flow is usually carried out through the rooms, while the air outlet is organized through the bathroom or toilet. Channels cannot be routed directly through the room. Only the placement of ventilation grilles is permissible in the apartment. Other system components must be hidden.
We figured out what function ventilation performs and studied the parameters of its effective operation. Now let’s decide which rooms require the installation of this system.
- The living room is the most popular part of the apartment. We spend most of the time here. Naturally, the volume of carbon dioxide released is the largest and must be removed. If this is not done, your health may worsen, a headache may appear, and all signs of oxygen starvation may appear.
- The bedroom is a room for sleeping. We're here all night. Accordingly, air circulation is absolutely necessary here. Renewing the air will ensure complete rest, vigor, and good health for the rest of the day.
- Kitchen is a room for preparing food. The air here is excessively heated, has a lot of odors and moisture.
- A bathroom, a bathroom, is a room with a high content of water vapor, often high temperature, the smell of detergents and other specific “aromas”. There is a high risk of moisture settling on walls and furniture. An increased concentration of water vapor can lead to the development of mold on the ceiling and walls of the room.
Peripheral secondary part
A check valve is an element of the heating system, consisting of a plastic or metal base, which performs the function of completely shutting off the coolant supply. This happens when the flow begins to move in the opposite direction. The metal disk is attached to a spring, which is under pressure when the flow moves in one direction, and when it moves in the opposite direction, the spring is activated to block the passage in the pipe. The valve device has not only a disk and a spring, but also a sealing gasket. This component helps keep the disc in place tightly. Because of this, there is practically no possibility of pipe leakage. Butterfly valves are widely used in domestic heating systems.
Let's look at the principle of operation and an example of when check valves are needed and when they are not. In the operating mode of circuits where there is circulation, the presence of a valve is not necessary. For example, if you look at a classic boiler room, where there are three parallel circuits. This can be a radiator circuit with a pump, a heated floor circuit with its own pump, and a boiler loading circuit. Often such schemes are used when working with floor-standing boilers, which are called pump priority schemes.
Pumping priorities are the determination of alternating operation of pumps. For example, the use of check valves occurs when only one pump remains in operation.
The installation of valves is completely unnecessary if there is a hydraulic arrow on the diagram. This allows, during pressure drops in certain pumps, to get rid of this problem without using check valves. The hydraulic arrow indicates the closing section, which works to restore pressure in one of the pumps.
The presence of a floor-standing boiler in the circuit also makes it possible not to install check valves for heating. This occurs due to its barrel, which bridges a certain place from the drop, which is considered to be zero resistance or a hydraulic arrow. The capacity of such barrels sometimes reaches 50 liters.
Check valves in heating are used if the boiler is placed at a sufficiently large distance from the pumps. In addition, if the components and the boiler are 5 meters apart, but the pipes are too narrow, this creates losses. In this case, a non-working pump can create circulation and pressure on other components, so it is worth installing a check valve on all three circuits.
Another example of using check valves is when there is a wall-mounted boiler, and two units are operating in parallel with it. Most often, wall-mounted boilers have one radiator system, and the second is a wall-mounted mixing module, along with a heated floor. Check valves do not need to be installed; if the mixing unit operates only in constant mode, then when not in operation the valves will have nothing to regulate, because this circuit will be closed.
There are times when the pump on the mixing wall unit does not work. This sometimes happens when the room thermostat pump turns off during a certain room temperature. In this case, a valve is necessary because circulation will continue in the node.
Nowadays, modern mixing units are offered on the market, when all loops on the collector are turned off. To prevent the pump from idling, a bypass with a bypass valve is also added to the manifold. They also use a power switch that turns off the pump when all loops on the manifold are closed. The absence of the proper elements can cause a short-circuited unit.
These are all cases where check valves are not needed. In most other conditions, check valves are not required. Valves are used only in a couple of cases:
- When there are three parallel connection nodes and there is no work in one of them.
- When installing modern collectors.
There are very few cases where check valves are used, so now they are gradually being removed from use.
Causes of hood failure
There are several reasons for the occurrence of reverse draft, when air from the ventilation is sucked into the room, or its complete absence:
- Installation errors. Incorrect placement of ventilation pipes or their insufficient length is the main cause of backdraft. It is especially common among residents of upper floors, because... to ensure the movement of air flows, the height of the pipe must be at least two meters.
- Illegal reconstruction. There are often cases when residents of apartment buildings unauthorizedly make changes to ventilation structures or completely dismantle a section of the ventilation duct running through their apartment. As a result, the functioning of the system stops.
- Installation of plastic windows. Replacing double glazed windows can have a big impact on air circulation, especially in older homes. In them, ventilation systems were designed according to the principle of natural impulse, based on the use of the temperature difference between indoors and outdoors. An important part of the system's operation was the constant flow of air from outside. Hermetically sealed plastic windows cannot provide it, especially in winter, when they are tightly closed due to the cold, and in summer such ventilation is useless, because... the temperature inside and outside the room is almost the same.
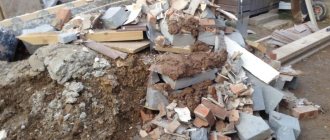
- Ventilation duct clogged. Construction debris, parts of the ventilation system that have collapsed due to dilapidation, a bird's nest, etc. can block the air movement.
Why ventilation in an apartment does not work well: possible reasons
Before you begin to eliminate ventilation breakdowns, you need to understand the reasons for their occurrence. They are usually the following:
- The design of the ventilation system is incorrect. At the construction stage, air exchange standards related to the area of the room and its functionality are not taken into account. Then the ventilation will not cope with its function. The only way out of this situation is additional artificial hood.
- The formation of obstacles in the ventilation system that interfere with free air exchange. Sometimes simply cleaning the outlet channel with your hands or a vacuum cleaner from a thick layer of dust and dirt can give a significant positive result. When the described actions are not successful, we can conclude that the system is clogged somewhere deep. In this case, it is advisable to invite specialists from the management company who know how to clean the mines. The cause of blockages formed deep inside the system is most often construction debris or pets accidentally getting in there.
- Neighbors above can sometimes unknowingly create obstacles to properly functioning ventilation. It happens that there is a blow from the exhaust grille and a hum is heard. This happens when neighbors have artificial ventilation included in the general system, and it is this that creates reverse draft. The problem can be eliminated only by installing forced ventilation in your apartment.
- Features of plastic windows. The tightness of plastic windows can serve as a real scourge for normal air circulation in the room. In this case, the exhaust system will not work efficiently. You can put up with this by periodically opening windows and vents or setting them to micro-ventilation mode.
- Repairs that were not coordinated with the management company specialists and carried out by the residents themselves. If such repairs affect the ventilation duct area, it may not work efficiently in the future.
- Insufficient room heating. The normal functioning of the exhaust system is based on the high temperature and pressure difference between indoors and outdoors. If there is a heat deficiency, air exchange will not occur with the desired effect, and may even stop altogether.
How to install a check valve
Installation of a multi-leaf grille and a membrane vent is not difficult and does not require a detailed description. The elements are attached to the wall and connected to the air ducts according to the factory instructions.
One addition: when installing an external grille, it is better to insulate the wall channel. From direct contact of the exhaust air with the cold walls, vapors will begin to condense. After the fan stops, the water will freeze and form ice.
If you decide to install a gravity check valve for your hood, consider the following nuances:
- Place the element at the outlet of the tee, but in an inverted position, as shown in the photo.
When the fan is not working, the damper will open. In an inverted position, the shutter flap remains open - It is better to place the tee on a vertical section of the air duct, and not under the ceiling. Then you can build a decorative box and completely hide the pipe.
- Provide ventilation grilles on the sides of the decorative box, as the home craftsman suggests in the video.
- Do not place the firecracker and tee close to the entrance to the mine. At this point the flow turns, a turbulence is formed, and the damper may not close completely.
- Do not place the damper vertically or at an angle, as many craftsmen like to do. In this position, the sash does not close tightly or does not want to open.
Ways to solve ventilation problems
Having figured out the cause of the traction problem, you can begin to eliminate it. There are several ways to correct the situation:
- Cleaning the ventilation duct. The operating rules of apartment buildings prohibit residents from accessing public communications, so in case of serious problems, work must be carried out by employees of specialized services. However, minor blockages can be cleared yourself. Remove the protective grille and look inside the ventilation duct. Using a broom or vacuum cleaner, clean the channel. In case of serious difficulties, call the management company.
- After installing double-glazed windows, ensure frequent ventilation of the room.
- In a private house, provide a gap between the front door and the threshold for air flow.
- Install supply valves or double-glazed windows with built-in valves. They are equipped with special curtains that allow you to block the air flow if necessary. Valves are available in window, ceiling and wall types.
- In case of serious problems, use forced air devices. Our company employees will tell you more about the equipment.
- Installation of forced ventilation. An electric fan is mounted directly into the hood to provide air movement.
If the measures taken do not help, contact the management company.
Example of installation of a ventilator with perforation
It is advisable to install the valve for perforation in the upper part of the window. The complexity of the work lies in the need to mill the frame - this cannot be done without special equipment and skills in working with power tools.
Carrying out preparatory work
When planning a valve insertion, you need to consider some points:
- It is better to install the ventilation device on a removed sash;
- installation is carried out in the warm season;
- When sawing a hole, you must work carefully so as not to damage the seal on the sash.
The sash is removed from its hinges and installed in an inclined or vertical position.
Part of the fittings (scissors and corner gear) are removed from the frame, and the counter strips are removed - they can interfere with milling
List of required tools
To install the inlet you will need:
- electric drill and drills (diameter – 5 mm and 10 mm);
- fine-grained file;
- jigsaw;
- template for marking holes;
- silicone sealant.
You can prepare a groove without a template, but it’s easier to work with. You can make a template yourself from plywood or hardboard.
Step-by-step installation and fastening
The entire process of installing a supply valve is divided into several stages:
Stage 1. Marking. Place a template on the vertical protrusion and mark the place where the device will be inserted.
Stage 2. Milling the sash. Using a large diameter drill, drill several holes in a row and connect them using a jigsaw. Repeat the operations on the frame fusion.
Window chambers opened during the milling process must be filled with sealant - this will prevent moisture from entering and whistling during air circulation.
Stage 3. Installation of the mounting strip and valve. Treat the back side of the plank with sealant, attach the part to the sash and secure with self-tapping screws.
Install the indoor unit of the ventilation device to the frame and snap the fasteners onto the bar. Check the evenness and strength of the valve location
Stage 4. Installation of the visor. Secure the protective visor on the outside of the frame with self-tapping screws. Treat the joint between the parts with sealant. It is advisable to use insurance during installation.
Stage 5. Completion of installation. Put the fittings back in place and hang the sash on the hinges. Set the ventilation device to the ventilation mode.
How to write an application to a homeowners’ association for ventilation cleaning – Housing and Communal Services
The operation of ventilation and hoods is invisible, but it is one of the main systems in an apartment building and ensures comfortable living in the apartment. Without proper functioning, unpleasant odors will appear in the premises from the entrance, toilet and kitchen.
In addition, lack of ventilation leads to the formation of mold and mildew on the walls and ceiling. Let's look at how a hood works in the kitchen, bathroom or toilet. And we will find out what to do in this case.
The ventilation in the apartment does not work. Where should I contact?
So, the window was opened, a draft appeared in the channel, the leaf “sticks”. “But I won’t be able to keep the window open all the time, especially in winter,” you might think.
Unfortunately, these are your problems.
And that's why. Let us turn to SP 60.13330.2016 “Heating, ventilation and air conditioning. Updated version of SNiP 41-01-2003" (currently in force).
7. Ventilation, air conditioning and air heating.
7.1.9 In rooms with natural… … …it is permitted, if justified, to use periodic ventilation through transoms and vents.
There is also SanPin 2.1.2.2645-10 “Sanitary and epidemiological requirements for living conditions in residential buildings and premises,” which contains the following:
4. Hygienic requirements for heating, ventilation, microclimate and indoor air environment
4.7. Natural ventilation of residential premises should be carried out by air flow through vents, transoms, or through special openings in window sashes and ventilation ducts. Duct exhaust openings should be provided in kitchens, bathrooms, toilets and drying cabinets.
Therefore, in response to a claim about non-functioning ventilation in the apartment, you will receive something like the following:
Why weren’t there problems with ventilation before?
Do you feel the wind blowing?
Houses were and are designed in such a way that inflow is provided through cracks in the windows (based on the same SNiP).
Wooden window frames in houses always provide such an influx, remember how they were blown in in winter? . Modern plastic windows are another matter.
When installed correctly, such a window provides almost complete tightness. As a result, you no longer have air flow into the room. And without an inflow, the exhaust hood does not work.
Maybe put a fan on the exhaust duct?
Installing a fan will not help the situation, because... the volume of air that the fan will extract must be replaced by something. But with what? Air can penetrate from neighbors through walls and interfloor ceilings, and enter through the front door.
The following situation is even possible: a hood with a fan will “take” air from another hood (installed a fan in the kitchen - it pulls air from the toilet). Thus, your hood will only work correctly if the windows and doors are open (i.e.
in the presence of air flow).
What to do?
It is necessary to imitate a slightly open window that constantly lets air through, with a small air flow.
For these purposes, in Europe they came up with window valves for mild warm climates, and “Alpine windows” for northern countries. We recommend installing an “alpine window” for our climate.
The best choice is the KIV-125 supply valve. In Russia, the average price for it is 2500 rubles, installation is about 3500 rubles.
When open, such a valve constantly allows air to pass through itself, but at the same time it will protect you:
- from dust
- from noise
- from a draft
- insect infestation
- by cold
How to write a complaint about backdraft in an apartment
A full explanation on the topic: “how to write a complaint about backdraft in an apartment” from a professional lawyer with answers to all your questions.
Where, to whom and how to competently complain about the management company?
1. Consider the application within the time limits specified in clause 5.1
“Instructions on the procedure for considering applications and receiving citizens in the system of the Prosecutor’s Office of the Russian Federation”
, approved by order of the Prosecutor General's Office No. 45 of January 30, 2013.
2. Take prosecutorial response measures and conduct an inspection at Management Company LLC “______________” and protect the rights of residents.
3. Oblige the Criminal Code to protect the residents of the house at ____________.
Supply and wall valve installation technology
The installation process of the device is quite simple, but specialized equipment is required for operation.
It is important to choose the right installation location and follow the algorithm of actions
Determining the optimal installation location
When choosing a room to install a wall “inlet”, you should be guided by the following rules:
- Installation is preferably carried out in a load-bearing wall.
- In an apartment building, it is better to install the valve with access from the outside to a balcony or loggia.
- It is not advisable to install supply ventilation on the wall of a building facing a highway or an industrial zone.
It is not recommended to use the wall valve in rooms with a high degree of humidity - in winter there is a high risk of the device freezing. As an option, you can use “supplies” with a heating function.
Having decided on the wall, you need to choose the optimal place to insert the valve.
The most successful areas are:
- between the window sill and the radiators - the supply air is heated from the heating device and distributed throughout the house;
- at the top of the window opening (2-2.2 m) - air masses enter a warm environment, warm up to a comfortable temperature and fall down.
In both cases, the wall valve can be hidden behind the curtain.
When installing the ventilator at the top of the window, you must maintain a distance between the slope and the device of at least 30 cm - this will reduce the likelihood of the ventilation duct freezing
Required tools and materials
To install the supply valve into the wall you will need:
- a stationary drill or a powerful hammer drill with a diamond bit, the diameter of which should be slightly larger than the size of the air duct;
- an industrial or household vacuum cleaner - especially important if installation is carried out in a “clean” area where repairs have already been completed;
- polyurethane foam;
- plaster mixture;
- construction knife;
- curly screwdriver;
- Marking tools: measuring tape, building level, pencil.
Ventilator installation is a dusty and noisy job. Therefore, it is necessary to use personal protective equipment: gloves, goggles, construction headphones and a respirator with a dust filter.
To install a ventilation valve with a breather, a device for cleaning and heating the air mass, you will need a diamond drilling installation, because a conventional drill will not be able to drill a hole of sufficient diameter:
Sequence of work
The entire technological process can be divided into several main stages.
Stage 1. Preparing the wall. If the building is lined with curtain panels, they must be temporarily dismantled. On the inside of the wall, apply markings for drilling - attach the base of the valve and mark the outline with a pencil. It is advisable to organize dust removal.
Use masking tape to secure the plastic bag and plastic container. Connect a vacuum cleaner hose from above to the “trap” - the dust generated during drilling will flow into the waste bin
Stage 2. Drilling a hole. Using a diamond bit or drill, perform initial drilling to a depth of 7-10 cm. Remove broken fragments of concrete, and use a chisel to knock out a notch in the center for more stable positioning of the drill. The entire channel must be made with a slight slope outward to prevent moisture from entering the room.
During drilling, the working area must be periodically moistened - this measure will reduce dust formation and protect the tool from overheating
Stage 3. Cleaning the canal. Insert a vacuum cleaner hose into the cut groove and remove all dust from the hole.
Stage 4. Installation of thermal insulation. To accommodate an additional layer of thermal and sound insulation, the hole may need to be widened. The exact dimensions of the channel depend on the type of insulation.
The optimal heat insulator for a wall valve is a foamed polymer material. It does not lose its qualities in high humidity conditions
Stage 5. Installation of the sleeve. Place the air duct tube into the channel with the heat-insulating casing, pushing it outward with a screwing motion.
Stage 6. Installation of the body and cover. Attach a protective grille to the outside of the wall. From the inside, apply markings for installing the housing, drill holes, hammer in plastic dowels and fix the panel to the wall.
We also have material that describes in more detail the process of installing a supply wall valve.
After the housing is secured, a damper that regulates the air flow and a dust filter are installed. The final stage is installing the cover
Precautions when working in a ventilation duct
If the air outflow is disrupted, an accumulation of flammable gases and combustible debris may occur in the ventilation shaft, so during operation, take the following precautions:
- Do not use open fire to illuminate the ventilation shaft and do not try to set fire to debris accumulated in the chimney, as this may lead to a fire.
- Do not place heavy objects into the ventilation duct.
- Do not use aggressive solvents or other chemicals to clean pipes. It is permissible to use dry ice, which when melted leaves no traces.
Supply ventilation systems
offers a wide range of different types of ventilation equipment:
- Devices for forced air supply and purification. Models of different sizes and power with a different set of functions are presented: heating, passive ventilation, ionizer, UV radiation, CO2 level measurement, etc.
- Supply and exhaust ventilation - equipment for ventilation, cleaning and heating of air.
- Supply valves - provide ventilation without the use of electricity, a high level of cleaning and protection against freezing.
- Dust filters are high-quality consumables for the equipment presented in the online store.
The AEROS company is Tion No. 1 dealer in Russia . We create comfortable conditions for our clients:
- We provide a two-year warranty on all equipment.
- Professional in-house teams of installers are available to customers.
- Delivery throughout Novosibirsk and the region is free.
You can get advice on the presented range and technical characteristics by contacting the company’s specialists by phone listed on the website or via online chat.
If the hood in the apartment does not work, this seriously worsens the quality of life of the household. Mold grows in the house, there is constant dampness, and the air becomes musty. This in turn provokes allergic reactions and other pathologies of the respiratory system. It is possible and necessary to deal with the problem.
Checking the functionality of ventilation in the apartment
The ventilation system is a public communication that extends through all floors of the house. Therefore, the management company is responsible for maintenance and performance. Its representatives, according to legislative norms, are required to check the functionality of ventilation ducts twice a year. If any problems arise with ventilation in an apartment building, specialists will eliminate them using professional equipment.
If you suspect that the ventilation system is not working, you don’t have to wait for the technicians, but carry out a small check yourself. You need to proceed as follows:
- Open the kitchen window slightly.
- Place a thin cloth near the ventilation grille. If there is good traction, the paper should stick to the mesh. If this does not happen, the air exchange in the room is disrupted - the ventilation does not work.
Instead of a thin sheet of napkin, you can use the flame of a lighter. It is enough to bring it to the ventilation grille. If the light moves towards the shaft, it means the ventilation is working properly. If the flame burns evenly, there is a suspicion of a malfunction of the ventilation ducts.
TOP 3 models for production sites
TEKHNOTSENTR LLC general industrial valve 150x150
A reliable device that is designed to remove large volumes of contaminated air. Adjustment is carried out manually using a special handle. Thanks to this solution, the product can be installed in one position, which contributes to good ventilation of the room.
The average price is 16,300 rubles.
TEKHNOTSENTR LLC general industrial valve 150x150
Advantages:
- Simple controls;
- High throughput;
- Durable housing;
- Reliability.
Flaws:
Production valve KOP from TD "COMTECH"
An excellent option that is suitable for installation in large rooms. The body is made of durable material that is not subject to corrosion. Adjustment is carried out using a special lever.
Average price – 1,200 rubles
valve Production valve KOP from TD "COMTECH"
Advantages:
- Durability;
- High-quality execution;
- Removes air quickly;
- Optimal cost;
- Convenient controls.
Flaws:
TCOG-05-250x500 from Vympel LLC
An excellent valve that will help organize proper ventilation of the room and eliminate toxic and unpleasant odors in a few minutes. The body is made of a thick layer of metal, which increases durability and increases the reliability of the device.
valve ТКОГ-05-250х500 from Vympel LLC
Advantages:
- Efficiency;
- Quickly removes contaminated air;
- Lasting;
- Easy adjustment.
Flaws:
Causes of ventilation system malfunction
The ventilation system in an apartment building is based on the principle of connecting vessels. A horizontal shaft extends from each apartment, which then cuts into a common vertical channel. Further along it, the exhaust air rises upward in a natural powerful flow and escapes through the pipe on the roof into the atmosphere. With working horizontal channels in each apartment, the total air flow in the vertical channel has a good speed. If one horizontal shaft fails, it does not affect the overall riser. But if several ventilation systems in several apartments do not work, this already seriously reduces the power of air flow in the vertical riser. All residents of the entrance will suffer.
If the ventilation in the house does not work, there may be several reasons for this.
- Blockage. This is the most common reason. More often, street litter in the form of leaves and dry branches is found in the shafts of the ventilation system. They enter from the roof side. Sometimes specialists remove dead birds and mice from ventilation ducts. Frequent debris in ventilation ducts is construction debris. It gets there because of the laziness of the builders who carry out repairs in neighboring apartments or because of the old age of the house. Over time, the building shrinks, the walls of the shaft crack, small bricks and other stones remain in the exhaust system.
- Violations during repair work. Often neighbors independently carry out illegal redevelopment in the kitchen, which provokes a change in the direction of the ventilation shaft. Violations during repair work also include the installation of overly powerful kitchen hoods or fans. They create an air flow of more than 1000 m3/hour. Such equipment will inevitably damage the ventilation systems of neighboring apartments.
If there is poor ventilation in the apartment, urgent measures must be taken to restore normal air exchange.
Types of devices by design
Check valve devices are available in rectangular and round designs, which allows you to select the appropriate model for each type of air duct. By design, valves are divided into four groups:
- A single-leaf valve device (the so-called “Petal”) has a single locking flap. The axis on which the leaf sits is offset from the center of the air duct. Therefore, the lower part of the screen is heavier than the upper. Direct air flow lifts the lightweight plastic flap, and in its absence, gravity returns the flap to its place. The disadvantage of the system is that installation is possible only in horizontal sections of the air duct.
- Multi-leaf devices (“Lattice” type) are designed similarly, but have not one locking element, but several. They are made in the form of blinds that cover the ventilation grille on one side. As a rule, grilles are installed at the exit of the ventilation shaft from the house.
- Bi-leaf valves (butterfly type) have a pair of leaflets mounted on the same axis. Externally, the valves resemble butterfly wings, hence the name. A spring fixed between the shutter blades returns the shutter to the closed position. “Butterflies” are perfect for ventilation systems equipped with exhaust fans. But the force of the natural air flow may not be enough to move the sash.
When choosing a butterfly valve for ventilation, make sure that the spring power is not excessive, and that the petals are equipped with a damper gasket. Otherwise, the valve will knock when closing, which can irritate the nerves.
- Valves based on a flexible membrane are the simplest in design. They have a thin polymer film acting as a damper. The direct air flow deflects it to the side. And the reverse flow (even the weakest) tightly presses the lightweight plastic to the body, blocking the lumen of the box. The main advantage is simplicity and low cost. The main disadvantage of the design is low durability.
Expensive valve models are equipped with adjustment mechanisms that allow you to adjust the sensitivity of the device. Cheaper varieties do not have such capabilities.
How to fix the problem
First of all, it is important to pay attention to window frames and doors. They must have a micro-ventilation system. If the windows are already in place, but do not have this function, you can install special fittings that will ensure a loose fit of the frame when closed.
You can also install a supply and exhaust fan. With its low power, it provides a good flow of air masses. Fans can be purchased in ceiling, window and wall versions.
Such measures are not the ultimate truth. If the problems with the ventilation system are serious, it is better to contact a specialist.
Selection criteria
In order to decide on the type of device, you need to understand what problems the installed ventilation system has, whether it is necessary to increase the flow of fresh air or help the exhaust part of the system. Next, choose whether you need an autonomous or electric type of valve. Aesthetics also plays an important role in choosing the right device. And also calculate your financial capabilities. Wall valves are more powerful than window valves, but they also have a corresponding price. But installing window valves is much easier than installing wall valves.
The most effective type of supply system is considered to be a design with a forced element for the influx of air masses. The components of such a device are the following:
- electric fan;
- filters for air flow purification;
- heating elements.
Such devices have the following advantages:
- ability to work independently of the general ventilation system;
- additional air purification;
- moisture level control.
Where to contact
If it is discovered that the hood in the apartment does not work, you must complain to the management company servicing the house. Its coordinates are indicated in the contract with the organization. When applying, you must write an application in two copies. The first must be left at the office of the service company with the secretary, and the second with a registration mark must be taken for yourself. When applying, it is important to ensure that the application has been registered. Otherwise, you can wait endlessly for a response from the management company’s specialists.
Specialists have the necessary equipment and diagnostic instruments to assess the condition of the ventilation system. Using special tools and equipment, specialists eliminate interference in communication.
The obligations of the management company are specified in government regulations 451.410 and 290. The documents deal with the rules for the maintenance and maintenance of common property. It is worth referring to these documents when contacting the management company.
https://nicedeck.ru/delimsya-opytom/ploho-rabotaet-vytyazhka-v-kvartire.html https://strojdvor.ru/ventilyaciya/ne-rabotaet-ventilyatsiya-v-kvartire-kuda-obraschatsya/
How to hang a hood over the stove
With the correct size, it is equal in width to or even slightly larger than the width of the slab. To install the hood correctly, you need to place it correctly and secure it. The electric hood is located exactly above the stove. The installation height depends on the type of hob:
- The minimum permissible height for hanging a hood above a gas stove is 75 cm.
- Above the electric value is slightly less - 65 cm minimum.
You determine the exact height yourself - based on the height of the housewife who will cook. The bottom edge of the hood should be slightly higher than her head. You shouldn’t hang it lower than the minimum distance, but you can hang it higher. But if you need to hang equipment higher than 90 cm from the level of the stove, you need a unit with increased power so that contaminated air is removed effectively.
Minimum height for installing hoods above gas and electric stoves
The hood is attached depending on the type. Built-in - to a specially ordered cabinet size. Wall hung (flat) and dome (fireplace) - to the wall. The fireplace hoods themselves can consist of two parts - a unit with a motor and filters and a dome. Both parts are attached independently of each other, but so that their outputs coincide.
It is worth mentioning separately about island hoods. They are attached to the ceiling. The kit includes a suspension system and clear instructions on what to do and how to do it.