When I announced that I was going to paint the refrigerator at home, my mother-in-law twisted it at her temple. “It’ll peel off.” But no. After painting the kitchen facade was successful, I began to take things easier. Why not repaint an old thing if the previous color has become boring or has gone out of fashion? Now don’t wait until the refrigerator breaks down to buy a beautiful and modern one. You only live once.
Updated kitchen with old refrigerator
Is it possible to paint a refrigerator?
The older generation never wondered whether refrigerators were painted. Previously, all refrigerators were white and nothing else. The marketing ploy worked for a long time. People thought that everything snow-white was clean and sterile. And, of course, no one thought of painting white as white.
The soul of a modern person is drawn to the beautiful and unusual. The interiors reflect the inner world of the owners, harmonizing in colors, shapes, and style. I also wanted to make the kitchen a little more harmonious. The snow-white old man was too dissonant with the new noble pistachio color of the headset.
Before getting down to business, I inquired about the technology of painting refrigerators and the reviews of those who had already decided to take such a step.
Information on this matter is contradictory.
Most “specialists” claim that repainting a refrigerator can only be done in a car workshop using special aerosols. You can't paint houses with them - they stink very much and can stain the entire kitchen. If you use regular paints, the surface will bubble and peel. But there were also encouraging reviews. I believed in them, and I was not mistaken.
It is better to divide the work into several stages
How to paint a refrigerator: choosing paint and tools
It’s not easy to make a choice among the variety of different colors. The surface of the refrigerator is not the most common, so not every paint will work. Choose from those that not only decorate, but also protect the casing of the device from scratches and chips.
There is no point in spending money on anti-corrosion agents, since the device will always be in a warm kitchen. Also, you should not take fire-resistant paint, because according to the operating rules, the refrigerator cannot be placed near a fire.
The paint must be elastic and resistant to detergents, be tintable and maintain an even layer on a vertical surface.
You can repaint your refrigerator at home using the following compounds:
- Enamel. This is the product used to paint refrigerators in production. It adheres well, and the surface after painting becomes smooth and glossy. The disadvantage of enamel is the presence of toxic solvents in it. Therefore, it is better to paint in a well-ventilated area or in an open space.
- Epoxy composition. After application, it looks like enamel and has the same characteristics, but costs more. In addition, epoxy compounds are more difficult to work with.
- Acrylic. This dye is safe as it contains no toxic substances. It is inferior in quality and characteristics to enamel, but is quite suitable for surfaces used indoors. Acrylic will cost much less.
The choice of paint for the exterior of the refrigerator depends on the desired result. If you want the unit to turn out bright and unusual, you should take a closer look at acrylic paints, as they have a wide range of colors. If there is rust on the surface, zinc compounds are suitable. They are much more expensive, but they prevent the corrosion process.
Attention! When working with these compounds, you will need a brush or roller. But you can simplify your task by choosing car paint in a can. Its characteristics are not inferior to enamel, and its use will make the process much easier and faster. The only drawback is the high cost.
Painting a refrigerator will not be complete without additional materials and tools.
Here's what else you'll need to get started:
- solvent for degreasing the surface;
- sandpaper;
- masking tape to cover unpainted areas;
- roller or brush (if we paint with them);
- dye;
- dry clean matter;
- film or paper to protect the floor;
- gloves and respirator.
Having prepared all the necessary tools and materials, you can begin the main process.
How to paint a refrigerator with your own hands
I found the process of repainting the refrigerator quick and simple. Active actions took 2-3 hours, no more. I divided all the work into 5 stages:
- Surface cleaning.
- Sanding and degreasing.
- Protection of seals and handles.
- Applying primer.
- Applying paint.
You can do them more than one day.
The main thing is to take your work responsibly.
The surface must be thoroughly washed, the gloss removed and coated with a primer. All these manipulations help the paint adhere better to the metal. Even though I’m not an expert, the paint sticks to my refrigerator like it’s original.
Non-standard ways to transform the outside of a refrigerator
Non-standard ways to change the appearance of a refrigerator include the following:
- Pasting self-adhesive film. On sale you can find many ready-made graphic fragments and story stickers made from vinyl. Also, film with an adhesive layer can be purchased by linear meters in any construction department of a hypermarket.
- Airbrush. This method of transforming the appearance of a refrigerator helps to apply patterns to the unit using the dot spraying method. This method has recently become increasingly popular; it is used to decorate cars.
- Decoupage. One of the easiest ways to decorate a refrigerator with your own hands at home. The substances used to fix the selected pictures do not have a strong odor, dry quickly and are available in any hand-made store. When finished, decoupage looks like a hand-painted design with acrylic paints with fine details and multi-layered “professional” strokes.
Of course, the methods described above do not apply to painting, but these options are also often used instead of and after the latter.
We prepare materials and tools
It is better to plan painting the refrigerator on a weekend. It doesn’t take long to paint it yourself, but you’ll have to wait for more than one hour for the layers to dry. I started in the morning and completed the event completely by evening. During the waiting periods, you can do household chores or just relax.
Now about the tools. To paint the refrigerator I used:
- universal short-haired (velor) roller;
- painting tray;
- narrow brush;
- artistic brush;
- masking tape;
- fine grain sandpaper;
- detergent, soda;
- rags, rags, newspapers;
- old toothbrush, spatula.
We recommend: How to properly clean and cut up catfish
List of materials:
- primer for metal – 300 ml;
- acrylic paint – 1 liter (a little paint left).
I bought the brush and roller at Leroy Marlene. I especially want to praise the roller. Proved to be a 5+ in his work: he rolled out the paint perfectly smoothly and did not splatter.
What paint to paint the refrigerator
It is better to contact a paint store consultant with this question. Ask what can be used to paint the outside of the refrigerator, and you will be offered different options. Both enamel and acrylic paint are suitable. The main thing is that the film adheres tightly to the metal, is resistant to abrasion and is suitable for wet cleaning.
I was faced with a choice:
- alkyd thixotropic enamel;
- acrylic latex paint;
- acrylic water.
I chose LITTLE GREENE Intelligent Satinwood water-based acrylic paint.
The advantage of water-based paints is that they do not have a strong odor and dry relatively quickly. Specifically, my paint did not yet require a topcoat. There was no need to use varnish.
Advice. It is better to choose a matte finish for the refrigerator. Fingerprints remain on the gloss, and the slightest scratches and dirt are noticeable.
Preparing the refrigerator and general painting algorithm
Before painting the refrigerator at home, you need to protect the floor with plastic film or newspapers. They are laid out around - so that there are no gaps between them. Surfaces with peeling enamel and rust are carefully cleaned and sanded with sandpaper. After preliminary work, it is necessary to roughen the entire surface of the refrigerator. The paint will not adhere to the gloss, and you will simply waste time. Cleaning the entire refrigerator to a “matte” state is not easy, but it is necessary. After stripping, the paint will go on smoothly, and you will not only get an updated refrigerator, but also enjoy the creative process. A repainted “old friend” will look better and take on new life in a new outfit.
There are old models with a matte surface that can be repainted without thorough stripping. First, make sure that the composition lies evenly: apply a little paint and leave for a while.
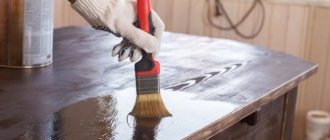
After removing the gloss, you can begin painting. Don't forget to unscrew the handles to avoid getting them dirty and mask large defects with a colored primer. The primer is sold in cans and applied to the defect by spraying. Permanent paint fills small dents and masks defects well. When using a primer, give it time to dry, then select the base paint. First, apply one layer, then watch how it lays down. Sometimes even one layer is enough, but for uniform coloring it is better to apply a second one. If painting the surface is difficult, you can paint the refrigerator a third time.
All types of materials used for these purposes are quick-drying. Drying time for each layer is 30 minutes. Then they start re-painting. If you are working with a roller or brush, start painting at the top, gradually moving lower and lower. Some people find it more convenient to paint clockwise. It is better to do this while standing so that you can always even out the color and remove smudges in time. A painted refrigerator can be coated with varnish, which is used to give cars a glossy shine.
Using paint in spray cans
If you have chosen a can that is intended for “updating” old cars, this material will apply easily, but a test application will not hurt. Spray the paint at a distance of 30 cm from the surface. The layer turns out thin but bright. To achieve a better result, you can paint the refrigerator in 2 or even 3 layers with car paint - fortunately, the process happens quickly.
The spraying technique is as follows: move the can clockwise so as not to linger in one place. This way, you will avoid a thick layer and smudges. As a last resort, use acetone, carefully removing drops with it.
Brush or roller
You can paint the refrigerator a different color using an ordinary brush or roller. The staining process should proceed as usual (from top to bottom or clockwise). There is no need to put too much paint on the instrument: this will help avoid smudges and uneven color. To paint hard-to-reach areas, take a small brush and work on them last.
Application of enamel compositions
Enamel compounds are specifically designed to work “on metal”. The layer turns out thick and is enough to fully paint an old refrigerator. Other paints adhere well to enamel. They can further decorate the refrigerator by drawing a few simple designs on it.
If your refrigerator is pretty “worn by life” and large chips and scratches are visible on it, the enamel will repaint them so that they become almost invisible. It is even used as a primer when it comes to shallow chips. The enamel is easy to apply. For a brighter and thicker color, two layers are enough.
First stage: surface cleaning
First, you need to wash the refrigerator thoroughly. I only washed it on the outside. Therefore, the process did not take much time:
- I took off the magnets.
- I diluted a few drops of dishwashing detergent in warm water. I wet the cloth and walked over the entire surface.
- Upon closer inspection, it turned out that in some places there were dried spots and a yellow coating.
- Dried stains were removed with a spatula and an old toothbrush.
- Rubbed greasy stains with baking soda.
- I wiped the surface several times with a clean, damp cloth and left the refrigerator to dry.
Second stage: de-glossing and degreasing
At this stage, I advise you to take a photo of the refrigerator in order to compare later - how it was and how it is now. It's time to get down to business:
- I armed myself with fine-grit sandpaper and began to rub the refrigerator section by section. As a result, the gloss should disappear from the surface, and roughness should be felt when holding your hand.
- I wouldn’t say it takes a long time to sand the refrigerator by hand, but your hand gets tired. Therefore, if you have a grinder or drill with a fine-grained abrasive disc, it is better to use them.
- We wipe the refrigerator from dust and degrease it. I still had technical alcohol. But you can also use regular vodka. I don't recommend solvents. Their smell is too strong. You may get a headache, and there are still 3 important processes ahead.
Accuracy is important in repainting
Color and pattern of self-adhesive film
Stores provide a large number of films to choose from with a wide range of colors and a variety of patterns. You can purchase material from the offered range, order a ready-made design layout, or create your own. When choosing a self-adhesive film, it is best to focus on the overall interior of the kitchen.
Such material can be plain, gradient or have a special pattern, even interesting 3D images. I would like to note that the vinyl film on the refrigerator looks interesting, reminiscent of leather, wood or marble.
If you are also tired of the wall color, you can choose a panoramic pattern for the refrigerator and kitchen, in which case they will go well together.
Flowers on refrigerators look very beautiful. If the kitchen is decorated in Japanese style, you can choose an image of a sakura flower for decoration.
For a kitchen in the Provence style, film with flowers or images of various landscapes is also suitable. A high-tech room will be perfectly complemented by geometric shapes and patterns.
Country music lovers can purchase film with photographs of the city, streets or images of faces. But, in general, the owner of the kitchen should always be guided by his taste and preferences.
Third stage: protection of elastic bands, handles and floor
I decided for myself that I would not disassemble the refrigerator. Moreover, I didn’t even turn it off and didn’t take out the food. This created some inconvenience at work. The sensor beeped all the time, which really got on my nerves. In some places I had to use an artist's brush.
If you want to repaint your refrigerator with ease, I advise you to disconnect it from the power supply, take out all the contents and unscrew the handles.
I'll describe what I did:
- She pulled out the refrigerator onto the newspapers spread on the floor. If there are no newspapers, you can cover the floor with bags, cling film or large oilcloth.
- I covered the handles, door seals and the inner surface around the edges with masking tape. You need to cover everything that you are not going to paint.
We recommend: How to renew paving slabs and how to quickly clean them from dirt and sand
Stage four: primer
The surface of the refrigerator is considered complex. Therefore, you can’t do without a primer. I used the same brand of primer as the paint. Products from the same manufacturer are perfectly compatible. They are manufactured using the same technology and undergo different tests. At least this applies to companies that value their reputation.
How I primed the refrigerator:
- I poured some primer into the paint tray.
- Rolled it out with a universal roller.
- Apply a thin layer to the surface of the refrigerator.
- I primed hard-to-reach areas using a small soft brush.
- Left it until completely dry.
- The primer dried in about 2 hours.
- After that, I lightly rubbed the primed surface with sandpaper.
- I wiped away the resulting dust with a damp cloth.
Advice. Wash the brush, roller and tray immediately after priming. It will still be needed for painting. If the primer on an instrument dries, it will be more difficult to clean. I wiped off the remaining primer with a rag and then rinsed everything in hot water.
First coat of paint applied to refrigerator
Step-by-step work instructions
When painting a refrigerator, it is important to be patient and enlist the support of family and friends. When transforming an old unit into a new one, you need to concentrate as much as possible on the process and make sure that outsiders are not distracted.
It is important to know and follow the order and frequency of all work. And that is why you should draw up step-by-step instructions for yourself and, without relying on excellent memory, write down the procedure in a notebook.
In order not to be confused by guesses, it is recommended to read the examples given below.
From a can
To ensure that spray painting takes as little time as possible and also gives the best results, you should follow the technique below.
- We de-energize the unit, remove all food from it, remove the internal drawers and shelves, and completely defrost it.
- We move the refrigerator to the center of the room or move it to the utility room.
- Using a brush, thoroughly wash the entire refrigerator outside and inside. Wipe dry. For cleaning, you need to use gentle (liquid or aerosol) detergents that dissolve grease.
- We dismantle handles and other small external parts that cannot be painted: plastic thresholds, moldings, trims, etc. If the unit has permanent parts, such as labels or visors, they should be sealed with construction tape.
- Be sure to lay oilcloth, newspapers, old wallpaper or rags on the floor of the room.
- Places where rust has appeared are thoroughly cleaned to bare metal. We also erase other minor damage to the paint down to the metal: chips of enamel at the corners and cracks in the paint. In cases where it is impossible to properly sand the unit and remove the peeling paint, you can use a product to remove the old enamel coating.
- We carefully clean the transition areas on the enamel with very fine sandpaper. This is done so that transitions are not visible, and the new paint lays down as evenly as possible - without protrusions or smudges.
- Remove the rubber seals or cover them with masking tape. You can also dismantle the doors entirely.
- Apply a primer suitable for the chosen paint. The base layer can be applied either using aerosol cans or with a brush. In the latter case, use metal paint packaged in ordinary tins.
- Let the soil dry enough so that a dry palm does not stick to it. If necessary (when you need to level the surface), apply a second layer.
- Apply paint of the selected color from a distance of thirty centimeters. The container should be held strictly vertically, and before doing this, shake thoroughly.
- Watch your hand movements and do not hold the aerosol in one place. It is important to ensure that the paint is applied in a thin layer.
- The paint should be applied in at least two layers. At the same time, be sure to ensure that each previous one dries well. Otherwise, smudges or cracks may form in areas where there is a large amount of paint.
After the restoration, when the paint has completely dried, you can apply a design to the refrigerator or cover the unit with car varnish. In this case, the outer coating will become more durable and shiny.
If you want to get a refrigerator of some “acid” color, you can use paint from graffiti cans. To cover one medium-sized two-chamber refrigerator, one large bottle of paint will be enough.
The inconvenience of using the above method is the impossibility of applying a high-quality coating to small parts. A home craftsman will also need to acquire skills in working with a spray can before painting the unit itself.
Painting with paints
After covering the refrigerator with new paint or in the case when the refrigerator does not need restoration, you can apply a design to its surface. For such purposes, paint must be selected so that it can adhere well and reliably adhere to the previous coating. The best choice for hand painting is acrylic paints. They are abrasion resistant, compatible with many enamels, are not afraid of water and come in many shades.
For those who do not know how to draw, but have a great desire to paint the refrigerator themselves, there are a huge number of ways, including:
- Ready-made or homemade cardboard stencils. They are secured to the surface with tape, and then the space inside the slots is filled with paint. With the help of such blanks you can decorate the refrigerator with bright colors and apply multi-color designs. If some details on the stencils are made with constrictions, then the voids in their place should be drawn manually after the base layer of paint has completely dried.
- Stickers. Such fragments are glued to degreased metal, and after that the surface around them is covered with spray paint or painted with a roller. You can remove the sticker only after the coating is completely dry. All irregularities along the contour will need to be drawn manually. To do this, you can either use the main color or make a edging in “gold” or “silver”.
People who know how to draw beautifully or copy pictures from a sample even decorate refrigerators with Gzhel or Khokhloma painting. There are also samples painted in any other painting styles. Household appliances, decorated with hand painting, look amazingly beautiful and add a special touch to the interior.
Painting with enamels
You can also paint the refrigerator manually with a roller or brush. The process is not much different from treating surfaces made from cylinders, only this coating will take a little longer to dry. With enamel paints you can easily apply a single-color roll, as well as decorate the refrigerator with simple pictures.
Most often, enamel coating is used to paint over scuffs and chips. Just know that the paint applied to the refrigerator must be special - for treating metal surfaces, and not the kind that is used to paint wood.
With a special paint that is water-repellent and resistant to temperature changes, you can paint chipped enamel under the rubber bands, on the footrests and in other places inside the refrigerator compartment. Paints for restoring the interior coating are only available in white. Colors that can be used to change the shade will need to be purchased separately. This kind of coating is applied only with brushes or rollers. Interior paint takes about a day to dry. Only after this time can a new layer be applied.
Slate coating
Recently, refrigerators covered with slate paint have been at the peak of fashion in kitchen interiors. It is available in several colors. There is also paint with magnetic chips. You can write on this coating with chalk, as well as make drawings. The method of applying paint is no different from coating with enamel paints using a brush.
You can buy material for the restoration of an old, but still usable refrigeration unit in any construction department of a hypermarket, or you can also make it yourself from:
- two hundred milliliters of white acrylic paint;
- two tablespoons of white putty or grout for the joints between the tiles;
- a few drops of water-soluble brown or black color.
Before applying slate paint, sand the surface of the refrigerator with coarse sandpaper. This action will help the layers adhere better. The coating can be applied with a brush or roller, but small parts should be painted exclusively with a brush.
The procedure is similar to spray painting. If you need to apply several layers of paint, then each previous one must dry. If the refrigerator needs to secure the metal layer, then a primer for acrylic should be applied under the decorative layer. An excellent choice would be a colorless substance containing magnetic shavings. Thanks to this life hack, all kinds of magnets and cute little things will be easily attached to the unit.
To make sure that painting a refrigerator with slate paint is easy, we suggest watching the video attached to this section of the article. It provides a clear example of the work, and also shows all the tools and equipment that will be needed in the painting process.

