How to properly sterilize empty jars
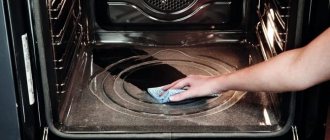
Sterilization is simply necessary so that the jars can be stored for a long time. Without it, various bacteria will begin to multiply in the workpieces. The toxins they release are very dangerous to human health and life. Using an oven you can carry out high-quality sterilization. In addition, the containers will not need to be additionally dried, which often takes a lot of time.
Another advantage of this method is that you do not need to heat each jar separately. Several of these containers will fit into the oven at once. The capacity of the oven is even greater than that of a microwave oven, which can hold no more than 5 cans. In the oven you can sterilize both empty containers and filled ones. And it doesn’t matter at all what exactly you roll up. These can be either various vegetable salads or pickled cucumbers and tomatoes.
Before you start sterilizing empty containers, you should make sure that the dishes do not have any defects. Containers with cracks or chips can easily burst during heating. The jars should also be free of any stains.
Important! All suitable containers are washed with dishwashing detergent; you can also use baking soda.
Then the containers are turned over and left to dry. Now you can begin the sterilization itself. All containers are placed in the oven with the bottom up. If the jars have not yet completely dried, then they are placed upside down. For sterilization, the oven temperature is set to 150 degrees. Half-liter jars are kept in the oven for at least 15 minutes, but three-liter containers will have to be heated for about 30 minutes.
How to pasteurize in a pan of water
Pasteurization of cans in water involves heating to a temperature not exceeding 100 degrees.
Prepare a saucepan that can hold several cans. The height should be such that you can close the lid with the placed jars. That is, higher than the size of cans or bottles.
Place a towel or a special grill on the bottom.
The jars should be placed so that they do not touch each other or the walls of the pan.
Pour warm water, close to the temperature of the brine or syrup.
It should reach up to the shoulders of the container in which the canned food is packaged.
Canned fruit and vegetables are pasteurized for 15-25 minutes, depending on the volume of the can.
Important nuances
You can only remove jars from the oven using special gloves or a kitchen towel. To prevent the jar from suddenly bursting, you must carefully place it on the surface with the neck down. To allow the jars to cool slowly, you can cover them with a towel on top.
Attention! Do not use wet oven mitts or towels when removing containers from the oven. Due to a sudden change in temperature, the jar may burst in your hands.
Be sure to hold the jar with both hands so that if something happens it does not fall and injure you. Then the question may arise, what to do with the lids? It is not advisable to sterilize them in the oven. The lids, like the jars, must be thoroughly rinsed, and then placed in a pan of water and boiled for 15 minutes. To remove the lids from the pan, it is better to first drain the water or use special tongs.
LiveInternetLiveInternet
I love easy recipes that don’t take up a lot of free time. But I really liked my neighbor Giacomo’s tomatoes. This year I decided to make it, and in the recipe the tomatoes in jars should be sterilized. This fact upset me, but not for long; it’s easier to do it in the oven. I liked it .Sharing with you!
Pay attention! Since pasteurization is a more gentle method of heat treatment of canned food than sterilization, you will spend more time on it, but you will get more attractive-looking products, since during pasteurization, delicate fruits retain their shape better, since they are less boiled.
How to sterilize canned food in a gas oven. This sterilization method, previously used primarily for the heat treatment of jars with glass lids and metal clamps, is being used increasingly, including the sterilization of jars with regular tin lids. Compared to the water sterilization method described above, it is less troublesome. Its only drawback is that it is extremely difficult to sterilize large jars in this way. There are two ways to sterilize filled jars in the oven: 1) simply placing the jars on a wire rack; 2) on a baking sheet with water. You can figure out how to put the jars on the wire rack without me, but for the second method, fill a deep baking tray with 2 cm of hot water, place the filled jars on it, covered with sterilized lids or closed with lids secured with clamps. After this, place the grill or baking tray with jars in an oven heated to 100 °C, then increase the temperature to 140-180 °C and sterilize. It is best to use this method to reduce the sterilization time of products that require long-term heat treatment, such as caviar and other similar snacks. Time is saved due to the fact that the oven can be set at a higher temperature - accordingly, the sterilization time is reduced. For example, to sterilize a liter jar of caviar, approximately 15 minutes will be enough (the usual time for its sterilization is at least 1 hour).
Pay attention! The time for sterilizing canned food in the oven does not correspond to the time specified in recipes for sterilization in boiling water; it is usually selected experimentally in accordance with the size of the container, the method of preparation and packing density of the canned food, the properties of the raw materials, as well as the individual capabilities of the oven itself. Since everyone’s oven is different, before you decide to switch to sterilizing canned food using this method, carry out a test sterilization of one jar, carefully observing the process through the oven window. Write down all your observations, including minute-by-minute timing of what is happening in the filled jar. It is especially important not to miss the moment of boiling - at this time, rising bubbles appear in the pouring or the top layer of the thick workpiece begins to move. The sterilization time is calculated, as usual, from the moment of boiling.
Pay attention! When sterilizing jars in a gas or electric oven for a long time, the sealing rubber bands may be damaged under the influence of high temperatures. Therefore, it is better to sterilize in a tray with water. In this case, when heated, water vapor is formed, which protects the rubber bands from drying out. In addition, water vapor is a better conductor of heat than dry air, so the contents of the jars will warm up faster - accordingly, the sterilization time can be reduced.
How to sterilize canned food in an electric oven. This method is quite convenient and simple for sterilizing small jars if there is no other way to do it faster. Its disadvantage is that sterilization takes longer than usual, and most importantly, it is difficult to accurately set the temperature and end time of the process. In addition, energy consumption increases. To sterilize filled jars in an electric oven, place them on a dry baking sheet or in water poured to the bottom of the baking sheet with a layer of 2 cm, and place it in the oven as low as possible. The jars can also be placed directly on the bottom of the oven, but first you need to warm it up a little by turning on the bottom heater for 10 minutes. Before placing jars on the bottom (under) of the oven, cover it with a wet cloth so that water vapor is generated during the sterilization process. When placing the jars, remember that there must be a free gap between them so that they can heat evenly over the entire surface. The width of the hearth fits 2 liter jars in one row. If you install more, they will be pressed too tightly against each other. 4 liter jars are placed along the oven, and thus 8 liter jars are sterilized at the same time. Half-liter jars can also be placed in two tiers - this will allow you to sterilize 16 jars at once. When adjusting the temperature, keep in mind that since warm air stays at the top, it is not practical to leave the overhead heater on all the time. If this is done, then after some time the upper layer of air will heat up to a temperature of 130°C and higher, and the lower layer - only to 70°C. In this case, the top row of half-liter cans will be overheated, and the bottom row will not be heated up enough. To avoid this, turn on both heating devices at the same time, and after 20-30 minutes turn off the upper device, leaving only the lower one on. If you need to sterilize half-liter jars installed in two tiers, first turn on the upper device for 20-30 minutes, then turn it off and continue heating for 5-10 minutes, turning on the lower device. In order to more accurately determine the time, during the process of sterilizing the first batch of jars, 20 minutes after turning off the lower appliance, remove one jar from the oven, quickly open it, measure the temperature of its contents and assess its condition. Depending on the temperature, the consistency of the canned food and the appearance of the fruit, proceed as follows. If the temperature in the jar is below 70 °C, turn on the lower device for 15-20 minutes, otherwise the workpiece will not be completely sterilized; if the temperature is above 70 °C, pay attention to the condition of the fruit (their hardness and general appearance) and decide how long further sterilization should be. After determining the temperature of the contents of the jar, cover it again with the lid as soon as possible and place it back in the oven for at least 20 minutes.
Pay attention! Remember that the process of regulating the temperature in an electric oven depends on the number of cans and the type of canned food. The more cans are sterilized, the longer the lower heating device is turned on. And keep in mind that fruits and berries that boil quickly are not sterilized for long, and at the end of the sterilization process they are left in the switched off closed oven until they cool completely.
Pay attention! When sterilizing compotes and other canned goods with filling, to control the temperature, use a jar of water covered with a lid or parchment paper (control jar), placing it in the oven along with the filled jars. Considering that the water heats up faster than the filling, you can determine the temperature in the jar of compote without removing it from the oven. After measuring the temperature of the water in the control jar, all you have to do is make simple calculations, based on the fact that the temperature in the jars with compote at this very time will be about 5 °C lower.
I don’t remember that a friend once told me how she cooks things in the oven. I searched the Internet, remembered my friend’s advice, and I can boast that I saved a lot of time. It’s not that everything is done much faster in the oven, but you don’t have to stand over it and steam like you would over a saucepan, plus a much larger batch can be placed in the oven, and this makes things much easier. Anyway, here's what I got:
First of all, sterilize the jars with lids in the oven. If you already have dry, clean jars ready, then you can skip this step. The jars with their contents will still go back into the oven. But if you have just washed the jars with lids, then it is better to dry/sterilize them in the oven first.
Place the jars with lids in the oven and turn on a low temperature of about 200F or 100C. If the jars need to dry, it’s better to have the neck down, but my rack is wide and the jars fall through, so I just put them on their sides.
While the jars are being sterilized, we get to work on the preparations: cucumbers, tomatoes, salads for the winter and everything else that you process this season.
Now we take out the jars and fill them with contents. If necessary, add hot brine or marinade. We put a lid on top of each jar, but do not screw it on. Leave the oven turned off or at low temperature.
Now we proceed as follows:
Place an iron baking sheet in the oven on a wire rack. Place jars with lids on a baking sheet and pour 3-4 cm of hot water (I take it from the tap) onto the bottom of the baking sheet.
Close the oven and raise the temperature to medium - 180C or 350F. Be sure to place the preparations in a cold or low-heat oven so that the jars do not burst due to temperature changes.
(In many recipes, I read that the preparations are placed directly on the grill without a baking sheet. I decided to try it, but I missed it, and the oil marinade, boiling, ran from the jars directly onto the hot spiral. As you know, it is better not to add oil to the fire. I will not go into details, but since then I’ve only rolled jars on a baking sheet with water. It makes my work in the kitchen more peaceful.)
Pasteurize as written in the recipe. I don't belong to the category that monitors time/size/temperature. I just leave everything in the oven for 15-20-30 minutes. until the preparations boil well for some time.
Now we carefully take out each jar. In this matter, you need to get used to using a good grip or mitten. Screw the lid on tightly and turn it over. Wrap the inverted jars in a blanket or towel and leave to cool. The step with the blanket may be unnecessary, but I sleep more peacefully this way. What difference does it make in what form the jars cool, so it’s better to stand upside down under the blanket according to all the rules.
Jars sealed in this way can be stored without refrigeration for years. We will definitely have enough to share and treat for several years to come.
I also noticed that the marinade from cucumbers and tomatoes prepared in the oven does not become cloudy as usual, but remains transparent.
I read another piece of advice for the future somewhere on the Internet - if a random jar swells, then you need to pour a tablespoon of salt onto the lid. After 2-3 days the bank will return to normal. I don’t know what the secret is, but I took the advice to heart
It turns out that everything is not as complicated as it seems. All the tomatoes have settled safely into the jars and the very small last saucepan is waiting for me in the refrigerator.
Yulia told on the MIRTESEN website
These methods of heat treatment consist of heating jars with future canned goods placed in them in a water bath, or simply in a saucepan with hot (pasteurization) or low-boiling (sterilization) water. Each type of canned food has its own heat treatment mode, which is always indicated in the corresponding recipe. However, regardless of whether sterilization or pasteurization is supposed to take 5 or 50 minutes, this must always be done in a certain sequence:
• take a large saucepan with a wide bottom that can accommodate several jars of the same size. Place a special wire grid on the bottom of the pan and cover with a cloth. If you don’t have such a grate, you can use a thick pad made of a kitchen towel folded in 3-4 layers;
• pour hot water into the pan or heat cold water. Its level depends on the capping method (for the most common method of capping with metal lids, water is poured to the level of the product in jars). But considering that when placing the cans in the pan, some of the water will be displaced, just in case, pour a little less water, and keep a kettle of boiling water on hand so that you can add it to the pan if necessary;
• To prevent a glass jar that you place in hot water from bursting, the temperature of the water should not be higher than the temperature of the contents of the jar, at least not higher than 10-15°C. If the recipe does not indicate this, first heat the water to 35-75 °C. This is not a typo: such a large difference in temperature is due to the temperature of the contents of the jar - the colder it is, the lower the temperature of the water in the pan should be. Thus, vegetable salads are placed in jars cold - they need water with a temperature of 35 ° C, and compotes, natural canned food and marinades are poured with boiling or hot filling - they need hotter water;
• place the jars on the stand so that they do not collide with each other or with the walls of the pan (the gap should be at least 5-10 mm) and cover them with sterilized lids. Keep in mind that you can pasteurize or sterilize only one size jar in one pan;
• now you can add the required amount of water from the kettle, so that the water level in the pan with the jars installed in it corresponds to the filling level of the jars, but is not lower than 3 cm from the top of the jars themselves;
• Once the jars are in place, cover the pan with a lid. Then gradually heat the water to the temperature specified in the corresponding recipe and maintain it for the specified time, without stopping heating. Remember that the water in the pan should under no circumstances boil violently;
• start counting the pasteurization and sterilization time (indicated in recipes) only from the moment the water temperature required in the recipe is reached. To measure it, use a thermometer;
• Having completed the pasteurization or sterilization process, begin to remove the jars from the water and immediately seal them. Do this quickly and carefully: without removing the lid, grab the jar by the neck using a special clamp (tongs) or potholder, transfer it to the table and quickly seal it using a seaming machine. In some cases, sterilized jars are rolled up without removing them from the water, and then cooled by adding cold water to the pan;
• check the sealed jar for leaks by rolling it several times on the table to make sure that no drops of fill appear from under the lid. After this, cool it as recommended in the recipe (read more in the section “Sealing quickly and reliably” above).
Do everything in this sequence, but keep in mind that the success of this event will only be ensured by strict adherence to certain rules.
Rule 1. Jars that you are going to seal with metal screw caps must not be screwed on before heating, as water vapor in the jar will create pressure that can rip off the lid. These lids are screwed on in the same way as regular ones are rolled up - immediately after sterilization is completed.
Rule 2. Glass lids with metal clamps can be closed before heating, since the clamp allows excess air and water vapor to be released from under the lid during heating. The main thing is to remember that you need to fill such jars to a level 2-3 cm below the top of the jar neck. During cooling, a vacuum will be created in the jar under the glass lid, which will tightly press the lid with a rubber ring to the neck of the jar.
Rule 3. Remember that the time required to heat water to boiling temperature when sterilizing half-liter and liter jars is no more than 15 minutes, for three-liter jars - no more than 20 minutes.
source
Sterilizing jars in an electric oven
Owners of electric ovens can also sterilize jars using this method. It doesn’t matter at all what shape and size the oven itself is. The whole process goes as follows:
- The jars are thoroughly washed using soda, as in the above method. Then the containers are laid out on a towel to dry.
- Do not forget that wet jars must be placed with their necks up, and the rest must be turned upside down.
- Metal lids can also be sterilized in an electric oven. They are simply placed next to the jars in the oven.
- We set the temperature to about 150°C. Heat three-liter containers for 20 minutes, and half-liter containers for about 10 minutes.
As you can see, using an electric oven can significantly speed up the sterilization process. You also need to carefully remove the jars using oven mitts and towels. It is necessary to place sterile jars only on a clean, washed surface, otherwise all the work will be in vain and bacteria will again enter the container.
Attention! If the temperature suddenly increases, the jar may burst, so it is better to immediately cover the container with a towel. So, the heat will be stored much longer.
Other sterilization techniques
Sterilizing jars is a labor-intensive and unpleasant procedure. Modern technology comes to the rescue in this matter, offering disinfection, for example, in a double boiler or microwave oven. Each technique has its advantages and disadvantages, but only the housewife herself chooses the method in which to process the workpieces.
Disinfection of jars by boiling
Boiling sterilization is popular even now. To do this, it is enough to have a large heating container and water on hand. The size of the pan depends on how many jars need to be sterilized in it at once. The container must be completely immersed in the liquid.
The process does not require additional equipment and is as follows:
- The jars are placed in the pan with the neck up (or horizontally). A rag or wooden pancake is placed under it.
- Cold water is poured so that the entire area of the jars is covered.
- The duration of treatment in boiling water is 15 minutes.
This method is inconvenient to process 3-liter bottles. Before you start sterilizing jars, you should make sure that they will fit in the pan. Along with the container, lids can also be processed.
Microwave sterilization
A microwave or microwave oven is a powerful device that can sterilize glass jars for sealing. To do this, you must meet a number of conditions:
- Only thoroughly washed, inspected jars should be placed in the oven.
- Metal lids cannot be disinfected in this way.
- Pour 10–15 mm of water inside the jar or place a container of water next to the empty container.
- For sterilization, a mode of 700-800 W is used.
- Processing time for cans is 5 minutes.
Disinfection in a slow cooker
A modern method of sterilizing containers before sealing is processing in a slow cooker. For the process you need:
- Wash the multicooker bowl well and pour 250–300 ml of water into it.
- Secure the mesh and place the washed jars in it, neck down. Their number will depend on the volume of the device.
- The lid should not be lowered.
- Sterilization is carried out with the “steaming” program. If there is no such option, the “baking” or “stewing” program will do.
- For cans with a capacity of 500 ml, 5–7 minutes of processing is sufficient, for liter containers – up to 10 minutes.
In a classic multicooker, you can immediately disinfect 2-3 half-liter jars. Covers for processing are placed next to the container or immersed in water, where they will be sterilized in boiling water.
Using a steamer
One of the advantages of a double boiler is the ability to sterilize dishes in it. The number of cans to be placed depends on the size of the device. For tall containers, you can remove one of the steamer sections. Sterilization is carried out as follows:
We recommend:
How to bleach plastic from yellowness
- Water is poured into a special compartment of the device.
- The bottom section contains pre-cleaned cans, turned upside down. It is advisable to place them without touching each other.
- Lids are placed on the top “shelf” of the steamer.
- Sterilization takes place in the “cooking” mode.
- The whole process takes 15 minutes.
At the end of the cycle, you need to leave the container to cool. When removing jars, you should use oven mitts.
How to sterilize jars with ready-made products
There are many benefits to using ovens for sterilization. Such seams are perfectly stored and almost never explode. Thanks to heating, the container is not only sterilized, but also dried. This saves time on additional drying of containers, as after steam treatment. In addition, your kitchen will not have increased humidity levels due to boiling liquid. This process does not cause any inconvenience. You don't even have to fish out hot jars from boiling water.
In addition to empty containers, ready-made seams can also be sterilized in the oven. This is also quite easy to do. The process goes like this:
- The jar is filled with the preparation and the container is placed in water. You won't need a lid at this stage.
- We set the temperature to 150 degrees. When the oven heats up to this level, set ten minutes for half-liter jars, 15 minutes for liter containers and 20 minutes for 3 or 2 liter pieces.
- When the required time has elapsed, the jars are taken out of the oven one by one and rolled up with special lids.
- Next, the jars are turned upside down and left until they cool completely. To ensure that the jars cool slowly, you should cover the preserved food with a blanket.
- After a day, when the jars have cooled completely, you can move the containers to the cellar.
Important! In the same way, you can sterilize jars with blanks in a slow cooker. To do this, use a mode called “Baking” or “Steaming”.
Preparing for sterilization
Before jars and lids are sterilized, they are prepared in a certain way. To do this you need:
- inspect containers and their lids for damage;
- reject containers with persistent stains of grease, rust, or cracks;
- use new tin lids for canning;
- Be sure to wash all the dishes.
Important! Most housewives recommend: to better remove dirt from glass, soak the container in hot water with the addition of detergent ingredients.
You can clean the dishes using products from the store or (the old fashioned way) soda with mustard and laundry soap. All these compositions have an alkaline base, which neutralizes fat well. This is why it is recommended to wash glass jars with a new sponge and always under running hot water. The neck of the container must be treated especially carefully. At the end, it is important to rinse and dry the containers and lids well.
Whatever sterilization method is chosen, diligent preliminary preparation is no less important than the process itself. It is this that will help to reject low-quality containers and prevent harmful microbes from getting inside.
Method number 3. Steamer
You will need : a steamer, a mesh or grill for the steamer.
A method similar to a water bath, but we don’t put the steamer on the stove, but plug it into an outlet. Place the jars on a wire rack, heat the steamer, wait until the steam collects in large drops in the jars, and remove the jars from the wire rack.
The lids also need to be boiled in a saucepan separately.
Why do cucumbers “explode”? More details