What is the optimal temperature for baking bread? It all depends on the kitchen tool you choose (oven, bread machine, multicooker). The number of degrees required for cooking ranges from 111 to 220 °C.
This article describes simple and understandable instructions and recipes. Familiarize yourself with the technology for preparing not only traditional wheat bread, but also:
- rye;
- Italian focaccia;
- stuffed bread;
- Indian flatbreads.
In addition, useful tips and tricks will help you prepare the perfect bread in your own kitchen. A soft treat with a crispy crust will be an excellent addition to any meal.
A simple recipe for white bread with a golden brown crust
Remember that the key to a good dish is quality ingredients. For bread, you should purchase high-quality flour, and the yeast used should be as fresh as possible. If these two points are met, you will definitely have perfect bread.
Products used:
- 310 ml water;
- 86 ml olive oil;
- 490 g wheat flour;
- 8-13 g salt;
- 8 g yeast.
Cooking processes:
- Combine flour and yeast in a medium sized bowl and season with salt.
- Make a hole in the center, add oil and water, mix thoroughly.
- If the dough seems a little tough, add a few teaspoons of water.
- Mix well, carefully transfer to a surface, sprinkle with flour if necessary and knead for 8-11 minutes.
- Once the dough is smooth, place it in a buttered container and cover with cling film, set aside for an hour.
- Cover a baking tray with special parchment and place the dough on the paper.
- Heat the oven to 195 degrees, sprinkle with flour, make a neat cut in the shape of a cross with a knife, bake for 26-34 minutes.
You can add curd mass, dried fruits, bran, sesame seeds, pumpkin seeds, nuts, spices and herbs. Sometimes bakers add a whole clove of garlic.
Bread in an electric oven, baking features
Friends, hello! Today I decided to talk about baking conditions in electric ovens in the context of working with bread. Despite the fact that almost every recipe has general recommendations on baking conditions (temperature, moisture at the beginning, etc.), in reality everything is not so simple when it comes to baking in electric ovens. Everything is different there. A good half of the kitchens are now equipped with them and you can bake whatever you want in them, they are reliable, familiar, stable and have a lot of functions, especially convection is appreciated. But, paradoxically, it is not very suitable for bread and in order to get perfect bread, you have to constantly fight with it.
Baking Standards
Temperature and time when baking bread in the oven are the most important guidelines for bakers. The number of baking minutes for different types of bread is determined by the instructions in the recipe.
- Corn bread baked on a baking sheet - from 33 to 58 minutes.
- Basic bread baked in a casserole dish - 43 to 62 minutes.
- Thin flat bread - from 6 to 14 minutes.
- Rolls and buns - from 14 to 23 minutes.
Although there are exceptions, baking times for most baked goods generally fall within the ranges described. To prevent the bread from burning from below, it should be baked on a baking sheet with parchment.
Moistened paper or foil will save the delicate crust of the bread product from burning. If you spray boiling water at the bottom of the oven, the dough will “rise” correctly.
Features of baking bread in gas and electric ovens
Bread is baked in both gas and electric ovens. Most often, housewives like to cook baked goods in an electric oven, but this does not apply to bread. It is bread that everyone produces best in a gas oven. Experienced cooks assure that you can adapt to any oven, you just need to put some effort into it. There are several nuances, the observance of which will always help you prepare delicious products, including bread.
Secrets of baking bread in a gas oven
- To ensure that the bread bakes evenly, adjust the position of the bread in the oven.
- Bread burns less if you bake it in a thick pan. If there is none, you should first place the dough piece on a silicone mat or parchment paper, and only then on a baking sheet.
- To ensure even heating of a gas oven, place a baking stone on the bottom of the oven. If you don’t have one, you can use a fire brick and a baking tray with salt.
Secrets of baking bread in an electric oven
- In an electric oven, bread should be baked for the first 10-15 minutes at 220 degrees. Then the temperature must be lowered to 180 degrees.
- When baking bread, do not use the convection mode or set it to minimum if you cannot turn it off completely.
- It is advisable to use a baking stone for baking bread. It may not be very thick - 1.5 centimeters. The main thing is to warm it up thoroughly – for at least half an hour.
If your oven (either gas or electric) does not hold heat and steam reliably, cover the bread with a ceramic hood for 15-20 minutes. Due to this cap, the bread will receive enough moisture. Instead of a ceramic cap, you can use any heat-resistant cookware.
Date: 03/22/2019.
Updated: 05/01/2019
Photo: nakormi.com
Cooking in an electric oven
Often, cooks are not sure what temperature of an electric oven when baking bread is ideal for preparing a soft treat with a crispy crust. Each recipe has its own technological nuances. Check out the technique below to make classic white bread.
Products used:
- 6-9 g yeast;
- 49 g granulated sugar;
- 43 g butter;
- 1.3 kg all-purpose flour;
- 90 ml melted butter.
Cooking processes:
- Mix the yeast with warm water and set aside for 3-8 minutes.
- Add two more cups of water and season with granulated sugar and salt.
- Combine the mixture with a slice of butter at room temperature and five cups of flour.
- Mix in a mixer on low speed, gradually adding the remaining flour until the mixture is smooth and sticky.
- Place the dough in a well-greased bowl, cover with cling film, and set aside for 46-68 minutes.
- Turn the dough onto a clean, lightly floured surface.
- Divide the mixture into two parts and, working with one part at a time, form a rectangle approximately 22x30 in size.
- Place in greased pans, bake for 30-37 minutes, bread baking temperature in the oven is 200 degrees.
- Let the bread cool for 8-11 minutes, then remove from the pans and cool completely before slicing.
The bread can be stored for up to four days in an airtight container or wrapped tightly in cling film. Use the flavorful treat to make light snacks, sandwiches and sandwiches.
A simple recipe for white bread in the oven
Homemade white bread in the oven
Recipe for wheat bread in the oven. It is quite suitable for getting acquainted with sponge dough. It seems to me that it will be easier for a beginner to knead the dough using a thin dough.
And the bread is small, only 300 grams of flour, so it will be easier to work with.
Many will agree with me that bread prepared using the sponge method is still better.
Unleavened bread does not keep as well, it begins to crumble after a day or two, and it often smells strongly of yeast.
The sponge method is quite simple, but requires certain skills.
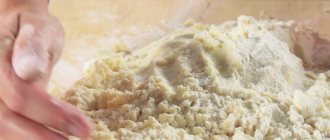
The most important thing in the technique of kneading bread dough is to achieve a consistency so that it can be formed into a ball that almost does not stick to lightly floured hands.
When you take out such dough with a scraper or a spoon from the dish after rising, it is viscous, tightly glued, it almost does not remain on the walls of the dish.
The dough ball can be made loose or denser. If the dough has risen, that is, the yeast is fresh, normal, alive, then the bread will definitely turn out, but the taste and shape will be different.
Some people like the standard of Soviet bread - a thick crispy crust and elastic pulp, while others like bread with a soft crust and a delicate, airy crumb.
By manipulating the amount of yeast and water, as well as the baking temperature, you can quickly find your version.
It is, of course, better to start mastering home baking with a small loaf of bread, but it is very important to accurately measure the ingredients. Errors by eye, imperceptible in large volumes, are more noticeable in a small portion.
In summer, the flour is dry, it is lighter in weight than in the wet season. Therefore, the use of measuring utensils will not be as accurate as we would like. Of course, it is better to use a kitchen scale.
When using measuring utensils, you do not need to compact loose products. A faceted glass without a slide contains approximately 150 grams of premium wheat flour. Whole grain flour is lighter, as is rye flour, this should be taken into account.
It is interesting that flour from different manufacturers produces bread that differs in taste and appearance. For wheat bread, it is better to use flour that says “bread” on it, but regular premium or first grade flour also works well.
Many people are faced with the fact that their oven thermometer shows the temperature incorrectly, which is why oven thermometers are so popular in online stores now.
You can do without a thermometer and adapt to your oven by selecting the temperature. This applies more to gas stoves, they have different gas pressure even throughout the day, and if instead of a thermometer with a scale, you set the temperature using the gas burner control knob, then there is nothing left to do but select the temperature based on the height of the flame and the noise of the oven. This comes with experience.
I tried baking this recipe with 1 teaspoon of yeast, with 1 dessert spoon and with 2 teaspoons. With one spoon, the dough rises more slowly and the bread turns out smaller and denser; the other two options give almost the same result, but with 2 teaspoons the bread turns out more airy.
Please note that the recipe is based on active yeast, not instant yeast.
By the way, the result also depends on the baking temperature: some people put it in a hot oven at 230ºС, then reduce it to 200-180ºС, others, on the contrary, start with a lower temperature, then increase it. This is all done by selection to obtain the desired result.
I'm used to starting baking at 180-200ºС. If after 30-35 minutes the bread is too pale, I increase it to 210-230º, then make sure it doesn’t burn.
Light texture of rye bread with low gluten levels
Information about the desired baking temperature for rye bread varies; some chefs advise setting the oven at 180, others at 200. The criterion depends on the amount of time the cook is willing to spend baking the baked treat.
Products used:
- 198 g rye flour;
- 196 g white flour;
- 33 g honey;
- 7 g quick-drying dry yeast;
- salt.
Cooking processes:
- Mix flour, yeast and salt in a separate container.
- Mix the honey with 250ml water, pour the liquid into a bowl and stir to form a dough.
- If the dough looks too dry, add warm water until a soft dough forms.
- Transfer to a work surface and knead for the next 7-11 minutes until smooth. Rye contains less gluten than white flour, so the dough will not be as elastic.
- Place the dough in a well-greased container, cover with foil and set aside for 80-120 minutes. The dough should swell and increase in size.
- Knead the dough lightly on a work surface to knock out any air bubbles.
- Baking temperature for rye bread: 200 degrees. Time: 36-38 minutes.
Rye bread can be varied by adding hard cheese and green onions. For an unobtrusive sweetness of the bread delicacy, add a scattering of soft raisins and ground nuts (almonds, hazelnuts) to the dough.
How long does it take to bake bread in the oven?
If you are going to bake bread, the main thing to remember is:
-Put it in a well-heated oven 250-270 degrees
-If you are baking out of shape, you need to make cuts to avoid tears
-To make the surface shiny after baking, grease with water and cool under a towel
-If you want the crust to be soft, cool under a damp towel
-If you don’t sprinkle the bread with flour, then sprinkle it well with water.
Bread is baked according to time depending on weight:
1 kg. the bun bakes for about 50 minutes,
1.5 kg - 60-70 minutes,
2 kg - 70-80 minutes.
The bread is ready when it sounds hollow when you tap the bottom.
An unusual variation on a standard seed treat
Dilute the standard treat with a bouquet of grains. Such a decorative element will not only advantageously emphasize the visual beauty of the finished treat, but will also add pleasant taste accents and slightly increase the vitamin arsenal of useful microelements.
Products used:
- 25 g butter, cut into cubes;
- 60 g pure honey;
- 400 g grain bread flour;
- 110 g white flour;
- 6 g instant yeast;
- 1 beaten egg.
Cooking processes:
- Heat the oil, honey and 300ml water in a saucepan. Set aside to cool to room temperature.
- Combine the flour, yeast and salt in a bowl, pour into the warm liquid and mix with a wooden spoon.
- Transfer to a work surface and knead with your hands for 8-10 minutes.
- Place in an oiled container, cover with film and set aside for several hours (preferably 2-3).
- Form the resulting dough into two elastic balls, place the larger one on the baking sheet, then place the smaller ball on top.
- Using the handle of a wooden spoon, lightly push the small piece of dough into the center of the larger one.
- The temperature for baking bread should not exceed 200 degrees, bake for 42-47 minutes.
What seeds are best to use for decorating finished bread? Arm yourself with fragrant sesame, pumpkin or sunflower seeds. The ingredients can be used raw, pre-soaked or lightly fried in olive oil.
Italian focaccia with potatoes and spicy turmeric
How to prepare an Italian treat, what temperature should the oven be for baking wheat bread, what ingredients are best to use for the filling? If desired, dilute the set of suggested ingredients with bacon, chicken, and cheese.
Products used (for the test):
- 12 g fresh yeast;
- 58 ml olive oil;
- 450g organic white flour.
For filling:
- 3 potatoes;
- 55 olive oil;
- 9 g turmeric;
- sprig of rosemary.
Cooking processes:
- In a large bowl, dissolve the yeast in 350 ml cold water and add the oil.
- Add flour and 1 teaspoon salt and mix thoroughly with your hands to form a dough.
- Place in the refrigerator or any other cool place overnight.
- The next day, transfer the dough to a 30cm x 20cm butter pan.
- Using your fingertips, gently stretch the dough into a rectangle, then fold it in half.
- Turn the dough 90 degrees and repeat the process, leave for 30 minutes, repeat this procedure several times.
- Bread baking temperature: 200 degrees. Gently stretch the dough to fill the baking tray.
- Cut the potatoes into neat rings, arrange the vegetable slices over the dough.
- Mix olive oil with turmeric and brush over the focaccia.
- Bake for 26-37 minutes, adding a sprig of rosemary during the final stages of cooking.
Use Italian herbs as additional spices: basil, garlic, oregano, dried lemongrass. Add some spinach, onions and a splash of balsamic vinegar.
Cooking bread at home: baking temperature
It is enough to simply prepare a fresh baked product within the walls of your own kitchen. All you need is a modest assortment of ingredients, patience and culinary inspiration.
Products used:
- 214 ml warm water;
- 60 g white sugar;
- 9 g yeast;
- 600 g bread flour;
- 430 ml olive oil;
- 9 g salt.
Place the water, sugar and yeast and water in the bread maker container. Allow the yeast to dissolve and foam for 8-11 minutes. Add butter, flour and salt to yeast. Select the “Basic” or “White Bread” mode, press start.
Simple spiced buns for easy snacking
This delicacy is ideal for a buffet table at parties, gatherings with friends in nature, or a cozy picnic. How to prepare simple bread with a spicy filling, what temperature should you set the oven for baking bread?
Products used:
- 500 g bread mixture;
- 15 whole sage leaves, 5 finely chopped;
- 110 ml good quality olive oil;
- 2 cloves of garlic;
- 4-5 fresh figs;
- ½ onion;
- 90 g sea salt.
Cooking processes:
- Place the bread mixture in a large bowl and stir in the spices (sage, pepper).
- Place two tablespoons of oil in a container of water and mix thoroughly.
- Mix the dry ingredients into the liquid using a wooden spoon.
- Then transfer the dough to a work surface and knead for 8-12 minutes.
- Wrap in cling film and leave for several hours until the dough doubles in size.
- Pat the dough with your palm a few times to knock out the air, then divide it into 8 portions.
- Roll out each ball and sprinkle the resulting rectangles with spices.
- Chop the garlic, cut the onions into thin rings, and cut the figs into circles.
- Transfer the filling to the surface of the dough; baking temperature is 180 degrees.
- Brush with oil, sprinkle with sea salt and black pepper and bake for half an hour.
Dilute the usual set of filling ingredients with ripe tomatoes and bell peppers. For extra piquancy, season the treat with paprika, chopped rings of hot jalapeno pepper or chili.
HOMEMADE BREAD IN THE OVEN
Author: Alexey Shevchenko May 08, 2014 19:00 Category: Food
ABOUT HEALTHY LIFE REQUIREMENTS FOR INDUSTRIAL BAKING BREAD
If, despite the undeniable fact that there is an abundance of bread products in stores, then homemade bread in the oven
unrivaled in taste, aroma and health benefits.
Scientists have found that coronary heart disease is much less likely to be detected in those who prefer black bread in their daily routine. In the not so distant ancient times, home baking in Russia was quite widespread. Unfortunately, the introduction during the Great Patriotic War and subsequently of the rationing system for bread and the establishment of a strict state monopoly on baked goods reduced home baking to its almost complete disappearance. Industrially produced bread has become an integral product in the diet of even rural residents.
However, recently, not only some rural residents, but also some city dwellers are turning with interest to the study of old bakery traditions. The existing monopoly on the production of bread and the constantly inflated prices for this staple food product for the majority of Russians raises many questions and complaints from ordinary consumers, not only regarding the price, but also about its low quality. Unfortunately, the quality of bread sometimes completely does not meet the requirements of a healthy lifestyle. About this here is the article “Healthy food is not only human longevity, but also comfort” and the article “Nutrition and health taking into account European standards.”
Home baking in today's economic conditions is extremely beneficial, first of all, for the category of low-income citizens, who are mainly pensioners. In addition, home-baked bread is much more hygienic and environmentally friendly.
WHAT DO YOU NEED TO BAKE HOMEMADE BREAD IN THE OVEN
Those starting to master home baking always face the question: where to start? Only with a certain period of time and experience can different preferences for baking homemade bread in the oven develop .
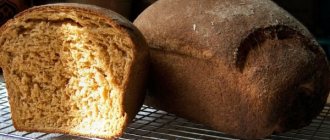
It can be a white loaf, gray, rush, loaf, hearth. No matter how much the range of our bakeries is praised in commercials, one thing is undeniable: nothing can compare with homemade aromatic, warm, fluffy crust with a crispy crust.
It is believed that for beginners, baking rye bread at home is a somewhat difficult task, but wheat bread is a completely surmountable obstacle.
So, we start with the fact that per kilogram of flour you need 400 - 600 ml of water, 30 - 40 grams of yeast, 1 tablespoon of salt, 2 tablespoons of sugar and 30 - 35 grams of butter. According to technologists, it is better to prepare the dough in two stages.
At the first stage, you need to put in a dough of yeast, for which you need to combine 0.5 kilograms of flour with the entire volume of prepared water. Why place flour and water in a pan of such a volume that subsequently will be able to accommodate 3-4 times more dough than the original ingredients. Mix the flour well with water, knead until it easily separates from the walls of the pan.
Cover the pan with the dough and leave for 3.5 - 4 hours in a warm place with a temperature of about 35 degrees. An important point: be sure to knead the dough every hour. Make sure that the dough increases in volume by one and a half to two times. When this state of dough has reached, only then can the second stage of preparing the dough begin.
You need to add the remaining 0.5 kilograms of flour and water, salt, sugar, and it would be a good idea to pour in one or two tablespoons of vegetable oil. If desired, in order to enhance the rich properties of the dough, you can beat an egg into it. After this, mix the dough thoroughly and leave it warm for another hour and a half, after covering it with a lid.
After an hour and a half, you need to knead the dough, wait 25 - 30 minutes, and only after that you can lay out the dough into molds. As a mold, you can use a baking tray for baking round bread, well-known metal molds, so-called bricks, curly molds, and sometimes even previously used tin cans. Not only the baking sheet, but also all the molds must be greased from the inside.
Proofing the dough into molds is considered the most important operation in the technology of making homemade bread in the oven. The fact of the formation of carbon dioxide during proofing serves the purpose of “raising” the dough, making it fluffy and airy. The whole secret of fluffy, baked bread lies solely in the success of the proofing process. To do this, the molds must be placed in a very warm place (near a hot radiator, stove, or even near a lit oven) for 30 - 40 minutes, depending on the volume of the mold.
Indian Baking Traditions: Soft Flatbreads
So many important criteria when baking bread! Temperature, time, amount of spices needed... The recipe for these flatbreads will greatly simplify the life of novice cooks, because they can be cooked both in the oven and in a frying pan.
Products used:
- 7 g dried yeast;
- 9 g baking powder;
- 25 g butter;
- 30 g brown sugar;
- 286 g white flour;
- 150 ml natural yoghurt;
- 30 g seeds (sesame, pumpkin).
Cooking processes:
- Place 125ml warm water in a bowl, add yeast and sugar, leave for 11-16 minutes.
- Pour flour into a separate container and mix thoroughly.
- Make a “well” in the center, pour melted butter, yogurt, seeds, and yeast mixture into it. It should be a very soft dough, but not so wet that it comes together into a ball of dough.
- When you are happy with the consistency, begin kneading, first in a bowl, then transfer the mixture to a work surface and continue kneading for 10 minutes or until the mixture is smooth and elastic.
- Grease a large bowl with additional melted butter, add dough, cover with cling film, and let rise in a warm place for 66-70 minutes.
- Divide the dough into 6 balls and place them on a floured baking sheet, then cover the tray with a towel.
- The temperature for baking bread in the oven should be 190-210 degrees, bake for 6-8 minutes.
If desired, you can fry the neat flatbreads in a frying pan. To do this, heat the olive oil, season it with spices and fry the delicious slices of dough for 4-8 minutes on each side.
Basic recipe
Photo source: https://cook.me/
From theory you can move on to practice. The first thing you can try is to bake the simplest white bread with a minimum of ingredients.
We will need:
- Flour – 450 grams;
- Water – 250 grams;
- Fresh yeast – 20 grams;
- Vegetable oil – 60 grams;
- Sugar – 1 tsp;
- Salt – 1 tsp. (no slide).
First, warm up the water and dissolve the yeast in warm water. Add salt and sugar, stir, add half the flour. Mix thoroughly, cover with a towel and leave warm for half an hour. Then add the second half of the flour and vegetable oil. Place the dough on the work surface and knead for at least 10 minutes. Form the dough into a ball, return to the bowl under the towel and let rise in a warm place for about 1 hour. After giving the dough the desired shape, you can make cuts on the surface with a sharp knife. Place in a mold or on a baking sheet and place in an oven preheated to 210 degrees. After 10-12 minutes, reduce the temperature to 190 degrees and bake the bread until golden brown. Cool on a wire rack for at least 20 to 30 minutes before slicing.
Vegan Recipe: Sweet Banana Bread with Walnuts
Dietary bread is suitable for both people who do not eat animal products, as well as simply losing weight, picky gourmets who want to dilute their gastronomic routine with a new bakery product.
Products used:
- 50 g coconut oil;
- 200 g plain flour;
- 25 g ground almonds;
- 9 g baking powder;
- 75 g fresh sugar;
- 4 dates;
- 3-4 very ripe bananas;
- 90 ml soy milk;
- 75 g walnuts.
Cooking processes:
- Mix flour, almonds, baking powder, sugar and dates.
- Puree the banana and butter together, then combine it with the flour mixture.
- Add soy milk and toasted walnuts to the dough for future bread.
- The baking temperature in a bread machine ranges between 168-175 °C, so it is better to cook the treat in the oven at a temperature of 200 degrees.
- Bake for 8-11 minutes, cool for 14-17 minutes.
Banana puree, which is one of the main components of the dough, can be replaced with any other fruit mass. Use apples, pears, apricots. Lovers of exotic accents use tropical fruits: pineapple, mango, avocado.
Bread baking temperature and time
In order for bread baked at home to be tasty, fluffy and have a crispy crust, you need to create the right conditions in the oven. Each type of bread is baked under special temperature conditions, which can vary depending on the recipe, the characteristics of the flour, the weight of the dough pieces and other parameters. If you do not maintain the temperature recommended for baking bread, its quality will suffer.
Most types of bread are baked at temperatures between 200 and 270 degrees. If baked goods are small in size (50-100 grams), they are baked at a lower temperature.
The most delicious bread is considered to be baked in ovens that allow you to regulate temperature and humidity. Such stepwise regulation helps to successfully implement the technological stages of baking bread. It is recommended to bake homemade bread in the oven as follows:
- First, the oven is heated to maximum temperature - usually 240-260 degrees. At this temperature the bread is baked for 10-15 minutes. When sending the dough piece into the oven, you need to create steam in it. To do this, you need to quickly pour a glass of hot water onto a baking sheet heated on the lower level. Steam is important to prevent the surface of the dough from dehydrating, which causes a hard crust to form on the bread.
- After the specified time has passed, the steam is released from the oven, the temperature is lowered to 180-200 degrees and the product is baked until done.
As for the baking time for bread, it will be individual in each case. First of all, all ovens bake differently. Secondly, the cooking time for bread depends on the weight of the product. Typically, 1 kilogram of bread is baked for about 50 minutes. It takes 60-70 minutes for bread weighing 1.5 kilograms. If the product weighs 2 kilograms, the bread is baked in 70-80 minutes.
The nuances of preparing classic bread in a slow cooker
Some models of kitchen tools allow you to adjust the number of degrees yourself. The temperature for baking bread in a multicooker ranges from 119-126 degrees.
Products used:
- 1.5 kg plain flour;
- 36 g yeast;
- 13-18 g salt;
- 1 liter of water.
Cooking processes:
- Sift the flour, then add butter and salt. For this procedure it will be very convenient to take a large bowl.
- The yeast is first placed in warm water, and when it becomes liquid enough, it needs to be poured into a container with flour.
- All ingredients are thoroughly mixed, the dough is left for 1-2 hours.
- After an hour and a half, the kneading procedure is repeated.
- The finished dough must be distributed into a multicooker bowl and baked in the “Baking” mode for 77-85 minutes.
The bread really turns out very tasty, it has a thin golden crust and a rather delicate structure, slightly porous. Don't forget to grease the multicooker container with olive oil before baking.
White bread in the oven
Ingredients:
- Premium wheat flour – 2 cups without slide – 300-320 g
- Active yeast “Saf-Levure” – 2 teaspoons
- Vegetable oil – 1 tablespoon
- Salt – 1 teaspoon
- Sugar – 1 teaspoon
- Water – 220-230 ml – less than a glass
Preparation:
1. Measure the flour, sift it, put it in a large bowl (mine is 2 liters) or a saucepan is 3 liters (with a margin so that the risen dough does not rest against the lid or towel). Add salt to flour, mix.
Making the dough:
1. Pour 220 ml of warm water (38 degrees) into a small wide bowl (mine is 1 liter, maybe less), add dry active yeast, stir lightly with a spoon until the water becomes cloudy.
2. Add 3 tablespoons of flour to the water with yeast, knead the batter without lumps, add a teaspoon of sugar.
3. Cover the bowl with a lid (film, towel, paper napkin) and place in a warm place.
4. The dough should rise up like a cap. Ideal when the cap seems to be cracking. It has risen with a cap - stir with a fork, the dough will turn into foam.
Knead the dough:
1. Pour the dough into a container with flour, knead with a fork, add butter, knead again with a fork, then with your hand until all the flour is collected in the dough and the dough stops sticking to the walls of the dish. You can take a break for 5-10 minutes and let the dough stand under the lid. If the dough is too dry, add water carefully, by teaspoons.
If the dough is too sticky, lightly grease your palm and fingers with oil.
2. Finish kneading on a table lightly sprinkled with flour and form a bun.
3. Place the bun back into the bowl where the dough was. Close the lid and place in a warm place to rise.
I put it in the kitchen near the gas stove, where something is being cooked. Or you can place it near a warm radiator.
4. After 1.5-2 hours, the dough increases 2-2.5 times, and there is a hollow in the center, the dough is ready.
Shaping the bread:
1. Place the dough on a lightly floured table using a dull table knife.
2. Form the dough into a round mound, cover with a bowl, and let the dough rest for 5-10 minutes.
3. Knead the dough on the table, wrap it inside all the time, and form the dough into a ball. Roll the lower part of the ball, where the seam is, on the table, circling it, pressing it against the table so that the seam sticks together better.
Proofing:
4. Place the bun on a baking sheet covered with greased baking paper and leave in a warm place for 40 minutes. The bun will increase 1.5-2 times.
5. At the end of proofing, make cuts on the bread with a sharp knife or blade.
6. 10 minutes (or however long it takes your oven to heat up) before the end of proofing, turn on the oven to preheat.
Bakery:
1. Bake bread in the oven at a temperature of 200-210ºС.
2. Create steam in the oven: place a mug with half a glass of water on a baking sheet below the level.
3. Bake until golden brown, 40-60 minutes. It usually takes me no more than 50 minutes.
4. Grease the finished bread with butter (top of the bread), cool on a wire rack.
5. Wrap the cooled bread in a towel.
The bread gains flavor after 6-8 hours.
For those new to the kitchen, for those who are looking for the simplest recipe for bread in the oven, I suggest you also look at the recipe for white bread in the oven without kneading the dough; I myself often bake bread this way.
Homemade bread in a bread machine: recommendations, tips
In fact, those cooks who have a bread machine at home are minimally involved in the baking process itself. Their task is to correctly measure the ingredients and load them into the device.
- Excellent white bread is obtained if a glass of warm water is poured into a ladle or bowl, one and a half teaspoons of dry yeast and a couple of tablespoons of sugar are mixed in it.
- Add 3-4 tablespoons of vegetable oil. Set the dough aside for 8-12 minutes.
- The dough is transferred to the bread machine container, a teaspoon of salt and wheat flour (approximately 457 g), sifted through a sieve, are added.
- All that remains is to select the “White Bread” or “Basic” mode.
What is the optimal temperature in a bread machine when baking bread? Typically 155-180 degrees. Baking time - from 1.5 to 3 hours.
If you want to cook rye bread in a kitchen tool, then first prepare the following products:
- 346 g rye;
- 235 g wheat flour;
- 61 g honey and vegetable oil;
- 12 g dry yeast;
- 328 ml water;
- rye malt (three to four tablespoons).
Mix all of the above, transfer to the bread machine, select the “Rye bread” mode and press the “Start” button. Experiment! For example, replace water with milk or kefir, or use olive oil for a more delicate texture.
We hope that now you will not have any questions regarding what temperature for baking bread - in the oven, bread maker, etc. - is considered the most optimal.
LiveInternetLiveInternet
Quote from Shrek_Forest
Read in full In your quotation book or community!
Very interesting questions and answers on baking bread in the oven..
For every housewife who loves baking, I think such questions and answers will be interesting and useful. Here we will mainly talk about baking bread.
SO:
Why is my bread cracked or torn?
A. The bread will definitely tear if it is not risen enough. The volume of the bread should double, only then can it be put into the oven.
b. If you forgot to make cuts on the bread or made very small cuts, in these cases the bread also tears. V. If your dough is too hard, then the bread will also crack.
d. You forgot to create steam in the oven*.
Why did my bread spread?
A. Your dough is too soft - this is described below.
b. You have shaped the bread incorrectly.
V. You left the bread proofing too long - in this case, the dough falls at the slightest touch.
You can very simply check whether the bread is good enough or not:
How to determine if shaped bread has risen enough
Basically you just need to watch the test. If its volume has doubled, it means it has risen enough. You can also check this like this: Press lightly with your finger on the dough; if the depression rises quickly, it means the bread has not yet risen sufficiently. If this depression gradually disappears, then the bread should be sent to the oven. Well, if the depression remains a hole or the bread falls at the slightest touch, then it has stopped standing, of course, in this case it needs to be baked urgently, this will only affect the appearance, not the taste
Why did the dough turn out very liquid or very stiff, although you did everything exactly according to the recipe and took the specified amount of ingredients?
Flour is to blame for this. It is different everywhere, depending on the variety and humidity, so sometimes the flour takes less, sometimes more liquid. In this regard, the recipes indicate only an approximate amount of liquid; it is impossible to indicate the exact amount. Russian flour usually contains more moisture than European flour, so you need to take it for every 100 grams. flour 10 grams less water than indicated in many recipes. Never add all the liquid specified in the recipe to the dough at once, but do it little by little until you get the dough of the desired consistency; if necessary, you can add more liquid than indicated. I do not recommend adding additional flour; this may affect the taste and quality of the bread.
Why is ready-made bread heavy?
Because it is not baked - baked bread becomes light and sounds dull when we knock on it.
Why wasn’t the bread baked even though the baking time and temperature were as indicated in the recipe?
Each oven works differently, one bakes faster, another longer. Therefore, it is not possible to indicate the exact baking time, but only approximately. Here everyone should know their oven and experiment with time. If after the specified time the bread is heavy and does not sound dull, it means it is not baked and you need to increase the baking time.
Why does bread have a very dark crust?
a.The oven is also most likely to blame here - it actually has more degrees than you think. Try lowering the temperature next time. b. If the crust is already dark and the bread is not baked yet, the oven is also to blame. In this case, you can cover the bread with baking paper and leave it in the oven until ready.
Why does my bread have insufficient sponginess?
A. The bread wasn't good enough. b. You have made a very stiff dough - the softer the dough, the larger the pores. d. The more rye flour the dough contains, the less “sponginess” the finished bread has. Pure rye bread generally has very small pores and this is quite normal. Why does my bread have a very hard or thick crust?
A. You forgot to create steam in the oven*.
b. The oven heats up more than the thermometer shows. In this case, try baking at a lower temperature next time.
V. You have selected the wrong oven setting. It is best to bake bread in the normal “Top and Bottom” mode, without a fan - the fan makes the bread dry.
d. You overcooked the bread in the oven. If you have a very hard crust, you can cover the bread with a damp towel for about 20 minutes immediately after baking.
If the crust of the bread wrinkles and becomes soft after cooling
This means that the water vapor remaining in the bread after cooking can move into the crust and soften it slightly. To reduce the amount of water vapor, try reducing the amount of water by 10-20 ml or using half the amount of sugar. If the bread is sticky and the slices are uneven, it was too hot when you cut it. Let the bread cool on a wire rack before slicing, allowing all the steam to escape.
Why do you need to put bread in baskets for proofing?
If bread rises in proofing baskets, then it is clear that it grows only in height, and not in width.
You can use any round or oval bowl to proof bread. Just remember to line your cup or pan with a linen towel, lightly sprinkle the towel with flour and place the bread in there, seam side up. Of course, when we transfer the bread to a baking sheet, it settles a little - this is normal, but in the oven it rises again.
* For successful results of bread and rolls, steam in the oven is very important - steam helps the bread rise and gives it a crispy crust. Steam can be created in the following ways: Method one: When the oven has warmed up, put buns or bread in it, close the door for just a couple of seconds, open the oven again and spray it on the walls of the oven with a spray bottle and quickly close the door again, after 3 minutes repeat this procedure again.
Method two: Place an empty baking sheet or some form (container) at the very bottom of the oven, place a baking stone on the next level (if you have one) and turn on the oven to warm up ~ 20 -30 minutes earlier before you put the bread in oven. When the oven is warm, boil water, pour it into a mug and place the risen bread in the oven. Immediately pour a cup of hot water onto the bottom baking sheet (mould, container) and quickly close the door, just be careful not to scald yourself with the steam. Whatever method you use, after 10 minutes of baking you need to release the steam from the oven. If you sprayed with a spray bottle, then open the door slightly and the steam will come out on its own, and if you have a cup or baking tray with water, then you need to remove the pan (container) from the oven
urlid.ru/akei