Tile is still a popular finishing material, which is used to decorate walls and floors for a reason. It is very easy to install and maintain, durable, attractive, and also has an impressive service life. All these advantages are extremely important for premises whose conditions are far from optimal. We are talking about kitchens, bathrooms, toilets and toilets. As a rule, problems do not arise with the ceramics themselves, but they still appear. The main culprits are most often tile joints, which quickly lose their presentable appearance due to constant contact with water and droplets of fat flying during cooking. Instead of the usual snow-white color, they acquire a gray, yellow tint. After some time, “settlements” of mold appear in the grout. Any owners want to quickly correct this shortcoming and restore its former white splendor. Those who have already encountered such an unpleasant “metamorphosis” would do well to find out how to clean the joints between tiles and what products can deal with their “grimminess” quickly and effectively.
Why do the seams between tiles darken?
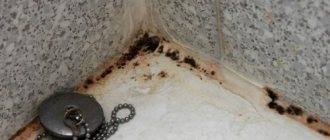
Before choosing a method for cleaning tile joints, you need to find out the cause of the contamination. This will help you purchase an effective remedy and prevent the problem from occurring in the future. The tile joints turn yellow or black due to the accumulation of dirt and cleaning agent residues. Due to high humidity, mold often grows in the bathroom, giving the grout its characteristic color.
The tile joints in the bathroom are dark with dirt.
Folk recipes
Traditional methods return surfaces to an attractive appearance. They are available, safe and quite effective.
A mixture of baking soda, fresh lemon juice and vinegar
Cleaning grout with soda, vinegar and lemon
Soda reacts with vinegar and citric acid, helping to whiten the grout. To clean tiles, apply baking soda mixed with water to the contaminated areas. After this, spray a mixture of lemon juice and acetic acid. It is recommended to use a spray bottle. The components are left on the surface for 10 minutes and then washed off.
Ammonia
This product effectively fights mold and mildew. 150 ml of ammonia are dissolved in 5 liters of water. The solution is sprayed onto the tile joints. After 10 minutes, the surfaces are brushed and washed with water. Despite the fact that the product quickly copes with dirt, it cannot be used often. This cleaning is alternated with the use of more gentle methods.
Ammonia helps remove mold.
Whiteness and soda
You can renew the grout using liquid bleach White and soda.
The procedure is performed like this:
- Mix the ingredients in equal proportions.
- Treat all seams between tiles with the compound.
- Distribute the product using a toothbrush.
- Wait 15 minutes, then repeat brushing.
- Wash off the cleaning composition with water.
This method is not suitable for cleaning colored grout. The use of bleach can negatively affect the decorative qualities of the building material. When working with household chemicals, use protective equipment for the skin, eyes and respiratory system.
Soda, lemon, toothpaste and mustard
If the tile seams have turned yellow, you can use a mixture of 100 g of soda, 50 ml of lemon juice, 1 tbsp. l. mustard powder and 1 tsp. toothpaste. 1 liter of water is poured into a bucket, to which the indicated ingredients are added. The composition is thoroughly mixed and applied to problem areas with a sponge. After half an hour, the product is washed off and the procedure is repeated if necessary.
Hot steam
This method does not involve the use of bleach or other cleaning compounds. Hot steam helps to quickly remove plaque and restore the grout to an attractive appearance.
This product gets rid of not only dirt, but also pathogenic bacteria.
Cleaning tile joints in the bathroom with hot steam.
How to clean various stains
In order to clean the joints between the tiles as efficiently as possible, it is worth considering the nature of the pollutants that cover them. Let's look at how to deal with pollution of various origins.
After renovation
The method discussed above using soda and vinegar will help to clean the seams between the tiles after repair. After removing dirt, you will need to thoroughly wash the walls or floor with plain water.
Fungus
Medical alcohol removes mold deposits well. To clean the joints between the tiles from fungus, you just need to apply the product to the space between the tiles with an old toothbrush. After fifteen to twenty minutes, remove the alcohol with clean water.
From nicotine
To clean the grout from traces of tobacco smoke, you will first need to mix any washing powder with ammonia in a small container to form a thick paste. The resulting mixture will quickly remove yellow nicotine stains from the space between the tiles.
We recommend: How to clean a wooden floor after painting it with enamel?
Removing rust
To clean the grout from rusty stains, you need to treat them with a two percent solution of oxalic acid. After fifteen to twenty minutes, thoroughly wash the cleaned surface. To achieve the best result, these steps will have to be done several times.
Important! It is better not to use this method when working with ceramics, so as not to damage the material. In such a situation, it is worth replacing the acid with a slurry obtained by mixing soda with water.
Old stains
If there are old stains on the grout that are useless to scrub off, you should paint over them with water-based emulsion. Just before applying it, you will need to thoroughly wash the surface and treat it with any antifungal compound.
How to whiten grout
Over time, the grout turns black. To return it to its original whiteness, you will need to treat the seams between the tiles with a heated solution of citric acid in water. To prepare it, you need to mix three liters of water with three packets of nutritional supplement. The exposure time is thirty to forty minutes.
Mechanical cleaning methods
Mechanical methods are used if the joints between the tiles have turned black for a long time. Chemicals cannot remove old stains. In some cases, the grout must be removed.
Sandpaper
This tool helps remove fine deposits from seams. Contaminated areas are treated with bent sandpaper. After this, wipe the tiles with a clean cloth. The treatment is carried out carefully, trying not to damage the tile. After cleaning, the grout can be painted.
Sandpaper for cleaning tile joints.
Steam cleaner
A steam cleaner is a device that supplies a jet of steam under pressure. Using this equipment helps you quickly clean tile joints at home and remove mold and bacteria. To remove any remaining dirt after treatment, wipe the surface with a wet cloth.
Hard sponge
Using this tool is an effective and inexpensive method of removing black plaque. Clean the seams with a hard sponge, then wipe the tiles with a clean cloth.
This method does not provide disinfection, so it is used in combination with chemical compounds.
Melamine sponge
Melamine sponge removes dirt of any origin. It functions on the principle of a simple eraser. The tool copes well with lime deposits, rust, and mold. To eliminate pathogenic microorganisms, the sponge is used in combination with chemicals.
Melamine sponge for cleaning joints.
When to change grout?
If the stains are too old or deeply ingrained into the material, and it is not possible to remove the fungus with any tools or means, you will have to replace the grout with a new one.
Before starting work, it is recommended to first soften the composition. Citric acid or soda is suitable for this. Among store-bought products, it is recommended to use Valo Clean and Litostrip formulations.
Then remove the old grout using a seam scraper (if you don’t have one, you can take a knife, spatula, or screwdriver). To remove material, run the tool along the center of the seam, then move at an angle from the edges. Carry out work with utmost care so as not to damage the tiles.
We recommend: 16 ways to get rid of mold in an apartment or house
Remains of the composition and dust are removed from the cleaned space using a vacuum cleaner, then a priming substance with an antiseptic effect is carefully applied. This is an important step to avoid the appearance of mold and mildew. Upon completion, it is necessary to dry the room and ventilate it.
An important point is the choice of composition. The first criterion for purchase is the width of the space between the tiles, since seams of different thicknesses require separate compounds. When purchasing, you should pay attention to the instructions for the drug on the packaging.
Mixtures are also distinguished by composition. The most popular are the following:
- Cement based. They are cheap, easy to use, and do not harden for a long time, which will allow you to adjust the seam if necessary. However, this material absorbs the seam well and cracks over time. It is better to choose formulations that contain hydrophobic additives, although they are more expensive.
- Made from epoxy resin. More modern grout mixtures. They harden quickly, cost more, but are not afraid of moisture and are resistant to fungi.
Grouts are available either in the form of a paste, which can be used immediately, or in the form of a powder - it is diluted with water (it is better to prepare a small portion, since after hardening the composition cannot be diluted again with water). When working with compounds, it is important to act strictly according to the instructions. The surface for applying the material must be dry.
To apply the grout, you will need a spatula, a damp sponge, and a grout float. Application instructions:
- Work begins from the corner, moving from top to bottom.
- The mixture is scooped up with a spatula and placed into the seam. The tool must be held at an angle of 30°.
- After 20 minutes, remove the remaining mixture with a damp sponge from the surface of the tile.
- Dry the composition for about 2 minutes.
If defects are found, they should be removed with fine sandpaper. When working, it is important to fill the seams 100%, otherwise cracks will appear on the material after drying. Do not dry the substance with a hairdryer - uneven drying will negatively affect the adhesion of the grout to the base.
A few days after application, it is necessary to cover the composition with a protective impregnation.
Household chemicals
You can eliminate black deposits in the bathroom using household chemicals. Ready-made formulations are easy to use, effective and quite safe.
Chlorine-containing products
Mechanical cleaning of tile joints in the bathroom with a toothbrush.
There are many disinfectant formulations containing active chlorine. These include Komet, Domestos, Beliznu gel. No less effective is chlorine powder, which is mixed with water before application. To clean bathroom tiles, thick compounds are used that penetrate the thickness of the grout and destroy mold.
Before use, study the instructions and prepare skin and respiratory protection.
Processing is done as follows:
- Wet the tiles and tile joints with water. Apply the chemical with a sponge or toothbrush.
- Leave the composition on surfaces for half an hour. This time is enough for the active components to react with contaminants.
- Clean the seams with a brush and rinse off the detergent.
Chlorine-containing household chemicals are used only for the restoration of white grout.
Special pencil
Pencil for bleaching tile joints.
A pencil is a modern means of cleaning the space between tiles. It is easy to use, safe, and effective. The pencil removes dirt and destroys pathogenic microorganisms. The product can be used to clean any tiled premises. All joints are processed with a pencil. The water base allows the composition to penetrate deep into the grout, due to which the surface is cleaned in a few minutes.
Oxygen bleach
An oxygen-based bleaching composition will help whiten old grout and eliminate mold and bacteria. Before use, it is diluted with water in a 1:1 ratio. Using a brush, distribute the bleach over the contaminated areas and leave for 3 hours. Remaining dirt is removed with a sponge, and then the surfaces are washed.
Using oxygen bleach.
Cleaning tools and supplies
You should not approach cleaning tiles and the seams between them with bare hands. It is better to prepare the necessary household items in advance.
During the process you may need:
- Thick rubber gloves to protect hands from aggressive detergents.
- A gauze bandage on the face to protect the mucous membranes if there are traces of black mold between the tiles.
- Goggles to prevent dirt particles and detergent splashes from getting into your eyes.
- Absorbent cotton rag.
- Microfiber cloths.
- A stiff metal brush (you can use an old toothbrush instead).
- A broom or large brush for sweeping up debris.
- Clean warm water.
- Detergent.
- A small metal knife.
- Sponge.
- Spray.
Preventive measures
Preventing the spread of mold in rooms with high humidity is easier than fighting this problem. The following measures help maintain cleanliness:
- Using sealant. After cleaning, the seams must be painted over with a compound that fills the pores of the grout. This prevents fungal spores from entering the cracks. Liquid waterproofing compound can be purchased at a plumbing or building materials store.
- Cleaning joints with soda. This product not only whitens the grout, but also suppresses the proliferation of pathogenic microorganisms. Cleaning with soda is done every 2 weeks.
- Airing the room. The joints between the tiles must not be constantly wet. It is necessary to take care of the ventilation of the room. It is recommended to keep the room door open. The tiles should be wiped with a dry towel.
- Timely removal of fungal stains. To eliminate dark spots on tiles and grout, use a pencil, which can be purchased at a household chemical store. This product contains bactericidal and antifungal additives.
The bathrooms are cleaned weekly. To eliminate fungal spores, the use of acetic acid or ammonia is sufficient.


