If an office chair sags under you, then the so-called gas lift - a mechanism responsible for lifting and fixing the chair. A new part costs 600-800 rubles, plus something will need to be paid for the work of the master. But the gas lift doesn’t have to be changed, but simply fixed once and for all in one thing – convenient for us! - position.
The work really takes two minutes - you need to remove the cross with the gas lift, use the pedal to push it up all the way and put something on the rod that will prevent it from going down. A piece of rubber hose is best suited (the landing on the chair will feel softer), but it can easily be replaced with a metal, polypropylene tube, or even a set of washers.
Here is an excellent video with instructions, I made my chair using it, and everything worked out:
Features of gas lift operation
First of all, I note that the malfunction indicated in the title always indicates a breakdown of the gas lift - a unit that performs the following functions:
- Creates a cushioning effect when you sit down . This relieves stress from the spine and makes sitting on the chair more comfortable. The element dampens the impact effect that often occurs when landing on rigid structures.
- Raises or lowers the seat due to a special mechanism . This allows you to adapt the design to people of different heights and adapt it to different types of work. For example, writing requires a different position than working at a computer, and thanks to the gas lift, adjustments are made in literally a matter of seconds.
- Provides rotation of the chair around its axis . This function is also provided by a pneumatic cartridge (this is also the name of the mechanism in question). Thanks to this element, you can rotate 360 degrees in both directions without any restrictions.
Thanks to the gas lift, the chairs become much more comfortable and functional
The design is a steel cylinder, inside of which a rod with a piston moves. The cylinder is made in the form of a sealed element of a certain shape, divided into two chambers. A valve is installed in the partition between the chambers, due to which gas moves from one chamber to another.
The gas is located in two chambers - external and internal and moves depending on the opening of the valve
When the seat is fully lowered, the piston is in the up position. When you press the lever, the damper opens and the gas moves from one chamber to another, it presses on the piston, and then it goes down, while simultaneously lifting the seat up.
When the lever is lowered, the valve closes and the structure is locked in the required position. Everything is quite simple, but if you look at the system inside, you will see that it consists of many elements. The diagram below shows a cross-section of the product.
The system inside is quite complex, but this does not matter, since we will not disassemble it
Another important element is the support bearing; it is located at the end of the rod and ensures free rotation of the chair in both directions.
The support bearing allows the chair to rotate freely in both directions
All pneumatic chucks are divided into classes, which depend on the thickness of the steel used for the elements inside which there is gas under pressure:
- Class 1 - 1.2 mm.
- Class 2 - 1.5 mm.
- Class 3 - 2.0 mm (designed for loads up to 120 kg).
- Class 4 - 2.5 mm (used on chairs that can support up to 150 kg).
The higher the class, the stronger and more durable the gas lift, but also the more expensive its cost.
Another part of the mechanism is the gas lift casing. It does not perform any functions and serves for decorative purposes, covering the metal cylinder and giving the chair a more attractive appearance. Used only on plastic models; on metal ones the structure does not close.
The casing is a simple telescopic element of three plastic sections inserted into each other
Keep in mind that the gas in the housing is under very high pressure, and any damage to the integrity is dangerous to human life and health.
Depth
The correct seat depth allows a person not to slouch and helps minimize the load on the back.
To determine the appropriate chair depth, you need to sit with your back straight and feet flat on the floor. Then measure the distance from the front edge of the seat to the back of the shin. The ideal length of the space is about 5 cm. If the distance is less, then the chair is too deep and the backrest should be moved forward. If the length is longer, move it back.
Most chair models allow you to adjust the depth using a special lever. If this is not possible, use a special backrest or orthopedic pillow.
Features of repair work
To begin with, I will tell you about the most typical causes of breakdowns, then you will find out what is needed for the work and how to properly organize the work process of replacing a failed element.
Causes of breakdowns
The gas lift does not fail so often, however, the problem occurs from time to time, and in order to reduce the likelihood of malfunctions, you need to know how they most often occur:
- Spruce trees often sit on the chair due to plaque . You cannot lower yourself into the seat very sharply, this creates overloads inside the gas cartridge, and over time the valve may fail - it will simply be squeezed out, and the system will lose its functionality. Sit down carefully and smoothly, and this problem will bypass you.
- Elements wear out from long-term use . Manufacturers recommend lubricating the elements with oil from time to time. This minimizes friction and significantly reduces wear, ensuring a long service life. To do this, the casing is lifted and lubricant is applied to the cylinder.
- The structure is subject to overload . If a person weighing 110 kg or more constantly sits on a chair designed for 100 kg, then the likelihood of system failure increases significantly. You need to select furniture with a margin of safety. You cannot sit together, as this also creates overload.
- Manufacturing defects . Products are produced in large quantities, and the company does not always have appropriate quality control. This is especially true for chairs from the budget segment, where the likelihood of defects is much higher.
If a malfunction occurs during the warranty period, the seller will replace the damaged part at his own expense.
How difficult is DIY repair?
If you know how to do minimal repairs with your own hands and are comfortable with a hammer, screwdrivers and other hand tools, then you can handle this job without any problems. You need to prepare the following:
| Illustration | Description |
| A chair with a failed gas lift . It is best to carry out work in a free room so that nothing interferes with your work. If you have a workshop, this will be the best solution that will ensure maximum ease of repair. | |
| Screwdriver Set . In general, it should be at hand for anyone who does at least some work with their own hands. This allows you not to worry that you will not have the tool of the required configuration in a given situation, because the shape and size of fasteners on different types of furniture vary significantly. As for chairs, the Phillips screwdriver PH2 is most often used. | |
| Rubber hammer . Used to knock elements out of their seats. It is best to have a medium-sized version on hand; a large mallet will not be very convenient to work with. |
If there is no rubber option, no problem, you can get by with an ordinary hammer, but you will have to work carefully so as not to damage the parts or spoil parts of the structure.
Gas lift replacement process
I'll tell you how to repair a chair and replace a gas lift with your own hands:
| Punch . It may be necessary when knocking out the gas cartridge from the crosspiece of the chair. It is not necessary to purchase a specialized option; you can adapt what you have at hand - a piece of pipe or a wooden stick of a suitable diameter will do just fine and will help you get the job done without any problems. | |
| New gas lift . You can purchase this part at any furniture fittings store or in places where office chairs are sold. It doesn't cost much, so repairs won't cost you too much. | |
| Bench vice . This item is not mandatory, but if it is available, the work process will be much easier, since you will be able to fix the parts to remove the old gas cartridge. |
| Illustration | Description |
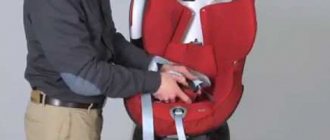
| The chair is being prepared for repair. I recommend removing the armrests from it in advance so that they do not interfere with the repair of the structure. | |
| The chair turns over so that you have free access to the bottom of the cross . If the floor is dirty, cover it with cardboard or rags. | |
| Using a flathead screwdriver, carefully remove the retaining ring . It is located outside and will not be difficult to find. | |
| Carefully remove the lower part from the cross . After removing the retaining ring, this will not be difficult, just pull the element towards you. | |
| The gas lift housing remains on the bottom of the seat ; it should be removed first. | |
| Place the structure horizontally to ensure good access to the bottom . The easiest way is to place the seat on the table; it will be located at a comfortable height. | |
| Hold the gas lift with your left hand, and take a hammer with your right . You need to hit the body of the piastra as close as possible to the element being removed. It is held in place by a cone, so it can be removed easily. | |
| Gently but accurately hit the body once or twice . The gas lift will pop out and remain in your hand. | |
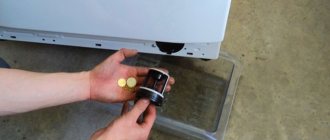
| Now we take the cross . The gas cartridge body remains on it, but first you need to remove the protective plastic casing, which simply snaps off. | |
| Remove the legs or wheels . They are held on by clips, so they are easy to remove: you need to pull forcefully towards yourself to pull the element out of its seat. | |
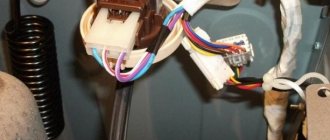
| Removes the plastic covers from the crosspiece so as not to damage them . To do this, use a flat screwdriver to unclip the latches near the center console and simply pull off the decorative elements. | |
| What remains is the metal frame . There is a housing inside, it protrudes 5 mm above the surface, and it will not be difficult for you to knock it out of its seat. | |
| Treat the joint between the gas cartridge and the cross body with WD-40 lubricant . Leave the part for a few minutes to allow the compound to penetrate deeper. | |
| The crosspiece is taken in the hand or placed so that the gas lift body does not rest . The hammer is taken flat and a clear and sharp blow is applied, usually this is enough for the elements to fall out. | |
| Decorative overlays are put on the crosspiece . They snap neatly into place. Then the legs or wheels are installed; they also just need to be pushed into the mounting hole until they click. | |
| The new gas lift is being unpacked . It is assembled, that is, the casing and the inner part are connected. First of all, the plastic casing is put on. | |
| The gas cartridge is inserted into the crosspiece . Since it is held in place by its conical shape, there is no need to fix it in any way; it will be fixed immediately after you sit in the chair. | |
| A seat is placed on the upper part. Align the mounting hole with the top of the gas lift and put it on, pressing it with your hand. Or you can just sit on a chair so that all the parts are tightly connected. | |
| The operation of the system must be checked . To do this, press the lever - the gas lift should raise the chair to the highest position. If everything is fine, the work is completed successfully. |
Rules for using office chairs
In order for the chair to serve for a long time and not cause inconvenience due to breakdowns, it is recommended to follow the following simple rules:
- The chair should be located in a dry, well-ventilated area.
- If for some reason the chair was in a low temperature zone (for example, it was transported in winter), it cannot be used immediately; it must be given time to adapt. Minimum time is 24 hours.
- During the assembly process, be very careful and careful, especially with regard to screw-on parts - do not strip the threads.
- Make sure that the load on the cross is not excessive.
Handle your office chair with care.
Experts remind that one chair is designed for use by one person. If a huge number of people use it, it will have sad consequences. You need to sit down on an office chair very carefully, avoiding sudden movements.
If the damage is minor and does not require complete replacement, a welding machine is required for repairs.
The armrests also need to be treated with care. You should not press on them, much less sit down. For overweight people, it is better to purchase designs with metal elements.
In the event of a complete breakdown, you need to buy a ready-made part.
You can repair an office chair yourself without resorting to the services of a professional technician. And if you follow the operating requirements, it will serve you faithfully for many years.
Features of gas lift operation
First of all, I note that the malfunction indicated in the title always indicates a breakdown of the gas lift - a unit that performs the following functions:
- Creates a cushioning effect when you sit down . This relieves stress from the spine and makes sitting on the chair more comfortable. The element dampens the impact effect that often occurs when landing on rigid structures.
- Raises or lowers the seat due to a special mechanism . This allows you to adapt the design to people of different heights and adapt it to different types of work. For example, writing requires a different position than working at a computer, and thanks to the gas lift, adjustments are made in literally a matter of seconds.
- Provides rotation of the chair around its axis . This function is also provided by a pneumatic cartridge (this is also the name of the mechanism in question). Thanks to this element, you can rotate 360 degrees in both directions without any restrictions.
Thanks to the gas lift, the chairs become much more comfortable and functional
The design is a steel cylinder, inside of which a rod with a piston moves. The cylinder is made in the form of a sealed element of a certain shape, divided into two chambers. A valve is installed in the partition between the chambers, due to which gas moves from one chamber to another.
The gas is located in two chambers - external and internal and moves depending on the opening of the valve
When the seat is fully lowered, the piston is in the up position. When you press the lever, the damper opens and the gas moves from one chamber to another, it presses on the piston, and then it goes down, while simultaneously lifting the seat up.
When the lever is lowered, the valve closes and the structure is locked in the required position. Everything is quite simple, but if you look at the system inside, you will see that it consists of many elements. The diagram below shows a cross-section of the product.
The system inside is quite complex, but this does not matter, since we will not disassemble it
Another important element is the support bearing; it is located at the end of the rod and ensures free rotation of the chair in both directions.
The support bearing allows the chair to rotate freely in both directions
All pneumatic chucks are divided into classes, which depend on the thickness of the steel used for the elements inside which there is gas under pressure:
- Class 1 - 1.2 mm.
- Class 2 - 1.5 mm.
- Class 3 - 2.0 mm (designed for loads up to 120 kg).
- Class 4 - 2.5 mm (used on chairs that can support up to 150 kg).
The higher the class, the stronger and more durable the gas lift, but also the more expensive its cost.
Another part of the mechanism is the gas lift casing. It does not perform any functions and serves for decorative purposes, covering the metal cylinder and giving the chair a more attractive appearance. Used only on plastic models; on metal ones the structure does not close.
The casing is a simple telescopic element of three plastic sections inserted into each other
Keep in mind that the gas in the housing is under very high pressure, and any damage to the integrity is dangerous to human life and health.
Armrests
Place your hands on the table surface or keyboard so that the angle at the elbow joint is 90°. In this position, your elbows should lightly touch the top of the armrests, moving freely along it from one side to the other. When your elbows rest completely on the armrests, this limits movement and quickly leads to fatigue, as your hands receive additional stress.
Adjust the armrests using a screwdriver or screw. If you can't lower the armrests, it's better to remove them.
Features of repair work
To begin with, I will tell you about the most typical causes of breakdowns, then you will find out what is needed for the work and how to properly organize the work process of replacing a failed element.
Causes of breakdowns
The gas lift does not fail so often, however, the problem occurs from time to time, and in order to reduce the likelihood of malfunctions, you need to know how they most often occur:
- Spruce trees often sit on the chair due to plaque . You cannot lower yourself into the seat very sharply, this creates overloads inside the gas cartridge, and over time the valve may fail - it will simply be squeezed out, and the system will lose its functionality. Sit down carefully and smoothly, and this problem will bypass you.
- Elements wear out from long-term use . Manufacturers recommend lubricating the elements with oil from time to time. This minimizes friction and significantly reduces wear, ensuring a long service life. To do this, the casing is lifted and lubricant is applied to the cylinder.
- The structure is subject to overload . If a person weighing 110 kg or more constantly sits on a chair designed for 100 kg, then the likelihood of system failure increases significantly. You need to select furniture with a margin of safety. You cannot sit together, as this also creates overload.
- Manufacturing defects . Products are produced in large quantities, and the company does not always have appropriate quality control. This is especially true for chairs from the budget segment, where the likelihood of defects is much higher.
If a malfunction occurs during the warranty period, the seller will replace the damaged part at his own expense.
How difficult is DIY repair?
If you know how to do minimal repairs with your own hands and are comfortable with a hammer, screwdrivers and other hand tools, then you can handle this job without any problems. You need to prepare the following:
| Illustration | Description |
| A chair with a failed gas lift . It is best to carry out work in a free room so that nothing interferes with your work. If you have a workshop, this will be the best solution that will ensure maximum ease of repair. | |
| Screwdriver Set . In general, it should be at hand for anyone who does at least some work with their own hands. This allows you not to worry that you will not have the tool of the required configuration in a given situation, because the shape and size of fasteners on different types of furniture vary significantly. As for chairs, the Phillips screwdriver PH2 is most often used. | |
| Rubber hammer . Used to knock elements out of their seats. It is best to have a medium-sized version on hand; a large mallet will not be very convenient to work with. |
If there is no rubber option, no problem, you can get by with an ordinary hammer, but you will have to work carefully so as not to damage the parts or spoil parts of the structure.
Gas lift replacement process
I'll tell you how to repair a chair and replace a gas lift with your own hands:
| Punch . It may be necessary when knocking out the gas cartridge from the crosspiece of the chair. It is not necessary to purchase a specialized option; you can adapt what you have at hand - a piece of pipe or a wooden stick of a suitable diameter will do just fine and will help you get the job done without any problems. | |
| New gas lift . You can purchase this part at any furniture fittings store or in places where office chairs are sold. It doesn't cost much, so repairs won't cost you too much. | |
| Bench vice . This item is not mandatory, but if it is available, the work process will be much easier, since you will be able to fix the parts to remove the old gas cartridge. |
| Illustration | Description |
| The chair is being prepared for repair. I recommend removing the armrests from it in advance so that they do not interfere with the repair of the structure. | |
| The chair turns over so that you have free access to the bottom of the cross . If the floor is dirty, cover it with cardboard or rags. | |
| Using a flathead screwdriver, carefully remove the retaining ring . It is located outside and will not be difficult to find. | |
| Carefully remove the lower part from the cross . After removing the retaining ring, this will not be difficult, just pull the element towards you. | |
| The gas lift housing remains on the bottom of the seat ; it should be removed first. | |
| Place the structure horizontally to ensure good access to the bottom . The easiest way is to place the seat on the table; it will be located at a comfortable height. | |
| Hold the gas lift with your left hand, and take a hammer with your right . You need to hit the body of the piastra as close as possible to the element being removed. It is held in place by a cone, so it can be removed easily. | |
| Gently but accurately hit the body once or twice . The gas lift will pop out and remain in your hand. | |
| Now we take the cross . The gas cartridge body remains on it, but first you need to remove the protective plastic casing, which simply snaps off. | |
| Remove the legs or wheels . They are held on by clips, so they are easy to remove: you need to pull forcefully towards yourself to pull the element out of its seat. | |
| Removes the plastic covers from the crosspiece so as not to damage them . To do this, use a flat screwdriver to unclip the latches near the center console and simply pull off the decorative elements. | |
| What remains is the metal frame . There is a housing inside, it protrudes 5 mm above the surface, and it will not be difficult for you to knock it out of its seat. | |
| Treat the joint between the gas cartridge and the cross body with WD-40 lubricant . Leave the part for a few minutes to allow the compound to penetrate deeper. | |
| The crosspiece is taken in the hand or placed so that the gas lift body does not rest . The hammer is taken flat and a clear and sharp blow is applied, usually this is enough for the elements to fall out. | |
| Decorative overlays are put on the crosspiece . They snap neatly into place. Then the legs or wheels are installed; they also just need to be pushed into the mounting hole until they click. | |
| The new gas lift is being unpacked . It is assembled, that is, the casing and the inner part are connected. First of all, the plastic casing is put on. | |
| The gas cartridge is inserted into the crosspiece . Since it is held in place by its conical shape, there is no need to fix it in any way; it will be fixed immediately after you sit in the chair. | |
| A seat is placed on the upper part. Align the mounting hole with the top of the gas lift and put it on, pressing it with your hand. Or you can just sit on a chair so that all the parts are tightly connected. | |
| The operation of the system must be checked . To do this, press the lever - the gas lift should raise the chair to the highest position. If everything is fine, the work is completed successfully. |
We are repairing a chair on wheels
This type of furniture is more susceptible to wear and tear than the same Soviet wooden chairs. Daily use quickly deteriorates the mechanisms and hydraulic parts that make up the structure.
But then another interesting question arises: why do some people’s chairs break down after two months, while others’ chairs last for years? Often this circumstance is due only to the quality of the materials of a particular model. First, of course, you need to pay attention to the fact that modern models can only withstand up to 130 kilograms, and the manufacturer provides a warranty of about 12-18 months.
But if it happens that the chair is broken, and the warranty card has not been valid for a long time, then with a little skill you can do the restoration work yourself.
Important! If you are not confident in your abilities, it is better to contact special service centers.
The problem and its solution
If it happens that the seat itself lowers when you try to sit comfortably, and rises synchronously with you, and this period of raising or lowering varies from one second to twenty-four hours, then the problem clearly lies in the gas escaping from the gas cartridge.
Important! The gas flits themselves cannot be repaired, since disassembling such a component can be hazardous.
In this case, you will have to take the damaged furniture, fix it in the most convenient position and begin replacing the old gas cartridge with a new one.
Important! The cost of such a part is low, which significantly reduces the cost of all work.
If you're still wondering how to fix an office chair, then you'll have to do a little preparation.
What will be useful?
In order to fix an office chair if it falls down, you need to acquire the following tools:
- Furniture chair.
- Set of different screwdrivers.
- Mallet.
- A drift made of metal material.
- New gas cartridge that will fit your furniture.
- A vice that will make the work process a little easier.
Important! If for some reason the repair takes place in the cold, then there is a possibility that the liquid in the gas elevator has frozen, and in this condition this part cannot be used. Wait until it reaches room temperature completely (this may take about a day).
Do-it-yourself troubleshooting
Making a high-quality repair of a computer chair is not as difficult as it might seem at first glance.
Some skills, as well as special tools, will allow you to solve the problem even at home. If you are racking your brain over the question: your office chair doesn’t hold its height, what should you do? The answer is simple, you need to change the gas lift. This is one of the few parts that cannot be repaired.
The procedure is as follows:
- Remove all external elements;
- Remove the outer casing;
- Remove the spring fastener from its seat;
- Remove bearings and all fixing elements;
- Remove the crosspiece and protective cover;
- Remove the faulty gas lift.
Gas lift is responsible for the elasticity of the stool.
After replacing the gas lift, all elements are assembled, but in the reverse order. If you are afraid that you will forget which element was taken from where, you can record each action on camera.
Failure options
A computer chair is a complex mechanism, and breakdowns, alas, are an inevitable reality.
You can save money by repairing the chair, or replacing broken parts yourself.
Professionals identify several of the most common faults.
- Broken crosspiece. This is a fairly common problem with plastic crosses. If your model has a crosspiece made of metal, you have nothing to fear; they break extremely rarely. The intersection of the beams is in the risk zone of the plastic cross.
- Deformation of the rocking mechanism. Because of this problem, you are unable to rest against the vertical and elastic backrest. If the backrest falls back, this indicates a malfunction of the position locks.
- Gas lift failure. In this case, the office chair does not maintain the specified height. Most often we are talking about deformation of the pneumatic cartridge. This part has a two-chamber structure, and each chamber is filled with air or gas. And if, when you press the lever, the mechanism does not operate and does not lower, then most likely the piston, seal or other element of the system is faulty.
If you are replacing a gas lift in the cold season, do not use it right away.
Self-disassembly of the product
Every user should know how to repair an office chair. It is not difficult to disassemble the product yourself; basic knowledge about the design is enough for this. Practical dismantling skills may be needed both for repairs and for transporting disassembled furniture. In order to prepare the chair for repair, you must:
Turn the furniture with its back to the wall, carefully stand with your feet on the horizontal crossbar, but do not press on it with force. Gently pull the backrest up, rocking it left and right. Separate the cross and gas lift. Screw all the wheels.
The most critical stage is separating the backrest and seat. Having completed dismantling, it is necessary to collect all the parts in one place so as not to lose anything
If something doesn’t work out, don’t make any physical efforts: plastic parts can easily break from one careless movement
If you want to effortlessly separate the gas lift from the rest of the structure, you can install the seat so that the pneumatic cartridge is at the top. After this, you need to take a hammer and gently hit it on the seat where the backrest is attached. Next, you should repeat the same thing in other places so that the mechanism that raises (lowers) the chair does not jam.
Repairing a computer chair has a clear algorithm. Any office chair, regardless of cost and appearance, has a standard structure. It is clearly visible in the diagram in the operating instructions. The following elements can be distinguished in the design:
- A metal or plastic base is a cross, or a base of five rays, shaped like a star.
- Plastic rollers with a metal hinge inside. More expensive models have iron wheels.
- Pneumatic cartridge. In some operating instructions this part is also called a gas lift.
- Rocking mechanism with a straight or slightly offset axis.
- Piastres, or height regulator. It is a metal platform equipped with an additional lever.
The most difficult furniture to repair is for executives. These are the most expensive seat modifications with a large number of additional functions. Products intended for personnel are much simpler. The cheapest furniture is made for office visitors. As a rule, it does not last long and cannot be repaired. Instead of a crosspiece, such chairs have four legs, and there is no rotation mechanism.