Most often, cleaning procedures are carried out by owners of Epson, HP, and Canon equipment. This manual contains several options for cleaning the printer head. All steps are described in detail and contain explanations for the most inexperienced.
Cleaning the printer print head is required for any model of inkjet machine when the quality of its operation begins to deteriorate over time. Cleaning involves a kind of direct physical washing of the nozzles, the nozzles through which ink flows onto sheets of paper. Their clogging leads to poor printing and wear on the printer itself. You can wash the head, like any other unit of the device, with special liquids that can be easily purchased at any computer store.
Which manufacturer's device is causing the problem?
- Epson 43%, 834 votes
834 votes 43%834 votes - 43% of all votes
- Canon 23%, 440 votes
440 votes 23%
440 votes - 23% of all votes
- HP 22%, 422 votes
422 votes 22%
422 votes - 22% of all votes
- Canon*3%, 58 votes
58 votes 3%
58 votes - 3% of all votes
- does not print in black*2%, 39 votes
39 votes 2%
39 votes - 2% of all votes
- Samsung*2%, 31 votes
31 votes 2%
31 votes - 2% of all votes
- Brother*1%, 26 votes
26 votes 1%
26 votes - 1% of all votes
- Canon Pixma mg2540s*1%, 11 votes
11 votes 1%
11 votes - 1% of all votes
- HP Desket F 2180*1%, 10 votes
10 votes 1%
10 votes - 1% of all votes
- canon mp 250*0%, 9 votes
9 votes
9 votes - 0% of all votes
- Canon pixma mg3640*0%, 8 votes
8 votes
8 votes - 0% of all votes
- Canon pixma ts 5040*0%, 7 votes
7 votes
7 votes - 0% of all votes
- canon MG2420*0%, 5 votes
5 votes
5 votes - 0% of all votes
- Canon pixma mp140*0%, 4 votes
4 votes
4 votes - 0% of all votes
- Canon Pixma TS3340*0%, 4 votes
4 votes
4 votes - 0% of all votes
- Panasonic*0%, 3 votes
3 votes
3 votes - 0% of all votes
- Canon G3010*0%, 3 votes
3 votes
3 votes - 0% of all votes
- Canon pixma MG 3340*0%, 3 votes
3 votes
3 votes - 0% of all votes
- Canon pixma mp 510*0%, 3 votes
3 votes
3 votes - 0% of all votes
- canon ip 7240*0%, 3 votes
3 votes
3 votes - 0% of all votes
- Canon pixma mp 280*0%, 2 voices
2 votes
2 votes - 0% of all votes
- Canon pixma G2415*0%, 2 votes
2 votes
2 votes - 0% of all votes
- Canon pixma mp 160*0%, 1 vote
1 vote
1 vote - 0% of all votes
- Canon pixma 13150*0%, 1 vote
1 vote
1 vote - 0% of all votes
- Ricoh*0%, 1 vote
1 vote
1 vote - 0% of all votes
- Lexmark Z25*0%, 1 vote
1 vote
1 vote - 0% of all votes
- g3415*0%, 1 vote
1 vote
1 vote - 0% of all votes
- Canon pixma ts 3100*0%, 1 vote
1 vote
1 vote - 0% of all votes
- Canon ts300*0%, 1 vote
1 vote
1 vote - 0% of all votes
- Xerox Phaser 3010*0%, 1 vote
1 vote
1 vote - 0% of all votes
- PIXMA G2411*0%, 1 vote
1 vote
1 vote - 0% of all votes
Total votes: 1936
18.03.2019
* - added by visitor
×
You or from your IP have already voted.
Causes of blockages
Most often, the print head does not want to work properly:
After a long period of inactivity
When the ink has simply dried out. In this case, several sessions of cleaning the nozzles through the printer utility program can help. If cleaning twice does not help, use the “Deep cleaning” function; you can repeat it after a day. Didn't help again? This means the problem is much more serious and may require flushing.
Due to mixing of incompatible paints
Water-based and pigment inks categorically do not want to cooperate, they curl up, give sediment, and quickly clog the nozzles. It’s good if you noticed the problem in time and the nozzles did not have time to burn out. Also, paint of the same type from different manufacturers may be incompatible. Ideally, ink tanks should be refilled with the same consumables. Some experts even advise not to print with new original cartridges if you are going to refill them later, but to immediately rinse and refill with the exact ink that will always be used.
As a result of printing with an empty cartridge
Carefully monitor the condition of the ink tanks, refill them on time, as printing with leftover ink quickly damages the ink tank. First, the nozzles become clogged, and then, if you do not pay attention to the print quality in a timely manner, the nozzles burn out. Here, washing will not help; such a head cannot be restored.
Preventing problems
Many of the problems described can be easily avoided if you follow simple rules.
- Do wet cleaning once a week and air the room daily.
- Carry out repairs and replacements immediately after discovering defects in the operation of your printing device. Failure or improper operation of one element can lead to the breakdown of others. Which will make repairs much more expensive.
- For the purpose of prevention, it is recommended to carry out program activities regardless of the occurrence of problems with print quality.
Flushing fluids
Flushing fluid OPC RSL100
Specialized ink stores also sell washing liquids. For example, OCP RSL100 or more concentrated Bursten PDK . But they are quite expensive, and washing a very dry head may require a large amount of product.
You can make your own alkaline solution using the following recipe. For 7 parts distilled water, take one part:
- ammonia,
- isopropyl alcohol,
- glycerin.
Mix the resulting mixture thoroughly and strain. It makes no sense to use distilled water separately, since it is ineffective for water-based ink and does not dissolve pigment paint at all.
Flushing fluid Mister Muscle
Important : Do not wash clogs with alcohol and vodka. Dried or curdled paint releases remaining liquid into ethyl alcohol, making further soaking difficult or impossible.
Mister Muscle glass cleaner in blue or green color has proven itself to be the best. Its effect is comparable in results to specialized flushing fluids, but the price is significantly lower. You can use other window cleaners whose composition is similar to Mister Muscle and contains ammonia.
How to remove the print head
Open the cover while the printer is turned on to allow the carriage to move out of the parking space. Turn off the printer. Remove the cartridges. The print head is clearly visible, but it is too early to remove it.
Canon iP3600 Print Head Lock
In different printer models, the latch holding the PG looks different, although the principle of operation is the same in almost all models. On the right side there is a lever, or the frame has a certain shape. You need to lift it up.
The MG5440 model has a slightly different principle. The latch here is a bar with the image of ink colors, which does not rise up: you need to pull it towards you until it clicks. Now the PG is free, tilt it forward and carefully remove it from the printer.
Part 3: Manually cleaning the ink cartridge
Sometimes print head cleaning programs do not help either the third or fourth time. The nozzles are completely clogged with dried ink, so when printing on paper there are gaps and smeared ink.
In most cases, this happens when the cartridge has dried out because it is removed from the device for some time and stored outside the printer for several months. It would be a shame to throw it away because it contains ink, so the only way to get the cartridge back into use is to clean it manually with washing up liquid.
The procedure for washing the cartridge will be something like this:
- remove the cartridge from the printer. To do this, open the cover and press the power button. Wait until the print head moves to the center of the carriage. Open the ink tank compartment and slide the cartridge up by pressing the locking lever. Pull out the cartridge;
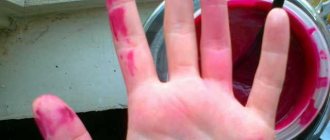
- inspect the container. The print head is where the ink flows out. Use a soft, dry, lint-free cloth to blot the head if the ink is still liquid. Also use a napkin to remove dried ink;
- take a clean napkin and wet it with clean water. Wipe the head area with a damp cloth. It is important to use clean distilled water for this operation. Be careful: the plate on which the nozzles are usually metal - aluminum, copper, silver, etc. It cannot be wetted with water, so take a cotton swab and rinse only that part of the head that is without metal, do not touch the nozzle plate;
- Reinstall the cartridge and run the head cleaning program, then check the print quality. Sometimes a simple “cold” wash is enough to get the printer to print well again. If problems persist, remove the cartridge and prepare for a “hot” wash;
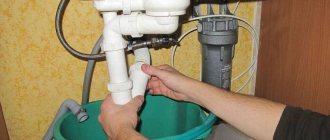
- To rinse the cartridge using this method, you need hot water (about 75 degrees Celsius) and a shallow container, such as a bowl. It is enough that the water level in the bowl is about 3 cm. This is enough for the print heads to be completely immersed in water. If the contamination is severe, you need to prepare a solution of water and ammonia in a 50/50 ratio;
- Immerse the cartridge in hot water or aqueous ammonia so that the head is hidden. If the cartridge has a plate with nozzles and it is metal, dip a cotton swab in ammonia and wipe only the head without touching the plate;
- Remove water from the cartridge using a dry cloth. Install the washed ink tank into the printer and perform head cleaning through the computer. After this, print a sample text and check the print quality.
There are several other ways to wash print heads and clean nozzles using flexible tubes from disposable medical systems and syringes through which a cleaning composition is supplied under pressure. You can simply pump with air or hold the cartridge with the print head down over steam. This is quite labor-intensive work. In addition, the methods themselves are not gentle. The diameters of the tubes must be selected as accurately as possible to match the size of the inkjet printer head.
Flushing using the software method does not require any effort from the user, but requires a lot of ink consumption. However, we warn you that pumping additional ink into the cartridge will not help solve the problem if the nozzles are dry and severely clogged.
Flushing
Make sure that the PG of your printer has no burns near the nozzles, the nozzles are intact, and flushing
Burnouts in the nozzle area (Click to enlarge)
has the meaning. If so, prepare:
- washing liquid;
- gauze, napkins or bandage;
- syringe;
- a low plastic container where the GHG will fit;
- tube from a medical drip.
Cover the table with newspapers and place a piece of bandage, folded several times, soaked in the washing liquid, under the PG. Using another piece of cloth, also soaked in the cleaner, gently blot the intake grates.
Remove the rubber seals, wash them, and thoroughly wipe the head body around the intake holes. Drying of ink in these places can lead to depressurization of the system. As a result, air may be sucked in and paint will flow intermittently. It is a good idea to periodically clean the O-rings for preventive purposes, even when there are no problems with the seal.
Digging
Instillation of PG (Click to enlarge)
A little liquid is instilled into each gateway with a syringe and needle. As soon as the drop is absorbed, add more. Change the bandage as it gets dirty and continue dripping until the liquid passing through the head is no longer the same color as the ink. If the liquid is not absorbed very well, heat it to 50–60 degrees. To enhance the effect, you can use a more aggressive agent, following the instructions for its use.
When each of the sluices begins to absorb well and allow flushing to pass through, let the head stand. After an hour, there should be no strong ink streaks on the fabric. This means that the washing was successful and the head can be returned to the printer. Before printing, be sure to clean the nozzles of cleaning agent using the printer utility program.
Soaking the nozzle plate
But washing is not always so simple. Perhaps one or two sluices do not allow liquid to pass through: the drop is not absorbed for a long time. For some time you need to remove it with a bandage and drip again, but if nothing has changed in an hour, it’s time to proceed to the next stage.
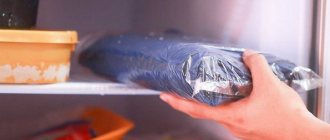
Pour 2-3 mm of washing liquid heated to 40° into a plastic container, lower the print head there with the nozzles down and place it in a warm place to soak, after covering the airlocks on top with a damp bandage to prevent them from drying out and covering the PG with a plastic bag. If no changes are observed the next day, heat the cleaning liquid again and leave for another day. In general, washing the print head is a long process; you can only save the part slowly.
Soaking intake holes
Flushing fluid filled
If the sluices still do not allow liquid to pass through, you can try to create some pressure from above. You need to put tubes about 5 cm long on each of the intake holes and fill them with cleaning liquid.
In this form, the structure can be left for a long time, periodically adding rinsing. If the liquid still leaves the tube through the problematic sluices, continue the procedure for two days.
Reaching out
When the liquid level in one of the tubes does not decrease, you can try the following technique. Pour a little product into the container, put a piece of cloth and press the PG nozzles against it. Insert a syringe without a needle into the tube and, carefully moving the piston towards you, draw the cleaning agent through the nozzles.
Do this several times, adding clean liquid to the pan. Pour out the used rinse from the syringe, then refill the tube and leave for another hour. The process can be repeated several times.
Important : the head must be pressed firmly against the wet fabric so as not to draw air into the nozzles.
If the liquid now leaves the tubes at approximately the same speed, the steam generator has been flushed.
Pumping
If after two days of soaking the liquid still does not flow well, you can
Pumping liquid through the steam generator (Click to enlarge)
try pumping it with a syringe in both directions. Continue to press the nozzles against the wet bandage, drawing in the liquid in the same way. Squeezing in the opposite direction must be done when the tube is full.
Liquid is drawn into the syringe so that there is a layer of air between the piston and the flushing agent. This technique helps to avoid a sharp push that could damage the nozzle plate.
You need to press the piston very carefully, no more than 2-3 divisions at once, then even more slowly, depending on the fluid loss.
Cleaning a Canon printer
When you start cleaning equipment, you should touch absolutely all the necessary components in order to accurately get rid of any problems that have arisen or to avoid their occurrence in the future. Each component is cleaned using its own method. In some situations, hardware will come to the rescue, but most manipulations must be done manually. Let's look at everything in order.
Step 1: Exterior Surfaces
First of all, let's deal with the external surfaces. To do this you will need to use a dry soft cloth. Before starting, be sure to turn off the power to the printer and do not use rough cloth or paper towels, which may scratch the surface. In addition, the use of chemical cleaners, gasoline or acetone is contraindicated. Such liquids can easily cause serious problems.
Once you have prepared the fabric, carefully go through all areas of the equipment to remove dust, cobwebs and foreign objects.
Step 2: Scanner Glass and Cover
Many Canon printer models are equipped with a built-in scanner. Its inner side and lid play an important role. Contamination that appears on them can affect the deterioration of scanning quality or even cause failures during this process. Here we also recommend using a dry cloth, always without lint, so that it does not remain on the surface. Clean the glass and the inside of the lid, making sure there is no more dust or stains.
Step 3: Feed Rollers
Incorrect paper feeding is most often caused by contamination of the rollers responsible for moving it. It is not recommended to clean the rollers just like that, since they wear out quite a lot during scrolling. Perform this only if necessary:
Sometimes a paper feeding error cannot be solved by this method, so you need to manually wipe the rollers. Use a damp cotton swab for this. Clean both elements by accessing them through the rear tray. It is important not to touch them with your fingers.
Step 4: Cleaning the Tray
It is recommended to regularly remove contaminants from the internal components of the printer, as they can cause stains to appear on the finished printed sheets. This procedure can be done manually as follows:
Wait for the paper to dispense. Pay attention to the fold, if there are ink stains there, repeat this step. If the second time is unsuccessful, wipe the protruding internal parts of the device with a cotton pad or swab. Be sure to turn off the power before doing this.
Step 5: Cartridges
Sometimes the ink in the cartridges dries out, so you have to clean them. You can use the services of a service center, but the task at hand can be easily solved at home. There are two methods of washing, they differ in complexity and effectiveness. Read more about the instructions on this topic in our other article at the following link.
If, after cleaning or replacing the ink tank, you have a problem locating it, we suggest using the guide presented in the material below. There you will find several methods to solve this problem.
Extreme methods
So, in fact, we have run out of methods that still have a high chance of saving the print head. If the goal cannot be achieved, you can use several more much riskier methods:
- Press out the liquid with a full syringe without an air cushion. The pressure on the nozzles will increase significantly, as will the risk of damaging them. Do not press the head against the fabric, but lift it slightly. Press the piston carefully, as before, the pressure is much greater due to the lack of an air cushion.
Hold the steam generator nozzles over the steam for several minutes and push through the flushing heated to 40–50 degrees.
Place the head on the surface of hot water for a few minutes, without dipping more than a millimeter, and draw the liquid through the nozzles.
The print head is washed (picture taken from www.chernila.com) (Click to enlarge)
- Use a more aggressive product: mix 9% vinegar and distilled water in a ratio of 1:9. This composition cleans well, but has a destructive effect on internal parts, and after using it, it is necessary to rinse with an alkaline solution to neutralize the acidic environment. Do not use this method if you are not prepared for the fact that the print head will fail in two to three months.
If one of these extreme methods helped achieve the desired goal, do not rush to return the PG to the printer. After such extreme measures, be sure to dry it with a hairdryer. Do not overheat the head: take breaks for about twenty minutes. If you doubt that everything has dried well enough, leave it near the battery for two days, and before installation, drop a little flushing liquid into each gateway.
You can also order repairs (rinsing / restoration) of the Canon print head by leaving a request.
The print head in inkjet printers needs to be cleaned occasionally. Otherwise it may become clogged. As a result, print quality will be greatly reduced. And if the ink dries out completely, the device will stop working altogether. Canon devices have a hardware cleaning function. You launch the program on your computer, and the gadget itself removes blockages. You can also wash the part manually. But for this it needs to be removed.
How to clean and align the print head of a Canon printer.
Video
Source
Sooner or later, the printer may print poorly, for example, stain the paper, leave black or white stripes, and color distortions will be noticeable. This often happens due to the lack of preventive measures during intensive, frequent printing. Elements of the device can become clogged, and if we talk about an inkjet printer, the cartridges of which are refilled with liquid ink, then the latter are susceptible to drying out, both in the cartridge itself and on the part through which the ink enters the sheet of paper - the print head.
This element, depending on the brand and model of the printer, may be built into the cartridge (non-removable) and vice versa. In both cases, you can restore the operation of the part by cleaning it thoroughly using one of the suggested methods below.
It doesn’t matter what kind of printer you have, Epson, Canon, HP, or even talking about a multifunctional device (MFP), because the only difference will be in the design. And in the material we described various methods that will help you clean the printer head at home in a variety of situations. With the help of the posted images and videos, you will probably be able to understand which method is right for you.
Causes and signs of pollution
The printer needs servicing if:
- There are white streaks or other defects on the printed pages.
- Some color has “disappeared”. There is ink in the cartridge.
- Print quality has decreased.
The problem may appear:
- Due to long periods of downtime. The paint has dried.
- Using empty cartridges. Don't "squeeze" the rest out of them. Otherwise the nozzles will become clogged. And this will lead to breakdown.
- Incompatible ink. Pigment and “water” ones cannot be mixed. A sediment remains, which clogs the head. And also you should not take paints from different manufacturers. If the device is new and already contains original Canon cartridges, replace the ink in them. Pick one type of supplies and always use it.
Nozzles become clogged over time. In any case, they will have to be washed. Even if you have good cartridges.
Method 3. Steaming
You take a dead, dead cartridge from an inkjet printer, which has been lying around no matter how long and has dried up tightly and all sorts of soaking, blowing, and ultrasonic baths do not help and everyone says throw it away and buy a new one - try this method and everything will work. This method applies to HP, Canon, Lexmark cartridges with a built-in print element. Take a kettle, boil water, when it boils and pour it into some bowl, the water depth is about 1 cm in and immediately lower the dried cartridge into this boiling water with the nozzles downwards, just before that remove the top sticker covering the holes as the paint will expand greatly and can flow out through top filling holes, hold in boiling water for 30 seconds and do this three times (carry out all operations with a refilled cartridge). Then you wipe the cartridge nozzles with a napkin and put some photo into the printer to print at the best quality, it will immediately turn out to be anything, then you make 4 main color sheets completely of the same color and print to run each color, the quality will still not be very good for In order to eliminate this, print any photo and in the printer settings set the quality to normal (not fast, not draft, but REGULAR). I would be most grateful if you leave a review here; I would also be grateful if you recommend this site to your friends.
Hardware cleaning
Blockages in inkjet printers are a common problem. After all, the paint dries in all devices. Therefore, they often add a self-service function. You can clean the Canon print head without even removing it. When connecting a gadget, the system must find and install the driver. But it is better to install the software from the disk that comes with the device.
The manufacturer's website has utilities for managing the printer. They have different settings and interface. It is not necessary to download them. You can also wash the nozzles this way.
- Refill the cartridges.
- Connect your gadget to your PC.
- Insert a blank sheet of paper into it.
- On your computer, open Control Panel.
- "Devices and Printers" menu.
- Right-click on the Canon icon.
- “Properties” item.
- Section "Service".
- Select the type of cleaning (“Standard” or “Deep”) and cartridges.
- Printing will begin. The printer will supply ink under high pressure. A jet of paint will break through the blockage.
- After cleaning, the system will offer to print a test page.
- To run the test yourself, click on the “Check Nozzles” button in the same “Maintenance” section.
First, perform a standard “rinse”. It may not work the first time. Try twice and print a test page. If it doesn't work, run a deep clean. Don't forget to refill the cartridges - a lot of ink is consumed. Do not remove the part yet. Wait a day. Then try cleaning again. If this does not help, you need to wash it manually.
Printer print queue on Windows 10: cleaning methods and error resolution
When trying to print a document, a Windows 10 user may encounter a situation where by sending the file and clicking the “Print” button, nothing happens. The document is sent to the print queue, the printer is operational and working, but the printing process does not start. In this case, many users reboot the PC, which solves this problem, but all files must be re-opened and printed again. This is not correct, since a special function that must work is responsible for the correct printing order of text documents. If it does not work, then we suggest considering ways to clear the Windows 10 printer print queue and solve the problem with this option.
In order to view the print queue on Windows 10, you should do the following:
There are several ways to clear the print queue folder of any printer from files on Windows 10.
You can clear the list of documents sent for printing through the Control Panel. To do this we do the following:
If the first method does not work, then you need to delete documents sent for printing using the Print Manager. However, this will force the printer to stop working. To complete this you need to take the following steps:
You can clear the print queue in Windows 10 using the command line. To do this, perform the following steps:
After running these commands, you should restart Windows 10.
If you have tested the above methods but the print queue is not clearing, you may want to try the following methods.
Method 1: Restart the Print Queue service
Method 2: Deleting the temporary folder
Method 3: Automatically clear the print queue using a batch file
You can clear the print queue in Windows 10 using a batch file. To do this, you need to open a text document. Preferably Notepad. Next, insert the following text into it: rundll32 printui.dll,PrintUIEntry /Xg /n “Local_printer_name” /f “D:\results.txt”.
Some scripts are written by Mcicrosoft itself. They can be studied at the link.
As an analysis of the forums where this topic is discussed shows, the above methods and methods should solve the problem with the print queue. If they do not help fix the problem, you need to pay attention to the functionality of the printer: reconnect it, update the drivers, run a system scan for damaged files. Perhaps the problem lies in the performance of the printing device itself.
Source
Severe blockage
If the head does not allow liquid to pass through at all, then the blockage is severe. But you can get rid of it too.
Take the IV tube.
There are also extreme methods. For example, you can insert a syringe without a needle into the nozzle and squeeze out the liquid. Or fill the cartridges with washing liquid instead of ink. But it's risky.
Method 1. Soaking
If the cartridge with a sponge inside dries out, you should try to soak the sponge. To do this, place the cartridge in a vessel filled with distilled water or washing liquid with the nozzles down (in the same position as it is installed in the printer). Soaking can take quite a long time (from several hours to several days.) It is important to pour little water so that only the nozzles are immersed in it (to a height of about 1 cm). Then the cartridge is filled with ink. It doesn't hurt to pump the ink through the suction cup with a syringe, but don't use too much force. Pull the syringe slowly, without sudden jerks, and when the ink begins to come out evenly and in large quantities (no more than 10 ml), it is better to stop the procedure. Before inserting the cartridge into the printer, wipe it clean of any remaining ink, and pay special attention to the electronics contacts. Do 2-3 head cleanings and print a test page.
Or : pour the composition generously onto a napkin and place the cartridge with nozzles on the napkin and let it sit for 1-3 days if it is very dry. Then blow out with a syringe with a rubber adapter in both directions; blow directly into the nozzles (the main thing is not to overdo it with blowing). HP, Lexmark, Canon and the like are quite successfully restored using this method.
Place and align
To reassemble the device:
- Install the head into a Canon printer.
- Press it with the clamp.
- Replace the cartridges. There should be a palette on the carriage. Don't mix up the colors.
- Close the lid.
- Do a test print.
If uneven lines appear on the sheet, calibrate the device. Most likely the carriage has moved. Canon heads need to be aligned.
- Refill the cartridges.
- Insert 3 sheets of paper into the tray.
- Start - Control Panel - Printers.
- Right-click on the Canon device.
- “Properties” item.
- "Special parameters".
- ABOUT.
- Save.
- Maintenance tab.
- Click on "Alignment".
- In the next window, also click on “Alignment”.
- The printer will print the samples.
- Enter the numbers of the samples that seemed high quality to you. Choose examples in which the white stripes are invisible.
You can also wipe the positioning tape along which the carriage moves. Use soft paper towels and service fluids. Then dry the tape. If your printer is properly maintained, it will last longer. And with regular cleaning, severe blockages will never appear.
The print head in inkjet printers needs to be cleaned occasionally. Otherwise it may become clogged. As a result, print quality will be greatly reduced. And if the ink dries out completely, the device will stop working altogether. Canon devices have a hardware cleaning function. You launch the program on your computer, and the gadget itself removes blockages. You can also wash the part manually. But for this it needs to be removed.
How to clean and align the print head of a Canon printer.
Signs that cleaning is needed
The fact that there is a need to inspect inkjet printer cartridges is evidenced by a number of printing defects, the main ones of which are the following:
- the templates on the test printouts contain uneven or unclear lines;
- During operation of the device, ink blots appear on the sheets;
- one or more colors are missing when printing the test pattern;
- When photographs and other color images are taken, horizontal streaks appear on the paper.
Poor print quality
The defects discussed are typical for different device models, for example, Epson, HP, Samsung, Canon. When rebooting does not help get rid of the unpleasant phenomenon, then you will need to clean the device cartridges. There are several reasons why you need to do this regularly:
- during downtime, it may happen that the paint in the nozzles has dried and will need to be removed to remove blockages;
- dust from the air settles inside the printer, especially on ink-coated components - the print head, cartridges.
For laser devices, cleaning is carried out when replacing the toner. At the same time, old ink and other contaminants are removed from the cartridge. The work is carried out using napkins, cloth or a lint-free brush. It is important that the electrical contacts remain clean. The work is carried out according to certain algorithms and does not require special skills.
Causes and signs of pollution
The printer needs servicing if:
- There are white streaks or other defects on the printed pages.
- Some color has “disappeared”. There is ink in the cartridge.
- Print quality has decreased.
The problem may appear:
- Due to long periods of downtime. The paint has dried.
- Using empty cartridges. Don't "squeeze" the rest out of them. Otherwise the nozzles will become clogged. And this will lead to breakdown.
- Incompatible ink. Pigment and “water” ones cannot be mixed. A sediment remains, which clogs the head. And also you should not take paints from different manufacturers. If the device is new and already contains original Canon cartridges, replace the ink in them. Pick one type of supplies and always use it.
Nozzles become clogged over time. In any case, they will have to be washed. Even if you have good cartridges.
Method 3. Steaming
You take a dead, dead cartridge from an inkjet printer, which has been lying around no matter how long and has dried up tightly and all sorts of soaking, blowing, and ultrasonic baths do not help and everyone says throw it away and buy a new one - try this method and everything will work. This method applies to HP, Canon, Lexmark cartridges with a built-in print element. Take a kettle, boil water, when it boils and pour it into some bowl, the water depth is about 1 cm in and immediately lower the dried cartridge into this boiling water with the nozzles downwards, just before that remove the top sticker covering the holes as the paint will expand greatly and can flow out through top filling holes, hold in boiling water for 30 seconds and do this three times (carry out all operations with a refilled cartridge). Then you wipe the cartridge nozzles with a napkin and put some photo into the printer to print at the best quality, it will immediately turn out to be anything, then you make 4 main color sheets completely of the same color and print to run each color, the quality will still not be very good for In order to eliminate this, print any photo and in the printer settings set the quality to normal (not fast, not draft, but REGULAR). I would be most grateful if you leave a review here; I would also be grateful if you recommend this site to your friends.
Hardware cleaning
Blockages in inkjet printers are a common problem. After all, the paint dries in all devices. Therefore, they often add a self-service function. You can clean the Canon print head without even removing it. When connecting a gadget, the system must find and install the driver. But it is better to install the software from the disk that comes with the device.
The manufacturer's website has utilities for managing the printer. They have different settings and interface. It is not necessary to download them. You can also wash the nozzles this way.
- Refill the cartridges.
- Connect your gadget to your PC.
- Insert a blank sheet of paper into it.
- On your computer, open Control Panel.
- "Devices and Printers" menu.
- Right-click on the Canon icon.
- “Properties” item.
- Section "Service".
- Select the type of cleaning (“Standard” or “Deep”) and cartridges.
- Printing will begin. The printer will supply ink under high pressure. A jet of paint will break through the blockage.
- After cleaning, the system will offer to print a test page.
- To run the test yourself, click on the “Check Nozzles” button in the same “Maintenance” section.
First, perform a standard “rinse”. It may not work the first time. Try twice and print a test page. If it doesn't work, run a deep clean. Don't forget to refill the cartridges - a lot of ink is consumed. Do not remove the part yet. Wait a day. Then try cleaning again. If this does not help, you need to wash it manually.
Severe blockage
If the head does not allow liquid to pass through at all, then the blockage is severe. But you can get rid of it too.
Take the IV tube.
There are also extreme methods. For example, you can insert a syringe without a needle into the nozzle and squeeze out the liquid. Or fill the cartridges with washing liquid instead of ink. But it's risky.
Method 1. Soaking
If the cartridge with a sponge inside dries out, you should try to soak the sponge. To do this, place the cartridge in a vessel filled with distilled water or washing liquid with the nozzles down (in the same position as it is installed in the printer). Soaking can take quite a long time (from several hours to several days.) It is important to pour little water so that only the nozzles are immersed in it (to a height of about 1 cm). Then the cartridge is filled with ink. It doesn't hurt to pump the ink through the suction cup with a syringe, but don't use too much force. Pull the syringe slowly, without sudden jerks, and when the ink begins to come out evenly and in large quantities (no more than 10 ml), it is better to stop the procedure. Before inserting the cartridge into the printer, wipe it clean of any remaining ink, and pay special attention to the electronics contacts. Do 2-3 head cleanings and print a test page.
Or : pour the composition generously onto a napkin and place the cartridge with nozzles on the napkin and let it sit for 1-3 days if it is very dry. Then blow out with a syringe with a rubber adapter in both directions; blow directly into the nozzles (the main thing is not to overdo it with blowing). HP, Lexmark, Canon and the like are quite successfully restored using this method.
Place and align
To reassemble the device:
- Install the head into a Canon printer.
- Press it with the clamp.
- Replace the cartridges. There should be a palette on the carriage. Don't mix up the colors.
- Close the lid.
- Do a test print.
If uneven lines appear on the sheet, calibrate the device. Most likely the carriage has moved. Canon heads need to be aligned.
- Refill the cartridges.
- Insert 3 sheets of paper into the tray.
- Start - Control Panel - Printers.
- Right-click on the Canon device.
- “Properties” item.
- "Special parameters".
- ABOUT.
- Save.
- Maintenance tab.
- Click on "Alignment".
- In the next window, also click on “Alignment”.
- The printer will print the samples.
- Enter the numbers of the samples that seemed high quality to you. Choose examples in which the white stripes are invisible.
You can also wipe the positioning tape along which the carriage moves. Use soft paper towels and service fluids. Then dry the tape. If your printer is properly maintained, it will last longer. And with regular cleaning, severe blockages will never appear.