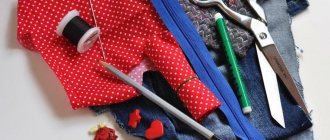
You will need
- Takes a drop (choose your size, take a closer look at 54-55),
- water (preferably hot),
- shaving foam or gel,
- hairspray (colorless),
- disposable razor,
- scissors,
- any plastic card,
- cockade.
Instructions
To begin with, we cut out the lining with scissors, but do not cut off the insert for the cockade. Next, immerse the beret in hot water and wait 2 minutes for it to completely soak. We take it out, squeeze it slightly, insert the cockade exactly in the center (we are guided by the insert inside the beret), put it on the head and tighten the ropes at the back of the head, tie it.
Without removing the beret, we begin to smooth it with our hands in the right directions. We smooth the left side back, bringing the hand to the back of the head. We stroke the top of the head to the right side, creating a half-disk near the right ear. We make the arch for the cockade as follows: hold the cockade, and with the right hand we smooth it forward from the top, creating an edging. Then everything is much simpler, you just need to straighten these sides and remove stains and holes. Don’t be afraid to smooth it harder, the beret won’t tear. Pay special attention to the arch and half-disk at the ear, make them more prominent and even (after its formation, it is advisable to iron the half-disk a little back to the back of the head, press it well to the ear and crush the ends). Your choice of how you want the half disk to look: cover the half disk, lightly touch it, or just hang in the air above it.
After we have made the form, we continue to improve it. We take shaving foam and apply it on the beret in large quantities. We coat everything thoroughly, every area (don’t remove the beret!!!). Then wait a few minutes, you can also iron the sides a little, but not too much. Next, we wet our hands with water and begin to rub in the foam (which is on the beret) with movements from side to side, with medium pressure. Having removed all the stains and white spots, we iron the shape a little more, smooth out the imperfections and leave our creation alone. Under no circumstances do we take off our beret; we walk around in it for about 1.5 hours, or even more. It is advisable to be in a warm place so that it dries on you.
When it's dry on your head, you can put it on a table or on a radiator to dry completely, but so that the half-disc hangs over the edge. Then the beret is completely dry, we must get rid of the pellets that formed from our foam and water. We take a razor and shave in the same directions where we smoothed the creation. We shave so that the surface is smooth and without defects, everything is neat and without rushing. After this, we take hairspray and spray it on the inside of the beret, that is, where we cut out the lining. Use all the polish, don't waste it, the more the better. All this is done to make the beret harder. You will feel the results after such an operation.
Our miracle creation is ready! All that remains is to take a plastic card and cut it to the size of the cockade. We make two holes for the antennae of the cockade (there should also be two holes in the beret), insert the cockade, then fasten a piece of plastic inside and move the antennae to the side. This will give our “piece of hardware” immobility. Everything else is up to your taste and color.
note
We roll the beret to the right side, not the left. Only a maroon beret can be rolled up on the left, since it is different from the others. The only exception for regular berets is the parade, only in it it is allowed to roll up on the left side.
Helpful advice
If you want to place a fragment or flag on the left side, place it straight and not far from the cockade. Remember, the two holes on the left side of the beret are for ventilation, not bling inserts.
The beret is a beautiful and comfortable headdress, the fashion for which has not gone away for many years. Making a beret yourself is not at all difficult - in this article you will learn how to sew a beret with your own hands and surprise others with your individual style. Anyone can buy a beret in a store, but not everyone will have a really interesting model. You can become the owner of a truly unusual beret, which you can sew and decorate in accordance with your own wild imagination.
Instructions
Then cut an even circle with a diameter of 28-30 cm for the top of the beret and a curved strip 16-17 cm wide for the crown.
Make similar patterns for the lining fabric. Sew the lining to each matching pattern piece, right sides together.
When cutting out the beret, do not forget about the seam allowances with which you will sew the parts.
Start stitching the cut parts from the widest part - the crown. Sew the upper round part of the beret to it from the inside out, and then sew a band to it on the other side. When sewing on the bands, pay special attention to the neatness and precision of your work so that the beret looks neat.
Sew it to the bottom of the crown, turning it right side out, and then turn it back to the crown and again sew the band behind the top edge with a neat small stitch. Decorate the finished beret with applique, flower, embroidery or a beautiful brooch. Your original and unique headdress is ready.
Video on the topic
The beret is associated with practicality and comfort. But this headdress, like no other, emphasizes the individuality and reveals the taste of its owner. By changing the shape of the beret, you create a new, unique look each time.
Instructions
The beret suits almost any face type, it does not spoil the hairstyle, and does not fit as closely as a hat. Berets are popular among young people and older women. The more voluminous it is, the easier it is to give it the required shape.
If you prefer a traditional beret shape, then wear it on your forehead, cover your ears partially or completely, and also pull the back part further towards the back of your head.
Beret is a headdress without a visor. Back in the Middle Ages, it became popular among ordinary people and in the army. At the end of the 19th century in France he was widely known. You will learn how to return the beret in this article.
There are a lot of varieties of this headdress: with a seam, seamless, felt, knitted, molded, sewn from thick fabric or wool. Today it is also widely popular. And many people like to wear this headdress. Berets are still worn by military personnel and workers. The styles are very diverse, so anyone can choose something to suit their taste.
Various shapes and materials - this is a practical headdress that will make you sophisticated and your image individual. How to hit a beret correctly will be of interest to many. And once someone starts wearing it, it is unlikely that they will ever be able to give up this habit. The shape of the beret can be easily changed and updated. To do this, you will have to put in a minimum of effort and time, following a few tips.
From the history of blue berets
This fashion reached the Soviet Union only in the 60s. Interestingly, the Marines were the first to wear this headdress. Berets appeared in the Airborne Forces in 1967. Few people know that the original berets were not blue, but crimson. Although the color blue was available in the landing uniform even then (edgings and shoulder straps). The crimson color of the berets was proposed by the artist Zhuk, who borrowed this color from paratroopers of other countries.
The crimson color was not the only one. The artist demonstrated two versions of color schemes to General Margelov. In addition to crimson, there was also a protective color. Berets of this color were planned to be worn as everyday wear, although this remained just a project. Raspberry berets seemed to “Uncle Vasya” more suitable for parades, but he did not approve the everyday version.
In 1967, airborne troops were given the chance to appear at the parade in crimson berets. However, the paratroopers did not wear this color of berets for long. For unknown reasons, the high command decided to change the color of the berets. It is possible that official party leaders were suspicious of the crimson color, and perhaps did not want to have anything to do with the color of the berets of the airborne forces of capitalist countries.
In addition, there is another version that says that the blue color is associated with the sky, which in turn could be most suitable for paratroopers. In general, there is no exact information about the reasons for such sudden changes in the color of the beret.
In 1969, the color was changed to the one seen today, blue. In addition, there was no casual and formal version of berets, which could differ in color.
Types of berets and rules of wearing for different branches of the military
A blue, orange or black beret is the most common military headdress. There are other types of this product, for example, which are part of the official uniform of some civilian professions (stewardesses, conductors on long-distance trains). The beret is a favorite headdress of various patriotic and paramilitary organizations.
| Type of army | Color | Peculiarities |
| Ministry of Internal Affairs | Maroon | Only particularly distinguished employees have the right to wear berets |
| Ministry of Emergency Situations | Orange | Seamless, made of felt |
| Airborne forces and GRU special forces | Blue | Conveniently adjustable in size |
| Marines | Black beret with emblem | Compact |
Description and characteristics of Kale cabbage (Russian cabbage)
There are no flags or other decorative elements on the maroon beret with a seam, but the logo of the troops can be placed. It is received only by those who have successfully passed the tests and demonstrated the required level of physical fitness. In the parade, it is worn tilted to the left side so that the uniform of all participants in the event is uniform.
This headdress is made from wool. It is a disc without a visor with the addition of a cockade and a flag; it comes in two types: suture and seamless (droplet). The first sewing method is used when the product consists of a single piece of fabric. The second manufacturing method is used if the hat needs to be made from several fragments of material. A military beret with a seam is more convenient to beat off. The droplet is easier to adjust in size.
Wearing rules require that a military beret sit vertically on the head. To do this, it is given a form. More information about the proper appearance of a branded hat can be read in the order of the Ministry of Defense of the Russian Federation dated September 3, 2011 No. 1500 “On the rules for wearing military uniforms and insignia of military personnel of the Armed Forces of the Russian Federation.” The bottom border of the cap should be strictly parallel to the forehead line. Bend to the right side is required. The edge should rise 3 cm above the eyebrows. To position the hat correctly, pre-treatment of the fabric is necessary. This is why you need to know how to hit the beret.
Maroon Orange beret of the Ministry of Emergency Situations Blue berets of the Airborne Forces Black beret of the Marine Corps
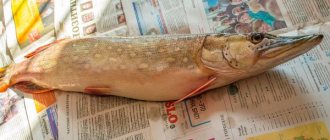
How to restore the shape of a hat using newspapers
If you have several hours to form the beret, for example overnight, you can use old newspapers. To do this you will need:
- several newspapers or booklets printed on thin gray paper;
- hairpins, paper clips or clothespins;
- water or weak sugar solution.
So, first you need to moisten the beret. At home, a spray bottle is suitable for this work. After you have lightly moistened the headdress with water or a sugar solution, you need to stuff it with newspapers. The paper should occupy the entire internal space of the accessory.
With this method, you do not have to beat off the edging - it is formed using bobby pins, clothespins or paper clips. Please note that the clamps should not be of the alligator type, that is, the compressing part must be flat, without protrusions. Otherwise, after drying, marks will remain on the beret.
A few hours later, after this piece of clothing has completely dried, you need to try it on and evaluate the result. Any defects can be easily corrected with wet hands. This method is often used for girls’ hats, as it does not require much physical effort.
Different troops have their own colors of hats. So, paratroopers wear blue berets, infantrymen wear black ones, and special forces wear maroon berets. But in order to look neat and stately, you need to work a little on the appearance of your attire. For the military, berets are made of light, pliable material. Therefore, as a rule, there are no difficulties in shaping the Ministry of Emergency Situations and the Airborne Forces beret.
Some advantages of a beret
- It does not fit tightly to the head, so you don’t have to worry about ruining your hairstyle.
- This famous headdress is suitable for everyone, without exception, for any type of face.
- A beret always makes you feel cozy and warm, as the edges of the headdress fit snugly to your head.
- The beret always remains fashionable - it is moved closer to the eyebrows or worn with an open forehead, completely covering the ears or partially pulled back like a cap, or worn to one side. He will always be popular.
- The beret is perfect for many styles, from classic to sporty.
For most military personnel, this question will be very useful. Few people know how to do this correctly. The hats issued in the service usually do not have a decent appearance.
First, heat the beer, then pour it into a bowl. This retainer will not be affected by either wind or moisture. Remember how in Soviet times, when people could only dream of varnish, fashionistas used beer to curl their curlers. Place the beret in the basin for about 30 minutes. After the time is up, take it out and put it on your head. Here it will take on the necessary form. Then make a droplet bend in the right place. Using your hands, bend the area under the border and form the edge into the shape of a nut. Leave the beret on your head until completely dry. To prevent the headdress, which has just taken the desired shape, from losing it, place it on a flat surface. You should not crumple it or fiddle with it in your hands, otherwise all your efforts will be useless.
A beret made of thick fabric can be shaped using an iron, water, hammer or rolling pin. After this it will be much softer and more pliable.
In our country, a beret can more often be found on the head of a military man than on a representative of the fair sex. Women's berets are usually made of soft wool or angora. There is no need to beat off such products. It is enough to put them on your head and slightly flatten them along the edge on one of the sides. A military beret is a different matter. It should sit proudly and strictly, indicating the seriousness of its wearer's profession. By the way, by looking at the beret you can determine which branch of the military the owner of the headdress belongs to, as well as obtain other additional information about him.
Step-by-step instructions on how to return the beret
Initially, the beret is issued to a serviceman in the form of a disk, which undoubtedly looks very ugly on the head. In order to give it a presentable appearance, soldiers beat off their berets, which is a very simple procedure and is performed using improvised means.
First you need to cut out the lining in the beret with scissors, but leave the liner for the cockade. Then immerse the headdress in hot water for two minutes until it is completely limp. Next, take out the headdress, squeeze it lightly, insert the cockade strictly in the center (you should follow the liner inside the headdress), put it on your head and tighten it with a rope at the back of your head
Without removing the headdress, use your hands to smooth it in the required directions. The left side is smoothed back, the crown is smoothed to the right, thus creating something like a half-disk at the right ear.
The arch for the cockade is made like this: the cockade is held with the left hand, and smoothed from the top forward with the right, forming an edge.
After giving the shape to the headdress, its improvement continues. To do this, take shaving foam and apply it to the headdress, and a lot. Next, you need to wet your hands with water and rub in the foam, without pressing hard on the headdress.
When all the stains with white spots have been removed, a final inspection should be made to look for any defects and eliminate them. Under no circumstances should you take off your beret; you will need to walk in it for approximately 1.5 hours.
After the beret dries on the head, it is dried on a table or radiator. In order for the beret to become as hard as possible and keep its shape longer, folk craftsmen advise spraying hairspray inside the headdress.
That's all, the beret is ready. All that remains is to cut the plastic card so that it matches the size of the cockade. Two holes are made for the antennae of the cockade, the cockade is inserted, after which a cut-off plastic card is secured inside and the antennae are spread out on the sides. This will give the cockade a more stable, stationary position. If you place the flag on the left side, then you need to do it evenly and not very far from the cockade.
“Guards Corner” - a band on the Airborne Forces beret
Red badges were attached to the paratroopers' berets, which were worn on the left side of the berets in everyday life, and during parades they were tilted to the right side. Later, such a badge - a band on the Airborne Forces beret - began to be worn in all formations and units of the Airborne Forces. However, there were no standardized sizes.
And since 1989, the mandatory wearing of uniform badges by all airborne troops has been enshrined at the legislative level. These badges were flags made of brass or rondole.
Since 1995, the band began to be made for the first time with the image of the Russian coat of arms. Subsequently, he was accepted along with a modified military uniform, and this was recorded at the legislative level. Corresponding changes to the military uniform of the paratroopers were made retroactively. This was the decision of the Head of the Central Clothing Directorate of the Russian Ministry of Defense in July 1995.
Such beads are of great value to their owners. Especially those that were created by skilled soldiers with their own hands even before 1989. Moreover, most of the bands made before 1989 are rare works of folk craft and are highly valued by collectors.
We beat back step by step at home
Before starting work, it is necessary to determine which side the beret will fight on. Typically, maroons have a slant to the left, while all others have a slant to the right. For military celebrations and parades, the edge is made on the left. After solving the issue with the form, you can start working.
Any person can take the beret on his own so that it sits perfectly on his head. There are many methods that can be used at home; the simplest and most common ones are described below.
Beating a beret at home
Method 1: sugar water
The first step is to prepare a sugar solution. To do this, you need to dissolve a tablespoon of sugar in a glass of warm water. Dissolved sugar will serve as a kind of fixative, which will allow the material to be fixed in the required form.
Step-by-step instruction:
- Place the beret on the open hand.
- Using the fingers of your other hand, vigorously knead the surface into the desired shape.
- Fingers should be periodically moistened in sugar syrup to fix the fabric.
- Straighten the edge.
The beret is repulsed. Now the main thing is not to get caught in the rain in it, because the water will soak it and it will lose its shape. Another disadvantage of this beating method is the fact that sugar can attract insects.
Preparation of sugar solution
In the same way, you can use beer instead of sugar, but this fixative will not be affected by either rain or wind. You can also treat the beret with your fingers soaked in beer, or you can simply soak the headdress in beer, squeeze it out and put it on your head. Shape, smooth out the edge and leave until completely dry.
Another way:
- It is necessary to moisten the beret and pull it onto a flat plate (the dishes should be the perfect size).
- Leave until completely dry.
- Fill a basin with sweetened water and put the beret in it for 2 hours.
- Dry the headdress.
Important! Before you wet your beret, you need to make sure that the fabric from which it is made is washable—some materials can only be dry cleaned.
Method 2: on the head
You can also beat off the beret on your head, following the step-by-step instructions:
- You need to immerse the headdress in warm water (if it has an emblem or patch on it, it is advisable not to get it wet). Soaking in hot water may cause it to shrink.
- Squeeze out excess water - no water should drip from it, but moisture should remain.
- Place the wet beret on your head, pull it up, and then pull it to the right, straightening the fabric with your hands. You can repeat the attempt several times until the headdress lies flat.
- Leave on your head until completely dry.
Burnet planting and care in open ground medicinal properties
Using this method of beating, you can achieve a perfect fit of the beret and also prevent severe shrinkage.
When beating the beret, you need to be careful; twisting it while spinning is strictly not recommended, as this can create creases on the surface or lead to stretching of the fabric. It is better to squeeze the beret in a thick towel - it will absorb moisture.
Put a wet beret on your head
Method 3: using a hammer
How to beat off the Ministry of Emergency Situations and others with a hammer? You can remove the headdress in a few minutes; to do this you need to do the following:
- Wet the beret with hot water.
- Allow to dry slightly, place on a chair or other flat, stable surface that you can hit with a hammer.
- Moving around the circumference, beat off the beret with a hammer.
Instead of a hammer, you can use a rolling pin or a steel tablespoon.
This method is suitable for rough fabrics. A military beret being prepared for a parade can be additionally soaked in sweet or starched water for durability.
Wet the beret with hot water
Method 4: using starch
There are three degrees of starching of a beret:
- low – 1 tsp. starch per 1 liter of hot water (the headdress will keep its shape until the first rain);
- medium – 1 tbsp. l. for 1 liter of water;
- high – 2 tbsp. l. for 1 liter of water.
Step-by-step instruction:
- Having prepared a solution of the desired concentration, you need to let it cool to room temperature.
- Dip into the starch solution, being careful not to wet the emblem.
- Gently squeeze out excess liquid.
- Smooth and straighten.
- Place it on a three-liter balloon or ball, giving it the desired shape.
- Do not remove until completely dry.
A starched beret will look perfect and keep its shape for a long time.
Beating berets with starch
Method 5: gauze and ironing
Some types of berets can be given the desired shape using an iron. This is a simple method that even a newbie in the army can do. You need to wash the headdress and iron it through double-folded gauze. Before ironing, you need to place a wet folded towel inside so that it helps give the desired shape.
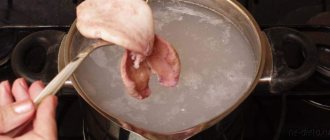
Method 6: shaving foam
This is not such an easy method, and you must strictly adhere to the rules described below, otherwise there is a risk of ruining the headdress. You will need a bottle of shaving foam, a container of hot water, a razor, hairspray and scissors.
Step-by-step instruction:
- Use small scissors to carefully tear off the lining of the beret.
- Place in hot water to soak.
- Squeeze without twisting, but squeezing with a towel.
- Put the wet beret on your head, smooth it out and give it the desired shape.
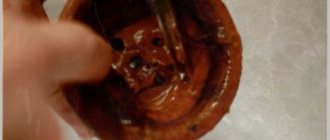
- Apply shaving foam to the headdress without removing it from the head.
- Wait a few minutes and then rub the foam into the fabric. This should be done evenly, avoiding the appearance of white streaks.
- After half an hour, the beret should be completely dry, and then it can be removed from your head.
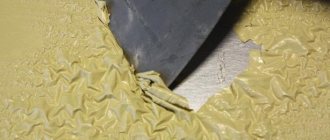
- Next, you need to carefully walk along the surface of the fabric with a razor to remove pellets and remaining foam.
- Apply hairspray to the inner surface; it is better to use the entire bottle to ensure a stronger hold.
- Cut out a shape from plastic that follows the shape of the cockade, insert it between the lining and the cockade.
- Sew lining fabric.
Beat off with shaving foam
Method 7: with old newspapers
If you don’t want to wear a wet beret on your head, you can stuff old newspapers inside or put the headdress on a round object, such as a ball:
- Crumple the newspapers into shapeless elements and stuff the beret with them.
- Wet using a spray bottle.
- Give the desired shape - you may need more newspapers; You can also use clothespins and hair clips to secure the desired shape.
- Leave with newspapers to dry.
- Try on and, if necessary, adjust the shape of the headdress by re-wetting.
We fix the desired shape with clothespins
By what means can you fix the shape of a beret?
Home fitting methods are inexpensive. All items necessary for the procedure, with the exception of paraffin, can definitely be found in the kitchen or bathroom.
Sugar water and plate
It is necessary to wet the beret, pull it onto a flat plate (choose dishes that are ideal in size) and leave it in this state until it dries completely. Then place the headdress at the bottom of a basin filled with warm, sweetened water. Wait 2 hours. Dry.
Important! The plate is removed only after drying, that is, there is no need to remove the headdress from it.
Wet it, put it on a mannequin or ball, give it the desired look and let it dry. When this happens, melt the paraffin and apply it pointwise to areas that need additional hardness ( processing is carried out from the wrong side
). Correct it, iron it with your hand, and then let it dry completely.
Classic laundry soap has a specific aroma. If you don’t want to become a source of such a smell on a holiday, buy a modern version of household soap in the store (only without coloring additives, otherwise unwanted stains will appear on your headdress). Well, or a product of the same name, suitable for washing children's clothes.
Wet the beret pointwise (only those parts that will undergo transformation). Rub wet areas with a bar of soap. Then fold the headdress to the desired side and secure the edge with a clothespin or paper clips. Leave for several hours.
Rigid frame
Make a cardboard backing. A frame made of wire or other material that holds its shape well and is able to transfer it to another object is also suitable. Then place the beret on the frame or place the backing inside it. Fix in the desired state with double-sided tape and store without removing or moving for several weeks.
Adhesive layer
Buy a base for the adhesive layer (for example, bag flezelin). Take measurements from the beret (you need height and circumference). Transfer the dimensions of the beret onto the interlayer and cut out. Then glue using a hot iron.
Hairspray (maximum strong hold)
Apply a thick layer of the product to the headdress, previously properly “beaten”. There is no point in saving varnish. The more you spray it, the better the beret will “stand”. Please note that some of these products contain microelements that add shine.
. This effect is not needed, so read the instructions carefully.
Suture beret: nuances
It is not always possible to hit a seam beret beautifully, but nothing is impossible, everything comes with experience.
If the suture beret does not fit tightly on the head, it will have to be sutured. After which it is slightly moistened and folded in the desired direction. To beat off a seam beret, you will need water, a towel and an iron.
Step-by-step instruction:
- The headdress should be carefully ironed on the side that will wrinkle.
- Then a towel crumpled into a ball is inserted into the beret and the opposite side is smoothed out.
- As you move from the side with the seam pressed to the side with the seam pressed, the shape should be worked out with your fingers.
- Place a piece of plastic (can be from a plastic bottle) under the cockade on the inside, cutting it to the shape and size of the cockade.
Method 3
If you are interested in how to beat off a beret quickly, easily and without any special equipment, try moistening the beret and running your fingers along the edge several times to thoroughly knead the edge. Then the left side of the band is carefully stretched until the desired configuration is achieved. After this, the headdress is once again moistened with water, put on the head, where it is given its final shape. When you succeed, you can carefully remove the beret and leave it until completely dry.
Method 4
Do you still not know how to beat off a beret using a newspaper? Then remember: old newspapers are placed in a moistened beret, and then using hairpins, clips, clothespins and other devices at hand, it is given the desired shape. The headdress is left until completely dry, then tried on. If there are any roughness or imperfections, you can lightly moisten the product again and adjust the shape manually.
In essence, nothing complicated. The main thing is that even before you start beating the beret, you know exactly what shape you need to give it. Even if your headdress looks unsightly at the very beginning, remember that berets are made from a material that can be easily processed and molded, so you will probably succeed. And another advantage of berets (ordinary hats, not military ones) is that each time you can get an almost new product, depending on how you wear the beret. The photos on this page confirm this.
Berets in Russian and other security forces
Currently, blue berets are the most recognizable attribute of airborne troops, along with the blue and white vest. Recently, berets in general have become widespread, and the legendary maroon berets have also become especially popular. Military personnel of only a few special units of the Ministry of Internal Affairs are entitled to receive the latter.
In addition, maroon berets are worn on the left side, and blue berets are worn on the right. The only exception for blue berets is parades, when absolutely all military personnel have to wear their hats on the left side, in accordance with the event protocol. You should also know that berets with blue colors are present in the armed forces of other states. For example, blue berets are worn by UN military personnel, although the shades of berets of the Russian Airborne Forces are different from all others.
Tips for beginners
The following nuances of caring for a beret can be advised to novice military personnel:
- For any beating, it is better to use a sugar solution rather than pure water.
- Soft berets fit better on the head and are easier to shape.
- A disposable razor can be useful not only for removing pellets from a beret, but also for eliminating “fluffiness”. During beating, the material begins to “wool” and the product looks unaesthetic.
- You can dry it not only on your head, but also on a ball or globe that fits in size, as well as on a three-liter glass jar turned upside down.
- To prepare a starch solution for beating berets, you need to dilute 100 g of starch in 130 g of cold water, and when all the lumps are mashed and dissolved, you can add 900 g of hot water. The solution must be stirred very well so that the starch is completely dissolved.
- If none of the above methods are suitable for beating your beret, do not despair: there are many more different methods, for example, gluing non-woven fabric, using paraffin, laundry soap, candle wax, cardboard, adhesive base and much more.
- No need to worry if you didn’t get the desired shape the first time, you can try again. Manufacturers use dense but pliable fabric for production; you should not be afraid of damaging it with frequent attempts to shape it.
- If you still encounter difficulties while beret-taking, you should ask for help in this matter - your colleagues will not refuse.
Drying a beret in a three-liter jar
Now you know how to beat a beret at home, and you will not be confused when receiving a shapeless “pancake” from the warehouse. You can tidy it up so that it becomes a symbol of pride and courage.
This article discussed simple and not so simple methods, and everyone can choose the one that suits them, based on the material of the beret, technical capabilities and weather conditions.
The easiest way to shape a beret
Uniform berets are made from very pliable fabric, so a pre-moistened headdress can be put in order even with your hands. To do this, after treating it with water, you need to rinse the edging with your hands. It should be smooth and as sharp as possible.
Wearing a beret correctly is an art. It is necessary not only to make the edge even, but also to correctly form the left side. It should seem to go down behind the left ear. To make the beret look in accordance with the regulations, you need to carefully grasp the band with your hands and stretch it to the left.
Once you have given the headdress a preliminary shape, wet it again and place it on your head. At the mirror, complete the formation of the edge and band, after which the beret is carefully removed and then left on a flat surface until completely dry.
Using an old spoon
For this method, you only need a flat surface, some water and an old, necessarily heavy spoon. You can replace it with a hammer. Lightly moisten the accessory with water and place it on a flat surface. For this, a table or stool is most often used. If you are going to work with a hammer, then you should put a large cutting board on the furniture.
After the above preliminary preparation, you will have to make the edge of the beret as sharp as the arrow on the trousers. To do this, you need to beat it off with a heavy spoon or hammer. After this procedure, the beret is put on the head and straightened. It is best to dry the headdress first, then you will not have to repeat the procedure after a few hours.
How to keep your beret in shape for as long as possible
The army teaches a person to be quite resourceful. Soldiers often use a variety of improvised means to maintain the shape of their beret:
- cardboard;
- thin plastic;
- candle wax (applied to the inside of the beret).
At home, you can place self-adhesive fabric in your headdress. The beret should be prepared first - moisten it with water mixed with a small amount of granulated sugar. You will also need to form the edging. To do this, it’s time to beat it off in the same way as in the method given above.
A reinforced beret can be worn for several days without adjusting its shape. However, as soon as you sweat a lot in it or get caught in the rain, you will have to start all over again - the edges of the beret will droop and will look very unsightly.
Final processing
After processing the product, it is necessary to properly remove the pellets and lint, otherwise the headdress will lose its appearance and will not look as intended. This is done when the beret is completely dry. To remove stray hairs, you need:
- Remove the suture beret from the head (other options are possible - drying on a ball, jar, mannequin).
- Carefully process the entire surface with a disposable razor, from the edges to the middle.
- Carefully blow off pellets, dust and debris.
- Treat the inside of the product with hairspray.
At the final stage, you should not skimp on the fixing agent. It's better to use the whole bottle. To remove the pellets, you can purchase a special machine. It will help solve the problem of protruding wool fibers that constantly come out during the beating process.
All military personnel are trained on how to properly attach a badge. The easiest way is to make perforations using any thin sharp object, insert two parts of the clamp into the holes and bend them all the way in opposite directions. The flag is fixed in the same way, only on the side. The cockade is attached to the front, clearly in the center.
Before wearing a seamless or drop beret, the employee is advised to once again carefully read the provisions of the charter on wearing a headdress. Each type of military has its own nuances. The main thing is to know in which direction the cap should bend, then the work will be successful. Don't forget about your hair: it shouldn't stick out from under the beret.
We put the beret on the mannequin Using a razor we remove the pellets From the inside we treat it with hairspray
Means for fixing the shape
Before beating the beret to make it hard, the fabric must be additionally treated with a fixing compound. This will allow the wool fabric to maintain its shape over a long period of time.
Shaving foam
- Putting a damp beret on your head or a dummy, give it the desired shape.
- Without removing, coat it thoroughly with shaving foam, without missing the slightest area.
- Wait five minutes for the material to soak in the product.
- Wet your hands in cold water and begin to rub the foam into the fabric with little effort.
- Having got rid of the stains, finally adjust the shape and leave the beret until completely dry. This will take about two hours.
During the application of foam, pellets may appear on the surface of the headgear. To get rid of them, treat the fabric with a disposable razor.
Sugar
- Dissolve a couple of tablespoons of sugar in two glasses of water.
- Soak the headdress in the sugar solution until the fabric is completely saturated with it.
- Beat the beret in the way you like.
A hat treated with sugar syrup will lose its shape upon first contact with water. In addition, the fabric may attract insects.
Hair fixation spray
- To keep your military beret in shape, spray hairspray on the inside surface when the item is dry.
- When the product is absorbed into the fabric and hardens, repeat the procedure.
- You may need to use up an entire bottle of hairspray to get your headdress hard and immovable.
Adhesive layer
- Take measurements of the beret and transfer them to a piece of paper or cardboard to draw a template for the part of the headdress that should maintain its shape.
- Using a pattern, cut out a part from adhesive fabric (usually bag interlining is used).
- Fix the adhesive layer with a hot iron.
The adhesive layer is resistant to water. This way, even after repeated washings, the shape will hold.
Paraffin
- Place the wet headdress in the desired position and wait until it dries.
- Melt the paraffin and treat the areas that need stability from the inside out.
- Adjust the shape if necessary and leave the product to dry.
Rigid frame
- To install the beret yourself, cut out the fragments that require fixation from cardboard or plastic.
- Place a solid frame inside the product.
- Secure the backing with double-sided tape.
Laundry soap
- To create a beautiful seam beret, moisten the areas that need to be shaped.
- Rub the material well with laundry soap.
- Press the edge with your fingers to make it sharp and secure with clothespins until completely dry.
Regular laundry soap may have a specific pungent odor. When treating headwear, it is better to choose modern products that are odorless or with fragrances. Watch the video to see how to hit the moeno beret.
The beret is worn not only by military personnel or workers, but also by fashionistas and fashionistas at any age. This headdress gives the image a special romantic note and a touch of nobility. Even civilians will benefit from military experience on how to properly beat off and put on a beret with a seam. Wear a beret and give the product a beautiful and stable shape, you will always look irresistible.
A seamless beret is a fairly practical headdress that is equally suitable for men and women and can be an excellent addition to any outerwear ensemble. Of course, today, like many years ago, the beret is associated primarily with the military. Each part has its own traditions of wearing berets and its own specific form of this headdress. However, it often happens that they are given to recruits in a state that resembles, rather, not a beret, but a pancake, a frying pan, or generally something shapeless. So the first test of a newly minted soldier is to hit the beret correctly. How this is done is of interest to many, so in this article we will try to simply and clearly explain how to bring the beret back to normal and give it the required shape.
How to return a beret: method 1
The headdress is lightly moistened with water, placed on a flat, hard surface, such as a stool, and then beaten along the edge with a hammer or an old spoon (but not aluminum) until the edge becomes thin and sharp, like
Method 2
How to beat off a beret and keep its shape for a long time? You can moisten the beret before “molding” by using not water, but a sugar solution, and after beating, insert a special adhesive fabric, thick cardboard, or plastic inside. Some are even experimenting with candle wax. As a result, when the beret dries, its shape will remain the way you want for much longer. The only caveat is that now, if possible, it is better for you not to get caught in the rain, that is, do not get your beret wet, otherwise you will have to repeat the whole process again.