How to insulate a raincoat with your own hands
Box - patterns in PDF, master classes, sewing pinned post
Yana, it happens that your figure doesn’t allow you to wear a down jacket (I don’t want to offend anyone), but your finances don’t allow you to wear a fur coat. If you want to look elegant and chic, then why not sew a coat with flannel.
Aliya, before cutting the flannel, wash it and cut it like regular fabric. And the “sandwich” will look like this: coat fabric together with flannel, then a layer of insulation (if you use it), then lining fabric.
How to sew insulation to outerwear To insulate coats and jackets, a layer of insulation is connected to the lining and sewn to the product or connected to parts of the product. The materials used to insulate clothing should not be very bulky and “breathable”. If you need to substitute bulk insulation, then the product itself is cut out one size larger. Show in full. Sleeves are not often insulated so that they do not become too puffy. Depending on the thickness of the insulation, it is stitched together with parts of the lining or product along the edges or fastened to the lining.
Men's and women's coats can have a detachable insulating lining. This type of lining is sewn from two layers of lining fabric, between which there is insulation, such as batting. Without an insulating lining, the coat can be worn as a demi-season coat with a lining - like a winter coat. Raincoats and jackets are also insulated.
Before sewing the lining, you need to attach the insulation to the wrong side of the sewn product. To avoid excessive thickness and bulkiness, usually only the front and back of the product are insulated. The insulation parts are sewn along the lines of the shoulder and side seams, then sewn to the edges of the product or attached to the seam line. Connect the insulation parts by sewing the side seams and overlapping darts. Trim the seam allowances of the insulation pieces to avoid excess thickness. Align the bottom edge of the insulation with the bottom edge of the product. Place the insulation on the wrong side of the product, pushing the sleeves through the armholes. Align all seams and pin crosswise. Baste the insulation on the side seams and along the seam allowances around the armholes using diagonal stitches. Attach the edge of the insulation to the neckline with pins and sew by hand using loose stitches over the edge or a blind hem. The stitches should be invisible from the front side. Finish the product by placing a lining on top of the insulation.
The insulation is machine sewn to the lining parts before they are connected. If the back part of the lining has a fold, then when cutting out the back from the insulation, folds should not appear. Trim the bottom edge of the insulation at the level of the lining. Make the darts on the lining parts in the form of a fold. On the insulation, sew the cut out darts end-to-end or overlapping. Pin all the weatherstripping pieces to the lining. Trim the insulation along the hem line of the lining. Pin and sew the lining pieces with the insulation already sewn on. Trim seam allowances from the insulation to avoid excess thickness and ensure a neat finished product. Using a machine, sew together the front parts made of insulation and lining along the neck lines, if necessary, align the edges of the allowances. Finish the item. #patterns #free patterns #sewing clothes #sewing for children #sewing
Source
Stage three: sew on the lining
For this work you will need threads that match the color of the jacket material. As a rule, people who do not sew very often are wondering what seam to use to join things.
You can sew the lining in any convenient way. The main thing is that traces of sewing are not visible from the outside. An oblique seam, in which the thread covers the cuts, works well. This seam will not only hold the two items together, but will also prevent the lining from fraying.
Set a Time for Reflection: How to Stop Constantly Worrying
Soft, warm, human-sized: a robot that will hug you if you're sad
Spain was covered with Saharan sand: video
How to insulate a coat
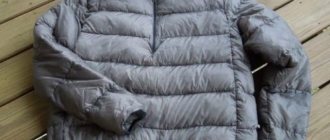
A coat is an irreplaceable and quite stylish item in your wardrobe.
However, it happens that a very good product wears out over time and becomes less warm. Or, at the time of purchase, more attention was paid to the appearance of the product than to the composition of the material from which it was made. Thus, when purchasing a chic coat, you may miscalculate and the coat will turn out to be quite cold and unsuitable for the cool season. One of the options for getting out of this situation , when there is no financial opportunity to buy a new product, is insulation.
Prevention
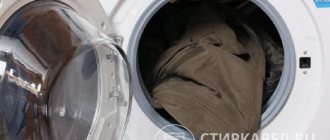
To prevent the padding polyester from whipping, it is better to wash the item by hand in the bathroom. You can use the same detergents as for the machine.
Try to rub the down jacket less, it is better to go over it with a clothes brush.
It is necessary to dry the item in a horizontal position, straightening out small lumps.
To avoid having to look for ways to straighten the filling yourself later, you should properly wash and dry the down jacket. This is the only way to prevent the formation of lumps.
Options for insulating a coat
In order to figure out what kind of insulation you need to use, it is important to understand the temperature at which you will wear it. That is, if you need to insulate your coat for the winter, you should choose more frost-resistant options; for cold autumn or spring, you can choose lighter insulation.
You can insulate a coat in different ways - sew a lining that will be fastened with a zipper or buttons, or stitch the insulation onto the branded lining of the product.
We insulate the coat with a lining
One of the most popular methods is insulation with a liner. Its convenience is that in sunny weather, when the air temperature is not too cold, you can unfasten the lining and feel comfortable. In colder weather, fasten it back.
Usually, when deciding to insulate a product with a lining, the sleeves are not insulated. This is done so that they are not too voluminous, since not all coat styles require a loose fit in this part.
Materials for insulating coats
All insulation materials differ in material thickness:
- Holofiber . A long-known material that is characterized by high wear resistance, hypoallergenic properties, easily restores its shape and retains temperature well.
- Sherstin. Very thin insulation, which contains wool (about 60%) and viscose. It retains heat perfectly, however, it can contribute to the appearance of pilling.
- Woolen or down scarves. This method of insulation has been known for a very long time. You can make a beautiful lining from this material, but it is worth considering that its temperature is not too high.
- Felt. Excellent insulating material that retains heat well.
IMPORTANT! It should be remembered that any natural filler significantly weighs down the product as a whole.
How to sew a lining for a coat
At the very beginning of work on creating a backing, you should decide on a material that will beautifully cover the insulation.
In order to sew a lining, you need to lay out the coat on a flat surface, straighten it and measure the distance from the shoulder seam to the bottom of the product, from the fasteners to the side seam and armhole. Thus, you can redraw the pattern either onto paper or directly onto the lining material.
Along the back, measure the distance between the armholes and side seams. And also the level of the neck. When all these elements are transferred to the fabric, you should begin cutting the material.
ATTENTION! Fabric and insulation should be cut taking into account seam allowances, at least 1 centimeter.
The next step is to assemble the insulation with thin material, which acts as a decorative part. All elements should be carefully stitched and edges processed to make them look neater. You can do this using folds of decorative material.
Stage two: sweeping away things
You need to sew the lining so that the stitches are not visible from the outside. This is not as easy to do as it seems, for one reason only - things will constantly shift during work. In order to sew the lining right away, without resorting to basting, you need certain skills.
Therefore, before you start sewing, the jacket and sweater must be fixed in the desired position. This is why you need to sweep things up first. It is more convenient to do this with threads of a contrasting color. The basting will then need to be removed, but it’s easier to do this if the stitches are visible.
Why was the film “The Grandmaster” banned in the USSR, where Myagkov played the main role?
Oh, this wedding: funny outfits of bridesmaids at weddings in the past (photos)
Japan will have a new minister of loneliness
It is important not to be lazy and sweep away things completely, and not just in certain places. This will prevent possible difficulties in further work. Be sure to stitch the bottom of the sleeves; a couple of stitches in the area of the shoulder seams will not be superfluous. You can also use a few cross stitches to connect things on the back.
The point of basting is to prevent the sweater from moving while you work. If a couple of stitches in separate places are enough to achieve this goal, then you can quite limit yourself to them.
How to insulate a cashmere coat. Insulation for winter clothes
We insulate the jacket for the winter. Good looking! Yours will be better!
Step 1: Gathering Materials
Choosing a jacket and space blanket is easy. I'll tell you how I did it and give some tips on choosing.
The jacket should not be thick. I chose one of my old fleece mountain biking jackets as it was thin and I wouldn't regret it if I failed. In addition, it was black, which allows it to absorb more solar heat on cold days.
2. Space blanket
The space blanket I chose was labeled "Emergency Survival Blanket." I chose the larger one so I could use the remainder for other items.
The total cost of this project was 500 rubles, since I already had the jacket.
1. Jumper - already available 2. Space blanket
Step 2: Preparing the Jacket
The most effective way to insert the space blanket into the jacket is to sew it on (I thought about using hot glue, but it looks too messy).
In order to sew a space blanket, you need to rip the jacket, there are two ways to do this:
1. Unravel the seams 2. Cut the seams
Both have their drawbacks, pulling out the threads is more difficult and takes longer, but the fabric will remain in its original form. Working with scissors is 100 times faster, but you may lose 2-3 cm of fabric. (This will make the jacket smaller and if I do this again I will choose a larger jacket size).
Note: When unraveling the jacket, label the sleeves and fronts so as not to confuse them with each other.
Step 3: Cut out the quilt linings
The next step is to cut the blanket lining to fit your jacket pieces.
Simply trace each piece of the jumper onto the blanket. When cutting them out, try to make each piece larger rather than smaller, because when you sew them together you will have to lose some of their area.
I decided not to put the space blanket over the collar as I just wanted to fold it back for sun protection. To fit the blanket into the sleeves properly, I had to redo the seams for a better fit.
1. Sharp scissors will cut the blanket easily.
Step 4: Hemming the Blanket Lining
Now comes the most difficult but exciting step! Sewing the blanket was not easy, since my jumper was fleece and stretched a little, which somewhat distorted the shape of the parts from the blanket. Start pinching the jacket pieces and pieces cut from the space blanket. Try to press the blanket as tightly as possible.
Note: When hemming a quilt, use a larger stitch to create fewer holes in the quilt. This will increase its tensile strength.
Step 5: Embellish!
This step should give the jumper more "aesthetic appeal". I went over all the seams again with my sewing machine to improve their appearance. This is optional, but will enhance the look of your jacket turned inside out.
1. Sew these seams
Step 6: Connecting the insulated parts of the jacket
Almost done! Now we need to assemble the sleeves of the jacket, the back and the front panels. There's no particular order here, but this is how I do it:
1. I sew the shelves to the back 2. I sew in the sleeves
Before sewing, make sure the jacket is turned inside out so that all seams are on the inside. - Sorry for the lack of photos at this stage, looks like I shoved them somewhere. I'll try to find it and attach it
Step 7: Bliss!
Horror! You have finished making the DMSC!
1. Looks good! Yours will be better!
What will you need for the job?
In order to have a beautiful and comfortable demi-season item in your wardrobe, you only need two items of clothing:
- Jean jacket;
- a thin jumper or sweater, you can use a warm old sweatshirt.
An important point is that the jacket and sweater must match in size. If the item intended for lining is smaller than the jacket, it will begin to tighten it. If the jumper is larger than the jacket, then the resulting item after work will certainly become unattractively puffy.
Checking the size match is not very difficult - you just need to put the jacket on the sweater and check the match at the sleeve attachment point. In the armpit area, things should fit perfectly, everything else can be fixed.
Dancing waiter: a guy surprises customers in an Indian restaurant
Juicy muffin with blueberry cream and fresh berries: a fragrant treat for tea
Archaeologists have found the remains of an ancient German court in Veliky Novgorod
Of course, for work you will need:
- scissors;
- needle;
- threads to match the jacket and in a contrasting color.
No sewing machine needed. You can insulate your jacket without it. Also, good sewing skills are not required, because the work ahead is very easy.
Shoes-hooves
High heels are beautiful, a small platform is also acceptable. But when all this is combined in one pair of shoes, and has an extreme height - no, no! In the understanding of men, such shoes can only be in the wardrobe of young ladies of a certain type of occupation.
Why a self-respecting fashionista would wear it, especially in broad daylight, is unclear.
“It’s vulgar,” the men say.
In addition, hoof shoes seem terribly uncomfortable and even dangerous to them. You can sprain your legs and break your knees by falling so high. More than 60% of men don’t like platforms that are too high, that’s it!
Insulation for clothing: types and characteristics
There are two types of insulation - organic, that is, natural and synthetic.
Natural insulation materials
, which belongs to natural insulation materials, is the most popular because its lightness and thermal insulation remain at a high level.
It is lightweight and retains heat at low temperatures, and high-quality down lasts a very long time. Any down clothing contains feathers as part of the insulation. This is necessary for uniform distribution of fluff throughout the product.
Disadvantages: down insulation can cause allergies and therefore must undergo mandatory antibacterial treatment (which some companies neglect); difficulty of care (washing, drying) at home.
- half-wool insulation, which in the mid-late last century in the Soviet clothing industry was used in sewing workwear, as well as as insulation for winter coats.
Batting is becoming less and less popular these days. Disadvantages: heavy weight and relatively high moisture-retaining properties. Wool and fur
very often used as a lining for winter clothing - an excellent natural material, known for its high warming properties, as well as ease of care.
How to choose an insulated parka?
Choosing an insulated parka is not difficult. If you have a decent budget and knowledge of how to distinguish real fur from a fake, then all that remains is to decide on the style and buy it in a good store. There are special nuances. They are also worth paying attention to. Before purchasing a product, we recommend:
- Pay attention to jackets whose fur can be detached. So, the product can be washed in a machine.
- When choosing natural fur, make sure that it is thick. When examined, hairs should not be pulled out. Swipe with a damp hand - if the lint remains, then the product is not of high quality. When choosing brightly dyed fur, be prepared for the fact that it may lose its original appearance and is dyed.
- Goose down and other waterfowl are the best insulation for parkas. Pay attention to how it is located inside the jacket. Do not purchase the product if the fluff clumps. There should be more fluff than feathers.
What kind of insulation is suitable for winter coats and jackets?
Fur coats, down jackets, parkas, coats or jackets - all these types of winter clothing are attractive and in demand in their own way. Over the years, the Bosfor Textile online store has selected the most popular and high-quality insulation for clothing:
- Let's start with a mixed material - batting
. This insulation consists of cotton wool, supplemented with textile scraps. The non-woven mass is fixed with stitches on a mesh base. Traditionally it is used to insulate coats. The material is inexpensive, warm, hygroscopic and easy to sew; - Sintepon in rolls
is one of the most popular insulation materials; it consists of polyester fibers. At Bosfor Textile we offer 2 types that differ in weight. The lighter one can be used as insulation for demi-season clothing. With a weight of 100 g/m - great for winter conditions. It has good heat-retaining properties, does not deform, is comfortable and practical. You can always buy synthetic winterizer in rolls at affordable prices in our online store; - Silicone
is a good insulation for a winter coat . This material is similar in its characteristics and appearance to synthetic winterizer, which is why it is often called “silicon synthetic winterizer.” Thanks to the improved structure, it has higher heat-regulating and operational properties; - synth wool
- occupies a special niche among non-woven needle-punched materials. He took the best characteristics of padding polyester and batting, leaving the shortcomings to his brothers in the sewing business. The material is quite lightweight, but at the same time warm, soft and available at an affordable price; - Fleece's
ability to retain heat is often equated to wool. Using the material as insulation, you can do without a lining; - Velboa faux fur
not only gives a pleasant tactile sensation, but also reliably retains heat. Such insulation will add chic and originality to the product;
- lining soldered on synthetic padding
, according to the name, consists of 2 layers: lining fabric and insulation, which are connected by thermal soldering. Easy-to-use material facilitates the sewing process and reduces material consumption; - The quilted padding lining
consists of a nylon lining and padding polyester weighing 60 g/m. Durable, reliable insulation, which significantly reduces the sewing time of the product. The stitch creates an interesting effect and reliably fixes the components; - The quilted lining on batting
forms a reliable air layer, as it contains wool. Thanks to the strong stitching, the lining and batting are well fixed and do not deform during wear.
To quickly select insulation specifically for your product, we suggest that you familiarize yourself with the table.
How to update a down jacket with your own hands?
If you have an old down jacket lying around in your closet, do not rush to throw it away immediately. With basic cutting and sewing skills, you can create a unique designer item from an old piece of outerwear. In order to sew such a down jacket with your own hands, you will need the following materials and tools:
- Old down jacket;
- 60 centimeters of padding polyester;
- Water-repellent fabric 2.5 meters;
- Lining fabric 1.7 meters;
- Detachable lock 70 and 40 centimeters long;
- Sewing machine;
- Scissors;
- Needles;
- Threads in color;
- Tailor's pins;
- Tailor's marker or soap.
Important! Please note that the specified fabric parameters are designed for sizes 46-48. If your parameters differ, then the amount of fabric must be purchased based on them.
Once the necessary equipment has been prepared, you can proceed directly to work. The sequence of actions is as follows:
- Pull out the filling from the old down jacket, then cut it into pattern pieces.
- Applying the old parts to the main fabric, cut out new ones. This way you should have:
- 2 shelves;
- Back;
- 2 sleeves;
- Collar;
- 2 parts for the middle of the hood;
- 4 side hood pieces.
- From padding polyester, cut out 2 side and 1 central part of the hood, as well as 1 part of the collar.
- Cut out pockets from the main fabric and 2 burlap pockets.
- Cut out all the main parts from the lining fabric.
Important! All parts that are cut from lining fabric should be 1 centimeter shorter than the same ones, only from the main one.
- Attach the upper parts from the main fabric with the same ones from the insulation, stitch them together.
Important! The insulation on the right shelf should be ground in by hand.
- From the wrong side, pin the padding polyester piece to the plank so that it overlaps the old insulation.
- Sew the padding polyester to the insulation along the edges of the plank.
- Use a sewing machine to sew seams from the neckline to the bottom of the front.
- Place the zipper with the outer side on the top shelf from the neck to the cut, pointing it down. Sew the zipper.
- Fold the right shelf with the left front side inward so that the middle of the front remains free.
- Turn the zipper on the left shelf towards the cut, and pin the right part to the cut of the right shelf.
- Sew the shoulder seams and press the seam allowances.
- Sew the side seams from the armhole to the top edge of the pocket entrance. Iron them.
- Place the burlap pocket made from the main fabric against the back, turn it forward, and straighten it out. Sew it like this to the back.
- Sew the edges of the lining to the edges and press the seams.
- Sew side and shoulder seams, as well as seam allowances.
- Attach a loop of dart cord to the center of the back.
- Fold the top of the down jacket with the lining face inward, stitch the sides.
- Cut the collar with padding polyester and stitch along the edge.
- Place the zipper from the hood on the cut and, aligning the middle of the collar, stitch it.
- Turn the free ends of the zipper tape towards the cut.
- Fold the collar in half lengthwise, right side inward, and stitch the sides. Turn out and straighten the corners.
- Baste the collar with the neck of the down jacket, as well as the upper back and lining. Sew them using a sewing machine.
- Sew the seams on the sleeves, placing them along the edges.
- Turn the sleeves inside out and sew them into the lining.
- Match the shoulder seams of the top and lining, matching them to the sleeves.
- Turn the hem of the bottom of the down jacket to the wrong side, baste it a centimeter from the fold, not reaching the middle of the front part.
- Fasten the hem at the bottom in several places.
- Turn the down jacket right side out through the gap in the lining.
- Sew the placket and sew buttons in several places.
- Sew the side elements of the hood to the middle part.
- Unfasten half of the lock from the collar and place it with the outer side on the bottom of the hood, align the middles, and stitch.
- Baste the outer sides of the hood together, machine stitching 2 centimeters from the fold.
- Sew the bottom of the hood and fasten it to the down jacket.
- Remove all threads from running stitches.
Your new down jacket is ready!
How to choose an insulated parka?
Choosing an insulated parka is not difficult. If you have a decent budget and knowledge of how to distinguish real fur from a fake, then all that remains is to decide on the style and buy it in a good store. There are special nuances. They are also worth paying attention to. Before purchasing a product, we recommend:
- Pay attention to jackets whose fur can be detached. So, the product can be washed in a machine.
- When choosing natural fur, make sure that it is thick. When examined, hairs should not be pulled out. Swipe with a damp hand - if the lint remains, then the product is not of high quality. When choosing brightly dyed fur, be prepared for the fact that it may lose its original appearance and is dyed.
- Goose down and other waterfowl are the best insulation for parkas. Pay attention to how it is located inside the jacket. Do not purchase the product if the fluff clumps. There should be more fluff than feathers.