How to tell if your laptop needs cleaning
Mainly - based on external signs of deterioration in heat removal from the elements of the device. Let us indicate those that an ordinary user might notice:
- Loud noise from the fan built into the case. Previously, nothing like this was observed, but now you turn it on and it makes noise almost constantly. The fact is that the speed of the laptop cooler (if you have not set other settings in the program that controls its operation) is adjusted automatically. As the temperature rises, it increases to increase air flow. At high speeds the fan makes more noise, hence the characteristic sounds.
- The operating system constantly slows down and freezes. This can be caused not only by overheating, but also by a host of other reasons (software failures, power supply failure, etc.). However, in combination with other symptoms, freezing and braking may be evidence of overheating of the device.
Overheating is one of the common causes of laptop breakdowns.
- A blue screen appears. True, more often it occurs due to completely different circumstances (inappropriate driver, incorrect BIOS settings, PC infection with viruses, etc.). If the laptop is not completely new, then overheating should not be ruled out as one of the reasons for the appearance of BSoD.
- Spontaneous sudden shutdown of the laptop. This sometimes happens with a normal, unclogged computer if its processor is heavily loaded with resource-intensive programs, for example, games. When this happens during normal computer operation, there is reason to be wary and check the device for overheating.
- The case heats up more than before and becomes much warmer to the touch. This is especially felt if you touch it from the bottom.
- Special utilities show that the temperature of the processor, video card, and hard drive is seriously higher than normal. There are a lot of programs mentioned above; just type the corresponding query in a search engine. The most famous of them: SpeedFan, AIDA64, CPUID HWMonitor.
Their cooling systems, unlike their stationary counterparts, are characterized by low power, which is just enough to ensure heat removal during normal operation.
Important! If you recently purchased a laptop and it has a warranty, refrain from disassembling the device yourself, as well as other actions that may void the warranty. To find out exactly what you can do and what you cannot do, it is best to contact the retail outlet where you bought the gadget.
The heat sources themselves - the central and graphics processor, the chipset (north and south bridge) and the hard drive - suffer the most from ineffective heat dissipation.
How to clean your laptop screen from dust and stains yourself at home: photos, videos
Cleaning a laptop monitor with your own hands
When cleaning a laptop screen, you need to know a few rules:
- You only need to clean the laptop screen when it is turned off and cooled down.
- A plastic bag or cling film will help get rid of dust on the screen - they will attract dust from the monitor.
- It is advisable to get a special cloth for microfiber screens.
- If you don’t have a special rag, you can use wet wipes (without alcohol), cosmetic discs, flannel cloth, or microfiber cloth.
- In cases of severe contamination, you can use a weak soap or 3-6% vinegar solution. After dipping the rag into it and carefully wrung it out, you need to carefully wipe the laptop monitor until clean.
- It is prohibited to use materials such as paper napkins, foam sponges, terry towels, toilet paper and materials with coarse lint to clean the laptop screen.
- Do not use alcohol-containing substances, washing and cleaning powders, or window cleaners to clean the monitor.
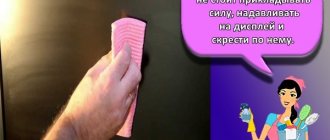
- Under no circumstances should you scrub or remove heavy dirt from the monitor with hard objects, nails, or a knife - for this it is better to use a wooden stick, a plastic spatula, or a piece of plastic cut from a plastic bottle.
Rules for wiping your laptop monitor yourself
- With the dry cleaning method, you just need to carefully wipe away dust and dirt from your computer monitor or laptop. The corners of the screen can be wiped with cotton swabs - do not put strong pressure on them, so as not to damage the fragile surface.
- When wet cleaning, it is necessary to wet a rag of a suitable material in a soap or vinegar solution and wring it out thoroughly. Spraying the aid on the surface itself is not allowed - moisture can get into the laptop case, which will lead to malfunctions or permanent breakdown of the equipment. Using gentle circular or upward movements, you need to walk across the surface of the screen, and then remove any remaining moisture with a dry cloth.
Why does my laptop become clogged with dust?
Using a cooling system, which consists of ventilation ducts, a cooling radiator and a fan, heat is exchanged between polluted room air and the internal components of the device. This entire system very quickly clogs the radiator ventilation grille and the fan blades located on the side of the laptop.
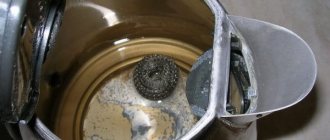
This is what a dust-clogged radiator looks like:
Laptop cooler clogged with dust
Do-it-yourself comprehensive laptop cleaning
Removing the back cover
The order is:
- Disconnect the battery from the laptop if possible, i.e. if it can be easily removed. In some models, the battery is located deep inside the device. There's nothing you can do about it. At a minimum, you need to wait until it is completely discharged. For those who have never disassembled a laptop before, it would be better to take this model to a service center. Only a professional can figure it out.
- Remove all caps from the bottom.
- Unscrew all visible bolts on the bottom. They hold the laptop lid together, hold the motherboard and other components. The length of the bolts may vary, so be sure to record on the camera where you removed which one. If the bolt does not unscrew, use another tool to unscrew it. If you try to unscrew the bolt with increasing force, you can knock off the “teeth” on it.
The first step is to open the laptop to get to the contaminated parts.
Important! If you disassemble the computer under voltage, you can accidentally close some of the contacts and cause a short circuit. This can lead to component failure, very costly repairs, or even fatal failure of the device.
Radiator and cooler
Now about how to clean the fan in a laptop.
- Disconnect the fan turbine cable from the motherboard.
- Remove all screws in the turbine casing.
- Remove the screws in the radiators. Look at the numbers on each screw head. The bolts should be unscrewed in this order, otherwise you may damage the crystals.
- Remove the cooler and radiator, then clean them. Usually, napkins and a can of compressed air are used for this, but if the dirt is very strong, the fan can be washed under the tap. Be sure to dry it after this, dry it very well. At the same time, the cooler can be lubricated during cleaning. If it makes a lot of noise when rotating, then this must be done. Pry up the edge of the sticker covering the screw part and use a needle to remove the rubber plug. Place a drop of machine oil into the channel. Replace the plug and sticker.
- Place and screw the fan back.
The cooler looks like a fan in a square or round frame, and the radiator is a box with a grille.
We found out how to properly clean a laptop cooler, but this is not the only part that needs to be thoroughly cleaned periodically.
Wipe the blades with a brush and blow air through the area where the cooler was located.
Video card and motherboard
One of the most fragile parts of the computer, so be very careful and careful.
- Go over the surface with a brush slightly moistened with alcohol. Blow off all contacts and microcircuits from a spray can.
- The processor should be removed with utmost care. Pull the pedal of the socket into which the processor is inserted slightly to the side, then lift up.
- After the pedal is vertical, carefully, holding the processor by its sides, remove it from the socket.
- Run a cotton swab soaked in alcohol over the contacts.
- Put everything back in its place.
The motherboard is the most fragile part of a laptop, so you need to remove it very carefully.
Important! Some users wash their video card with water. It is not recommended to do this unless absolutely necessary. Water is the main cause of contact oxidation. If you decide to do this, then it must be cleaned. Be sure to dry the board thoroughly before reinstalling it.
Go over the contacts with a cotton swab dipped in alcohol.
Replacing thermal paste
Not always, but often it is done along with cleaning the cooler.
- Remove old thermal paste.
- Remove what remains with a cloth soaked in alcohol.
- Apply new thermal paste in small doses, spreading it over the heatsink with your finger.
Apply the paste a little at a time, spreading it with your finger or spatula (included) over the radiator plate.
There should be no scratches left after replacing the thermal paste.
Cleaning the keyboard
There are deep and superficial keyboard cleaning. In the first option, dirt is removed from the keys and between them with napkins soaked in technical alcohol; in the second, the keyboard is removed.
The keyboard is perhaps the dirtiest place on the computer.
The order of removing the keys:
- Find out which side is easier to disconnect them from. This can only be done experimentally, acting alternately from different sides. Removal should only take place in a vertical direction.
- Remove the letter and number keys; they have a similar fastening mechanism.
- Remove the top buttons: E, Esc, F, etc.
- Remove the large buttons: spacebar, Enter, Shift.
- Take out Fn, Win, Ctrl, Alt.
- Take out the black stencil. Remove the film base. It consists of three layers. Separate each one.
Cleaning procedure:
- Place the removed keys in a container with water and detergent (washing powder, laundry soap).
- Leave for about twenty minutes. At this time, apply detergent to the keyboard with a napkin or rag and clean it.
- Remove and dry. Can be done under a hairdryer.
- Return the dried buttons to their place.
Important! The keys should be put aside along with the microlifts intended specifically for them. In many laptops, each of them corresponds to a strictly defined button.
It is important not to damage the markings or flood the keys.
Cleaning the connectors
We will talk about cleaning USB ports. If this is not done in a timely manner, the port will begin to lag, lose connections, and stop recognizing connected devices.
- Dip a long bristled brush into rubbing alcohol.
- Let it dry so that it doesn’t drip, and there’s just a little bit left.
- Push the brush inside the port, but not too much, otherwise you might break something.
- Blow out the port with compressed air by holding the can towards it.
Lightly wipe the ports and blow them with compressed air.
Screen care
The cleaning procedure is as follows:
- Clean glaring smudges and other similar dirt on the screen.
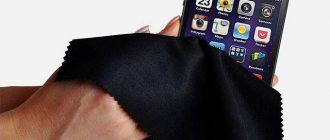
- Wipe the screen with a damp cloth or a cloth with cleaning agent.
- Dry the monitor. It is acceptable to use microfiber, cotton and flannel fabric.
The monitor should not be rubbed with compounds that contain alcohol, as moisture may damage the screen.
What not to do:
- When cleaning the monitor, do not allow detergent to come into contact with the keyboard. To prevent this, place your computer monitor parallel to the floor.
- Do not use alcohol when cleaning the screen. If your monitor is matte, isopropyl alcohol may cause staining. Alcohol will cause streaks on a glossy screen.
- Do not allow significant amounts of water to come into contact with the monitor. Do not even spray screen cleaning liquid on it. Only damp cloth or napkins.
- Do not press hard on the monitor, even if the dirt is difficult to get rid of.
Buy alcohol-free wipes for LCD screens or a spray solution.
Important! A dirty monitor not only harms the computer, it is also evidence of the carelessness of the owner of the equipment. If a friend or girlfriend sits down at such a laptop, they will form an unpleasant opinion about the user.
How to clean your laptop from dust and change thermal paste yourself at home?
Replacing thermal paste in a laptop with your own hands
- Another step in cleaning the laptop and its cooling system is replacing the thermal paste.
- This process must be carried out after cleaning the radiator.
- You can purchase thermal paste at any specialized computer store.
- When the radiator is cleaned, you need to apply just a little thermal paste to its body so that it does not extend beyond its limits.
- A clean radiator with new thermal paste can be replaced.
What are the dangers of heavily soiled laptops?
If there is no or untimely cleaning, the laptop will quickly break down, in some cases even become beyond repair.
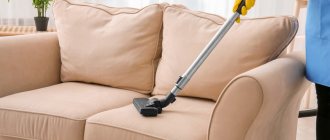
Use equipment on a hard surface - dust from the carpet or bed will clog the grille.
Let's list the consequences of excessive laptop contamination, starting from the most harmless.
- A smudged screen interferes with normal work and prevents you from concentrating.
- The computer often freezes, the keys begin to stick, and you have to wait for a long time until the machine resumes its operation.
- The computer suddenly turns off. According to the law of meanness, a shutdown can occur at the most inopportune moment. Once enabled, many data cannot be restored.
- The blue screen of death appears. After a while, the laptop can be turned on and it will work, but soon the same thing will happen again.
- A short circuit caused by dust in any of the computer components.
- Overheating and failure of the processor.
- Overheating and failure of the video card.
Do not eat while sitting at the computer - crumbs may get inside.
Deleting temporary files
Temporary files are information data that is created automatically by each newly installed program. They contain data during operation and interaction with other software.
At first glance, it seems that these files are few and their weight is insignificant, but in fact a huge number of them accumulate, but this is not scary. The scary thing is that all the files of existing utilities and long-deleted software are accumulated and this significantly negatively affects the operation of the laptop. In this situation, you also need to clear the memory.
This procedure is provided by the developers of the Windows operating system. Therefore, to clean a partition or the entire hard drive from temporary files and other similar garbage, you need to:
- Go to “My Computer” and select the partition or disk on which the system files are stored. Often this is drive C. Right-click.
- In the context menu, select “Properties” and in the “General” tab, left-click on the “Disk Cleanup” button.
- After the computer thinks, a window will open where you can see which files can be deleted and how much space they take up.
- Mark the required directory and click “ok”.
Disk cleanup is quick if your computer is minimally clogged. Laptop computers that have been in use for a long time and have never been cleaned can take several hours to clean.
How to prevent pollution from happening again
The rules are simple and even seem banal, but failure to comply with them has resulted in the failure of a single laptop.
The most difficult thing in cleaning a laptop is to disassemble it without damaging anything, and reassemble it so that there are no “extra” parts left.
- Clean your computer in a timely manner. How often to do this depends on the operating conditions. When used in an ordinary city apartment, it is enough to clean it once every six months to a year. If the room is very dusty, then more often. In any case, it is better to do this before the computer begins to show signs of overheating.
- Avoid situations where you might accidentally spill tea, coffee or other liquid on your computer.
- Don't leave your laptop unused for long periods of time. It will just sit and collect dust.
- Clean your screen regularly.
Turn off the laptop when work is finished and wipe the device regularly.
Important! If you are not sure that you can properly disassemble and, most importantly, assemble your laptop yourself, contact professionals for cleaning. It's better to pay a little than to break an expensive computer. Services offering similar services are available almost everywhere.
I hope you understand how you can clean your laptop from dust yourself. If you do everything correctly, it will work properly for the entire period stated in the documents.
A laptop is a convenient portable device, and proper care is the key to its reliability and safety.
How to clean the laptop cooling system from dust yourself at home: photos and videos
Do-it-yourself laptop cooling system cleaning
- In addition to the cooler, the laptop cooling system also includes a radiator. The radiator is located near the fan and looks like a grille of thin plates.
- The radiator can be released using a special mechanism. When removing the cooling system, you need to pay attention to the thermal paste - very often it melts and solders the radiator to the processor. In this case, it is recommended to carefully remove excess thermal paste with a napkin from both parts of the laptop and remove the radiator.
- To rid the radiator of dust, it is advisable to blow it thoroughly - with a vacuum cleaner, hair dryer or spray can.