The Greenfinch mushroom is a forest fruit that grows well together with coniferous trees due to their ability to fill the soil with useful substances for the germination of mycelium.
This mushroom grows best in areas of mixed sandy and sandy loam soil in pine forests. But among mushroom pickers, Zelenushka is not in particular demand, since it is almost impossible to clean them of sand.
If you know certain secrets, you can completely clean the mushrooms of sand and make them suitable for subsequent cooking.
Pre-cleaning of greenfinches in the forest
Collecting green rows is a rather labor-intensive and slow process. During their growing season (September - early November), you can no longer find other mushrooms in the forest, which means finding greenfinches will not be difficult. But before you put another mushroom in the basket, it must be thoroughly cleaned of soil and sand.
Greenfinches grow quite deep in the soil, so you will have to clean the mushroom a little when collecting. You won't take the soil home, will you?
How to pre-clean greenfinch right in the forest
- Carefully clean the mushroom with your hands or a knife to remove lumps of earth, adhering leaves, blades of grass and other vegetation. If sand is stuck to the stem, you can scrape it off with a knife, but try not to touch the fruiting body of the mushroom.
These mushrooms need to be cleaned carefully, being careful not to touch the fruiting body of the mushroom.
If there is sand left between the plates, you can completely remove it at home
At the end of the preliminary cleaning, it is necessary to cut off the stem of the mushroom.
The above manipulations will help get rid of the bulk of the sand and soil that are stuck to the mushroom. Now you can put it in a basket or bucket without fear that dried sand will fall onto the lower greens and then have to be washed out.
Please note that there is another great option for collecting greenfinches. When you find a mushroom, do not rush to pull it out of the ground. Carefully cut the row with a knife, leaving part of the stem in the soil. So, you don’t have to waste time scraping off the sand, because it will be enough to remove small leaves and tap the cap.
If you do not want to clean the mushroom in the forest, then it should be cut 1–2 cm below the cap
Remember that the mushrooms will need to be cleaned of sand immediately upon arriving home. Collect medium to large sized greenfinches and make sure they are not too old.
Small greenfinches have caps slightly curled towards the stem, and the plates are small, so it is very difficult to clean them
Video: how to properly cut greenfinches when picking
Let's find out how sandpipers grow?
Mushrooms, photos of which you have probably seen in encyclopedias and magazines, grow in a kind of bridge: from small specimens along the edges to a curved arc of their older and taller counterparts. And such a bridge can even span a small obstacle, such as a stump, a rotten log, or a mound of earth. If you want to find a single mushroom, pay attention to the hummocks, generously sprinkled with foliage - near the sandpiper the soil may be slightly raised.
If you cut the rows carefully, they will grow back very quickly. But an incorrect cut, damage to the mycelium, or cutting down all the mushrooms at once can ruin their harvest in the entire clearing.
How to clean greenfinches at home
Before cooking mushrooms, you must first thoroughly get rid of the sand, and then clean the mushroom itself.
How to remove all sand from green rows
There are two effective methods, using which you can simply wash away the sand stuck between the mushroom plates. Please note that before using any of the following methods, the mushrooms must be washed thoroughly. If necessary, the caps should be wiped with a washcloth or damp cloth to remove dirt from their surface.
Soaking in water
Greenfinches, unlike most other mushrooms, do not absorb water well. That is why it is recommended to soak them before cleaning.
- Prepare a large container of water by adding a few tablespoons of salt to it.
- Immerse the greenfinches in water and rinse.
- After the sand has settled, remove the mushrooms with a slotted spoon, being careful not to stir up the water.
- If the mushrooms were initially very dirty, repeat the procedure.
Thanks to this method, the rows will be almost completely cleared of sand. Salt is needed here so that the mushroom plates open better. After this, you need to rinse each mushroom well under running water, washing away any remaining soil.
Most common types
In total, there are about 40 species of sandpipers, which have another name - rowers. They come in different colors - from grayish to brown. But there are only three most popular ones.
Greenfinch
The main difference between this species is its green color. It does not change even after prolonged heat treatment. The mushroom is edible, but in small doses and after soaking and cooking. You can add it to any dish. Bonus - it can be found before the first snow.
Gray sandpiper
Edible, gray in color. It is suitable for consumption after heat treatment. Dangerous in its raw form.
Red sandpiper
Conditionally edible - only after long and proper preparation it is suitable for consumption. It is red in color and has yellow flesh. Before cooking, soak in a saline solution for at least a day, then you can pickle, fry or boil.
Pre-cleaning of greenfinches in the forest
Collecting green rows is a rather labor-intensive and slow process. During their growing season (September - early November), you can no longer find other mushrooms in the forest, which means finding greenfinches will not be difficult. But before you put another mushroom in the basket, it must be thoroughly cleaned of soil and sand.
Greenfinches grow quite deep in the soil, so you will have to clean the mushroom a little when collecting. You won't take the soil home, will you?
How to pre-clean greenfinch right in the forest
- Carefully clean the mushroom with your hands or a knife to remove lumps of earth, adhering leaves, blades of grass and other vegetation. If sand is stuck to the stem, you can scrape it off with a knife, but try not to touch the fruiting body of the mushroom.
These mushrooms need to be cleaned carefully, being careful not to touch the fruiting body of the mushroom.
If there is sand left between the plates, you can completely remove it at home
At the end of the preliminary cleaning, it is necessary to cut off the stem of the mushroom.
The above manipulations will help get rid of the bulk of the sand and soil that are stuck to the mushroom. Now you can put it in a basket or bucket without fear that dried sand will fall onto the lower greens and then have to be washed out.
Please note that there is another great option for collecting greenfinches. When you find a mushroom, do not rush to pull it out of the ground. Carefully cut the row with a knife, leaving part of the stem in the soil. So, you don’t have to waste time scraping off the sand, because it will be enough to remove small leaves and tap the cap.
If you do not want to clean the mushroom in the forest, then it should be cut 1–2 cm below the cap
Remember that the mushrooms will need to be cleaned of sand immediately upon arriving home. Collect medium to large sized greenfinches and make sure they are not too old.
Small greenfinches have caps slightly curled towards the stem, and the plates are small, so it is very difficult to clean them
Video: how to properly cut greenfinches when picking
How to clean greenfinches at home
Before cooking mushrooms, you must first thoroughly get rid of the sand, and then clean the mushroom itself.
How to remove all sand from green rows
There are two effective methods, using which you can simply wash away the sand stuck between the mushroom plates. Please note that before using any of the following methods, the mushrooms must be washed thoroughly. If necessary, the caps should be wiped with a washcloth or damp cloth to remove dirt from their surface.
Soaking in water
Greenfinches, unlike most other mushrooms, do not absorb water well. That is why it is recommended to soak them before cleaning.
- Prepare a large container of water by adding a few tablespoons of salt to it.
- Immerse the greenfinches in water and rinse.
- After the sand has settled, remove the mushrooms with a slotted spoon, being careful not to stir up the water.
- If the mushrooms were initially very dirty, repeat the procedure.
Thanks to this method, the rows will be almost completely cleared of sand. Salt is needed here so that the mushroom plates open better. After this, you need to rinse each mushroom well under running water, washing away any remaining soil.
Is it possible to grow floodplain yourself?
It is suitable for cultivation and breeding in artificial conditions - both indoors and outdoors. The technique is simple, you just need to follow a few technological rules. On a farm scale, almost no one does this, since the mushroom is not in great demand. However, amateurs can grow this variety for themselves if they wish.
The most important conditions are the required temperature and sufficient humidity. Poplar row fruits set at a temperature of no more than 15 °C. Such an environment can be created in a basement or cellar. However, it is better to breed sandpipers outdoors.
The process must contain the following phases:
- First you need to make a substrate. To do this, combine 50 g of mycelium, a liter of water, 100 g of chalk and 5 kg of soil (preferably a turf layer of soil with rotted twigs, taken under a poplar).
- Pour the mixture into boxes or boxes, add 5 cm of wet soil on top.
- The soil with mycelium is laid out on the beds, and everything is covered with film to maintain high humidity.
- The best temperature for mycelium germination is 20 °C.
- When the soil is overgrown with it, the film is removed and the substrate is transferred to the shade. The first mushrooms will appear in a month and a half.
- After harvesting, the soil is moistened, then soil is added.
- Before winter frosts, the area with mycelium is covered with leaves or grass.
- In the spring, when the air temperature reaches 10 °C, the beds are opened.
Primary cleaning of fungus in the forest
You need to start cleaning the mushroom in the forest, since soil and sand spoil the appearance and taste of the fruit. And therefore, after the mushroom is cut, you need to remove dirt and sand from the surface as much as possible.
Of course, it is impossible to completely get rid of it, but if you know certain nuances, you can cope with this task.
Cleaning Features
It is not enough to simply wipe the surface of the mushroom from sand and soil, as it is important to know some features that can prepare the product for subsequent use.
- Using a knife or hands, you need to clean the surface of the mushroom from soil and sand without damaging the product itself. If dirt is stuck to the stalk, you can clean it with a knife, simply scraping off all the excess. But it is important to be extremely careful not to damage the fruit itself, as this can lead to a violation of the integrity and cause subsequent rotting of the fruit.
- Take the mushroom on the stalk vertically so that the plates are downwards. After this, tap the cap a little so that the grains of sand fall out from the mushroom. This way you can remove sand from the internal cavity of the mushroom. This procedure is best carried out at home so as not to accidentally damage the fruit, since there are no conditions for such cleaning in the forest.
- You need to cut off a piece from the stalk on which dirt and sand are stuck.
But remember that you cannot pick the mushroom, as it must be carefully cut off without damaging the tubers. Inaccurate manipulations can cause subsequent rotting of the root system and lack of harvest the next year.
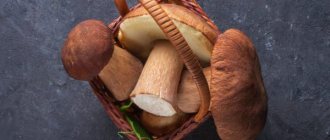
Characteristics of sandpipers
This genus of mushrooms has up to fifty species, each of which has its own characteristics, but a generalized description of sandstone can be given.
Appearance and photo
Sandstone can be recognized by certain characteristics. Among them are:
- Spread in large groups.
- Growing in rows.
- The presence of a tubercle on the caps of old mushrooms.
- The habit of hiding in the sand or under leaves.
The most striking feature of the edible row is the flour aroma. You can see what sandstone looks like in the photo.
Morphology
The sandpiper's cap is convex, fleshy, and has the shape of a hemisphere. As it grows, it straightens and bends, acquiring an irregular shape. The edges of the cap are thin, curled, and cracked. In young individuals, the surface is slightly wet and slippery. The diameter of the cap is from 6 to 12 cm.
Depending on the species, it can have the following colors:
- green;
- grey;
- brown;
- red;
- shades of brown.
The leg is fleshy. In cross section it ranges from 1.5 to 4 cm, in length - from 3 to 8 cm. The color of the leg changes with age from shades of white to red-brown. When pressed, the surface of the leg darkens.
The plates of young mushrooms are white. With age they acquire a reddish-brown tint. The pulp of the row is thick, fleshy, white. Under the skin of the cap it is a little reddish, and under the skin of the stem it is grayish. Almost all types are characterized by a certain aroma, reminiscent of the smell of freshly ground flour.
Place of distribution
Sandstones grow in large families. Their rows can be found in the following places:
- coniferous forests;
- deciduous forests;
- parks;
- planting;
- roadsides.
Rows are most popular in the Omsk, Volgograd, and Saratov regions of Russia, Kazakhstan, and the Altai Territory. These areas are considered poor in mushrooms, so sandpipers are actively eaten here.
Edible or inedible
Rowers can be either edible or toxic. The following mushrooms are edible:
- black scaly;
- giant;
- dove;
- yellow-brown;
- massive;
- matsutake;
- Mongolian;
- red;
- poplar;
- grey;
- carved;
- earthy.
Commonly edible species include the silver, golden, booted, yellow-red, bearded sandpiper and greenfinch. All other representatives of the rows are inedible or toxic.
Difference from false mushrooms
Edible species are often confused with inedible or poisonous rowers. Below is a list of the most common false mushrooms with a description of the main differences.
| Species name | Features |
| Leopard |
|
| Mouse pointed |
|
| Soapy |
|
| Brown |
|
| White |
|
The main sign that sandstone is edible is its floury smell.
Collection rules and conditions
Sandstone begins to bear fruit in August. The last mushrooms are harvested in October, and some species survive until the first frost.
You can collect rows only in relatively environmentally friendly places. The fruiting bodies of mushrooms tend to absorb toxins from the external environment, as a result of which even edible species become poisonous. You can check mushrooms for toxicity in a fairly simple way: if the flesh of the sandpiper is white, it is suitable for consumption, yellow flesh indicates unsuitability.
There are more than 40 types of sandstones in nature. But the following types are considered the most common:
Cleaning mushrooms at home
It is quite possible to peel mushrooms at home if you first wipe off all the sand. You can use the above method to remove sand and dirt from the inside of the mushroom.
After this, soak the mushrooms in water, since due to their structure they do not absorb water well, so it may be difficult to clean.
For soaking, prepare water and add a few tablespoons of salt. This makes it possible to dissolve all the dirt and make it easier to clean the mushrooms for later use.
Proper cleaning of green mushrooms is an opportunity to enjoy the refined taste, aroma and benefits of the prepared dish, but remember that there are a lot of nuances regarding the collection, processing and preparation of the fruit, so special attention to detail is required.
The greenfinch mushroom is very tasty when pickled, but the main difficulty in preparing greenfinch is getting rid of the sand in which they grow.
To get rid of sand, the stems of the mushroom need to be cleaned, tapped on the cap, and then after rinsing with water, pour cold water over it for several hours, stirring occasionally. Then, while cooking the mushrooms, sand also spills out. The result of a good cleaning of greenfinch mushrooms will please you with the absence of the crunch of sand on your teeth.
It is best to use a small knife for cleaning, preferably a mushroom knife or a hard dish sponge.
There is no need to soak before cleaning and it is better not to even wet it. Remove the skin and separate the stems from the caps. All mushrooms have been peeled. You can read more details here.
Recipes and cooking features
Sandstones can be prepared in different ways. Starting from mushroom soups and ending with juliennes. But the most delicious dishes are considered to be salted and fried sandpipers. Before cooking, mushrooms must be prepared. Preparation of sandstones involves the following actions:
- Rinse thoroughly.
- Pour in very salty water and leave for a day.
- Wash off the salt.
- Boil for half an hour.
- Drain the water and rinse again.
Washing mushrooms
Soaking is a prerequisite for using the rows for food.
Salting for the winter
Salting sandboxes is not difficult. For pickling you will need the following products:
- sandstones – 1 kg;
- garlic – 4 cloves;
- currant leaves – 6 pcs. into each jar;
- allspice peas – 10 pcs.;
- salt – 50 g.
Salting rows
Place 3 currant leaves on the bottom of the jar. Pepper is sprinkled on top. Then the prepared sandboxes are laid out in layers, sprinkling each layer with salt and garlic. The remaining currant leaves are laid out last. The jars are closed and left for 6 weeks. After this period of rowing, you can eat.
Fried Sandpipers
Sandpipers can be fried. To do this, prepared mushrooms are fried with onions until golden brown. You can also cook sandstones in egg batter.
Some housewives prefer to add a little sour cream at the end of frying. This makes the sandpipers even juicier. Fried rows taste like chicken meat. Properly prepared mushrooms will be the highlight of any table.
Beneficial properties of sandpipers and restrictions on use
Sandpiper is a source of fiber, glycogen, thiamine, and riboflavin. They contain the following elements:
Mushrooms are rich in vitamins A, D, B. They have the following effects on the human body:
- immunomodulatory;
- anti-inflammatory;
- antibacterial;
- antiviral;
- antioxidant.
At the same time, eating sandpiper raw can cause stomach upset. Mushrooms should not be eaten by small children, pregnant or lactating women.
What kind of mushroom is greenfinch?
These mushrooms have many local names, because they are most often called yellow mushrooms, sandstone mushrooms, and green mushrooms. The period of their growth lasts until the onset of frost. It is for this reason that greenfinch is very popular among mushroom pickers, because it can be collected when no other mushrooms can be found. The size of the greenfinch can reach 12 cm, and its dense pulp is rarely attacked by worms, which allows you to almost always harvest a good harvest.
Greenberries can be collected from early autumn until frost
Greenfinch is suitable for preparing a wide variety of dishes. These mushrooms are very tasty when marinated, but they can also be fried, salted, and eaten boiled. However, you should know that this type of mushroom is classified as conditionally edible, which means that before preparing any dishes, the greenfinch must first be boiled. And when salting, it is better to give preference to the hot method.
Collecting greenfinches - video
Preliminary stage: how to clean these mushrooms in the forest
Since this mushroom grows too close to the ground, it collects a large amount of dirt. When going in search of greenfinches, you should not neglect their preliminary cleaning in the forest.
- After removing the greenfinch from the soil, cut off the cap and the lower part of the mushroom stem.
- Remove pine needles and other debris from the cap that stuck to the greenfinch during the rains.
Before putting the greenfinch in the basket, it is advisable to clean it of dirt and forest debris
Is it possible to confuse: twin mushrooms
There are many species of sandpipers in the family that are not only inedible, but also poisonous. Some of them have their own distinctive features, which can be used to identify a bad mushroom.
Let's look at the most common types:
- leopard row is similar to the earthy row, but is very toxic, it has white mouse plates and characteristic spots on its cap; the mushroom does not have a floury taste and smell, like the edible species;
- mouse pointed row is a low-toxic species, but should not be consumed. Can be recognized by the dark protruding sharp hump in the middle of the cap. It has no odor; old mushrooms have yellow spots;
- soap row is the type that is most often confused with edible. It has a fruity-soapy, not very pleasant smell, the flesh turns red when cut;
- brown row - a dark mushroom with a brown tint, turns red when cut, has an unpleasant odor;
- the white row reaches 8 cm in height, has a flat, outstretched cap with wavy thick edges, turns pink when cut, has a pungent smell of radish.
How to wash and clean mushrooms from sand and other dirt at home
At home, you can perform better cleaning of mushrooms, which is necessary before their further use.
- Returning home, soak the greenfinches in plenty of warm water, leaving them in this state for several hours.
- Then drain the water and fill the mushrooms with saline solution (0.5 tablespoon per liter of water). They can stay in it for up to 12 hours, but you can remove them from the salted water much earlier, after 2-3 hours, if you need quick cooking. It should be taken into account that the volume of water should exceed the volume of mushrooms by 3–4 times.
Thanks to pre-soaking, you can remove the maximum amount of sand from agaric mushrooms
Rinsing with running water will remove any remaining dirt on the greenfinches.
After these procedures, you need to boil the greenfinches for 5 minutes, then carefully remove them from the pan, and then drain the water used during cooking. During the cooking process, the sand remaining in the mushrooms will fall to the bottom of the pan.
How to wash and prepare the variety for pickling - video
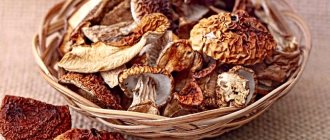
Dry cleaning before drying process
Since greenfinches are classified as conditionally edible mushrooms, they are dried quite rarely. In addition, decoctions of dried green mushrooms are not particularly tasty and do not have a pronounced mushroom aroma. But if you decide to dry greenfinches, you can use dry cleaning. However, in this case it will not be possible to completely get rid of the sand that has penetrated the pores of the mushrooms.
- Gently wipe the greenfinch caps with a clean cloth.
- Lightly tap the caps, trying to knock out the sand.
- If necessary, use a knife to scrape off any dirt stuck to the stem of the mushroom.
- Then you can begin the drying process itself.
How to clean mushrooms correctly: porcini mushrooms, oyster mushrooms, saffron caps, greenfinches, boletuses, boletus and other types
“Silent hunting” allows you to combine business with pleasure - take a walk through the forest and stock up for the winter. But the matter is not limited to harvesting - the “harvest” needs to be processed, and first of all, cleaned. This is done differently for different types of mushrooms.
General rules and recommendations for cleaning mushrooms
Mushrooms are a perishable product. After cutting, they quickly become flabby and lose their aroma. It will not be possible to put the baskets somewhere away and remember about them after 3-4 days. In addition, worms from already damaged specimens quickly move to still clean ones.
It is advisable to clean and process the collected mushrooms on the same day.
Basic tips for cleaning mushrooms:
- Start cleaning mushrooms while still in the forest, removing large debris - stuck twigs, needles, leaves. The base is cleared of sand and earth. You can cut off a little to check if the mushroom is wormy, and not take home something that you still have to throw away.
- Sort them out. Different types clean differently.
- It is more convenient to peel mushrooms with a small sharp knife with a thin blade. It will cut the flesh but not crumble it.
- Wear gloves. During the process of peeling mushrooms, your fingertips quickly darken.
- When washed, mushrooms absorb water, partially losing their taste. If possible, limit yourself to dry cleaning. If they are not very dirty, you can simply wipe them with a damp cloth, otherwise, go over them with a soft-bristled brush. When the dirt does not come off, scrape it or cut off these areas with a knife.
Where possible, it is best to limit mushrooms to dry cleaning.
How to properly clean different types of mushrooms
The nuances of cleaning are determined mainly by the structural features of the mushrooms (spongy or lamellar).
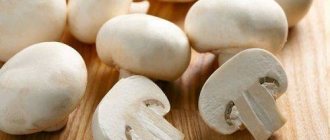
White
You won't have to tinker with them for a long time. Just wipe the caps with a damp cloth and scrape off the stuck grains of sand with a knife. Cut off the base of the leg along with the ground.
Porcini mushrooms are not only very tasty, they are also a pleasure to peel
Boletus and boletus
Worms are especially fond of them. First check this by cutting off the base of the stem. Then separate it from the cap, scrape it with a knife, removing the black “patina”, and quickly rinse in water.
Wipe the hats with a damp cloth, cut them in half, also checking for worms. Cut off the sponge underneath.
Firstly, it is in it that mosquito larvae most often settle, secondly, during the heat treatment it becomes unpleasantly slimy, and thirdly, it is very poorly digested.
When cleaning a boletus mushroom, be sure to cut both the stem and the cap to make sure that the mushroom is not wormy.
In very old mushrooms, the stems harden and become fibrous. It's better to throw them away.
Flywheels are cleaned in much the same way. They also remove the top layer of tissue from their darkened legs and remove the sponge. But you also need to remove the skin from the cap.
Many mushroom pickers neglect moss mushrooms, but they have a very good taste if you peel the cap
Oyster mushrooms
Only mushrooms with a cap diameter of 10 cm or less are suitable for eating. For the rest, it is extremely tasteless, and the leg is generally inedible. Oyster mushrooms growing on trees do not need to clean their caps from soil, sand, or other debris. The bottom of the legs is cut off, if there are any darkened areas, and the mushrooms are washed in running cool water.
Before cleaning, oyster mushrooms are “calibrated”, selecting mushrooms that are too large and unsuitable for food.
greenfinch
They look very similar to russula, which is why they are cleaned the same way.
If there are a lot of mushrooms, pour hot, but not boiling (85–90°C) water over them for 5–7 minutes so that it just covers the mushrooms.
Then, using a slotted spoon, vigorously stir the contents of the container - the mushrooms rub against each other, the dirt lags behind. Clean greenfinches can be caught with the same slotted spoon or you can add more water so that they float to the surface.
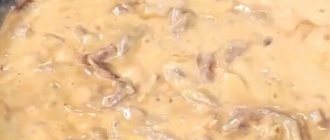
The greenfinch (also known as greenfinch) does not look very appetizing, the characteristic shade remains even after heat treatment
Milk mushrooms, valui (gobies) and saffron milk caps
They grow mainly underground, so they need to be thoroughly cleaned of soil particles and grains of sand. To effectively get rid of debris, mushrooms are soaked in cold water for 1–3 days (it needs to be changed 3–4 times a day). The same technique helps to neutralize the bitter taste inherent in milk mushrooms and gobies. They are first cut in half to reject wormy specimens.
After soaking, the remaining dirt between the plates is cleaned with a brush. The top of the cap is wiped with a wet rag and, if necessary, scraped with a knife.
Cleaning of milk mushrooms begins in the forest - the largest pieces of debris are removed from the caps
Raincoats
They look very unusual, so many mushroom pickers avoid them. Meanwhile, these mushrooms taste almost indistinguishable from chicken; they are extremely filling and nutritious.
First, wash them by wiping off dirt with your fingers or a wet cloth. Cleaning the raincoat is not difficult - the base of the stem of small mushrooms is simply cut off, and the skin is removed from large ones (there are “record holders” weighing 10 kg or more).
They peel almost like eggs. The mushroom must be cut in half - if the flesh inside has turned yellow, it can no longer be eaten.
It should be white or creamy, elastic to the touch (not mushy consistency).
Peeled puffballs must be cut to evaluate the quality of the pulp.
Morels
They are not eaten by worms, but the dirt gets stuck in numerous folds. Mushrooms should be thoroughly washed in running water, the lower part of the stem should be cut off, and the largest specimens should be cut in half. Next, the morels are boiled for 10–15 minutes and washed again.
Morels are early mushrooms considered a delicacy, but the configuration of the cap causes serious difficulties when cleaning
When to wash and soak mushrooms
It is best to avoid washing mushrooms if possible. Spongy (and some lamellar) varieties quickly absorb moisture, losing flavor. The best option is dry cleaning and wiping with a damp cloth.
All so-called milkweeds need soaking. Cuts of such mushrooms exude white (only saffron milk caps have orange) juice and are used for pickling. These include milk mushrooms, valui, and tremors. Soaking helps repel unpleasant bitterness.
They are filled with cold water for at least a day, maximum for three, changing it at least once a day (preferably 3-4). For little-known bitters and pigs, the period increases to 4–7 days. If you add salt to the water (about a tablespoon per liter), you will get rid of the worms in the pulp.
After soaking the mushrooms, do not forget to regularly change the water in the container at least once a day
It is also recommended to soak Polish mushrooms. Any damaged areas quickly turn blue. When cooked, the liquid turns out almost black. Soaking for 3-4 hours allows the mushrooms to return to a more aesthetically pleasing light color.
The slightest damage to the Polish mushroom leads to its flesh turning blue
How to prepare mushrooms for long-term storage
In addition to all kinds of homemade preparations, mushrooms can be preserved for a long time by freezing or drying them. The strongest specimens are selected for freezing; slightly wormy ones are also suitable for drying - in the process the worms will crawl out of the pulp.
Mushrooms can be frozen raw or boiled. In the first case, only dry cleaning is recommended; as a last resort, they are quickly rinsed in water, but in no case soaked. Then they will need to be thoroughly dried by laying them out on cloth or paper towels. Dried mushrooms are cut into pieces or plastics.
Before freezing, cook the mushrooms for no more than 15–20 minutes in boiling water, after cutting them. Next, you need to wait until they cool down and all the liquid drains.
Whether or not to wash mushrooms before freezing depends on the method chosen.
To freeze, the pieces are laid out on boards or baking sheets lined with parchment paper and placed in the freezer. Then pour portions into sealable frozen food bags. The shelf life of the product is up to a year.
: how to freeze mushrooms
For drying, only tubular mushrooms are used; lamellar mushrooms retain their characteristic bitterness after drying, which intensifies. You shouldn’t wash the mushrooms before doing this either, otherwise the process will take longer than usual. Dirt is removed from them with a damp cloth or sponge, and if necessary, cut with a knife.
The caps are separated from the legs. Both are cut into plastics with a maximum thickness of 10–15 mm (optimally 4–6 mm). Mushrooms are dried both naturally (in the sun) and in ovens and electric dryers.
The process is complete when the dry mushrooms bend and break easily, but do not crumble. They are stored in linen or paper bags, hermetically sealed containers at a temperature of 10–15°C, given that they very easily absorb any odors.
Lamellar mushrooms are not suitable for drying
Reviews from gardeners
Picking mushrooms is not such a labor-intensive task, unlike cleaning them. Each type has its own nuances that must be taken into account. Otherwise, ready-made meals and homemade preparations will not be as tasty as we would like.
- Yulia Golova
Source: https://dacha.help/ovoshchi/kak-chistit-griby
How to properly prepare greenfinches for further consumption
Before you start preparing fresh and dried greens, they must be boiled.
- To do this, soak dried mushrooms in cool water for an hour.
- Wash the greenfinches.
- Pour water into an enamel pan of suitable size and boil it. In this case, it is advisable to maintain a 1:1 proportion of the mass of mushrooms to the volume of liquid.
- Add 30 g of salt per 1 liter of water to the water.
- Place the dried mushrooms in salted water and bring them to a boil, then cook for 10 minutes.
- Remove the greenfinches with a slotted spoon and rinse under running cold water.
- Drain the water from the pan and fill it with clean water, preparing the same saline solution again.
- Place the greenfinches back into the pan and cook for 20 minutes.
- Then repeat steps 6–8. And cook the mushrooms again for 20 minutes. Thus, the total cooking time for green mushrooms will be 50 minutes.
Thanks to this method, you can not only thoroughly rinse the green mushrooms from sand and prepare them for further use, but also rid the mushrooms of radionuclides, reducing their amount in the product by 2-3 times. After carrying out such processing, you can begin preparing greenfinches in various ways, without fear of the possibility of poisoning and eliminating the presence of unpleasant taste sensations.
How to pickle greenfinches using a hot method - video
Using the methods described in this article, you can clean greenfinches efficiently and prepare them for further use. When working with these mushrooms, which are classified as conditionally edible, be sure to boil them before preparing various dishes. This will avoid poisoning. By pre-soaking this type of mushroom, you can effectively remove sand that clogs into their pores. Properly prepared for consumption, greenberries will delight you with their exquisite taste and will become a worthy table decoration.
How to properly clean mushrooms
In order for fresh mushrooms in the finished dish to remain elastic and retain their taste and aroma, immediately after purchasing or collecting they need to be prepared - cleaned and washed. Knowledge of the basic rules and methods of processing mushrooms will help you do this work correctly and efficiently.
What tool to use to quickly clean
A small, sharp knife can help you peel mushrooms quickly and easily after picking. Thanks to the thin tip, you can easily remove worms from mushrooms and clean off debris without crumbling the fragile pulp. If the dirt cannot be removed, it is better to carefully cut it off.
You will also need a damp cloth with which you can remove dirt from the knife and mushrooms. You also need a container in which the cleaned specimens will be stored. Since mushroom juice can stain the skin of your hands dark, it is better to work with gloves.
Is it necessary to wash
To easily process mushrooms after harvesting, you do not need to wash or wet them before starting work. Otherwise, they will become slippery and fall out of your hands, and some types simply fall apart or lose their taste when exposed to water.
Dry cleaning is best. To remove sand and dirt from mushrooms, you can use a soft brush. Those intended for drying do not need to be washed. It is enough to clean them with a damp cloth. If you plan to fry, it is permissible to quickly rinse with water.
It is recommended to keep products that are planned to be salted, boiled or pickled for a short time in a weak saline solution. Then rinse. When pickling mushrooms that have a bitter taste, you need to keep them in cool water for 1-2 days, changing it periodically.
Valui bulls
This type is most often used for salting or pickling. But first you need to rid the valui mushrooms of bitterness. To do this, wash each specimen well, remove dirt and debris. Carefully inspect for the presence of pests.
All questionable areas must be removed. Pour the prepared raw material with water, placing light pressure on top. It will hold the mushrooms under water without crushing them. Soak the valui for at least 2-3 days.
Change the water in the container at least 2 times a day.