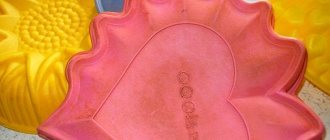
Perhaps every novice pastry chef dreams of learning how to bake tall, even sponge cakes: so tall that you can cut them into several layers and immediately assemble the cake. But often not everyone is able to achieve such a result. And it seems like they kneaded the airy dough and preheated the oven, but the sponge cake still doesn’t rise. Are you familiar with this situation? If yes, then let's figure out what went wrong.
As a rule, if you manage to achieve the correct consistency of the dough and if your oven bakes properly, then the reason for the non-rising sponge cake may be hidden in the baking pan, or more precisely in its improper use. Therefore, today I will share with you the basic rules for preparing a mold for baking sponge cakes and tell you in which forms the biscuits turn out the best.
What to choose for the oven and Russian stove
It is impossible to say which form is better without taking into account the type of oven in which you plan to bake homemade bread.
In a gas oven, you can safely use options made of ceramics, clay, aluminum, steel, and cast iron. Heat-resistant glass is more capricious, so it’s better not to buy one on purpose. And if you have already bought it, then place the glass container only in a non-hot oven or at least on a cold rack.
in an electric oven . Almost all forms for homemade bread on the market will be appropriate here.
Silicone and glass molds are ideal for the microwave But you can only get real bread in a microwave with a convection function.
Clay, cast iron, ceramics, and cast aluminum are suitable for a Russian stove Do not use glass or silicone products. Even heat-resistant glass should not be placed on a hot surface - it can crack from the temperature contrast.
Analyze which bread baking pan is better, more convenient and practical for you, because every housewife has her own tastes and preferences. But for beginners, we recommend non-stick ones, and if you are afraid that the dough will stick, use baking paper. To prevent your bread from going stale, choose the right bread bin according to the advice on our website.
What is the best way to grease a baking dish?
To lubricate the container, it is better to use refined vegetable oil. If you use a product with aroma, it will spoil the taste of the dough. Sunflower oil is the most popular and in demand, but sometimes cooks experiment with flaxseed and sesame oil.
If the product needs to be given a golden crust, then the container and baked goods are coated with butter. It will add a memorable taste to the dish. It is preheated in a water bath. To distribute the mass, use a silicone brush or lubricate the molds with your hands. You may want to wear protective gloves. It is important not to forget to coat the sides of the container with fat.
Margarine is an alternative to butter. This is a budget option that does its job well.
If there is no butter, you can grease the mold with margarine, but it is more harmful than regular butter.
The chef of one Moscow restaurant claims that unsuccessful baking is often not related to the dough, but largely depends on the lubrication of the surface. Butter and margarine contain a small amount of water, so it is better not to use them. It’s smarter to use vegetable oil or fat. You also need to sprinkle the pan with flour so that the dough does not take up excess grease. The flour will act as a barrier between the mixture and the surface of the container.
Experienced cooks, bakers and housewives prepare non-stick grease for molds in advance. It uses the following components:
| Ingredients | Quantity, in grams |
| melted butter | 128 |
| Wheat flour | 90 |
| refined oil (to choose from: vegetable, flaxseed, cottonseed) | 130 |
Step-by-step recipe:
- According to the recipe, wheat flour is used, since it has no unpleasant aftertaste and is ground finely. First combine the cooled ghee and flour. Stir thoroughly with a fork.
Required Ingredients - The mixture is placed in the refrigerator for 20 minutes.
This was the mixture. She is sent to the refrigerator - Take it out and put it in a tall glass or bowl.
- Beat with a mixer and gradually, without ceasing to stir, pour in the oil in a thin stream.
- The procedure is a little similar to making mayonnaise. The resulting emulsion is placed in a glass jar with a wide neck.
This is how you should end up with a creamy lubricant. - The lubricant is sent to a cold place for storage. Some people leave it in the cabinet at room temperature, but it's better to keep it in a cool place.
Shelf-life Unlimited. If the housewife prefers to keep the emulsion in the refrigerator, then before using it, you need to leave it on the table for 5-10 minutes. This will keep the mixture warm and easy to spread.
This substance can be used to coat any coating - for baking bread, rolls, Teflon, cast iron, metal, ceramic. You can also coat the mixer blades in the bread machine - thanks to the mixture, they will come out of the finished product without damaging it.
This mass is convenient to use. It is loved by housewives who often prepare baked goods in molds and on a baking sheet. The mixture never smokes, dishes do not burn and easily come off the surface.
It is not necessary to prepare the emulsion by strictly calculating grams. You can take a cup of each component.
What else can be used to lubricate the container?:
- 100% solid oil;
- melted butter;
- melted pork fat;
- refined vegetable oils - flaxseed, soybean, corn, cottonseed;
- lard - although it contains a lot of fat, it is suitable in a pinch;
- fat with a melting point above 25°C;
- melted coconut oil.
An important requirement is that all products have high melting points. If the dough is liquid, then use soybean or corn oil, since they have virtually no aroma.
How to level a sponge cake
- Start with the cooled crust on a flat surface. The domed side should face up.
- Use your palm to press lightly onto the top of the cake to keep it in place. Use a thin, serrated knife to cut off the dome using a slow sawing motion.
- Try to cut as little as possible to maintain the height of your cake. Be sure to keep the knife level.
- Use a serrated knife to lift the dome slightly, then place a circle (thin cutting board) under the cut portion to remove the dome.
- Set the dome aside for later use (the extra layer can be dried to make pastry crumbs or frozen for later use).
