/Order/
Cleaning the kitchen is serious business. Prepare your rubber gloves and enthusiasm - in this article we will tell you how to clean the kitchen at home easily and safely for finishing facades, countertops and aprons (including wooden ones!).
But, before you start choosing a recipe, we recommend that you familiarize yourself with the following universal rules and recommendations, which are relevant for both painted/unpainted wooden kitchens and laminated, varnished, plastic facades made of MDF and chipboard.
- For those in a hurry, we advise you to go straight to the recipes using the quick navigation (at the beginning of the article).
General recommendations
- The most important rule is: ALWAYS test the cleaner on an inconspicuous area before cleaning your kitchen. Treat it, then wipe clean and dry, wait 1-2 minutes and evaluate whether the color of the coating has changed, whether the shine has disappeared, etc.
- A greasy coating on kitchen furniture is a mixture of dust with fumes and a tiny suspension of fat that forms during cooking. The older the plaque, the more difficult it is to get rid of it. Therefore, the optimal schedule for “general” cleaning of the kitchen from grease is 1-2 times a year, “major” cleaning is every 2 months using mild products and, of course, when the need arises.
- To clean hard-to-reach areas, crevices, or decorative trim, use a toothbrush dipped in the cleaner from our article. You can also clean narrow crevices with a knife wrapped in cloth.
- Do not use harsh abrasives; only baking soda, a soft toothbrush, or the hard side of a regular foam sponge are acceptable. This is especially true for wooden kitchens, as well as any painted furniture without a top protective coating.
- When cleaning the kitchen, it is better to use a new sponge with a clean abrasive side. An old, greasy sponge can do even more damage.
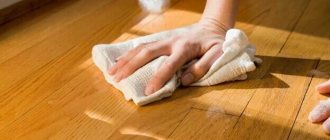
- At the end of cleaning, it is advisable to wipe the kitchen: clean with a damp microfiber cloth and dry with a clean, dry microfiber cloth. This way you will avoid streaks and residues of the cleaning product itself.
- When cleaning the kitchen, pay special attention to the cabinets above the stove.
And now some special recommendations and warnings.
| For a wooden kitchen (painted with stain, enamel or other types of paint, unpainted but treated with oil/wax/polish/special impregnations/matte varnish, etc. | For all other kitchens: glossy, varnished, plastic, laminated and painted MDF and chipboard sets |
| A wooden kitchen requires the most delicate care. Most “folk” remedies like peroxide, ammonia, alcohol or citric acid are contraindicated for it, as well as ordinary alkali-based household chemicals. | Whether you use expensive or cheap household chemicals, the main thing is that it contains alkali. It is the one that most effectively copes with grease and dirt. |
| Manufacturers of wooden kitchens recommend washing facades only with special products with neutral Ph or a solution of warm water and soap (dishwashing detergent), diluted in a ratio of 5:95. But what if the Fairy solution does not remove old fat and stubborn stains? Ideally, thorough cleaning of the kitchen should be entrusted to special cleaning services, especially if the kitchen is relatively new, with expensive finishes. Our recipes are in most cases safe for wood, but there is still some risk in them. | It is convenient to use a spray bottle to clean the kitchen. |
| When wiping the kitchen, try to move along the grain of the wood, and not against or across. This will allow you to better clean the pores of the material and act more delicately on the fibers. | Before applying cleaning agent to the contaminated area, moisten it, for example, using a spray bottle. Moisture will speed up the chemical process somewhat. reaction and will make cleaning easier. |
| The rag should not be too wet. Excess moisture is harmful to wooden surfaces. | |
| After washing and cleaning wooden furniture, do not forget to treat it with protective wax, oil or polish. |
General do-it-yourself
Not all housewives know that cleaning can become a real holiday. If you know what is included in the concept of general cleaning and what nuances need to be observed, then in the future this process will arouse more enthusiasm.
When wondering about spring cleaning and where to start, take care of the issue of comfort and wear comfortable clothes. It should not restrict movement.
Cleaning should not be done alone - you can involve household members in this procedure. If you prefer to clean without companions, turn on some invigorating music.
Contacting cleaning companies will help you save time; the price in Moscow is usually affordable.
Before starting to clean the kitchen, specialists check that everything you need is at hand. Cleaning companies, where the cost of work depends on the volume, always use disinfectants and professional chemicals for washing tiles, sinks and ovens.
What is included in general cleaning and how is its cost determined? It all depends on the individual characteristics of the order. The determining factor is the scope of work, which includes:
- washing dishes;
- cleaning cabinets both inside and outside;
- cleaning tiles;
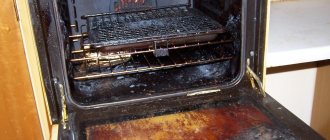
- removing dirt from the stove and oven;
- washing floors.
It is worth noting that adding additional wishes to the order also affects the general cleaning and its price.
According to the Konmari method
Information. Some time ago, the Japanese Marie Kondo changed people's understanding of the state of their homes. The basic principle of cleaning using the KonMari method is to keep what brings you joy and get rid of the rest.
Home will become a place where you want to return.
This is interesting: How to dye jeans at home
Marie recommends looking at all the items in the kitchen and deciding what brings out positive emotions.
What doesn't please you needs to be removed.
If you don’t dare get rid of unnecessary things, then carefully study the pictures and rules for cleaning the kitchen and bathroom in the Japanese book:
- Fridge. Get rid of products that have expired;
- Storage cabinet. Sort through all the grains and spices. Throw away what has been open for a long time or is not to your liking;
- Shelf with equipment. Get rid of anything that is out of order or that you haven’t used for a long time;
- Wardrobe with dishes. Remove all defective utensils and items you no longer like;
- Cupboard with pots. Get rid of anything old or damaged, throw away unused baking dishes;
- Store items vertically if space is limited.
Method 1. Express cleaning and polishing for advanced cases (soda + vegetable oil)
PURPOSE: wooden UNpainted kitchens and countertops (coated with matte varnish, oil, wax, polish, any impregnations), varnished and laminated kitchens made of MDF and chipboard, aprons made of any materials.
This recipe is especially helpful if you need to bring an old kitchen or countertop back to life with minimal time and money.
- With its help, you can, firstly, easily remove tightly adhered drops of fat, plaque and stains. Secondly, to “seal” the pores of the wood, protecting it from moisture and dirt. And thirdly, to give the facades a natural shine and brightness. Essentially, this old homemade recipe replaces both cleaner and furniture polish.
CAUTION: Painted wood kitchens and light wood kitchens (oil may yellow slightly).
CLEANING FREQUENCY: It is important that cleaning with soda-oil cleaner is carried out regularly - at least every 2 months. The fact is that oil tends to oxidize and lose its protective properties, possibly changing color.
INSTRUCTIONS:
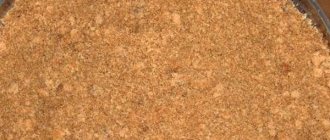
Step 1. Mix 1.5 tablespoons of baking soda with 1 tablespoon of vegetable oil (you can use more in a ratio of 1.5:1).
Step 2. Apply the resulting “scrub” to contaminated surfaces, paying special attention to cabinets in the stove area. The soda will crumble a little, and the oil will be absorbed like polish. You will see that the tree will become cleaner and a little brighter before your eyes.
Step 3: Wipe treated areas with a clean, damp microfiber or soft cloth.
Step 4. Wipe the remaining cabinets from dust and light dirt with a damp cloth. If necessary, you can treat the entire kitchen with an oil-soda solution.
Selection of cleaning products in the store
Surface cleaning products must be selected with extreme care. All kinds of solvents and ethers should be excluded. All this, after regular use, will eventually dry out the wood or spoil the varnish if it is applied to the surface. When choosing acceptable detergents, you need to pay attention to PH neutrality, oil, wax, and silicone content. It is not necessary to look for the entire set of qualities, but if possible, they should be taken into account. All this is important, since a kitchen made of natural wood continues to breathe even after treatment and reacts to external stimuli.
Method 3. Universal recipe for deep and thorough cleaning (6% vinegar + isopropyl alcohol)
PURPOSE: For general cleaning of old grease and other complex stains of painted and unpainted wooden kitchens, laminated, varnished, plastic glossy facades made of MDF and chipboard, all types of countertops and aprons.
CLEANING FREQUENCY: 1-2 times a year.
INSTRUCTIONS:
Step 1. Mix 6% vinegar with rubbing alcohol (isopropyl) alcohol in a 7:1 ratio and add a few drops of liquid soap to the solution.
Rubbing isopropyl alcohol can be purchased at outlets that sell printer supplies, companies that sell fiber optics, and specialty online stores. You should not experiment with other types of alcohol.
Step 2: Wipe the cabinets with the mixture using a microfiber cloth.
Step 3: Now wipe the kitchen clean with a cloth soaked in warm water.
Step 4. Finally, rub a special wood furniture oil that contains beeswax into all surfaces. This action will “seal” the pores and protect your kitchen from stains, dirt, moisture and grease for a long time.
Alcohol-containing detergents
Most products with a small amount of alcohol or vodka are suitable for natural wood surfaces. You can prepare your own detergent from the following ingredients:
- alcohol
- vinegar
- essential oil
Vinegar and alcohol mix one to one; you only need to add a few drops of oil. The components are mixed and added to a spray bottle and applied to the grease stain.
Method 4. Ammonia + warm water
INTENDED USE: For all types of surfaces, but with great care for wooden surfaces.
CLEANING FREQUENCY: if necessary, but not more often than once every two to three months.
INSTRUCTIONS:
Add ammonia to warm water in a 1:1 ratio, then remove dirt with a sponge or spray the product from a spray bottle, wipe the treated area clean with a damp cloth. Finally, dry the surface with a dry soft cloth or microfiber cloth.
Method 5. Hydrogen peroxide + water
INTENDED USE: Only for kitchens, splashbacks and countertops made of MDF and chipboard. The product will help not only clean the kitchen of grease and dirt, but also disinfect the areas treated with it.
- It is permissible to clean a wooden kitchen with hydrogen peroxide, but only if you need to remove mold.
CLEANING FREQUENCY: If necessary.
INSTRUCTIONS:
Mix these ingredients in a 1:2 ratio, treat the desired areas with the resulting liquid using a rag (it is best to spray the product from a spray bottle).
Method 10. Removing fat using a steamer
PURPOSE: To remove old greasy deposits on all kitchen surfaces except wooden ones (!).
INSTRUCTIONS:
If you have a clothes steamer, then you can treat the entire kitchen with it, from the facades to the apron. The method is good for its simplicity and effectiveness. After such a “bath,” the kitchen should be wiped with soapy water and then with a clean, damp and dry microfiber cloth.
- It is advisable not to steam the edges, because this is the weakest point of any furniture made from MDF and chipboard.
Method 11. Removing complex stains using a melamine sponge
Surely you have already heard about melamine sponge or even tried it in action. This sponge consists of many thin melamine rubber fibers; like an eraser, it easily grabs and rolls off dirt from any surface. Contrary to myths, melamine miracle eraser is only harmful if ingested.
For this reason, we recommend not scrubbing interior shelves, drawers, and cabinets with a sponge. After cleaning, the crumbs must be carefully collected and all facades wiped clean. And, of course, the sponge should be kept away from children and animals.
PURPOSE: To remove old greasy deposits on all kitchen surfaces except wooden (!) and any countertops. Use with great care on painted facades - there are cases when the melamine sponge removed the paint along with the stains.
INSTRUCTIONS:
Wet the sponge in water, squeeze out excess moisture, then wipe the dirty areas with it. Carefully collect any accumulated dirt and discard it.
Soap solution
Soap is a universal product suitable for any type of furniture. Regular laundry soap ideally breaks down fatty deposits on the surface and does not harm human health. The method of washing surfaces with soap is simple. You need to take a piece of laundry soap and rub it on a pre-moistened sponge. As a result of these manipulations, thick foam is formed. The foam should be applied to contaminated areas and wait until the fat dissolves. After some time, the foam can be washed off with water and then wipe the furniture dry.
