Why do some people's long-bought dispenser work properly year after year, while others regularly experience water leaks? In most cases, the answer lies on the surface, because proper operation of this equipment (and by all its users) prevents the occurrence of many common breakdowns. And yet, sometimes the cooler leaks for no apparent reason. A puddle that forms under the cooler can quickly ruin your mood and become an unplanned cost item for repairs at the service center. Let's see what problems can be solved on our own.
Poor quality packaging is one of the most common reasons why a water cooler leaks.
For some people, the cooler can work properly for many years, while others constantly face the problem of leakage. The reason lies in how correctly the dispenser was used. And this is sometimes very difficult to control. After all, the device can be used by several family members or a large team of office employees.
Although it also happens that a cooler can leak, even if it has one very thrifty owner. Therefore, before the puddle that forms under the dispenser ruins your mood and entails unplanned expenses, you should figure out what problems can be prevented by everyone who bought this useful device.
There is a possibility that the dispenser itself does not need repair. It happens that the integrity of the bottle itself, which contains purified water for the cooler, is broken.
Poor quality packaging supplied
It is quite possible that your dispenser is completely intact and intact (that is, does not need repair), and the source of the existing leak is bottled water for the cooler, in which a small crack has formed. Using a visual inspection, it can be quite difficult to determine the presence or absence of a microcrack, so we recommend doing a number of simple steps before looking for other reasons for a cooler leak:
1. To begin, turn off the water heating and cooling switches, which are most often located on the back wall.
2. Now disconnect the problematic equipment from the power supply (simply unplug it from the socket).
3. After this, begin to carefully remove the PET container that is installed in the bottle receptacle slot.
4. Then drain the remaining water from all taps:
- if the cooler is a floor-standing type, then unscrew the cap of the drain valve, which should be located on the back wall;
- if the cooler is a desktop type, then remove the silicone plugs that should be located at the bottom of the cooler.
5. Next, close all the taps (including tighten the drain taps) and replace the previously removed plugs.
6. The last step is to install a new bottle and further check the functionality of the water cooler.
If this does not help and your cooler is still leaking, then you should continue to search for the likely problem.
Hot water tap does not flow
If you open a hot tap and the water barely drips or does not flow at all, you need to replace the bottle. But if cold water flows from a hot tap, then in this case you need to:
- Wait 15-20 minutes until the heat exchanger radiator heats up and try to get hot water again.
- Check the power supply - the dispenser may have been disconnected from the network, and without electricity it only dispenses cold water.
- Turn on the fuse - when overheating, the cooler is disconnected from the network, de-energizing the heating circuit.
What to do if there is a full bottle on the cooler and it is plugged in? Of course, contact the specialists from the service center. In this case, repairing coolers yourself is impossible. The technician will have to disassemble the device, remove the broken or clogged heat exchanger, wash it and put it back in place. Along the way, he will check the wiring and change the fuses. This work cannot be done without a special tool.
Even the most experienced craftsman will not be able to make a dispenser at home. Therefore, do not waste money on calling specialists - immediately take the cooler to the service center.
Water does not drip from the tap, but flows from somewhere inside the body
You came for water and found yourself in a puddle. What to do in this situation? How to fix a global leak? Let's figure it out together. And we’ll start with the reasons for this breakdown:
- Most often, a puddle under the cooler is caused by a not tightly closed drain valve. Repairing such a breakdown is more than simple - you need to tighten the plug a couple of turns, turning the plug clockwise. If the leak cannot be repaired, remove the bottle, twist the cap and buy a new one.
- The second most common cause of leakage can be a defective bottle. What should you do in this case? Of course, remove the questionable container and put another one in its place.
- Very rarely, the cause of a breakdown can be a burst pipe. To find such a defect, you will have to open the housing and wipe all the pipes with a dry cloth (or toilet paper). If a wet spot appears on the paper, then there is nothing to do here - call a specialist. Such a defect can only be repaired by a specialist.
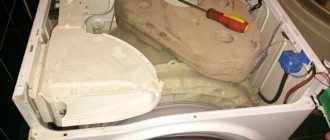
- Sometimes the heater coil may be the cause of the leak. It happens that the storage tank bursts in the cold and begins to drip. This happens if the dispenser was stored in an unheated room without necessarily draining the liquid. The radiator can only be replaced at a service center. It is impossible to repair such a breakdown with your own hands.
Before replacing the bottle, do not forget to disconnect the dispenser from the electricity. Also, drain the hot water by cooling the disconnected heat exchanger. Otherwise, you will have to change not the bottle, but the device itself. Wiring burned out from a leak is very difficult to repair even in a service center.
Very often, customers contact us about water leaks.
The working cooler suddenly begins to leak inside, and a puddle of water forms under it. In 99% of cases, the reason is a defective bottle - it has a microcrack through which air is sucked into the system - the cooler tanks overflow and begin to leak over the edge. This is a defect of the bottle, not the cooler. You just need to replace the bottle with another one, drain 1 liter of water from each tap and the problem is solved. To do this, you don’t need to take the cooler to a service center or call a specialist - everything can be solved by simply replacing the bottle.
Instructions for troubleshooting coolers
If you have discovered a malfunction of the water cooler and want to solve the problem yourself, then use our instructions for diagnosing and eliminating the most common problems: B) The cooler was not plugged in, or the key was turned off C) Left without water, and the lock worked D) Failure (heating element)B) Plug in, turn on the keyC) Turn on the safety button on the hot water tankD) Replacing the cooler for repairC) The compressor does not workD) Refrigerant refilling is requiredB) Reduce the degree of cooling using the regulator on the rear wall counterclockwise (control time 1 hour)C) and D) Replacing the cooler for repair D) Broken tap(s). The stem (spade taps) was torn off. B) For AEL and Biryusa 102 brand coolers, you need to tighten the needle by removing the needle holder. Family brand coolers need to be replacedD) Replacement of the cooler for repairB) Short circuit in the coolerB) Replacement of the cooler for repairB) Defective bottle) Defrosted hot water tank - burst (usually in winter in unheated rooms)D) Damage to internal tubes when moving the cooler without draining water from the tanksB) Remove the defective bottle, drain the water from the hot tap, install another bottleC) and D) Replacing the cooler for repairB) Incorrect opening of the tapC) Mechanical damage to the tapB) Use the tap correctlyC) Replacing the tap at the client or in the workshopB) Incorrect use of the carbonation function waterC) Failure of the carbonation deviceB) The carbonation system is very sensitive to long periods of downtime without use (recommendation - use at least once a day)C) Replacement of the cooler for repairB) Mechanical damage (broken)B) Replacement of the cooler for repair Failed to fix the problem on your own ? Our technician can carry out diagnostics in the office or at home. Back to the list
Upon completion of conservation, sanitize the dispenser.
General provisions
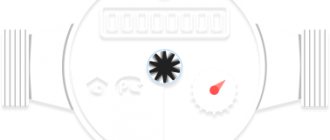
| Designation in the figure | Name |
| 1 | Bottle installation location |
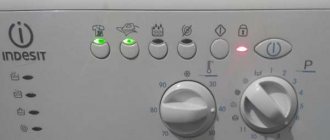
| 2 | Green cooling indicator |
| 3 | Red heating indicator |
| 4 | Yellow power indicator |
| 5 | Cold water tap |
| 6 | Hot water tap |
| 7 | Collection container for drops |
| 8 | Cooling system |
| 9 | Cooling thermostat |
| 10 | Green cooling switch |
| 11 | Red heating switch |
| 12 | Cooling radiator |
| 13 | Network connection wire |
| 14 | Drain valve |
| 15 | Grounding |
As you can see from the given structure of the water dispenser, the faucets are indeed precisely the part with which a person who decides to drink from the cooler comes into contact. Consequently, the requirements for it must be special.
Would you like iced tea or...
I remembered after this post: A knife that heats up and marketers that heat up
About 12 years ago, I worked in a computer store in a warehouse. The task was quite simple: an order comes from a client, you need to find one or more items in the warehouse and bring it for pick-up. The rest of the time the tasks were minimal and it was possible to get tea/coffee. There was no cold water in the warehouse, only a kettle and a tap, which meant we had to wait until it cooled down. As always, while this is happening, work arrives, you forget about your seagull, and when the time comes, it is already cold. Sometimes I brought a bottle of water, but it’s a waste of time, you need to make a detour to go to the store and it’s expensive, especially considering that it wasn’t just me who used it, who would ask permission?)) This is generally a separate topic for conversation, taking food without asking.
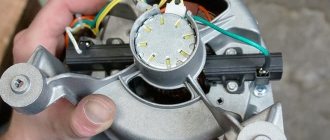
After the weekend, when I went to work I came across a processor cooler, or rather just a radiator without a fan, no one knew where it came from or what to do with it, there was no marking, kit or box, and the inventory didn’t give anything, we shouldn’t have such a position . Don't throw it away. For some time he just lay nearby on the table, and attempts to find out his fate led nowhere (cameras were difficult at that time, the quality was poor and they did not always work for recording). In another rush, I pour myself some tea, thinking that I won’t drink it again, while I’m sitting my eyes fell on this same radiator, it looked something like this:
I remember exactly that it was two-section, and the number of copper tubes was from four to six. The thought came to mind: “after all, these things cope well with hot processors,” what if we try to cool tea with it? I wiped it off from dust and placed it in a mug for a couple of minutes. And I clearly underestimated the capabilities of these towers! When I took the radiator in my hand, it was close to hot, but when I tried the tea, it turned out to be almost cold, the tower took almost all the heat from the tea. Empirically, I determined the time it takes for the tea to be brought to the desired state; ~20 seconds is enough. After several shifts, when I came to work, I didn’t find the radiator, no one knew its fate...
alban85
3 years ago
What are the features of self-repair of a cooler?
There can be many reasons for the malfunction. There are often problems that can be eliminated quite quickly. Let's look into them.
The device is dirty
If dirt has accumulated in the cooler, it will stop working and will need to be cleaned .
- First, the device is disconnected from the power supply and the water bottle is removed.
- The surface of the cooler must be thoroughly rinsed using the usual detergents used to wash dishes. The work must be done carefully, especially in the place where the needle is located, onto which the liquid container is placed.
- Then they take the pallet. It is thoroughly washed and rinsed.
- All parts of the dispenser are wiped dry with a soft cloth.
Then all elements of the device are returned to their places. Fill the bottle with water and drain a little through the tap. This is necessary to flush the tap as there may be some detergent left in it.
The device does not heat water
Most often the cause of the malfunction is the following:
- The device is not connected to the electrical network.
- You didn’t click on the “turn on” button, which is located on the panel.
After performing the necessary operations, the indicator still does not light, check the outlet itself. This is easy to do: take any electrical appliance and connect it. If it doesn’t start working, the reason is a malfunction of the socket itself: either replace it or plug the cooler into another socket. If the cooler doesn’t start working in that socket either, you’ll have to disassemble the equipment:
- We remove the panel located on the rear panel and check the functionality of the fuse. If necessary, insert a new element.
- Again nothing happened, which means the reason is the heating element. In this case, the malfunction can only be repaired at a service center.
There is no water in the cooler taps
There are only two reasons for this malfunction:
- When installing the bottle, they forgot to remove the label.
- During operation, a plug of air appears in the container, preventing the cooler from working efficiently. Eliminating the inoperative state of the installation is simple: pump the dispenser until air bubbles appear in the water container itself.
If owners operate the cooler correctly and follow the instructions, then, as a rule, such misunderstandings do not arise. In addition, you need to check the operation of the taps every time the water in the bottle is changed.
Water flows out on its own or the faucet is leaking
If you notice that water flows out of the dispenser spontaneously , check the safety of the container. Perhaps microcracks have appeared on it. You can eliminate this error yourself. To do this, remove the damaged bottle and replace it with a new plastic container. If liquid constantly leaks, dripping from the faucet, then you cannot solve the problem yourself: only service center specialists can remove this malfunction.
Water is not cooling fast enough
Electronic coolers often suffer from this disease. This is due to the design of the equipment and technical capabilities. Cooling of one liter takes place in an hour, while the water temperature can be fifteen degrees lower than the surrounding air. Coolers do not have great performance capabilities. These devices are not high-performance devices . If you need colder water, then the cooler is installed in a cool room where the sun does not reach.
Cooler dispenser heats up poorly
The technical parameters of the coolers are to blame for the malfunction. A standard device can heat no more than five liters of water in one hour. If the liquid is poured in a larger volume, then the cooler does not have time to heat the water. This is not a breakdown of the device; it can be easily fixed if you follow the operating instructions. But the presence of scale means that the water will not heat up quickly enough. From time to time, the cooler should be mechanically cleaned. The work is carried out depending on the model and recommendations. Cooler disassembly steps:
- Using a shaped screwdriver, unscrew the screws from the back wall. A tank with temperature sensors, in which water is heated, is located at the top of the device.
- A drain plug is rigidly attached to the right, through which water is drained. On the left is another plug that is removed to drain the cold water in the cooling system.
- Taking key No. 15, you need to remove the rubber seal. Using a small shaped screwdriver with a fairly long handle, remove the 4 screws.
- We dismantle the heating tank by cutting off the clamps from the pipe, and then all the tubes.
- Then we remove the power wires, temperature sensors, and ground wires with six screws.
- If after removing the tank there is no paste on the seats, then you need to cover them with thermal conductive paste.
- After this, we begin assembly, starting with the last part removed.
Having completed the assembly, fill the system with water. Let's check how it flows. After this, all that remains is to connect the device to the network. If the indicator lights work normally, the problem has been resolved. You can watch the video in more detail about this operation. Other troubles:
- The cooler may fail if it is turned on when there is no water. The heating elements heat up and burn out.
- The pump failed. You need to connect the cooler to the network and check the operation of this element.
- When installing the cooler, make sure that there is a distance of approximately 10 cm between the device and the wall. Otherwise, the device may quickly become unusable.
How to fix a cooler faucet with internal threads
To change a clogged tap with internal thread, you need to follow the following plan:
- Unplug the device and remove the water bottle. You will have to partially disassemble the supply line, and this work should only be done with the electricity turned off and the water tank removed.
- Remove failed fittings. To fix a faulty supply line, you need to remove the shut-off device from the pipe. To do this, turn the shut-off fitting counterclockwise, moving it out of place, and twist the broken assembly from the threaded fitting or fitting.
- Buy replacement parts based on the brand of your cooler. Some models support mug pressure, others - hand pressure. If you are not sure that you understand the characteristics of your valve, take it with you to the store and show it to the consultant.
- Before replacing a part that comes into contact with drinking water, it is worth washing it inside and out. Therefore, wash it in a solution of soda or soap, under a strong stream of hot water.
- Put on gloves, pick up the washed fitting, screw it onto the thread, turning it clockwise.
Finally, you need to check how the liquid flows from the new valve. To do this, place a bottle on the cooler and open the valve. At the very beginning, air will come out of the pipe. The water will appear a little later, at first it drips in a thin stream, and then flows in a wide stream. Wait for a steady stream and close the valve. Your dispenser can now be plugged into a power outlet.
Using the same scheme, you can repair a device in which hot or cold water drips from the tap with the valves closed.
How to replace taps with external threads
If your valve stops supplying water or starts leaking when the valve is closed, proceed with the following plan:
- Turn off the device and remove the bottle. A cooler that is turned on cannot be repaired even in theory.
- Remove the back panel by unscrewing the screws with a Phillips screwdriver.
- Locate the silicone tube connecting the faucet to the faucet that is dripping water.
- Feel at the point where the fitting and the silicone pipe meet for the lock nut that presses the faucet to the body.
- Unscrew the locknut from the threaded fitting, turning it counterclockwise. If there is not enough space in the housing, then try fixing the nut and unscrewing the tap, but be careful not to twist the silicone tube. After unscrewing the nut, pull the tap, removing it from the silicone tube.
- Now, to fix the cooler, you will need a new faucet. Take the old valve and go to the store with it. Consultants will help you choose the same model.
- Don't forget to clean the valve before putting it back in place. If you don't do this, you may get an intestinal upset.
- Installation of the valve begins with unscrewing the locknut. It is put on a silicone tube, after which the valve is inserted into the hole in the housing. Then the tube is pulled onto the valve fitting and tightened with a lock nut. That's it, your cooler is now repaired and ready to go.
If these manipulations are too complicated for you, call the experts at home. They will repair a dispenser whose “spouts” are leaking water, without taking the device to a service center.
The washing machine is broken
Life hack, it may be useful to someone, but I’m not sure it will work on all washing machines. My wife started washing, the machine stopped with half a tank of water and issued E03. The forums said: 1. The pump is broken 2. The outlet pipes are clogged 3. The water level sensor is broken. There are instructions for everything about everything, how to disassemble and repair. I got lazy. First, unplug it from the socket and shake it, turn it on, the error goes away. Turned it on. 5 minutes and the error appeared again. My wife has already sat down to look at the new washing machines being delivered. And I... and I remembered my plumbing past. He pulled the drain hose out of the canal, took in more air and blew three times. The washing machine responded with bubbling in the tank. Well, the air has flowed, which means the water will flow. I turn it on, there is no error, I put it on spin and I hear water flowing into the channel. That's it, the machine has spun out and is already humming for the second wash.
gromt
4 years ago
When your water cooler leaks, it's helpful to refer to the instructions.
By looking through the cooler's operating manual, you can also familiarize yourself with options for eliminating the main causes of leaks. However, most dispenser users throw away such instructions. The real lucky ones are the owners of floor coolers with a counter-flow system. But it happens that this option also needs fixing. Often in such systems, the seal on the bottle receiver slips, or the needle falls through.
What to do if the water stops flowing altogether, reasons
Sometimes the water dispenser does not dispense water. The liquid stops flowing for the following reasons:
- the sticker on the neck of the bottle has not been removed or has been partially removed;
- an air lock has appeared;
- the water supply tube is pinched;
- There is a foreign object stuck in the system.
The empty container is removed. Install a new bottle after removing the label. The cork is removed by shaking the container. At the same time, open the tap, holding it until water flows. Foreign objects from the pipes and gaskets are removed after unscrewing the panels. You can open the case yourself only in situations where the warranty period for the dispenser has expired.
Why is the cooler leaking from below, the problem is in the tank
The seal of the water column cannot be maintained if there is a crack somewhere. In such a situation, the storage tank overflows and a puddle appears under the device. In this case, water flows down the inner, not outer, walls of the cooler. Most often, cracks in the bottle occur from below (at the bottom) and are formed during rough transportation of the container.
But sometimes microcracks appear on the side walls of the bottle. In such cases, the dispenser initially works normally, but begins to leak when the water level drops below the microcrack. If you see a puddle under the cooler, immediately check the storage tank.
If the water cooler is leaking from below (there is a puddle under the device), most likely the storage tank is full. This means that the seal of the bottle is broken and needs to be changed. But if the tank is not full, then the problem is in itself, or in the tubes coming from it. Or in the check valve, which is connected below the tank.
Cooler does not heat water
The reasons may be the same as for lack of water cooling. First of all, check that the cooler is connected to the network correctly and see if the water heating toggle switches are turned on. As for connecting to the network, the problem is trivial, but this may be the reason. It happens that the cooler is connected through an extension cord - try to do without it. Perhaps the problem will go away.
The second problem is the combustion of the dispenser’s thermal protection.
. Unfortunately, this is a common problem due to carelessness and improper use.
ATTENTION! Before turning on and checking the cooler, you need to install a water bottle!
The fact is that for the cooler to work properly and to avoid overheating of the heating element, the equipment tanks must be filled with water. The lack of water is accompanied by false activation of heating or cooling, which leads to combustion of the heating element, since it is forced to heat air rather than water. This applies not only to turning on the cooler for the first time, but also to resuming its operation if it has been inactive for some time.
Damage to heating element or thermostat
You can diagnose it yourself if you have a multimeter tester:
- Check the functionality of both thermostats, which are located on the body of the water heating tank. Relays must be short-circuited. If the relay is open, you need to press the button between its terminals. Pressing should be accompanied by a click. If there is no contact on one of the relays, then the problem is in the relay.
- Check the ohmic resistance of the heating element contacts. If the tester shows infinity, then the heating element will have to be changed.
Another common reason for a decrease in cooler performance can be scale on the walls of the cooler storage.
. This problem can be eliminated and prevented by regular (about once every six months) cleaning of the cooler, as well as by choosing water with a low salt content.
How to use a cooler correctly
To avoid breakdowns, you need to follow some rules:
- Clean the container and all equipment regularly (at least 1-2 times a week).
- Don’t forget to turn off the water cooler if the liquid in the container runs out.
- When the device is operating in cooling mode, do not use the thermostat.
- If the appliance is set to heating or cooling mode, it must not be disconnected from the power supply.
- Only purified water can be used.
- Remove stickers, labels, corks, films before using a new container.
- Monitor the air temperature in the room where the device is installed. If it is very low, the hot water tank will burst.
- Do not move the device from one place to another if it is filled with water. There is a chance of damaging the internal tubes.
Careful, careful handling of the cooler can protect it from many breakdowns and leaks and ensure its long-term operation.
To what temperature does the cooler heat water?
The operating principle of the cooler heating system is practically the same for different models. The design of such a system includes:
- storage tank for heating water (volume from 0.6 to 3 l) with thermal insulation protection;
- heating device (can be assembled with a heating container or is a separate unit). The heater power, depending on the model, is in the range of 400–1200 W;
- control board;
- 2 temperature sensors (the response temperature of the lower controller is from 70 °C to 86 °C, and the upper one is from 93 °C to 96 °C).
When the heating system is turned on, the dispenser heats the water in the cooler's storage tank until the upper temperature sensor is activated. The temperature of the liquid is brought to the value required for making coffee or tea. When the heating system is turned off, the water cools down. When its temperature drops to 70 °C, the lower temperature sensor will work and the heating equipment will turn on. The device operates cyclically. It heats up the water for a couple of minutes and then turns off for 10 or 20 minutes.
If you open the hot water tap, then instead of the flowing volume, liquid from the bottle will flow into the storage tank. This will cause the temperature inside the heating container to gradually decrease. When the temperature reaches the set value, the lower sensor will work and the cooler will quickly heat the incoming water.
It should be noted that operating the heating element without a water bottle installed will cause it to burn out. Such damage is not covered by the manufacturer's warranty. Employees of the cooler service center will easily determine the cause of the malfunction when diagnosing broken equipment, so always turn on the dispenser only after installing a bottle of water.
In order for the water cooler to work as long as possible without serious breakdowns and expensive repairs, it is necessary to follow the equipment maintenance schedule and the frequency of its prevention.
As noted above, the temperature sensors in the heating container are triggered when the water heats up to a temperature of 92 to 96 °C (depending on the model of the device).
Here you need to provide the following information:
- Based on information from a school physics course, many people know that water begins to boil at 100 °C.
- The actual temperature of water poured from a boiled kettle ranges from 90 to 95 °C.
The range of leading manufacturers includes water dispensers with a turbo heating function. If conventional models are equipped with heating elements with a power of 420 to 600 W, then devices with turbo heating use systems from 700 W. The latest version of coolers is necessarily equipped with a liquid crystal monitor, which displays the temperature of the water in the heating storage tank. In addition to the LCD display, such devices have a button for manually turning on the turbo mode for heating water.
Traditional coolers heat from 4 to 6 liters of water per hour. This performance is quite enough to provide hot water to an office with a small number of employees.
If there are a lot of people working in the room, then it is not necessary to buy several dispensers. For such cases, manufacturers produce floor coolers equipped with large heating containers. Such drives have heating elements with a power of more than 1200 W.
The appearance of powerful dispensers does not differ from standard models. Most parts for assembling cases fit both standard models and coolers with increased performance (models with turbo heating have performance ratings exceeding 12 l/h).
Pinch or contamination of the hose
This can be considered a consequence of incorrect manufacturing assembly of the device. This specifically concerns the fastening of faucets. They can be screwed on incorrectly. As a result, the tube through which water is supplied will be pinched. This in turn will block the water supply.
To eliminate the problem, you will have to disassemble the cooler. It will be difficult for a person who does not know the technical intricacies to do this on his own. Defects are often discovered immediately after purchase. If the cooler is under warranty, you won’t have to pay anything.
Types of cranes
Taps are distinguished by the method of supplying drinking water. Lever and pressure devices are interchangeable. The former are appropriate for situations where blocking accidental water distribution is important. The second ones are suitable for those who are used to using disposable cups. Push-button and keyboard analogues are made for a specific model of water dispenser. Difficulties often arise when replacing them.
Lever
To pour liquid, a person needs to use both hands. One needs to hold the cup, the other needs to press the lever. This dispensing method protects the user from burns if he accidentally touches the locking mechanism. Spare parts with a polystyrene rod are more wear-resistant.
Crane-push
The push model or push tap is easy to use. To pour water, the user just needs to press the trigger with the glass. This type of faucet should not be installed in water coolers that may be used by children. When purchasing a new locking mechanism, you should consider the type of thread.
Push-button or keyboard
These mechanisms are installed inside the housing. They are reliable. There are devices with mechanical and electromagnetic control. The first type is non-volatile. When the device is de-energized, it is possible to supply liquid at room temperature. The second type dispenses water automatically after lightly touching the button. Without power supply, the water dispenser will not work. If it fails, the entire module will need to be replaced.
The power of knowledge or the “painful” experience of the past?
Proper handling of the water cooler is at least a 90% guarantee that it will work without breakdowns for many years, so teach your household, office employees and other people who have constant access to the cooler to use it correctly. But in public places (i.e. with free access to the dispenser), you can only hope that the actions of your customers will not cause a breakdown of this equipment.
- Cooler from “A” to “Z”: installation, operation and care
- What is purifier
- Cooler failures
When can you not repair a cooler yourself?
Not in all cases you can cope with the problem yourself. An ordinary leak in a cooler often indicates a more serious breakdown that requires repair with the participation of service specialists:
- a hot water tank burst under low temperature conditions (for example, inside an unheated room);
- during the process of transferring the dispenser, the connecting tubes broke because the water from the device was not drained in advance;
- The faucet was severely damaged and must eventually be replaced.
High-quality repairs can only be made if the cause is identified. Before disassembling the water purification device, carefully read the instructions for the cooler, which indicate possible malfunctions and how to solve them.
Where to buy a quality water cooler
engages in supplies to Russia of coolers, pumps and related equipment designed for bottling water from bottles of various sizes. All equipment is supplied under the “ECOCENTER” brand.
We provide the best price-quality ratio of equipment, and also offer our partners excellent service and flexible terms of cooperation.
You can see the attractiveness of collaboration by comparing our prices with similar equipment from other suppliers.
All our equipment meets the standards established in Russia and has quality certificates. We deliver dispensers to our customers, as well as all the necessary spare parts and components in the shortest possible time.
Start of cleaning
The question “how to disassemble a cooler” is quite easy to deal with. The first step is to disconnect the computer from the network and disconnect all existing cords. The next step is to remove the housing cover from the left side, while carefully placing the unit on the right side. Next, you need to clean the internal parts of the computer from dust and foreign contaminants.
Since the cooler’s job is to properly distribute air flows, the part, accordingly, removes a lot of dust and small debris from the environment. Most of the unnecessary dust contaminants settle on the radiator and other important components.
Cleaning can begin with the most general actions, for example, using a regular vacuum cleaner. But it’s better to finish more thoroughly - wipe the parts with a napkin moistened with any alcohol solution. You can use both cologne and vodka. Any alcohol-containing substance is good because it does not react with air, dries quickly and does not cause metal corrosion (which is typical for water). Depending on how finely and deeply the cleaning was carried out, the further operation of the computer depends.
Cooler cleaning
The cooler must be cleaned regularly, regardless of heating or cooling problems. It is better to plan the maintenance of your equipment than to correct faults at the wrong time. For cleaning you will need: 1. damp cloth or napkin 2. detergent 3. dishwasher (new) 4. screwdriver Unplug the cooler and remove the water bottle. Wash the surface with detergent and a sponge. Pay special attention to the needle on which the water bottle is placed, being especially careful not to damage it. The next step is to thoroughly wash the tray under running water and wipe dry. Then the cooler is assembled in the reverse order and tried to be plugged into the outlet. If the cooler starts working properly, then the reason was contamination.
Remember that you need to clean the cooler regularly to avoid pathogenic organisms getting into the water.