One of the most popular materials for quickly connecting two objects or surfaces is double-sided tape. The areas of its application are so wide that different types of adhesive tape with a wide variety of performance characteristics have been created.
How to make double-sided tape?
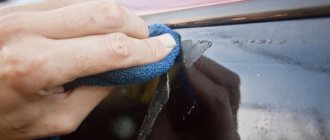
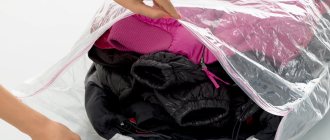
Double-sided tape is used not only in electrical engineering, but also in everyday life.
Indeed, it is very convenient for them, for example, to glue mosquito nets to windows or perform any other similar work. However, often there is no double-sided tape at hand. You can always purchase adhesive double-sided tape on the website https://greypack.com.ua/tovar/klejkaya-lenta-dvuhstoronnyaya/. If you cannot do this for some reason, we strongly recommend that you read the publication below. It will allow you to create double-sided tape from ordinary tape.
Another method with glue
This time without adhesive tape: just cover the back side of the drawing with glue and wait for it to dry. When the time comes to stick the craft, we wet it a little and the sticky layer “comes to life.” And it’s even easier to immediately place the drawing in the right place after applying the glue.
All these methods are inexpensive and convenient, but with double-sided adhesive tape this work will be even more enjoyable and faster.
Source
What is double-sided tape made of?
The industrial version of double-sided tape (the one that can be purchased at construction markets and on the Internet) can be of several types:
The first option is the most convenient to use. The fact is that the tape itself, on which glue is applied on both sides, is made of foamed polymer. It can be an excellent sealant.
It is for this reason that such double-sided tape is often used when repairing plastic windows (and not only plastic ones). The tape makes it possible to temporarily fix, for example, a built-in frame with a mosquito net, which falls out due to breakage.
Double-sided masking tape has virtually no load-bearing capacity. It tears like ordinary paper. The presence of adhesion also made it possible to find a wide range of applications for it.
Types and their features
Foam based adhesive tape . It has the widest scope of application, as it allows you to reliably glue surfaces with completely different structures, even those that have unevenness.
On a thin base . Often used for creativity, such as modeling. It is perfect for gluing a nameplate on a car. Making stickers without thin double-sided tape is quite problematic.
Fabric . Used when working with floor coverings.
Installation or construction double-sided . It has a more durable structure, is better suited for outdoor use, and is also more resistant to humid environments and solvents.
Heat resistant . Used for fixing electronic components, installing chimneys and other structures that must withstand high temperatures.
Transparent double-sided . It is especially often used when repairing phones to fix the touchscreen.
Silicone . It differs from others in that it has low initial adhesiveness and sets completely within 12 hours. It is used when strong fixation is required for a long time, for example, when installing outdoor advertising.
Despite the variety of types of double-sided tape, there are only two types of glue:
We create double-sided tape from ordinary adhesive tape
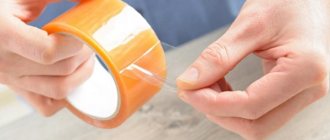
Let's say you have a fairly large roll of ordinary polymer tape at home. It takes a little trick to turn it into double sided. Initially, you should separate the edge of the tape by at least 3 centimeters.
To create a double-sided adhesive agent, it is better to use an ordinary pencil. We place it on the back side of the separated edge of the tape (it is not adhesive), and begin to wind the tape around the pencil until it begins to stick to itself.
Just a few turns are enough. All that is required now is to cut off the resulting adhesive cylinder. It can glue plastic bottles quite firmly.
There is another way. You will need a clean surface (a table top is fine). A very small part of the tape is pasted onto the table and then also wrapped inside out.
The result is a long strip that is double adhesive.
The video will demonstrate how to quickly and easily make double-sided tape from ordinary tape:
Source
How to glue double-sided tape ZM
The process itself is very simple, but before performing it you need to evaluate the “front of work”.
Fixing the carpet with tape
The correct way to do this is as follows.
- The less adhesion a surface has, the more difficult it is to stick something on it. Thus, wood material does not require special “power” of the tape, glass also holds it well, but tiles, and especially plastic, cannot boast of such abilities.
- The type of glue matters. Thus, rubber is chosen when it is necessary to quickly glue objects with low adhesion ability, but at the same time it is not resistant to ultraviolet radiation, so it is not suitable for attaching anything to a car. Acrylic glue is UV resistant and does not bond as quickly, but over time the strength of the connection only increases. An excellent option for fixing a mirror in the bathroom or a display in the room.
- Before work, the surface must be cleaned and treated with a clean solvent - hexane, isopropanol.
- Then the ZM adhesive tape is glued to the surface in the desired areas. To improve contact, the material should be pressed firmly.
- Remove the liner and attach the object to the adhesive layer, pressing for a few seconds. If we are talking about acrylic glue, then it is better to use the item - a towel holder, a shelf - after a few hours.
At what temperature to glue double-sided tape depends on its type and purpose. In general, you cannot use the tape even at -5C or above +38C, however, special products have a wider temperature range.
How to make double-sided tape with your own hands at home using regular or other tape?
Double-sided tape is not one of the essential items that you keep on hand, but this useful household item can come in handy at any time! What to do if this happens, and all stationery and construction stores nearby are closed? Fortunately, you can make double-sided tape at home from ordinary adhesive tape, which is found in every home, but is it worth the trouble? Let's discuss what is the advantage of the fastening material in question over others.
Terms of use
Regardless of the type of double-sided tape and its adhesive base, the most important thing is to glue it correctly:
- First of all, it is necessary to clean and degrease the surfaces to be bonded. The less dust and grease traces there are on them, the more reliable the fastening will be. The most optimal means for this is alcohol, medical or technical, it degreases well, cleans and evaporates quickly. It is very important to make sure that after cleaning there are no traces of alcohol left on the surface, as it easily dissolves the glue. To do this, it is enough to wipe the surface dry with a paper napkin after treatment.
- Then, without removing the top layer, you need to stick the tape to a surface that is larger or less movable. For better adhesion, you can smooth the tape with a hard roller.
- After this, you can begin to directly connect the objects: remove the top protective layer of double-sided tape and apply it. At this time, it is important to be careful and not allow the adhesive surface to come into contact with your fingers, otherwise the result of the final work will be worse.
- For better fixation, press the surfaces firmly against each other for a while or use a roller again.
- In cases where particularly strong fixation is required, it is recommended to use a primer that increases the adhesiveness of the tape.
If something goes wrong during the process, the tape will have to be dismantled. How to peel off double-sided tape, safe means and methods:
- the tape can be removed well when heated;
- There are many special means for removing tape;
- glue residues can be easily washed off with alcohol, gasoline or WD-40;
- When removing tape from plastic, you should not use acetone; if the surface is glossy, you should give preference to oil.
Double-sided tape of any type is a convenient and practical tool. With a minimum of effort and time, it allows you to connect different materials with each other. A wide range of products ensures that there is a solution for a specific practical problem.
What is double-sided tape and how is it made?
Double-sided tape is a universal fastening material. Unlike ordinary adhesive tape, this product has both sides working, which significantly expands the scope of its use in everyday life. This tape is used for minor repairs. It is used to attach decorative elements (paintings, mirrors, appliques) to walls, furniture and other surfaces. Also, adhesive tape is often used in scrapbooking and other types of needlework, etc.
How and from what is adhesive tape made so that it performs the fastening functions assigned to it? There are 2 types of ready-made double-sided adhesive tape: baseless and with base. In the first case, the adhesive strip is covered on both sides with wax paper. In the second, an adhesive layer is applied to a base made of fabric, paper or polyethylene foam. Obviously, making such adhesive tape yourself is not at all difficult, if only you had suitable blanks at hand.
How to apply stickers correctly?
All pictures offered by brands are glued differently. Therefore, let’s dwell on this point in a little more detail in order to understand the essence of the process and the sequence of actions. But first, let’s note the difference between gel polish techniques and the usual type of coating, which does not require a special drying lamp.
For gel polish
Hybrid coatings, which combine the properties of both gel and varnish at the same time, have a number of features that are reflected in the technique of fixing the sticker. For example, without a lamp they do not dry at all, and if it is chosen incorrectly, then such a coating may not last long. When the technique is followed and the lamp has the required power, the decor lasts without the need for correction for about two to four weeks. Stickers have to be glued on top of several layers of special products provided by the technology for working with hybrid varnishes. In addition, this procedure from hygienic manicure to the very end of work is very long.
For regular varnish
Conventional coverings, which women have been using for a long time, have less wear. They are also inferior in color to their hybrid counterparts. However, stickers can be applied to them much faster, which is very convenient in the fast pace of modern life. And there are much fewer layers of material here, although, as in the version with gel polish, the process will require sealing the picture to increase its durability. However, regular polish often begins to chip off the surface of the nail already on the second day, and therefore many women prefer not to waste time on constant correction, but to use stickers and gel polish.
Mermen
When working with gel polish, decals are cut out according to the shape of the nail.
You should not adjust the sticker at the top: it is important that it lies evenly at the base, in the cuticle area. The top edge can be removed later, but if it is cut off, it may not be long enough
- A base layer is applied to the prepared nail, which is then dried in a lamp. After this, a pigmented white gel polish is applied on top of the base and the coating is dried again.
- Now put a little more base on the brush and cover the nail with it again, not forgetting about its end. This time the coating is not dried.
- Take a picture, place it face up on a wet napkin, wait about 30 seconds.
- After this, use tweezers to remove the film from the paper backing and place it on the nail and straighten it.
- Next, the decor is dried, after which it is sealed with layers of base and top, drying each of them for 2 minutes in a lamp. Instead of a base, you can use a top as a backing for the sticker.
Foil
Working with the tape is done on the basis of gel polish.
- After the nail is prepared for a decorative manicure, apply a base, dry it, then cover the nail with the selected pigmented varnish. The coating is dried again. If the varnish has poor pigmentation, it is applied not once, but twice, and each layer is dried until the material is completely dry.
- After this, they take a special glue with a white viscous mass, intended specifically for such transfers. Cover the entire surface of the nail with glue.
- To prevent the mixture from flowing behind the side ridges and cuticle, a special protective silicone agent is applied to the skin around the nail just before painting begins. It dries and forms a thin film that can be removed at the very end of the work.
- There is no need to dry the glue in a lamp; it will dry quickly on its own.
- As soon as it becomes transparent, take a cut piece of film and transfer the picture, pressing it tightly to the surface of the nail.
- After this, the design is sealed with a layer of top coat and must be dried in a lamp.
Self-adhesive
Self-adhesive pictures allow for work with both gel polish and regular coating. To stick them correctly, a dry working surface is important. You should not experiment with undried topcoat, it is useless. The sticky layer of such a sticker needs something to grab onto. The whole point of the work is to separate the picture from the backing and glue it onto a nail painted with colored varnish, pressing it well.
However, this technology has one caveat. Many women complain that the transfer quickly breaks off from the base. Masters note that after the backing for the sticker is completely ready and dried, it is necessary not only to glue the sticker properly, but also to give it two to three minutes so that it takes on the rounded shape of the nail. Only after this can the sticker be sealed with a layer of topcoat to dry or with transparent varnish (when working with regular pigment).
How to make double-sided tape with your own hands from ordinary tape?
To make double-sided adhesive tape on your own, just find ordinary tape at home and follow the instructions step by step. To make homemade double-sided adhesive tape you will need:
The result is a piece of tape that is 2 times narrower than the original one, but sticky on both sides (which is what was required). However, is the resulting fastener as good as its industrially produced counterpart? What happens if you use both tapes under equal conditions (on the same surfaces, without primers, etc.)?
Second manufacturing method
There is another way to make decorative tape. To create a more artistic and beautiful adhesive tape you will need:
You need to stamp the design on a napkin using an ink pad and let it dry. Before use, separate the lower layers from the napkin. Glue the patterned layer onto the desired surface using pencil glue. For greater durability, the design can be covered with a layer of finishing glue.
As in the first method, you can glue the top layer of a napkin with a pattern to double-sided tape and cover it with decoupage glue to add strength.
Pros and cons of homemade double-sided tape
Speaking about the advantages of homemade adhesive tape, we can mention:
It is impossible not to talk about the disadvantages of homemade fastening material. So, among the disadvantages of self-made adhesive tape are the following:
What is better - purchased or home-made material? In the vast majority of cases, a clear advantage remains with the industrial product, but when it is impossible to purchase a ready-made tape for some reason, a homemade one will serve as a completely worthy replacement.
Source
How and where to store homemade tape?
Now that you understand how to make decorative tape, it is important to know how to store it correctly. The main task is to maintain the stickiness of the tape, so you should protect it from direct sunlight. In addition to bright light, adhesive tape is afraid of heat from radiators and other heating devices. If exposed to temperature for a long time, it can simply “melt.”
It is better to store the finished tape in a folder file or by rolling it into a roll and securing the end with a paper clip. After which it should be put away in the closet. It can also be stored in a special tape dispenser, which is sold in office supply stores. This device has one more advantage - it is equipped with a special cutting edge that will simplify working with adhesive tape.
Source
How to make bulky double-sided tape with your own hands
I want to tell you how I make voluminous double-sided tape from cardboard. In principle, everything is already clear, there is nothing complicated about it, and I think many people do this, but I decided to write this small master class, maybe not everyone has figured out how to do this yet.
Factory-made tape has a habit of running out very quickly and it’s not always possible to get it, so one fine day I ran out of it and had to get out.
We will need the following materials:
- cardboard from any packaging that suits your thickness (I still have covers from notebooks, I use them); - double sided tape; - scissors; - PVA glue.
It’s very simple, we take cardboard and glue it with tape on both sides. I do not stick the tape end to end, but so that there remains a strip of cardboard without tape, then it will be easier to pick up the protective layer with your nails and tear it off before gluing it to the decor.
I cut it into strips like these.
And, when I need it, I cut them into squares, triangles, thin strips, depending on the current need. By the way, they are much easier to cut than real tape; you can cut even very thin strips.
If the cardboard is not thick enough, then I glue it in two layers and put it between newspaper under a press (like a herbarium) so that the cardboard dries evenly and does not ripple.
As a press I use a piece of glass and plastic bottles filled with sand and water. Both dumbbells and abs are “2 in 1”.
This is how thick the strips of bulk tape are.
There are a lot of layers to this card and I especially enjoyed using this type of tape. I used the thinner one for the wings, tail and neck to give volume, but so that the overall height was not too large, and I already used the thicker tape for gluing the rooster and numbers to the base of the card.
This is how my master class turned out. I hope it will be interesting and useful to someone. Thank you very much everyone for your attention.
Thanks for the useful idea! It’s very timely for me now: the shops are far away, and I don’t have time to run around them.
Yes, when something ends in the creative process, it is very frustrating. But in principle it is not always possible to find it in stores, only via the Internet, and this takes a long time ((
Very useful) good lifehack
Great idea, Lyudmila, thank you very much for sharing!