Yoga mat cover
Many people devote their free time to yoga classes, individually or in groups.
A yoga mat is necessary, but it is very inconvenient to transport. I’ll tell you honestly that not all rugs are initially sold with a cover or carrying bag. With minimal sewing skills, you can easily sew a rug cover with your own hands. Yoga Mat Bag
Material
A durable material is suitable for such a bag; it is advisable to choose a color in accordance with the color of the mat itself.
Cutting
To do this, use a regular ruler and chalk, but it is advisable to use roller scissors. If you want to sew a closed bag, add 10 cm to the length on the pattern.
It is important that the blank for the belt is the required width and length. Choose a place for the belt on the fabric so that the pattern is solid.
Belt
For the belt, take a long piece, fold it in half and sew it on a machine.
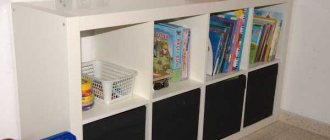
Pockets
The pockets can be used for keys, yoga cards, and bottles of water.
Make a rectangular piece, taking into account seam allowances. Then trim the corners.
Add a clasp or snap to the brown pocket to prevent items from falling out.
How to sew pockets
Base
Sew the base from the inside first, then sew from the outside.
Kuliska
To create a drawstring, you will need the following steps - step by step instructions:
- fold the fabric 1.5 cm wide and iron it;
- unfold the body of the bag and make holes for the cord,
- sew the product on the sides,
- insert the lining into the yoga bag and sew,
- Use a pin to pull the cord through the hole and secure it.
What is the difference between a fitness mat and a yoga mat?
Zoya Prokhorova 10 3 years ago Head of Communications Group for the Sportmaster brand
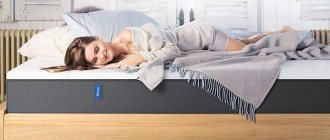
A yoga mat is the main and, one might say, the only accessory that is used in yoga. It’s hard to even call it an accessory; the mat is your space for doing yoga. It is important enough that this space be comfortable, which is why there are more selection criteria for a yoga mat than for a fitness mat. This is the main difference.
First of all, the yoga mat must be suitable for your height and dimensions. It's difficult to do any asana when your feet don't fit on the mat. Therefore, the optimal length of a rug is a person’s height plus 15-30 cm. In width, a 60 cm rug is enough for an average person, 80 cm is enough for a person with a larger build, or for those who like to be more free-spirited.
The thickness of a yoga mat is 3-6 mm; with a larger thickness, stability in performing asanas is lost. Fitness mats are usually thicker and softer, where cushioning and comfort are more important.
Another important criterion is the “stickiness” of the mat, i.e. its grip with the floor and with the body of the practitioner, so that in asanas the arms and legs do not move apart, and the mat itself does not slide on the floor. Otherwise, the practice may end in injury.
Well, moisture absorption. This is a particularly important criterion for so-called hot practices: the wet surface of the mat slips, creating discomfort.
Follow these criteria when choosing a yoga mat. Do not do yoga on fitness mats, it is at least uncomfortable, and at most dangerous.
Necessary tools and materials for sewing a yoga mat bag
Any product can be sewn easily and quickly if everything is prepared in advance. High-quality materials guarantee long-term use of the accessory:
- A durable fabric is suitable, preferably with water-repellent impregnation. For sewing, half a meter of fabric 1.5 m wide will be enough;
- A frame with a jumper for adjusting the length allows you to change the size of the belt for ease of wearing. It can be metal or plastic;
- A zipper closure will protect the contents of the bag in bad weather;
- zipper for pocket.
Most modern needlewomen have a sewing machine. When sewing in a zipper, a special foot is useful; it allows you to perform the operation quickly and accurately. Threads for sewing should be synthetic or mixed; they will ensure the strength of the seams and will not fade in the sun.
Where to begin
I've found that I'm more likely to stick with a new habit if it's as convenient and comfortable as possible for me. So I came up with a bag that fits a yoga mat perfectly. And with such a carrier it will be much easier for me to get to class. This DIY bag is super easy to make (it's really just a big rectangle with handles) and I guarantee even a beginner can sew it up in no time.
Materials:
- 2 meters of medium weight fabric (I used cotton fabric, which is similar to lightweight canvas);
- thick braid or strap of any type for handles (you will need from 1.5 to 2 m);
- sewing machine;
- threads to match the fabric and handles;
- iron and ironing board;
- tailor's pins;
- scissors;
- tape measure;
- tailor's chalk.
Master class on how to sew a bag for a yoga mat with your own hands
To create a pattern, two dimensions are required - the length and diameter of the roll. The cut of the bag consists of the following parts:
- two circles - with the diameter of the rolled rug plus 5 cm. An increase is given for the seam width of 1 cm and the free position of the rolled rug in the bag;
- one rectangle - with a length (equal to the length of the rolled one plus 7 cm) and width (equal to the circumference of the previous part);
- blank for a bag handle strap 1.5 m long and 10 cm wide.
Sewing begins with stitching the strap. If the fabric allows, you can prepare the piece using an iron by ironing the seam allowances inward. One end of the stitched strap is threaded into a frame with a jumper to adjust the length; a prepared piece of strap 10 cm long is threaded into the frame without a jumper.
Kate Sewing Blog
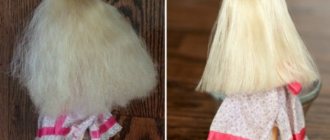
After class, the yoga mat is hidden in a cover - away from dust and mechanical damage. The case will be useful for transporting the mat if you attend classes at a club. Even a beginner can sew such a cover in a few hours.
Backstory: I got a new yoga mat. And I decided to sew a new cover, because the old one had many shortcomings.
What I needed from a new case: - one-piece cut, no mesh; - a well-sewn handle that is difficult to tear off); — bright reflective color (so that it can be seen at pedestrian crossings); - protection from rain and snow.
If this is what you are looking for too, read on.
I want to draw your attention to the fact that such a cover can be sewn even if you do not have a sewing machine.
- A rectangle of fabric (thick, you can take either linen or cotton, but then the cover will get wet) - cut 70 cm x 40.
- Rectangle of fabric - 40cm x 6cm (*edging)
- Fabric mug - diameter 12 cm (*bottom).
- Belt tape - 1 m.
- Cord - 70cm.
! Allowances of 1 cm are taken into account!
1. Tie in the long edge
Fold up each long edge of part #1 by 0.3-0.5 cm. It is better if you use a special foot.
Sew on the edging for the lace
Sew on the “edging” where the lace will be threaded. To do this, attach parts 1 and 2 (from the list above) with the right sides on. Sew at a distance of 0.5 cm. Unscrew the facing and fold it in half. Then turn up the long edge of the facing by 0.5 cm. And stitch as shown in the diagram below.
Make sure there is enough space for your lace.
You can use triple straight stitch everywhere.
3. Sew the long edge
Fold the rectangle lengthwise, right side inward. Sew with a straight stitch. But! Do not reach the edge approx. 7cm.
4. Sew on the top of the handle
Apply one edge of the belt tape to the place where the top diverges. Sew very tightly. Don't forget to remove the arm platform from the machine.
5. Sew the bottom
Before sewing the bottom, attach the bottom of the handle. Turn the “cover” out. Place the bottom (of the mug) inward, like this:
Sew well the bottom of the handle.
Sew in the place where the pin is now)
6. Retract the cord. Voila!
You can also make
a tightening so that the rug does not unwind.
Bag base
To start, cut two rectangles measuring 55 x 70 cm.
Place the two pieces together with the right sides of the fabric facing inward and stitch around the perimeter with a seam allowance of about 1.5 cm. Don't forget to leave a small gap 20-25 cm long to turn the future bag right side out.
Trim the excess at each corner diagonally close to the seam and turn the piece right side out, carefully pulling the fabric through the hole you left in the seam.
Fold the seam allowance in the gap that you left for turning inside and iron it so that it does not protrude beyond the seam line. Sweep the part, to do this, sew a stitch “forward with the needle” along the entire perimeter, moving the fabric away from the seam as much as possible so that it does not form a fold. Iron the bag and remove the basting threads. To be sure, the gap can be closed with hidden stitches.
Sit down at the machine again and stitch a rectangle along all sides, this time without gaps, at a distance of 0.5 cm from the edge.
Why is it necessary to store a rug in a case?
A cover designed for a yoga mat is a necessary accessory that protects it from various external damages. Why is it important to have “clothes” for the doormat?
- It's hygienic.
- Any sports mat absorbs not only a person’s sweat, but also his energy.
- Using someone else's or a government-issued rug is against the rules of hygiene and you are charged with a different, not always positive, energy.
- The rug will always be aesthetically pleasing.
- Comfortable to wear.
- Great for moving long distances.
Case selection criteria
The range of covers and bags for rugs is currently quite rich. It is not easy to choose a high-quality and comfortable case for yoga practice. But, following certain criteria, you can easily cope with the task.
It is important that the size of the bag matches the size of the rug. If you order it from an online store, you need to carefully read the specified parameters and try them on for your rug. When the length of the cover is less than the width of the rug, it will look ugly, which will cause inconvenience. But it’s very convenient if you buy a slightly larger cover, because this way the mat will easily fit and you can put something else in it.
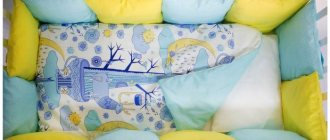
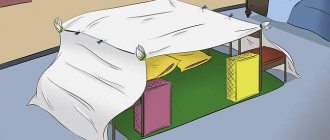
Instructions for sewing a developmental mat
Decide on the size of the rug. It will depend on the available space (not every mother will be able to allocate an area of 2x2 m in an ordinary apartment) and content. Basically, the sizes of developmental mats vary from 1x1 m to 1.5x1.5 m. Draw a sketch of the rug. It’s better to immediately think about the color scheme and complementary details. Maybe your developmental mat will be divided into developmental zones or will be a transforming mat. Calculate how much fabric you will need for the main fabric and additional parts (sewn on, attached with Velcro, buttons, snaps, etc.). The underside of the rug can be made of smooth, non-staining fabric or even oilcloth. In the latter case, it will be easy to wipe with a damp sponge. The main part of the rug should be made of natural, safe, bright fabrics of different textures. It can be flannel, velvet, fleece, silk fabrics
It is important that the fabrics do not fade, otherwise your rug will look pale after the first wash)) Select the accessories. All accessories for a developmental mat must meet safety requirements
It is better to take beads unpainted; they should not be fragile, because a child can try them “by tooth.” Look for plastic tractor zippers, not metal ones. Choose larger pull tabs on the zippers (it will be easier for small fingers to remove them). It is possible that you will have to purchase some additional details: rattles, a mirror separately. All finished appliqués (even those with adhesive) will need to be sewn on. Rug filler. You can use padding polyester as a filler for a rug, but then you will have to quilt it with the main fabric (when washed, non-quilted padding polyester tends to bunch up). It’s easier to choose thin foam rubber for the filler. It will keep its shape better. Cut out the fabric. Baste and stitch the main pieces of the top of the rug. Sew all the additional details into the right places. Sew securely, kids manage to tear off even what an adult can’t do, so don’t skimp on threads. Assemble the top and bottom parts of the development mat and place the padding polyester (foam rubber) inside. Sew up the edge. Your mat is ready.
Addition:
If you can later hang the rug on the wall or want to attach it to the crib frame, then at the assembly stage, think about and sew loops to one side of the rug. If you want to make soft arcs on the rug for hanging toys, then you can use either halves of a children's plastic hoop or pipe insulation made of Porylex (a material similar to foam rubber in the form of a hose).
Case-bag
A yoga bag is a great choice for storing and moving your mat. The case is generally light in weight, made of thin material with a minimum number of pockets and no zipper.
A yoga bag has its advantages:
- made from more durable fabric;
- with zipper;
- many pockets, sometimes with secret compartments;
- comfortable to wear the mat.
A yoga bag is often used for outdoor events.
Usually it contains not only a rug, but also other things necessary for a person. What to choose? It all depends on the person’s goals and the volume of the rug.
Choosing a rug
When choosing a mat for yoga or aerobic exercise, you should pay attention to its dimensions, the material from which it is made, and texture
Material selection
Yoga mats are made from the following materials:
- Latex models. They are preferred by experienced athletes, since natural rubber prevents slipping and is also an environmentally friendly material that does not allow cold to pass from the floor to the body. But there are also disadvantages: such a product wears out quickly (compared to synthetics) and is heavy.
- Thermoplastic products (TPE). Such decisions are rational for measured training. This model is easy to roll out, but it does not come back. The product has good adhesion to any type of floor covering. The material is pleasant to the touch.
- Made from cork wood. It has good absorbent properties, which prevents the accumulation of sweat and the body sliding on the floor. Moisture is well absorbed because it is collected by the pores of the material, which can be natural or artificial. The material has low thermal conductivity, which makes it possible to exercise on a cold floor. To prevent slipping there is a rubber coating.
- Made from PVC. They are widely used among tourists. The well-known “foam” is used not only for training in the gym, but also for going out into nature. The product has good wear resistance, regardless of the intensity of exercise. Polyvinyl chloride is light in weight and inexpensive, which is its main advantage. But if the top layer is destroyed, the product will begin to absorb dust, from which it will not be easy to clean. If you take care of your inventory, the likelihood of such a situation occurring is minimal. Rolled “foams” often remain in this state and, when rolled out, roll up again.
- Made from cotton. To prevent the body from slipping, the bottom layer is made of rubberized material. Such models are soft, so even a child can exercise comfortably on them.
- Jute rugs are an excellent solution, as this material is 100% environmentally friendly. The equipment is soft and does not slip. This product is ideal for those who have practical experience in yoga.
Dimensions and weight
When doing yoga, you often have to take lying asanas, so you need to choose a product according to the person’s height, adding another 15 cm. For fitness classes, you can choose a model 220 cm in length, so that it is comfortable to do different movements.
Almost all models have the same width with a slight difference of 2-3 cm. The thickness range of products can be from 3 to 10 mm or higher. Often they choose a product that is comfortable for a student who does not yet have experience standing firmly on his feet in different poses. For beginners, products whose thickness varies from 4 to 6 mm are suitable, while experienced instructors should take a closer look at mats with a thickness of 3 mm.
The weight depends on what material the mat is made of and what size it is. When choosing, they usually focus on the weight of the person who will be exercising. A simple calculation says: if a person’s weight is up to 60 kg, then the weight of the product should not exceed 1.5 kg
It is also important how intense the classes will be. A yoga mat has less weight than a fitness mat
Rigidity
What rigidity of the product to choose, according to experts, should be determined by the athlete himself. Most often, soft ones are chosen for yoga, and hard ones for fitness. You can find out how hard the rug is by studying the following markings:
- universal models that are the golden mean of rigidity - Mind Body;
- the mat with the greatest rigidity is designated Hab Mats;
- products with medium hardness and good shock absorption are designated Workout Mats.
Marketers help simplify the choice, thanks to which sporting goods stores have ready-made kits and products made from high-quality materials.
Structure
There are 2 types of structure:
- With closed cells. This mat will be useful for those who practice static yoga, for example, the practice of hatha, pranayama, meditation, yin yoga. Closed-cell products have good stability and absorb less moisture.
- With open cells. Such models will be appreciated by lovers of intense yoga. Among these types of mats are Vinyasa, Ashtanga and Bikram. It is comfortable to work on such products, as they have great stickiness, absorb moisture well and are incredibly soft. Their absorbent properties can be compared to a sponge. These features allow open-cell rugs to absorb various bacteria and contaminants, but they must be constantly cleaned. Most often, such models wear out faster than closed ones.
DIY rug bag
If you do not have the opportunity to purchase a ready-made bag for the rug, you can make it yourself. How to quickly sew a cover for a yoga mat with your own hands? We offer a step-by-step manufacturing method:
- Prepare dense matter. If its width is 150 cm, then its length is 50 cm.
- Roll up the rug and measure its dimensions. Add 6 cm to the circumference for seams and a loose fit.
- Measure the length and add 7 cm (2 cm for seams, 5 cm for gathering on both sides). The result will be 12 cm.
- Cut a rectangle for the handle and fold the material inside in four for better density.
- Sew the handle at such a distance that it is comfortable to place the bag on your shoulder.
- Fold the fabric for the base of the bag and make a stitch, 2 cm away from the top (room for the braid).
- Turn the fabric to the wrong side and sew the side seam. Do not sew holes on the sides, for ease of retracting the tape.
- Fold the bottom of the bag for the rug into quarters and sew it up.
For example, in finished form:
- product length – 75 cm;
- handle length - 60 cm;
- width – 5 cm;
- braid length – 87 cm;
- fabric width is 40 cm.
Another option for sewing a bag for a rug can be seen in the video clip:
Attach the handles
Cut two pieces of belt about 90 centimeters each. Attach each piece to the short side of the rectangle. The beginning of each segment should be about 15 cm from the edge.
Lost weight: what Sofia Tarasova sacrificed for the sake of “VIA Gra” (new photos)
Women's jeans: before you buy them, you need to pay attention to one detail
Rare shot: Viktoria Isakova showed her grown-up daughter from Yuri Moroz (new photo)
Secure the belt with pins. Repeat the same steps on the other side, try to position the braid as symmetrically as possible.
At this stage, try on the bag: this way you will understand whether it is comfortable for you to wear. If necessary, adjust the position and length of the handles so they are as long or short as you like.
Sew the handles along both sides from the edge of the rectangle to where they end. Be sure to change the thread in your machine to match the color of your belts!