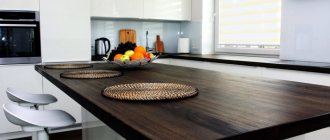
Features of gluing edges to tabletops
To perform high-quality gluing of the material to the tabletop, you need to take into account many nuances, since this process has its own characteristics. Proper preparation will allow you to avoid mistakes during the edging process and will allow you to get a high-quality result, which, firstly, will perfectly cope with its functions, and secondly, please the eye with an aesthetic appearance. Next, we’ll look at what an edge is, why and where it is needed, as well as other important features.
To perform high-quality gluing of the material to the tabletop, you need to take into account many nuances, since this process has its own characteristics.
What is edge
Furniture edging is a strip of melamine, polyvinyl chloride, ABS plastic or other material that acts as decoration and a way to protect the product. if the furniture is made from cheap materials, then you cannot do without such an addition, otherwise it will not be possible to avoid the effects of formaldehyde resins on the health of household members, and also to protect the furniture material from moisture. If the edge has been glued, the service life of the product increases.
Furniture edging is a strip of melamine, polyvinyl chloride, ABS plastic or other material that acts as decoration and a way to protect the product.
Edge Features
Furniture edging is usually understood as a strip made of melamine, polyvinyl chloride or ABS plastic. It can also be made from another material and act as decoration or a way to protect furniture. It leads to an increase in the service life of the product. Many owners of houses and apartments are convinced that the product is used solely for beauty, but this is not entirely true. Of course, it has a decorative function, but it also protects furniture from moisture penetration.
Due to the development of advanced technologies, modern manufacturing companies produce different edges. However, not all of them are optimal for attaching at home. Melamine-type tapes are produced with a width of 19-54 mm, and their thickness ranges from 0.2 to 0.4 mm. This means that absolutely any countertops can be refined. There is also an impressive selection of decorative solutions and shades.
Why do you need an edge?
Many people believe that this element is necessary solely for beauty and a neater appearance. In reality, the edge, of course, performs a decorative function, but this is not its main purpose. The main task of the edge is to protect furniture from moisture. The kitchen is a wet area in the house, and therefore this aspect is especially important here, and closing the ends with the help of such a trick is a necessity. In addition, if the ends of the product are covered, then formaldehyde emissions from the chipboard material will not harm human health.
In reality, the edge, of course, performs a decorative function, but this is not its main purpose.
There is an alternative option that can be used instead of adhesive edges - these are end caps. Their installation is a fairly simple process, but some elements in this case may look superfluous and harm the appearance of the product.
There is an alternative option that can be used instead of adhesive edges - these are end caps.
Where should edging be done?
As mentioned earlier, edging is necessary not only to make the product look beautiful. In addition, it helps protect furniture from moisture and households from exposure to chemical elements. Based on this, we can conclude that edging is necessary:
- in the kitchen - during family meals, household members should not inhale fumes of resins that are in the chipboard material, as well as in the kitchen space there is high humidity and water is often used, therefore, in order to avoid premature failure of furniture, swelling of surfaces from moisture and other unpleasant consequences from interaction with moisture, be sure to trim the ends with an edge.
- in living spaces - a table made of chipboard can be in a children's room, and children will study lessons behind it, or it can be in a study or office - it doesn't matter, in all these cases safety and protection from formaldehyde is important, which edging can provide.
Why do you need to process the ends?
We list the main reasons to process the ends:
p, blockquote 5,0,0,0,0 —>
p, blockquote 6,0,0,0,0 —>
p, blockquote 7,0,0,0,0 —>
- Aesthetics. Leaving your countertops untreated is like brushing only your upper teeth and not your lower teeth. A lot of time is spent in the kitchen, and it is important that the furniture and surroundings bring only positive emotions.
- Extending service life. Here we are talking not only about mechanical damage, but also about splashes of water, clouds of steam and simply temperature changes. The edge seals the end and protects it from all negative influences, extending its service life.
- Health protection. The fact is that formaldehyde resins, harmful to human health, can evaporate through the open edge of a cheap chipboard tabletop, so finishing the ends is simply necessary.
- Masking of defects. If the edge of the tabletop was damaged during transportation (which happens very often), then a correctly selected edge will hide everything.
Types of furniture edges
There are several types of edges that can be used to decorate the ends.
Paper with melamine
The best option for DIY home edging. It already has an adhesive layer, making the process much easier. It is easy to glue such material, but in terms of its performance characteristics this option is inferior to other types of edges.
davThe most optimal option for DIY home edging.
PVC
PVC edges are strips of polyvinyl film. Their direct purpose is to seal the ends of panels and countertops. There is no adhesive layer provided here, and it will be difficult to glue such material with your own hands.
PVC edges are strips of polyvinyl film.
ABS (ABC) plastic
But this type of edge will be easy to glue on your own, because there is already an adhesive layer, which greatly simplifies the task. It is for this reason that this option is most popular in use.
But this type of edge will be easy to glue on your own, because there is already an adhesive layer, which greatly simplifies the task.
Veneer
Veneer is not at all a popular material for edging furniture. It is a section of wood that has been shaped into a strip and painted. More often, such an edge is used in furniture production and exclusively for edging veneered furniture products. To use such material, you need to have a lot of honed skills, knowledge about working with this material and experience. Such material is expensive. In general, there is no reason to use veneer for DIY edging at home. However, it is necessary to know about the existence of such a variety so as not to accidentally acquire it through ignorance.
To use such material, you need to have a lot of honed skills, knowledge about working with this material and experience.
Acrylic
Such products are made of transparent acrylic. A pattern is applied to the reverse side. Due to the fact that there is a layer of polymer on top, a feeling of a three-dimensional pattern is created, which looks very impressive. For this reason, this variety is called 3D edge. You should not use this material at home. This is too complicated from the point of view of the technological process, and there is no practicality in using such material. As a rule, it is used in professional furniture production if it is planned to make furniture with unusual design solutions.
Due to the fact that there is a layer of polymer on top, a feeling of a three-dimensional pattern is created, which looks very impressive.
Profiles
Profiles are mortise. In this case, the T-profile is inserted into a milled groove at the end of the chipboard. When a special machine for PVC edges was difficult to find, and there were a lot of milling machines in the shops, this option was especially popular. Today he has faded into the background.
Profiles are mortise. In this case, the T-profile is inserted into a milled groove at the end of the chipboard.
The profile can also be overhead. This option is convenient because it does not require special equipment and can be used at home. As a rule, such a U-profile is simply enough to be put on the end and glued with liquid nails. However, there is also a drawback - a few millimeters of the edges will protrude, and dirt and dust particles will get stuck under them.
The profile can also be overhead. This option is convenient because it does not require special equipment and can be used at home.
Types of finishing
At the moment, there are several ways to give the ends of the tabletop an aesthetic appearance. Only 2 of them are suitable for making edges at home:
- Covering with melamine tape. Glue applied to the tape itself simplifies the process, but the resulting edge is susceptible to moisture and is not resistant to mechanical stress.
Today it is the cheapest and most accessible, therefore it is very often used in furniture production. - PVC strip trim. Requires more expense, but the edges are stronger.
Quite a popular furniture edge for cladding the end surfaces of laminated chipboards. All thanks to the ideal price-quality ratio.
How to glue an edge to a tabletop with your own hands
First of all, it is important to pay attention to whether the tabletop was cut with high quality. This directly affects the edging. The fact is that it will not be able to hide unevenness, and will only hold well on a perfectly executed cut. We will divide the entire subsequent process into small stages.
- First you need to position the tabletop in such a way that it is convenient to work with the end.
- The end itself should be wiped with a damp cloth to clean the surface with a damp cloth to ensure a strong fit.
- Next, you will need scissors - cut the edge to the required length.
- When the end has dried after wiping with a damp cloth, you need to apply the cut edge to the surface with an adhesive layer.
- You need to align the edge along the top edge of the tabletop, then carefully trim the edges.
- Next, you will need an iron for ironing synthetics - heat it up.
- The edge needs to be covered, for example, with newspaper. One layer will be enough. It needs to be ironed for 3-5 minutes. This procedure will allow the glue to melt and stick the materials to each other.
- After the glue has “set”, the edge must be carefully trimmed with a knife.
- If ABS plastic was chosen as the edging material, then cutting such material will be difficult. To prevent unevenness from spoiling the appearance, you can carefully remove them using a sander.
How to glue it yourself?
You can make an edging with your own hands only if it is melamine (without an adhesive layer), PVC (with glue) or an aluminum profile (screws are required).
p, blockquote 66,0,0,0,0 —>
Of course, you can experiment with other materials, but working with them requires skill, and the edges themselves are not so budget-friendly, so it’s better to immediately entrust the job to professionals.
p, blockquote 67,0,0,0,0 —>
How to attach an edge without a special adhesive layer
If there is no adhesive on the edge itself, then you need to purchase any universal construction adhesive or liquid nails. After this you can start working.
p, blockquote 68,0,0,0,0 —>
- Position the tabletop in such a way that it is convenient to work with the end.
- Clean and degrease the surface of the end - this will ensure maximum adhesion of the materials.
- Measure the length of the end and cut the edge to the required length. Go over the top with a stiff roller.
- Apply glue to the end. Glue, align, trim excess (if any).
- After the glue has dried, trim the edge with a sharp knife (if it sticks out). For ABC edge plastic, it is better to use sandpaper.
p, blockquote 69,0,0,0,0 —>
Material and tools for work
To do the edging of the tabletop yourself, you need to prepare all the necessary tools:
- an ordinary household iron or a hair dryer for heating the edge;
- construction knife (it is important to stock up on new blades);
- fine-grained sandpaper;
- scissors.
The materials you need to prepare are:
- tabletop on which the edge will be glued;
- the edge itself, matching the color and thickness.
Installation technology
To use certain types of edges for furniture, you must:
- prepare the materials and tools that will be required to complete the work;
- prepare the end;
- perform the work of fixing the edge.
Preparing tools
To carry out repair work if the edge has come off or completely replace the finishing material, you will need to prepare:
- sufficient amount of edge;
- sandpaper;
- file;
- scissors or stationery knife;
- rubber roller (can be replaced with rubberized gloves);
- any dense material, for example felt;
- an iron or a hair dryer if the edge is equipped with an adhesive base;
- glue if a non-self-adhesive edge is selected.
What glue should I use to glue furniture edges? To get the job done, you can use any universal glue, for example, “Moment” or liquid nails.
Universal glue for fixing edges
Furniture preparation
In order to achieve the maximum level of adhesion of the edge to the end of the furniture and ensure an even fit of the finishing material over the entire surface, it is necessary to prepare the end before performing installation work. The following types of work are performed:
- removing burrs and leveling the surface with a file;
- finishing the end with fine sandpaper.
Finishing the end with sandpaper
Installation diagram of self-adhesive furniture edges
To glue an edge with an adhesive base to the tabletop with an iron, you must:
- cut the finishing tape in accordance with the size of the end plus 2 - 3 cm in case of shrinkage of the material;
- attach the tape to the end and align the edge along the entire length;
- gradually heat the edge with an iron (hair dryer). Roll the heated areas with a roller until they cool completely;
It is recommended to heat and glue the tape in small sections of 15–20 cm.
- trim off the remaining tape.
Scheme of installation work
The process of self-fixing the edge tape with an adhesive base is presented in more detail in the video.
Which glue to choose for edges
Modern furniture manufacturers use hot melt adhesives. This type of glue has long proven itself and has virtually no equal in its quality characteristics. However, there is one significant drawback to using them - you need to have special equipment that can perform gluing at high speed and of good quality. For those who plan to make furniture professionally, it makes sense to purchase such equipment. If you are just an amateur and do not plan to make furniture, then this option is definitely not suitable.
Modern furniture manufacturers use hot melt adhesives.
At home, the use of PVC glue is common. It does an excellent job of gluing paper materials to any other materials. It is important to consider that this glue is not compatible with moisture, so it should not be used for kitchen furniture. But universal adhesives will not only reliably glue materials to each other, but are also not afraid of moisture. It will take 3-4 hours to dry, after which the product will be ready for use. This glue is inexpensive, besides it is available - it is available in almost every store, and it is safe. Professionals who plan to use hot melt adhesives should pay attention to products from the Kleiberit brand.
Professionals who plan to use hot melt adhesives should pay attention to products from the Kleiberit brand
How to glue an edge without adhesive
Sometimes it happens that edges with an adhesive layer are out of stock or for some other reason it is not possible to purchase them. In such a situation, you can use an alternative - an edge without an adhesive layer. However, you still have to buy glue separately.
In such a situation, you can use an alternative - an edge without an adhesive layer.
Additional Information! You can safely purchase glue from brands such as “Moment” or “Lux 88”. You definitely shouldn’t buy “88 Luxe” glue, especially if the edge is made of PVC.
It is better to apply glue both here and there - on the edge and on the end of the tabletop. Pressing must be done using a hard roller. If excess glue is visible, it must be removed immediately using a damp cloth. After the glue has completely dried, the edge can be carefully trimmed.
It is better to apply glue both here and there - on the edge and on the end of the tabletop. Pressing must be done using a hard roller.
Useful tips
You can do the edging of the tabletop yourself, the main thing is to follow the instructions and take into account all the important nuances. To consolidate everything that was written about in this article, we can summarize and once again recall all the recommendations of experts in a generalized form.
1. The edge may have glue on the inner surface, or may be sold without it. The list of necessary tools and materials and the progress of work will depend on this. If there is already an adhesive layer, then using an iron at low temperature (this mode can also be called “synthetic”) or a hair dryer and a hard roller, apply the edge to the end, which was previously cleared of dust and small crumbs. Be sure to ensure that the entire cut surface is covered with an edge.
Be sure to ensure that the entire cut surface is covered with an edge.
2. After making sure that the edge lies flat and covers the entire surface, we begin to heat it (if an iron is used, then the material should be covered with a light cloth or one layer of newspaper on top). The material needs to be smoothed and leveled, exactly until it cools completely.
The material needs to be smoothed and leveled, exactly until it cools completely.
3. If you cannot find specialized glue, you can use universal glue. For its high-quality “fight” the surface must be especially clean.
If you cannot find specialized glue, you can use universal glue.
4. Adhesive can be applied to both surfaces that are connected to each other. You need to press the edge tightly against the end so that the glue glues the two materials well. You can use a rag or roller to smooth the surface.
You can use a rag or roller to smooth the surface.
5. After the glue has set, the protruding parts can be trimmed or chipped off. The chipped areas can be treated with sandpaper.
The chipped areas can be treated with sandpaper.
Edging a tabletop with your own hands is a fairly simple process, but even here it is important to know certain rules and features. This article looked at how you can glue an edge to a tabletop at home, so after reading the materials in this article, you can safely get down to business.
Edging a tabletop with your own hands is a fairly simple process, but even here it is important to know certain rules and features.
Why do you need an edge on the tabletop?
The edge of the tabletop performs three main tasks:
- makes furniture edges attractive;
- protects the table from moisture, chips and scratches;
- adds completeness to the design of furniture and the room as a whole.
In addition, formaldehyde, which is contained in laminated chipboard, is not released into the environment if the furniture is covered with high-quality edge tape. With its help, owners are protected from substances harmful to health.
Tips on how to glue furniture edges
PVC edge for chipboard
Furniture made of chipboard at the cut edges is easily subject to mechanical damage and does not have an aesthetic appearance. An edge on the edge of the furniture will help to cope with these problems.
It will protect the surface from various types of damage - water, chips, scratches and will complete the interior design.
Very often, when buying furniture, you have to glue the edges yourself, and beginners have a lot of questions and difficulties about this.
How to properly glue an edge to a tabletop: step-by-step instructions
To edge a tabletop with your own hands, use one of three types of edges: PVC strip, melamine strip, ABS edge.
The method of work depends on what material is chosen for covering the tabletop. Each has its own effective gluing method.
Before edging the tabletop, you should prepare the following tools and materials:
- household iron;
- construction hair dryer;
- fine-grained sandpaper on a block;
- a piece of felt or wallpaper roller;
- stationery knife;
- metal ruler;
- scissors;
- universal glue (if you use tape without an adhesive layer);
- rags;
- solvent.
It is necessary to free up space so that you can easily unfold the table.
Attention! The edge for gluing should match the tabletop in width and color.
https://www.youtube.com/KqHzzpCmNgs
PVC edge for table top
Strips of polyvinyl film are most often used to seal the ends of laminated chipboard countertops. They are available in widths from 19 to 54 mm. The average thickness of products is 0.5 mm.
You can purchase PVC film with or without an adhesive layer. However, the second option is more common. The tapes are abrasion resistant and do not allow moisture to pass through.
Important! PVC plastic can withstand temperatures from –10 to +50 °C.
Algorithm of actions when gluing PVC film without an adhesive layer:
- Measure the length of the edge of the tabletop that needs to be processed.
- Cut the PVC tape so that its length is 2 cm longer than the length of the edge to be processed.
- Apply glue evenly to the inside of the edge. It is best to use "Moment" or "88-Lux".
- Leave the tape to soak in glue for the time specified in the instructions. 2 minutes before finishing, lightly coat the edge of the tabletop with glue.
- Apply the tape to the front end of the table and roll it with a roller.
- Wait until the glue dries and cut off the protruding tape with a knife.
- Carefully sand the edge on a block to make it even and smooth.
Advice! To carefully cut off the protruding part of the edge, hold the knife so that its blade does not go at an angle, but along the plane of the furniture.
How to Apply Melamine Edge Tape to a Tabletop
Melamine edges, like polyvinyl edges, are available in widths of 19–54 mm. The thickness of such products is slightly smaller - from 0.2 to 0.4 mm.
Melamine tapes have an adhesive layer. Therefore, they are easy to stick at home. The disadvantages of the material include its instability to moisture and mechanical damage.
Scheme for gluing the edges of the tabletop and melamine tape using an iron:
- Preheat the iron well. It is important to choose the temperature so as to prevent the paper base from burning.
- Cut the tape 2 cm longer than the end being processed.
- Apply the tape to the tabletop with the side with the adhesive layer, aligning it along one edge.
- Heat the edge with an iron so that the glue softens and adheres to the end of the table.
- Carefully rub the edge tape along its entire length with felt or smooth it with a roller.
- Wait a few minutes for the glue to cool.
- Remove the protruding edge from the end parts with a steel ruler (press it against the plane of the steel and cut off excess tape and glue with short movements in the direction of the table top).
- Sand the edge with fine-grit sandpaper.
- Remove traces of glue with solvent.
Advice! It is not recommended to use a knife to trim the edge of the melamine tape. It will cut the edges of thin material and ruin the appearance of the edge.
How to glue ABS edge to the end of a table top
Acrylonitrile butadiene styrene plastic edging tape is an environmentally friendly product with a smooth surface. It is pliable when applied to folds. At home, you can use ABS edge, the thickness of which is from 0.5 to 1 mm. Material with a thickness exceeding 1 mm is attached to the tabletop exclusively using a special machine in a production workshop.
Important! The ABS edge has an adhesive layer, so it can be easily attached to the tabletop using a heat gun.
Steps to work with ABS edge:
- Wipe the end of the tabletop with a damp cloth, remove dust and sawdust.
- Wait until the edge is thoroughly dry.
- Cut the material to the required length.
- Attach the strip to the end with the adhesive layer down. Align it with the top edge of the tabletop so as not to cut the edge on both sides.
- Place one layer of newspaper on the edge.
- Dry with a hair dryer while pressing with a roller. The procedure lasts 4-5 minutes until the adhesive melts and attaches the material to the end of the table.
- Cut off the excess edge of the material from the bottom with a knife.
Important! ABS edges are difficult to cut and small nicks may form. They are carefully removed with sandpaper.
Applicable edges
Modern technologies make it possible to produce various edges. However, not all are suitable for gluing at home. Melamine tapes are produced in widths of 19-54 mm. With a thickness of 0.2-0.4 mm, they allow you to refine the edges of countertops of various shapes.
A large assortment of decors, which, in terms of color, closely match the chipboard.
A PVC strip of the same width may be slightly thicker. For gluing the ends of the tabletop, edges are produced with or without an applied adhesive layer.
PVC plastic obtained by extrusion is able to withstand temperatures from minus 10 to plus 50 degrees.