Features and types of countertops
Since the tabletop is a working surface, it bears a significant mechanical load. Therefore, durable materials are used for manufacturing. It can be laminated pressed chips (MDF), natural wood, ceramics, artificial or natural stone.
Naturally, you want the room to look attractive.
The most reliable and durable ones are made of stone. This surface does not wear out for years. But such countertops are also expensive, so they are rarely found in apartments. Other materials are usually coated with acrylic polymers or laminates.
The countertop is considered to be the part of the kitchen unit that loses its attractiveness the fastest.
Paint and glass
A painted tabletop with glass will look presentable and very rich
The three-dimensional effect will directly depend on the thickness of the glass on the tabletop - the thicker it is, the “deeper” the tabletop will look.
This method does not require painting the tabletop - you can place the glass directly on an untreated surface with any texture
An old countertop can be updated using tempered glass. First you need to update the appearance of the countertop through decor. For this purpose, it is cleaned, degreased and coated with paint.
Important : you can approach the matter with imagination and paint the tabletop. The more complex the drawing, the more respectable the room design will look. This method is suitable not only for those who know how to draw. You can also paint using stencils, and this can be done even by someone who did not go to art school.
When the tabletop is dry, a sheet of tempered glass is attached to the top. This table looks elegant and expensive. Tempered glass will ensure the durability of the table. He will not be afraid of accidental impacts or wet cleaning. But such a table should not be in close proximity to the stove.
How to update your kitchen countertops
To ensure that the surface takes on its original appearance, it can be painted with safe acrylic paint, tiled, or the top layer can be sanded and varnished. As a last resort, replace the countertop and splashback in the kitchen and install it in its original place.
Surface preparation
First of all, you need to wash the surface well. A household cleaner and a regular sponge will do. The clean countertop is wiped dry and then degreased with alcohol. If there are chips or large scratches, they need to be repaired with repair putty and then smoothed with fine-grained sandpaper.
They update an existing countertop in different ways - the end result here largely depends only on your imagination.
Selection of tools and materials
Tools you may need:
- fine-grained sandpaper;
- acrylic paint;
- varnish;
- napkins;
- water;
- glue;
- brushes;
- stencil;
- vinyl film;
- tile;
- tile adhesive;
- grout;
- rubber or flat spatula;
- durable glass;
- pattern templates.
Important! While working, be sure to use protective equipment: gloves and goggles.
Update process
The easiest way to update the surface is to cover it with film. Its service life is 3-4 years. One side of the film is fixed, and the other is stretched towards the edge of the table. To prevent air bubbles from forming, you need to smooth the film with a rubber spatula.
Self-adhesive film will “give” new life to the kitchen table.
Other finishing methods will require more creativity. The prepared surface is coated with a primer for better adhesion of materials, painted and decorated.
Color change
Acrylic water-based paints are suitable for work. They are quite elastic, stable, and most importantly – absolutely safe. To apply the base color, you can use a roller or a wide brush.
You can restore the excellent appearance of your kitchen table with paint.
The tone does not have to be uniform. Patterns applied with a sponge dipped in paint will look original. However, this procedure is done when applying the second or third layer. For the first one, you need to use an even base shade.
The painted surface is dried, then covered with a second layer of paint. After this, you can fix the tempered glass or apply an original design.
Alkyd enamels are excellent for restoring countertops. They are non-toxic, cover the surface well and dry quickly.
Decorating with tiles or mosaics
How can you change the countertop on a kitchen unit without changing it? One of the most difficult methods is suitable for this - laying tiles or mosaics. It will take time, but the result looks extremely impressive. In addition, tiles and mosaics have an enviable service life.
Repairing a kitchen table can be done using decorative tiles.
You will need tiles or mosaics, glue, a flat trowel and grout.
The glue is applied to a cleaned and degreased surface. Cover the table top with an even layer, but not all of it, but in the area where it is supposed to be laid out. You should not apply glue in advance, as it will dry out.
It is best to combine large and small fragments. This way you can create a unique pattern. After the tiles have been laid and dried, grout is applied to the seams and smoothed with a flat trowel.
The combination of tiles and mosaics looks original.
The most expensive method of repairing a countertop is the third one - using tempered glass. But the result looks accordingly - expensive. The set of actions is standard: cleaning, degreasing the surface, coating with paint, after drying - laying, securing the glass sheet.
Thus, updating the countertop can be done at home.
Using the decoupage technique
An inexpensive and very original way to restore a countertop. You can use ready-made napkins for decoupage or get creative: cut out fragments from magazines and newspapers.
A tabletop decorated with fragments of old and artificially aged newspapers will look original. If you make a black and white apron for it, the design will take on a finished, finished look.
Ready-made decoupage pictures can be purchased in specialized stores, or you can make them yourself using napkins or unnecessary magazines.
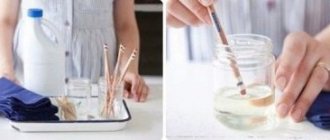
Decoupage is performed in several stages:
- prepare the surface (wash, degrease)
- Dilute PVA with water in a 1:1 ratio, moisten napkins or newspaper clippings with the composition;
- glue a selection of drawings to the surface, smooth it out, expelling all air bubbles;
- wait for it to dry completely;
- coat with varnish in 2-3 layers.
Instead of varnish, the tabletop can be covered with a sheet of tempered glass or triplex.
The main thing is not to overdo it with the number of patterns, otherwise the kitchen table will look too bright.
Stencil painting
For those who do not have artistic skills, this option is suitable. To apply interesting patterns, just find beautiful stencils. You can find pictures on the Internet, transfer them to thick cardboard or film. The stencil is attached to a surface that has been cleaned and painted with the main color and the bare areas are filled with color. It is better to remove the stencil after the paint has completely dried.
Another creative idea for restoring a tabletop involves painting using a stencil.
You can use rollers, brushes and sponges.
DECOUPAGE
A huge advantage of decoupage is that it does not limit your imagination and allows you to change the tabletop beyond recognition, with little effort. An old tabletop at a table can be changed beyond recognition if you approach the matter creatively.
You can make a creative thing with your own hands if you use the decoupage technique. Decorating the surface of a table using this technique does not require any special skills or abilities - anyone can do this work with a minimum of tools. For work you will need:
- PVA glue;
- Pictures;
- furniture varnish.
To decorate your table, you can purchase ready-made pictures for decoupage, sold in any craft store. But motifs cut out from paper napkins or pictures from magazines and books are quite suitable.
You can design a drawing on a computer and print it out - this way you can see the whole picture in advance and decide on the drawing before starting work. Stages of work:
- Before work, thoroughly wash the old countertop and treat it with any degreasing agent - a swab moistened with alcohol will do;
- Dilute the glue in a ratio of 1:1;
- Moisten the selected motifs with it and glue them to the tabletop. The composition is created based on your taste, the main thing is not to overdo it with the number of motifs, otherwise the tabletop will look tacky.
- Carefully straighten the glued pictures - there should be no bubbles under them;
- Wait until the tabletop is completely dry;
- Cover the dried surface with varnish;
- Wait for the varnish layer to dry and apply a second coat;
- To prevent new decorations from being erased from the tabletop during wet cleaning, repeat the varnishing operation 3-4 times. For ease of use, the varnish can be purchased in aerosol packaging.
This hand-made table design will be in a single copy. This will make the interior design unique and memorable.
Important : using the decoupage technique, you cannot decorate the surface of the working area, as it is subject to intensive use and is often washed with chemicals. Design using decoupage technique is suitable for dining tables, table tops and window sills.
We also recommend watching the video instructions:
Updating a natural countertop
If the work surface is made of natural materials, it just needs to be slightly “refreshed”. A varnished wooden tabletop can be polished quite well with a special paste and a drill attachment. A radical approach may be required:
- sand the surface, remove the old coating;
- level the wood, cover chips and cracks with wood putty;
- walk with fine-grained sandpaper;
- varnish in several layers;
- polish the coating.
It is important to do everything correctly and avoid mistakes that could affect the service life of the surface.
If the countertop is made of untreated solid wood, it is enough to sand it and cover it with stain.
Restoring natural or artificial stone will require some skill. To make the surface shiny and glossy, it is enough to polish it.
You need to polish the cast stone as carefully as possible, since it is applied to the surface in thin layers and will withstand no more than 2-3 polishings.
It is important to do everything carefully with your own hands and not spoil the source material.
You will need:
- sander;
- polishing machine;
- polishing paste.
You can use a universal device with different attachments for polishing (abrasive up to P1500) and grinding (abrasive P120).
Action plan:
- sand the surface, constantly moistening it with water to reduce the temperature;
- When the unevenness is eliminated, use polishing attachments, gradually changing them to smaller ones.
The transformation of the kitchen after updating the countertops will be more than noticeable.
Important! The attachments must be moistened regularly to prevent dry friction. In addition, less dust will fall from them.
REPLACING THE TABLETOP
The trend of 2015 is naturalness. Therefore, if you want to follow it, we recommend taking a closer look at a wooden tabletop. Today their choice is quite wide, so choosing one will not be difficult.
A radical way to update a countertop is replacement. The new countertop can be made from:
- Fiberboard;
- chipboard;
- MDF;
- Solid wood;
- composite material.
A backlit glass tabletop is something incredible. Plus, the lighting can be done in different modes and colors. Countertops with a non-standard sink shape will confuse some, while others will absolutely love it
You can purchase a ready-made countertop. Or purchase material from which to cut out a part of the desired shape and size using a circular saw and jigsaw. An old tabletop can serve as a template.
After this, you need to install a new part in place of the old one. It can be secured with self-tapping screws or special wood glue. The gaps between the wall and the countertop, if we are talking about the work area or the sink area, are masked using sealant. You can additionally glue a molding - ceramic or plastic. This will make the decor of your work area more stylish. The ends of the tabletop are glued with furniture edges. The easiest way is to use a hot-melt edge that is glued on with an iron.
If everything is done carefully, the interior design will not suffer at all and will not look handicraft.
So, you can update your countertop with your own hands in different ways. But in any case, with due care in the work, the kitchen design will not suffer, but, on the contrary, will acquire a touch of exclusivity and originality.
How to replace a kitchen countertop
The most radical way is to completely change the work surface. In what cases is this necessary:
- irreversible changes (the board has dried out or cracked);
- the tabletop does not hold firmly;
- there is an opportunity/desire to install a more expensive and high-quality option.
How to replace a countertop on a kitchen unit:
- dismantle the tabletop;
- remove old sealant and glue from the frame;
- check the stability of the headset, tighten if necessary;
- if necessary, install a hob, faucet and sink, having previously made cuts for them;
- secure the tabletop with glue and sealant.
When all fasteners are installed, the tabletop is ready for use.
During work, it is important to ensure that the geometry of the structure is maintained. This process is labor-intensive and requires special skills and tools, so it is better to entrust the installation to professionals.