Which paint to choose
The wide selection of colorful materials will confuse even an experienced home craftsman. How to repaint a table and, most importantly, what paint to choose? To navigate the huge world of renovation, it is enough to first get acquainted with the types of materials for painting the table.
There is no need to rush to replace it with a new purchase, because such a table can become an interesting design highlight and will help express your creative nature.
Water-dispersed
Water-dispersed acrylic paint is simple and easy to use. Even a beginner can handle it. The product provides an even coating on a wooden surface without lumps or air bubbles. If you don't like the result and the paint has not dried yet, you can wash it off with cold water and start working again. This is handy when you're painting furniture for the first time and don't know what to expect.
This is the best option for furniture that is located in heated rooms, and not on the veranda or terrace.
The non-toxic, safe composition makes the product especially popular for restoring and painting home furniture. When the surface of the table dries after transformation, it acquires water-repellent properties. For a kitchen table this will be a definite plus. Water-based paint is also suitable for outdoor furniture and countertops.
Oily
Oil paint is used less often than others in everyday life, as it has a low degree of wear resistance. It contains drying oil, which is why the painted surface takes a long time to dry.
Over time, oil paint becomes cracked and chipped, loses its beauty and peels off. To work with such a coloring composition, it is necessary to carefully prepare, sand and prime the wooden surface.
To ensure that the surface of wooden furniture is evenly painted, shiny and durable, oil paints are usually used.
Acrylic
Acrylic paints are incredibly popular. They are sold in different containers and aerosol cans. The tabletop can be painted with this product using a roller, brush or spray. Acrylic composition is safe for humans and pets. The paint has no unpleasant odors and dries quickly.
The table can be painted without even taking it outside, right in the kitchen, if you provide a constant flow of fresh air. The paint is resistant to temperature changes, does not crack in the cold and can withstand hot climates. This is a universal product for the home craftsman to update not only the table, but also other furniture.
The only drawback of the product is that it can wear off and fade over time. And also scratches remain due to mechanical impact.
Acrylic paints are water-dispersion compositions that contain polymers, water, pigments and additives that improve the technical properties of materials.
Alkyd
Alkyd enamel can be matte or glossy. By combining such textures you can achieve incredible results in furniture restoration. The product has increased resistance to frost and harsh climates, and is not afraid of either the sun or aggressive chemical compositions of detergents.
Enamel paint is sold in aerosol packaging and in containers. Alkyd enamel is suitable for outdoor furniture.
During operation, an unpleasant acrid odor will be felt, which can cause dizziness, nausea and deterioration. Therefore, you need to prudently acquire a respirator and other personal protective equipment.
Alkyd paint is universal and is intended for application to various surfaces.
Enamels for wooden surfaces
Nitro-enamel paints for wooden surfaces are not widely popular due to their low wear resistance. A tabletop painted with this product quickly becomes unusable due to changes in temperature and exposure to sunlight. If you painted the countertop with enamel paint, the furniture should be constantly in the shade due to sensitivity to ultraviolet radiation.
But such paints are inexpensive, which allows you to update the color of your furniture every season. Due to its toxic composition, the product is best used for street design. Nitro-enamel paints dry quickly, but you should adhere to a complete drying time of 1-2 days.
A high-quality coating can also be created using enamels. They are resistant to light, mechanical stress, and are not subject to corrosion.
Other types of paint
The paint industry provides a wide range of products to repaint a table. When choosing any other paint, make sure that it is intended for painting wooden surfaces. Also, the choice of coloring agent will directly depend on the type of wood. Paint should not only decorate the table, but also protect its structure from the negative influence of the environment, from the penetration of moisture, and from the appearance of mold.
When the coating extends the life of the entire product, it becomes obvious how important the choice of paint is.
Surface preparation and painting
- Disassemble the product (remove drawers, unscrew legs, remove decorative trims), cover metal fittings or inserts that are difficult to dismantle with masking tape.
- Wash all parts with warm soapy water, wipe, and dry at room temperature.
- Using protective products, begin the restoration process by sanding the surfaces or removing old paint.
- Fill cracks and chips with putty.
- Treat all surfaces with an anti-rotting compound, then with a primer, after drying, sand with emery and use a vacuum cleaner to remove dust.
- Prepare the room for painting by covering the floors, put on work clothes, and begin processing the table.
- Before working with paint in a can, you need to shake it well and spray it at a distance of 20-30 cm. Before painting, the composition is slightly diluted with a solvent in the proportion indicated on the packaging.
- After the first layer has dried, it is painted again; usually 2-3 coats are enough for high-quality detailing, but it can be secured with a colorless varnish.
- After drying (at least 24 hours), remove the tape and assemble the table; after 2-3 days it can be used.
Preparing the surface for painting
All irregularities should be filled with putty.
Painting process Pay attention to: How to remove paint from furniture at home: recommendations for beginners
How to paint a wooden table correctly
Before you begin the painting process, prepare everything you need for the job.
Selection of tools and paint
When choosing paint, focus on the location of your table. Will it be outdoors or indoors? When you purchase quick-drying dyes, this does not mean that the furniture can be used in a couple of hours. Let the paint dry for at least a day, preferably two. The coating must not only dry, but also harden so that small efforts or mechanical actions do not leave dents.
If the paint is not water-based, then it will be better that the entire process of painting wood does not take place in the living room.
When you have decided on the coloring composition, allocated time and space, outlined and thought through the design, it’s time to prepare the necessary materials. You will need:
- various paint brushes and paint rollers;
- paint sprayer if the countertop is large or you have several pieces of furniture;
- a paint tray where you can pick it up with a brush or roll it out with a roller;
- antiseptic for wooden surfaces to prevent mold;
- a primer that will prevent the paint from being absorbed into the wood and provides an even, beautiful coating;
- gloves, respirator, safety glasses and other personal protective equipment;
- chemical reagents or a wire brush to pre-prepare the countertop for painting in order to remove old paint or varnish;
- pieces of cloth and old newspapers to remove smudges and drops.
The materials used to paint old boards must be of high quality.
Surface preparation
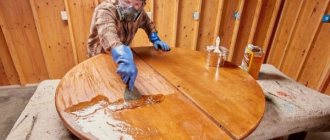
Preparing a countertop for painting requires some skill. But this stage cannot be skipped. If you apply new paint to an old coating or varnish, the surface of the table will soon become covered with new cracks and chips. Sanding, cleaning the countertop from old paint fragments, puttying, eliminating cracks and depressions provides excellent adhesion between the wood and the fresh paint layer.
Allow the primer to dry thoroughly before applying the first coat of paint.
- If you are painting the entire table, take it apart into pieces. If you plan to refresh only the countertop, then this procedure is not necessary.
- Using a sanding machine, a stiff brush or sandpaper, prepare the surface of the furniture to be restored. Remove any remaining varnish or old paint, level the surface, and eliminate all unevenness and roughness. The more thorough the preparation at this stage, the better the paint will adhere.
- Apply primer. It is desirable that it be the color of the future paint. If you plan to paint it white, choose a primer of the appropriate shade.
- Cover with masking tape the areas that you do not plan to paint. It is better to prevent the dye from getting onto unwanted areas than to wash off the blots later.
- Have a rag handy to wipe your hands or any fallen drops. It is also recommended to cover the floor with newspapers or film so as not to stain the floor with paint.
If the surface is covered with regular paint, then large areas are painted with wide brushes, and small details and corners should be covered with a thin brush.
Painting process
The painting process is fun and even creative. The future appearance of the entire table will depend on how you paint the surface.
- Prepare the area for painting, remove all unnecessary items, put on protective clothing and gloves. Cover the floor with unnecessary newspapers, film or paper.
- If you have spray paint, shake the can thoroughly before use. All components inside should be mixed.
- If you have paint in a can, pour a little of the product into a special tray or tray. This will make it easier for you to dip your brush or roll out your roller.
- When painting, spread the paint evenly over the wooden surface. Try to apply thin layers and let them dry. It is better to do several such approaches than to apply paint tightly at once. This coating dries slowly, forms smudges and bumps, and is easy to deform and leave marks.
- Each layer must dry thoroughly before applying the next. Only in this case will the surface of the table be painted evenly, without bald spots or gaps.
- Paint the tabletop first, and then the legs and other parts. Make it a rule to move from large planes to smaller ones. Lastly, paint the decorative elements and fittings.
- It is better to do a multi-layer coating, apply the coloring composition at least 2-3 times.
- If you want a slight wood grain and roughness, lightly sand the surface after the tabletop is dry.
- After the product has completely dried, you can apply varnish.
- The protective tape can be removed after all layers have dried.
After the parts have dried, acrylic varnish is applied on top. So, the surface will be resistant to mechanical damage.
Drying the table
Painted furniture should dry for a day or two in a well-ventilated area or outside in a shady area. Do not touch or check the surface with your finger. Assemble the furniture only after all parts have dried; do not screw the legs to the tabletop until the drying process is complete. It is important to protect your freshly painted table from flying insects. Otherwise, they may stick to the surface and leave marks.
After the allotted time has passed, you will be able to use the updated furniture.
Necessary tool
Many enamels have an unpleasant odor and take a long time to dry, so it is better to paint in a non-residential area. The floors in a small workshop or garage are covered with film or old newspapers so that you don’t have to clean up traces. For coloring you will need:
- fungicide or antiseptic for impregnating wood;
- wood primer (white or transparent);
- paints or varnish;
- solvent;
- wood putty;
- means for removing the old layer.
It is advisable to restore the table in a separate room on a flat, hard surface. In the process of preparing the kitchen table for painting, it is important to mark the legs, drawers and other parts with numbers so as not to get confused during assembly.
Important! If the legs are not loose, it is better not to disassemble the product. When the legs of the table are wobbly, it is better to disassemble it, it will be more convenient to paint. After assembly, it is possible to strengthen it with a frame or corners, significantly extending its service life.
Before painting the table, prepare tools and working equipment:
- Screwdriver (needed during disassembly of the product).
- Working tools (roller with attachments, paint brushes, spatulas).
- Work clothes and protective equipment (goggles, gloves, respirator).
- Auxiliary containers for preparing paint, a container for applying paint with a roller.
- Special compositions for decorating tabletops.
- Fine-grained sandpaper, sponge, masking tape, rags.
Helpful advice! Sometimes a beautiful product only needs to be replaced with a tabletop or 2-3 legs. You can turn to a carpentry workshop for blanks. It is better to change the legs all at once so that they do not differ in texture, shade of wood, or type of processing.
Antiseptic for wood
Wood putty
Primer for wood
Features of table decoration
When the paint is completely dry and hardened, it's time to start decorating. There are several techniques you can use at home. They are good because they do not require expensive investments and are easy to create at home. This is a great option for updating a child's room.
- Decoupage. For this technique you will need napkins with a beautiful pattern, brushes and PVA glue. Select the topmost layer of paper with a decorative element, attach it to the tabletop and apply glue on top with a brush. Make sure that the napkin does not tear, form air bubbles, or move from its original position. After the glue has completely dried, the decorative element is coated with transparent varnish.
- Tulle. Find a piece of tulle with a beautiful pattern. Wet the material, apply it to the table surface and fix it. Using spray paint or a brush, paint the tulle fabric evenly. After drying, remove the improvised stencil. It will look especially impressive if you use contrasting colors of the paint composition.
- Artificial aging of wood looks stylish in a home interior. To do this, sand the surface of the table with sandpaper and wipe certain areas with ammonia. When they darken, go through sandpaper again and varnish.
- Patination. This method produces beautiful, dark, vintage stains on a wooden surface. Apply the patina using stain or other suitable means, wait until it dries and remove unnecessary layers with a foam sponge.
Decorating the table surface
The painting of the table will be decorated in an original way if you use the decorative technique of decoupage. It is important to decide on the color and pattern, which should be in harmony with the overall interior of the room. For example, an image of a geographical map will go well with the interior of an office if it is placed on the surface of a desk.
Specialized stores for decoupage sell napkins with various designs, so choosing a suitable design will not be difficult. Or you can go the other way and make the table lace using tulle. Here you need to rely on your imagination, and your table will become a piece of art.
Decoupage technique in vintage style
To paint a countertop in vintage style, you will need the following materials and tools:
- sanding machine or sandpaper;
- glue (use PVA or special decoupage glue);
- aqualak;
- primer;
- varnish for a wooden table;
- decoupage cards or drawings, photographs from magazines;
- a jar of white acrylic paint or other light colors;
- fan brush or roller.
Work order:
- Using sanding, the surfaces where painting will be carried out are cleaned.
- The dust is swept away and the base for decoupage is primed.
- Paint the table white in at least 2 layers. The first one must dry completely before repainting.
- The dry surface is sanded again - first with coarse-grained and then fine-grained sandpaper.
- A layer of scuba coat is applied.
- The cut out drawings are laid out on the table surface in the required order, with their outline outlined.
- Remove the images and place them in a container of water for up to 5 minutes. Using PVA diluted with water, carefully glue the drawings to the contour areas, avoiding tearing the paper.
- After drying, you need to sweep away the dust from the table and apply several layers of acrylic varnish, being sure to let the previous layer dry.
The work must be done carefully and consistently. Be especially careful when gluing wet pictures so as not to damage them.
Decorating with tulle
You can paint the table yourself and decorate it with a pattern using tulle. The work includes several stages:
- The countertop is cleaned and leveled.
- Base paint is applied to the table, which will be the main tone.
- Use masking tape to cover areas that do not need to be decorated.
- Tulle is laid evenly on top, and acrylic paint is smoothly applied from a spray can.
- Carefully remove the tulle and allow the surface to dry.
- To protect the pattern, you need to varnish the wooden table. Let it dry.
Any old table, if it is still functional, can be revived and given a chic look.
Painting other types of tables
In addition to the dining table, there are ladies', magazine, desk and others. The large number and variety of species sometimes confuses the master. The more complex and ornate the decor, the more careful painting of all the nuances is required. In such cases, it is better to use a spray gun or aerosol cans.
The finely sprayed coloring composition gets into hard-to-reach places where no brush, much less a roller, can reach.
If you want the wood grain to show through, don't use a pre-primer. Choose liquid paints that will not additionally level the surface of the furniture. This coloring composition will repeat the relief of the wood.
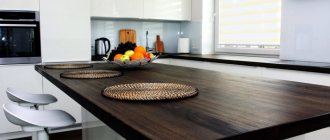
If you want a smooth desk, such as a desk, choose thick enamel with a matte finish.
Matte paint is a stylish and modern finish for furniture.
When is painting needed?
The first and most significant reason for painting an MDF or chipboard countertop is the loss of attractive appearance. Many people spend most of their personal time in the kitchen: this is not only cooking, but also eating it with family, as well as gatherings with friends and loved ones. Therefore, countertops on which food is prepared fail faster than other pieces of furniture.
How to update and paint a very old table
Very old furniture usually has damage, dents, chips and cracks. There is unnecessary texture in the form of a bug-eaten surface. The fittings have already loosened, the legs have become loose and the tabletop is slightly “wobbly”. It’s not enough to just repaint such furniture; it needs to be repaired and restored.
To begin, disassemble the table into as many components as possible. Wash the surface of the table top and legs, dry and examine carefully. All damage and dents can be smoothed out using putty and primer. Tighten the fittings or replace them with new ones.
Old tables are often made from good, strong wood that will last for many years to come.
Required tools and materials
To make a beautiful wooden tabletop and legs, you will need the following building materials:
- sandpaper;
- antiseptic;
- white primer;
- waterproof varnish or paint;
- masking tape.
You need to make sure you have the tools in advance:
- brushes and rollers;
- paint tray;
- grinding tool.
To paint your table while protecting your hands from harmful chemicals, make sure you have rubber gloves.
Painting the table white
White furniture shades come with warm or cool undertones. In the first case, yellow, orange and reddish shades are mixed with the white color. If the interior is made in cold colors, add a little green or blue to the white paint.
How to paint a children's table with your own hands if it is dark in color? To pre-treat the countertop, choose brightening pastes or primers in white shades. This will allow you to repaint even the darkest furniture. Each layer of the painted surface must dry thoroughly. The finish can be matte or glossy. For extra shine, coat the table with varnish. In this case, the white furniture will literally shine.
For an antique effect, you can choose materials to paint in the desired color and completely cover the surface, wait until it dries, then carefully remove part of the top layer with a sponge.
Choice of coverage
Modern manufacturers offer a wide range of materials to suit every taste and budget. Let's look at the main features of each coating before we get to work and paint the table.
- Water-dispersed acrylic paint. It is non-toxic, dries quickly after painting, and is easy to use. Even a non-professional can handle it and paint the kitchen table, since it lies evenly on the surface. If it was not possible to paint the table properly, the tabletop can be washed with cold water, but only before the paint has time to dry. After drying, the wooden coating becomes impervious to moisture and is not afraid of ultraviolet exposure.
- Alkyd enamel. The material is suitable for exterior finishing work with a wooden surface, so it is suitable for furniture that stands outdoors. The enamel has a wide range of colors, can be matte or glossy, and is resistant to aggressive detergents, frost and direct sunlight. It is usually used in aerosols, but there is also a liquid option for painting the table. When working, be sure to wear a respirator and be outside or in a non-residential area, since the pungent odor disappears slowly after covering the countertop with enamel. To paint a table with alkyd enamel without harm to health, it is important to follow these precautions.
- Nitro-enamel paints. Very toxic, but dry quickly. Among the advantages are the relatively low cost, and the disadvantages include low thermal stability, the rapid occurrence of cracks after coating due to exposure to ultraviolet rays. You can paint a table with this paint that is in the shade most of the time.
- Oil paint. It is made on the basis of drying oil, so it dries for quite a long time. Used for interior and exterior work on wooden products. Covers the surface with a thin film, but subsequently quickly wears off and peels off. Previously, oil paint was used everywhere, but today, to paint the table, higher quality analogues are used.
Main difficulties and mistakes
Common mistakes can lead to unexpected results. This can ruin your mood and furniture. Therefore, follow a few rules and do not make mistakes common to beginners.
- Dilute the paint in the proportions indicated in the instructions. This is important so that the paint does not turn out to be too thick or, on the contrary, liquid. Failure to follow these simple recommendations will result in drips and uneven coverage.
- The product must dry well. If you start using the table before the paint has completely dried, there is a risk of leaving dents, fingerprints, dark spots or scratches on the tabletop.
- Poor grinding of the surface makes it uneven and bumpy. Even if it is not noticeable, after painting, especially in light colors, all the flaws will be noticeable.
- Insufficient putty also reduces the lifespan of finished furniture. If you think that the legs need not be puttied, then over time the cracks and damage will only increase in size. Such a table will quickly become unusable. Do not ignore inconspicuous areas and loose fittings, repair and update everything on time.
- Test the paint on a small area of the product. Does it apply well, are you satisfied with the result, how many layers do you plan to apply? It is advisable to decide on these nuances in advance so as not to improvise on the fly with an unexpected result.
There are a great variety of decor options, and the result of a home craftsman’s creative search will be limited only by the flight of his imagination, time and materials.
Paint selection
Furniture with a laminated facade is best painted with water-based acrylic paint. It is suitable for painting products white, and to add color to the base you can add a color of the desired shade. Also, if necessary, the paint can be diluted with water to achieve a lighter tone.
Acrylic paint can be used indoors: it does not have a pungent odor, does not emit harmful compounds, is durable and easy to clean. To paint large surfaces, you can use acrylic paint in cans.
Thixotropic paint is also suitable for painting furniture - it has a special consistency, thanks to which it applies smoothly, without running down or forming smudges. Painted surfaces will resemble plastic ones.
Rules for caring for a painted table
The painted surface does not require special care. But there are unacceptable things that can disrupt the smoothness or texture of the decorative coating.
- Wipe a varnished or polished table only with soft cloths or microfiber. Do not use rough sponges, scrapers or cloth with fittings. This may leave marks or scratches on the countertop.
- If you have varnished the surface of the furniture, do not clean it from dust using a wet method. This removes the natural shine and makes the varnished table matte. Remove dust using a special broom or vacuum cleaner.
- An unpolished surface can be washed, but so that the water does not stagnate. Immediately remove excess liquid and wipe the countertop dry.
Depending on the paint chosen, the wood may absorb water and swell.
Painting a table at home is easy. The main thing is to follow simple rules, safety precautions and use your imagination. Perhaps the process of painting a table will captivate you so much that you will become seriously interested in restoring furniture in your home.
Remember that there are always many opportunities to give old furniture a new life with your own hands.
Types of countertops and their defects
Working surfaces are made from different materials:
- A natural stone. It is less susceptible to wear and tear than others. A countertop made of natural granite, for example, is not at all afraid of damage.
- Acrylic is a type of artificial stone. It is not resistant to scratches and cuts.
- Quartz agglomerate is durable like granite, but over time it still loses its appearance.
- Casting stone is a solid thin-layer polymer on a base. Requires careful sanding.
- Plastic is a budget option for countertops. It wears out quickly without the use of cutting boards.
- Wood treated with impregnations and varnishes also requires care to maintain its appearance.
