In what cases should chipboard be painted?
The main reason for decorating a board made of shavings is its unpresentable appearance. Untreated products look rough, and sawdust is not visible under the paint.
Expert opinion
Zakharova Irina Yurievna
Cleaning professional with 15 years of experience. Our best expert.
Ask a Question
Particle boards quickly become covered with chips and chips. The paint protects the surface from mechanical damage, increases its resistance to moisture and prevents the evaporation of formaldehyde.
Furniture doors and drawers made from unfinished chipboard will warp over time. Painted boards are less susceptible to warping, especially if they are additionally coated with varnish.
The nuances of working with chipboard and fibreboard
To make the right decision on how to paint chipboard or fiberboard, you need to take into account the features of these materials. Although they are almost identical, each has its own structure.
- Chipboard is a particle board that can have different densities. Essentially, this is a finely ground fraction of wood materials, which, through the action of a press and the addition of glue, is formed into slabs of the required size. The final density depends on the size of the chips used and the quality of pressing. The lower this indicator, the better the product will absorb any liquids and paint. It is difficult to work with such slabs, since longer preparation is required. Is it possible to paint chipboard? Yes, but each specific case must be approached individually.
Chipboard is considered a traditional material for budget finishing - Fiberboard (fibreboard) is a similar material, but has a different structure and production technology. The manufacturing principle is that a very fine wood fraction is hot pressed. The result is a product with high density. Therefore, it is difficult to paint such products, because the coloring composition does not always have the necessary adhesion. Although there are soft fiberboard options, they are used for rough work or as a substrate.
The share of fiberboard when finishing internal surfaces reaches 25%
Rules for choosing the right paint
When planning the painting result, consider the following points:
- ease of use;
- area to be painted;
- desired color.
Small chipboard products are easy to paint with a spray can and brush, so aerosol or can paint is suitable for the job. It is convenient to go over large surfaces with a roller. In addition to color, you need to choose what the surface should be like:
- glossy;
- matte;
- tinted.
The color can be single or combined. For multi-colored dyeing, you should choose a harmonious combination of shades, look for colors in the line of one manufacturer, or choose a tone for coloring. When choosing a primer and paint, it is better to choose formulations of the same brand and on the same base - water-based, latex, acrylic.
Applying paint
The main stage - coloring - is the most enjoyable process that even Tom Sawyer enjoyed. It's nice to watch how furniture is transformed.
If the structure is painted disassembled, the walls are laid horizontally so that the paint is distributed evenly, without drips. Furniture as a whole is painted more slowly, carefully monitoring the uniformity of the resulting layer.
First, they make the background, then let it dry for half an hour, after which they paint twice more, pausing for drying.
If you wish, you can play with color to enhance the decorative impression, for example by painting the tabletop in a light color and the side walls in dark tones. To enhance the effect, furniture is varnished, making from one to several coatings on different parts. With great desire and careful attention, the effect will exceed expectations.
1 1 1 1 1 1 1 1 1 1 Rating 4.79 (17 Votes)
When dealing with interior and exterior decoration of premises, we often use sheet materials such as chipboard. This material allows you to easily obtain perfectly flat surfaces where necessary. Also, chipboard is one of the most common materials for making furniture; it is widely used in construction and has been used for several decades for a variety of tasks. Very often, when making or restoring furniture, the question arises: how to paint chipboard with your own hands?
A product made from chipboard, as a rule, is the result of a lot of work, and therefore it will be very disappointing if many days of work are ruined by unsightly painting. Such a seemingly uncomplicated task as repair or decorative painting of chipboard surfaces has its own characteristics and pitfalls, so adherence to painting technology, the right choice of tools and materials will allow you to perform this work at home beautifully and efficiently, and the coating will make it durable and resistant to any damage. Today the market offers a very wide selection of very different coloring materials and compositions, and the chance of making a mistake in the choice of paint and the technology for its application only increases. After studying this material, you will learn how to paint chipboard with your own hands, what paint to choose, and also receive a number of important tips directly on the painting process itself. To paint chipboard yourself and avoid turning your house into a paint shop, prepare the necessary tools and materials in advance.
What do you need to paint chipboard yourself?
Primer – you can use an acrylic primer Paint – alkyd or acrylic, spray or regular Brushes and roller if you use regular paint rather than spray paint Acrylic clear varnish – it will protect the painted wood surface from damage, and will also add depth to the color and shine of the new coating Respirator and gloves for protection during work Solvent for degreasing the surface before painting (you can use white spirit, kerosene or special degreasing compounds) Cloth napkins or just dry, clean cotton rags Masking tape and paper or covering film Very fine-grain sandpaper Spatula and putty, best car, you will need it if you plan to remove deep scratches or chips.
So, let’s move on directly to working with our product or structure made from chipboard materials.
Step-by-step instructions for painting chipboard
Step_1 Preparing the workplace. Before you start working, cover the floor and (preferably) walls of the room with covering film or newspapers.
Step_2 If you plan to paint furniture made of chipboard, then before starting work, remove all parts that cannot be painted: unscrew the handles and other fittings, remove the glass, remove the drawers. It is also preferable to paint doors and facade elements after removing them first - this will allow you to apply the paint as efficiently and evenly as possible, avoid unpainted areas at joints, etc.
Step_3 Removing old paint layers. If you are not painting a new product, but are carrying out repair painting of an old chipboard product, you must, if possible, get rid of the old paint and varnish coating. If the old coating is already peeling off a lot, and in some places has completely peeled off, it is better to remove it completely. To do this, you can use special removers of old paint, or a hair dryer, or do it by hand - using a sanding machine or sandpaper. If the old lacquer coating holds up well, then you can simply sand the old surface so that it is smooth. Use fine-grain sandpaper for this.
Step_4 The next step is to clean the surfaces from dust and dirt. To do this, use warm water and a cotton rag; if it is very dirty, you can add detergent to the water, after which you need to wipe the surface dry with dry rags.
Step_5 Degrease the chipboard surface with a non-slip solvent, such as white spirit or acetone.
Step_6 ADDITIONAL STEP. Alignment. If there are deep cracks or chips on the surface, they must be filled with putty. The easiest way to do this is using automotive putty. Upon completion of puttying, sand the treated surfaces, then repeat step 4 - clean the surface with a damp cloth.
Step_7 Priming. Coat the chipboard with one or two layers of primer, this will allow for better adhesion of the paint to the surface and reduce paint consumption during further painting. It is best to use an aerosol acrylic primer. After priming, wait until the primer is completely dry.
Stages of dyeing at home
In order for the coating to last for a long time, it is important to properly prepare the surface of the particle board.
Required tools and materials
To work you will need:
- narrow brush - for painting corners and ends;
- foam rollers - for priming and painting facades;
- masking tape - to protect permanent fittings and elements painted in a different color;
- sandpaper - coarse and fine.
When painting chipboard, it is recommended to pour the paint into a ditch for rolling out the roller for better absorption of the composition. As a result, the color will be even and the coating will have no gaps.
In addition to paint, the following materials are used in the work:
- primer;
- alcohol;
- solvent;
- varnish
Use a solvent to remove old paint, and degrease the surface with alcohol. You may also need putty to cover deep chips and a spatula.
Surface preparation steps
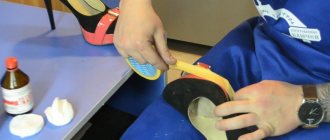
Chipboard furniture is disassembled before painting. The fittings are removed, and the stationary parts are sealed with masking tape. The surface is then prepared for painting.
Alignment
The relief surface is smoothed with coarse sandpaper. The rough sheet is moved sweepingly along the fibers. Use the same method to remove old paint. Rubbing with sandpaper will cause the surface to become covered with dust. Small particles are brushed off with a dry paint brush. Wood dust cannot be removed with a damp cloth. Debris will stick to the wet board. It will be impossible to remove it, and the surface will have to be leveled again.
Skinning
At the next stage, the board is sanded with fine-grained sandpaper. Dust is also cleaned off with a dry brush.
Cleaning and degreasing
A smooth, sanded board without dust is wiped with a damp cloth and then dried with a dry cloth.
For better adhesion to the primer, the surface is degreased and wiped with alcohol.
Surface priming
Damaged boards with cracks are repaired with putty. The primer is applied with a roller or brush in a thin layer. Before painting the product in dark colors, you need to apply primer in two layers. The completely dry board is ready for painting.
Chipboard painting technology: step-by-step instructions
How to repaint old furniture:
- to take apart;
- remove the fittings;
- cover the permanent decor with masking tape;
- remove old paint with a sanding machine or solvent;
- prepare the surface by leveling, sanding and priming;
- Apply paint with a roller or brush.
See also
Consumption rates for acrylic paints per 1 m2 for different surfaces and examples
It is recommended to lay the board horizontally, since in a vertical position the composition will spread. Particleboard partitions begin to be painted on top. You need to paint in at least 2 layers. New chipboards are painted in the same way, skipping the removal of the old paint.
To give the surface texture, rollers with synthetic long pile are used. Applying the paint with a short-haired roller will result in a smooth surface.
Before final painting with acrylic paint, it is recommended to practice on a “draft”—trimming the board. The sample is prepared in the same way as the main surface and the tone is applied. The inspection will help you evaluate the color and appearance of the paint on the furniture.
Preparation and painting of chipboard
Any work on painting chipboard at home consists of several stages. You should not neglect them if you ultimately want to get a high-quality result. Furniture made from particle board must first be prepared for painting.
Before painting chipboard furniture, you need to decide on several questions:
- full and partial repainting is planned;
- coloring design, that is, completely in one color or combined.
Let's look at all the stages using a specific example of how to repaint a chest of drawers. In principle, it doesn’t matter what is being repainted, the main thing is to understand the process, and it can be applied to any furniture.
In the video: painting chipboard products.
Surface treatment
Before painting chipboard furniture, it is important to properly treat its surface and prepare it for painting. Initially, the chest of drawers should be disassembled into individual elements. Remove all drawers, disassemble them if possible and remove fittings. It will be easier to process them and paint high-quality chipboard furniture with your own hands.
Important! Processing begins with the use of coarse-grit sandpaper.
It is necessary to sand until the old paint completely disappears. We also make sure that no greasy stains or other contaminants remain on the surface. Otherwise, quality painting cannot be guaranteed. When sanding, movements are performed in a sweeping manner and along the fibers.
After completing the rough processing, we clean the parts of the chest of drawers from shavings and dust. You can use a flat paint brush. It is impossible to work efficiently with this rag. On the contrary, the rag will clog shavings into the smallest dents of the chipboard slab, which will negatively affect the quality of the paint.
Next, we move on to the grinding stage, which is also carried out with sandpaper, only the grain size is much smaller.
The main thing in this process is to treat difficult areas. When finishing the process, we completely clear the chips again. At the final stage, we wipe the parts of the chest of drawers with a damp cloth, then wipe them with a dry cloth and let them dry thoroughly.
Padding
Painting work should not begin without first priming the furniture parts. Treating them with a primer will significantly improve the quality of painting. It is better to use an acrylic-based primer composition.
Painting furniture made of chipboard is done either with a brush or with a roller. The main thing is that the layer is as thin as possible. After applying the composition to the surface, leave the parts for some time to dry completely.
Choosing a paint shade
While the primer dries, we select the tone of the paint. If you plan to paint it in a single color, for example, white, then there won’t be any special nuances. If you decide to be creative and paint old chipboard furniture in combined colors, then you should choose tones that are comparable to each other. We choose the main color, and then select related tones for it, as if shading the main palette.
By the way, you can achieve lighter shades by adding some white dye.
Before you paint the chipboard with dyes, you need to apply the paint to the unwanted wooden surface to determine the natural shade. This is justified by the fact that acrylic paints change tone when drying.
Application of paint and varnish
Next, we’ll take a closer look at how to paint chipboard with your own hands. At the first stage, we decide on the coloring solution, or rather on its quality. It should be of optimal consistency, neither liquid nor thick. It should also not contain dry grains.
Next, we determine the number of layers to be applied. Here the consumer himself must decide, taking into account the condition of the old chipboard furniture, personal preferences and other factors. But, experienced craftsmen advise applying at least two layers. It is imperative that each subsequent layer is applied after the previous one has completely dried. To apply the layer evenly, paint should be done using a roller or brush, moving in the same direction.
The next step is to fix the paint with varnish.
To do this, wait until the paint has completely dried and apply varnish to the surface using foam rubber. To do this, dip the foam rubber into a container of varnish and apply it evenly and gently onto the layer of paint. For better effect, repeat the procedure several times, naturally after the previous layer has dried. After waiting for the last layer to dry completely, you can assemble the chest of drawers.
Additional touches can be added to add originality or achieve a vintage design. Draw golden lines or artificially age them. The main thing is not to leave smudges or other marks when performing additional strokes. You can ruin all the work done. For insurance, it is better to use masking tape.
Rules for applying varnish with your own hands
Wood chips and resin have different absorbent properties. When decorative compounds are applied to clean chipboard, a non-uniform color is obtained. The primer promotes uniform distribution of the coating. Therefore, the main rule for varnishing particle boards is mandatory priming.
How to varnish chipboard:
- the cleaned surface is coated with a primer;
- polish;
- apply the first layer of varnish;
- after complete drying, sand again;
- coated with a second layer of varnish;
- finally level the dried surface.
The varnish is applied with a brush, and for a more uniform coating, a cotton swab with cotton filler is used. When applied with a swab, the composition saturates the surface well.
Painting Tips
- If necessary, you can use a brush or roller. But in this case the paint must be applied in several layers;
- After painting, irregularities may appear on the paint layer. They must be removed by sanding with fine sandpaper;
- When using aerosol paint, the bottle must be kept at a distance of about a third of a meter. In this case, before use, the can must be shaken for at least a minute;
- If possible, when applying paint, it is better to position the sheet horizontally in order to avoid drips. This principle should be applied both when using aerosol paint and when using the manual method. If there is no possibility of a horizontal arrangement, then it is better to paint with movements from top to bottom;
- After the paint has dried, it is recommended to varnish. This way you can provide the paint layer with reliable protection in the future. At the same time, when working with acrylic paint, it is better to also use acrylic-based varnish;
- To achieve an even layer of paint when working with a roller, try to use a short-haired tool. At the same time, there are rollers that allow you to leave textured patterns on the surface;
- When painting, seal with masking tape or otherwise cover those areas that should not be painted. If paint gets into such places, try to wipe it off as soon as possible;
- Despite the fact that almost all modern paint and varnish products are non-toxic, it is better to ventilate the room while working at home. It doesn't hurt to wear a respirator;
- Try to choose a paint with good hiding power. Otherwise, the original color will show through the paint layer and you will have to repeat the coloring almost immediately;
- It is better to apply the next coat of paint no earlier than after 24 hours. In this case, the total time for the composition to set and gain strength is approximately 3 days.
Options for subsequent decoration
Original ways to design furniture from chipboard:
- two-color painting: front surfaces white, and side surfaces black, light green, yellow, red;
- antique effect: add a darker, well-diluted shade to the painted surface;
- pasting with colored film: decorate the doors of a cabinet or chest of drawers with a floral pattern, an abstract pattern;
- drawings using stencils: ornaments and flowers are applied on top of the main tone in a contrasting color.
Aerosol paint is also used for decoration. With their help, they create the effect of ombre and chrome plating. Walls and partitions are covered with wallpaper over paint.
Surface preparation
For the production of furniture, they used and still use different coatings on chipboard, which have to be removed at home using largely different methods.
In any case, it is better to disassemble cabinets, tables, bedside tables and take them outside or other open, well-ventilated space. If necessary, you can work without disassembling, then you should free up space around it, lay newspaper or thick oilcloth underneath so as not to stain the floors in the room.
Painted furniture
If varnish or paint has been applied to the slabs, they can be treated with a hairdryer. After heating and softening, the top layer can be easily cleaned off with a spatula. Thick coatings of old paint can form swollen bubbles when exposed to hot air, which are much easier to clean off than thin layers.
If you need to clean an ancient countertop, a regular heated iron will do. By ironing the surface through the foil, the coating can quickly be removed with a spatula or knife. For vertical or shaped surfaces, for example on a rustic chest of drawers, in the absence of a hairdryer, a torch or blowtorch with any heating source will help remove the old paint. The work must be carried out very carefully, keeping in mind safety measures.
There is an alternative method for removing varnishes and paints, the essence of which is to treat the layer with solvents. The organic liquid is generously distributed over the surface with a brush, wait a while, then the softened layer is removed with a spatula. The solvent method is convenient, but requires caution due to the high volatility and flammability of the liquid.
Furniture coated with polymers, veneer or laminated paper
If there is a laminated, veneered or laminated layer on the surface, you will have to work hard. It is very difficult to remove them just like paint, because there is a high probability of damage to the particle base of the chipboard material. Therefore, the furniture is treated with sanding cloths until the roughness of the coating is formed, which allows the new layer of paint to be securely fixed.
Nowadays, chipboard home furniture very often has a laminated outer layer. It should be prepared with great care, especially if you plan to subsequently paint the chipboard in an elegant white color.
Sanding is first carried out using sanding plates with large grains, then the dust is carefully swept away with a brush. Please note that you should not wipe dusty areas with a cloth, because dirt particles will penetrate into the pores and interfere with the subsequent fixation of the coloring pigment.
At the next stage, sanding is carried out with fine-grained sanding sheets, especially focusing on edges, corners, and other areas where pre-treatment was previously difficult to do. After this, sweep out all the dust particles again.
Note! Before you start painting, it is recommended to vacuum the room to prevent dust particles in the air from sticking to the freshly painted furniture.
Otherwise, instead of the long-awaited glossy cabinet or table, you may end up with a non-uniform matte finish.
After sanding, you need to slowly run your hand over the surface of the furniture, feeling each area for any unevenness or damage. If there are any, the furniture must be puttied with special compounds or a mixture of fine wood shavings and PVA.
After waiting several hours, up to a day, you can begin priming, which is absolutely necessary to improve the fixation of coloring pigments in the future. The primer mixture will also need a day to dry completely, provided that the work is carried out in a warm room.
If the temperature is close to the minimum allowed 5℃, drying may take longer.
Aftercare rules
How to extend the service life of painted furniture and chipboard structures:
- do not install in direct sunlight or near heating devices;
- do not place dishes with hot drinks and dishes on the countertop, use mats;
- before transportation, pack in cardboard boxes, wrap the corners with newspaper;
- clean surfaces from dirt with a slightly damp cloth, you can use a soap solution;
- do not rub with a hard brush or metal sponge;
- Do not clean with abrasives or household chemicals containing chlorine.
If the coating is cracked, do not allow moisture to enter the crack.
