Return to list of articles Even the most expensive and high-quality leather loses its presentable appearance over time. Scuffs appear, paint wears off in areas of greatest stress. And sometimes you just want to stand out and create a unique gradient on a leather bag, belt or purse.
Painting would be an excellent option. I am attracted by the large selection of colors and the opportunity to get involved in the creative process. We'll tell you what and how to dye leather at home to transform your product.
What is leatherette?
Leatherette is a material that is used instead of genuine leather for the production of shoes, clothing, bags and other products.
Leatherette items are very relevant and in demand, they have become a part of our lives. Taking into account the fact that over time things lose their attractive appearance, the paint on clothes or shoes may fade, it is important to have proper care. However, this is not a reason to move away from your usual and favorite things; by resorting to painting in time, you can extend their service life. Next, we will look at several ways in which you can easily and simply paint artificial leather at home.
Liquid Leather
Among the large assortment of leather paints, you can find a product that is liquid leather. It can be used to restore a burnt or cut genuine leather jacket. The product is ideal for restoring car interiors and scratched shoes.
Liquid leather allows products to return to their original appearance. This product is a simple, unique composition that allows you to quickly eliminate any damage to the surface of leather products.
The basis for liquid leather is a water-alcohol solution that perfectly penetrates the structure of the material. After complete drying, the composition will not separate. After all, the product penetrates the material. It is worth noting that the composition can be used for any type of material: artificial leather, natural and pressed leather.
Dyeing leatherette at home
Dyeing artificial leather at home depends on several conditions, primarily influenced by the products used for this. We list several options and means through which you can paint artificial leather.
Bottles with shoe impregnation
If only minor restoration of individual areas and places on clothing or things is required, then it is quite possible to use special means. Bottles with shoe impregnation are compact, easy to use and very popular. To restore small areas, you need to use the sponge that comes with the bottle. Apply the contents of the bottle onto a sponge and use gentle movements to paint over problem areas. If there is no such sponge, then you can use a regular brush or cotton swab, the result of the actions should be exactly the same. In order for the coloring of shoe impregnation to be more reliable, it is recommended to apply at least 2 layers, leaving a break for absorption of 30 minutes.
Other paints for leatherette
Dye for artificial leather penetrates sufficiently into the structure of the fabric itself and guarantees reliable coloring of products. Things made from such material will be protected from water and will remain breathable. Such products are very convenient and are sold in special packaging.
Acrylic paints
Acrylic paint has excellent results for restoring faux leather items. These paints have a wide range of colors and high quality.
Acrylic is a material that is capable of stretching, which guarantees protection against cracks. Working with acrylic paints requires a sponge or brush to apply the product to the surface of clothing or things.
If the paint has thickened, you can try to return the correct consistency by adding 2-3 drops of acetone and stirring the contents.
Restoration of leather goods
Quite often, genuine leather products are damaged. These may be cracks, scratches or cuts. Deep tears are not easy to repair, but scratches can be repaired.
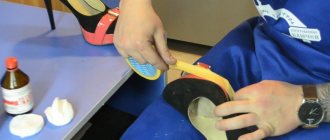
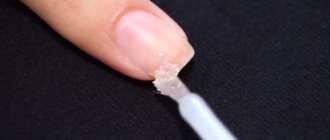
The product can be restored using a special composition called “liquid leather” or restoration paste. This material must be applied by hand using a small putty knife or your own hands. Liquid skin is squeezed onto a sheet of paper and applied to the damage in small portions.
For example, repairing a leather jacket occurs as follows. The damaged surface is wiped with a dry cloth, then a small portion of liquid leather is applied to the scratches. After this, the paint is pressed manually using plastic gloves. Only to such gloves the composition does not stick during work.
The liquid leather is then dried with a hairdryer and pressed again by hand. Layers are applied until the defect is eliminated. After each application, the layer must be heated with a hairdryer and pressed manually.
If a build-up forms, it can be easily removed with fine sandpaper after the layer has dried. Next it is painted with topcoat paints and polished with a rag. Separate finishes are not used,
Where to find products for coloring artificial leather?
Currently, products for coloring artificial leather can be bought in almost any hardware store and even in a supermarket, while in hardware stores there is a large selection of paints that specialize in coloring leatherette. In shoe stores you can find shoe impregnation that will skillfully renew your shoes or boots. This ensures good coloring of leatherette. In addition, such products can be in small containers with dyes for both artificial and natural leather.
How to dye a leather bag?
To restore a leather bag, you will need special paint. It is advisable to buy it in specialized stores that work with trusted companies, since there is a high risk of damaging the bag with low-quality paint. The dye should be special for leather, and not universal for products made from various materials. Bag paint is sold in different forms:
- sprays - they are convenient to work on a large surface without fittings;
- tubes - applied using a tampon, ensures good absorption.
bottles - often such paint is not capable of properly painting the skin;
Make sure the packaging says it is a paint and not a tint. Paint in tubes is more convenient if the bag has fittings, beads, or metal elements.
In order for the bag to serve for a long time, the dye must be fixed. For this purpose, special formulations are sold in stores. But if it is not on sale, the fixative can be made at home.
Mix:
- 1 liter of water;
- 1 glass of vinegar;
- 1 tbsp. l. salt.
Treat the bag with this solution when the dye is completely dry.
Recommendations for preparing leatherette for dyeing
Before painting the problem area, it is necessary to carefully prepare and clean the area from dust; if this is not done, cracks may appear after painting: the paint will lag behind the material. In order to clean leatherette, you need to treat the area with soapy water and rinse with running water; this can be done with a regular napkin. Next, wipe the area with a sponge again and remove any remaining dirt.
Thus, during painting, all work is carried out strictly with gloves.
After painting, you need to make sure that the leatherette is completely dry; a good solution is to dry it naturally, without using heating devices - their use can lead to a change in the shape of things.
Working with topcoat
Preparation
The surface must be cleaned from dust with a brush. Degrease with Cleaner LGR After this, apply paint, evenly distributing it over the surface. When working from a spray bottle, the can must be kept at the distance specified in the instructions. Otherwise, streaks may form instead of a uniform layer.
When using alcohol paints, it is better to work in a ventilated area, as intense evaporation occurs and may make you feel worse.
Application
The paint is applied with brushes, swabs with long handles or from spray bottles. If minor repairs to the product or drawing are being made, the remaining areas must be covered so as not to get dirty. This can be done with gauze, cloth, film, and secure the edges with masking tape. After use, tools must be washed in running water and soap. Allow to dry naturally.
Finishing
The product needs to dry for several hours and then undergo final polishing.
Painting bags and other things
Let's take a closer look at painting bags and other things made of leatherette: for this we prepare everything necessary, namely: paint (it is better to choose acrylic), acetone, a sponge, as well as a palette and gloves. If missing, you can replace it with aluminum foil. Try to read the instructions carefully; it is recommended to work strictly in accordance with the steps prescribed in the instructions.
Features of acrylic as an artistic paint for leather
The first feature of acrylic is its quick drying. This is emphasized in any leather painting master class when working with acrylic. This property is not very convenient, because acrylic, and especially multi-colored mixtures of it, dries too quickly, not giving the worker time to look at and correct what happened. Therefore, when working with acrylic, it is necessary to think through the entire work process step by step in advance. In this case, when applying layers of paint one on top of the other, you do not need to wait long for them to dry completely. Most artists who paint on leather with acrylic paints recommend applying thin layers to prevent cracking, which is another annoying issue when working with acrylic. If you don’t like the layer and it hasn’t dried yet, you can immediately remove it with a wet cloth.
If the object to be painted is large, painting experts recommend using a foam sponge, and sometimes even a foam roller, for application.
Procedure for painting
Prepare the paint, pay attention to the fact that it should not be very thick; to do this, dilute it with acetone. It is important to take into account that acrylic paints dry quite quickly, so do not squeeze out a lot, the best solution is to add paint as needed, then mix the resulting paint consistency with a sponge. When starting coloring, it is recommended to apply the dye smoothly and evenly. Next, things need to be left to dry, this usually takes about 20 minutes. Then the second layer is applied. Drying of things is done independently, without the use of artificial heat sources.
Final stage
After complete drying, the product must be coated with a special paint fixative. It is best to use acrylic composition. Of course, there are quite a lot of similar remedies. However, experts recommend using only water-based fixative . Also, the choice of this product depends on what effect you want. The fixative can make the skin look glossy or matte.
Apply the fixing compound using a sponge on an already unpainted jacket using even movements and preferably in one direction. During the application of the fixative, white streaks or foam may form . In this case, there is no need to worry. Scary stains will disappear after the composition dries. The fixative helps protect the leather jacket from rubbing and fading.
Products must be completely dry before using acrylic fixative. Otherwise, after applying the composition, the skin will become sticky and the product will be damaged.
Homemade paint fixer
Once the fixative has dried, the jacket should be wiped to remove any white stains. If you don’t have a special paint fixative on hand, you can make it yourself. To do this, you need to mix a liter of water, a tablespoon of salt and 200 grams of table vinegar . The resulting composition must be applied to the leather product using a sponge. After this, you need to wait until the skin dries and wipe it off.
Other tips for painting faux leather
Pay attention to what specific type of leatherette the items that require painting are made from. Let's take a closer look at the main features of artificial leather care.
- Read the instructions for use carefully.
- Do a little testing before painting, try on a small area and not in a visible place.
It is recommended to make sure that there are no streaks or other undesirable reactions when interacting with the dye. You need to wait until the painted area dries to see the result.
LiveInternetLiveInternet
"VINEGAROON" is a black dye for vegetable tanned leather. It is made at home and its ingredients are ordinary vinegar and iron. When mixed and kept for a month (or so), the iron oxidizes, dissolves in the vinegar and produces a liquid that, when interacting with vegetable tannins in the leather, reacts and turns black. The more tannins, the darker and more saturated the color. Therefore, before painting, you can soak the leather in a strong infusion of tea or coffee or walnuts and the color will be deep black. And it is for this reason that this “dye” is applicable only to vegetable tanned leather; it will not work on chrome leather - there are no vegetable tannins there. In principle, this cannot be called a dye either, since by its nature it is not a paint, but an oxide that reacts and changes color. During wear, such dyed leather does not leave black marks on clothing, as often happens with conventional paint.
The beauty of this dye is that it is very cheap (simple table vinegar and the cheapest metal wool, or even cheaper if you have a handful of old rusty nails). It can be made a liter or two or more without any special expenses. And it paints better than regular paint - right through, and does not rub off on clothes.
<<>>
I would like to note that this recipe was not invented by me personally. I collected information on the Internet on the forums of tanners and woodworkers (vinegaroon is used for tinting wood products - the same tannins are used to treat leather). Based on the collected material, the mistakes and successes of others, I decided to try to make winegarun myself. Along the way, I decided to take pictures and share my results with you.
I can answer all the questions not as a specialist, but as a person who “read a little about it” and “tried it myself.” If you search for the word “vinegaroon” you will find a lot of information on this topic (if you are interested).
So..
All we need is pure white vinegar without any impurities and RUST-PROOF dishcloths. Old rusty nails work great too, as do iron filings. The main thing is that it is NOT stainless steel.
In my nearest store, I didn’t find regular washcloths (only stainless steel), but I did find washcloths with soap. They cost pennies but you have to rinse out all the soap.
In the photo there is a small bottle of vinegar and a bunch of washcloths - this is too much, as it turned out later, you will only need 3-4. You need more vinegar.
I rinsed the washcloths not just in hot water, but also with a mixture of dishwashing detergent in order to rinse out all the oils with which the washcloths are coated so that they do not rust. The smaller and finer the fibers, the better and faster they will oxidize and dissolve. Look for small and thin ones in the store.
Take a glass scrap jar. I didn’t have one, so I took the “needed” one. What to do..
Gut 3-4 washcloths and put them in a jar. Do not press them, let them “hang” in free flight.
Here I stuffed a full jar, but then took out half.
Fill with vinegar. I only bought one bottle but now I realized that I needed more..
Oxidation begins instantly - vinegar turns rusty in seconds
Cover the jar with a lid. Do not close it tightly - you need a small hole, otherwise the evaporation gases will rip the lid off the jar.
Place in a warm place. My jar was on the kitchen floor. There was no smell, only if you stuck your nose into the jar - then brrrrrr!
Literally the next day the liquid clears and becomes clear. The iron becomes covered with bubbles - the process has begun!
Stir the entire mixture every day.
All this should infuse and dissolve for at least two weeks, preferably a month. During this month, I added more vinegar and iron - I decided that half a jar was very little (greed, probably).
In the photo you see what I got after a month and a week of infusion. The iron dissolved, an oxide crust appeared on top and sediment appeared on the bottom. The liquid is almost transparent. The yellow color in the photo is rust on the walls of the can.
Now you need to strain everything. You see that the liquid is transparent. You also see black pieces of oxide.
This is what is left at the bottom. I got excited and also poured it into a common pot, but it was probably better to throw it away.
The liquid turned out to be quite cloudy
..so I strained it again
that's what's left on the napkin
Now I left the jar to sit for a couple more days, but with the lid completely open, so that all the vapors would evaporate. the main oxidation process took place due to vapors, so it was very important to keep the lid closed throughout the month, leaving only a couple of holes for excess gases to escape. Now let's let everything air out.
After a couple of days, my liquid separated as you can see in the photo.
I strained it again through several layers of thick napkin. Red color is the top layer
Now the middle layer has come - it is lighter and yellower
We don't need the sediment - we'll throw it away
these are still pieces of oxide after the second stage of infusion
And this is our dye. Vinegarun. Everything is strained and packed into jars (or bottles if you prefer).
Now it can stand for a year or two. It depends on how often you will use Vinegarun. You color the leather, then pour the liquid back into the jar and seal it. Leave until next use. And so on until the “fortress” weakens. When you see that the color is no longer completely black and that in order to color it you have to keep the skin in the vinegaroon longer and longer, it’s time to renew it. You don't pour out the liquid, but simply add a couple more washcloths and a bottle of fresh vinegar and go through the whole tincture process again.
The color of the winegarun may turn out different (I mean the color of the liquid and not the color of the painted skin). I got a beautiful amber color, but to be honest - on all forums they usually write that the result is either black or cloudy red or transparent... It all depends on the proportions of vinegar and iron, I think, as well as on the infusion conditions - lighting, temperature, infusion time. Many tanners are very impatient and start using the tincture within two weeks or even earlier. It will turn black, but for a truly high-quality infusion it is better to be patient and let it sit for a month.
Therefore, if you get a different color than mine, this does not mean that you did something wrong. Perhaps I did it wrong
If during “fermentation” the liquid becomes reddish-cloudy, this means that you have gone too far with iron and there is not enough vinegar to process everything. Add fresh vinegar to the bottle and everything will clear up in a day or two.
Now let's try to color the skin. It is best to do this in a bath. Take a tray for developing photographs (if you have one, I have a lot from my turbulent childhood, but they all stayed in Ukraine), you can take any other suitable non-metallic container that is large enough to accommodate your pieces of skin. I’m not painting anything now, I just took a piece of leather for clarity and I won’t use baths. I'll get wet right into the jar.
If you are using a bath, pour vinegarun into it and dip your skin in it.
Keep the skin in the solution for a few seconds and remove. Here in the photo I only held it for one second - I got it wet and took it out. The skin instantly turns gray - the reaction has begun
I got wet again and took it out immediately. This is for clarity. The lighter area - 1 second in the solution. The darker one - 2 seconds in the solution.
Now we place the skin on the table surface and look at it. The color changes before your eyes. Blacker and blacker every second.
Let stand for 5-10 minutes (I stood for 2 minutes, but it takes longer for it to soak in and blacken well). Now you need to stop the reaction and to do this you need to dip the colored piece of skin into a baking soda solution. I put a full tablespoon of baking soda per liter of water.
Dip the skin into this solution and immediately remove it. If you hold it for a long time, the skin will “burn.” You will see how, upon contact with a soda solution, the skin becomes covered with bubbles - the oxidation process is neutralized (I don’t remember the last time I used such clever words - probably back in school!
Now immediately lower the skin under running water and rinse everything well. There is no need to wrinkle or twist the leather - if you have embossing on the leather, you will destroy it. Just hold it under the tap for a long time or keep it in a bowl of clean water so that the soda rinses out
This is the wrong side.
It's dried out a little. You see a line that separates the light area and the darker one. As you remember, the lighter one was in the winegaroon for only one second, and the darker one was in the winegaroon for 2 seconds.
You need to keep it for no more than one minute; when the solution is completely fresh, even half a minute will be enough. I held it for one and two seconds - just so you can see how it works.
Our piece of skin is completely dry. The color is black but not black either. Now the real magic is to give the skin a deep black color.
During this whole process, the skin lost oil and became dry. Therefore, the color is more gray than black. We need to return lost oils to the skin so that it can acquire a truly beautiful color. You can use any oil FOR SKIN. You can use NEATSFOOT OIL - it is the best for the skin. You can use any other one you find - look at the manufacturers of leather treatment products.
Do not use olive or sunflower vegetable oil - these are mineral oils and are not suitable for working with leather.
I took what was at hand - one of the oils that I use when working.
I only applied the oil to half a piece of skin so you can see the difference.
They also say that you can use leather conditioner (not for your facial skin, but for leather products) instead of oil. I decided to try it and took my favorite.
I applied the conditioner to a small area - in the upper right corner of the skin.
I applied oil from the inside too - but just a little so that the skin does not become sour in the oil, but enough so that it changes color
I decided to go all the way and applied a fixative - a little, for shine.
In the area where there was no oil, the fixative was absorbed instantly - there the skin is dry and needs nourishment. And where you applied the oil, the skin is already sufficiently nourished and the fixative is absorbed slowly, reluctantly.
I note that at the site where the conditioner was applied, the fixative was absorbed very quickly, which means that the conditioner was not enough to return the necessary substances to the skin. It's better to use oil.
Everything was absorbed and dried. The lower part of the leather in the photo is treated with oil. Beautiful black rich color. Top right is a piece treated with conditioner. If you don’t compare it to a piece of butter, then in principle it’s normal. At the top left is pure vinegarun without further treatment with oil. The skin has lost oil and has a gray, dry color.
Here is a photo from a different angle (black is quite difficult to photograph). The area without oil or conditioner is circled in red.
Closer shot.
The cut shows that in the area treated with oil (on the right), where the oil was absorbed, the color became black. And where there is no oil - on the left - the color inside the skin remains the same.
Circled in red is the area that spent one second in winegaroon. Everything else - 2 seconds in solution.
The section shows that where the skin was in the solution for only one second, the dye did not have time to be absorbed into the skin. And where I held it for two seconds, the dye penetrated deeper. When coloring the skin in Vinegarun, within 30 seconds or longer, the solution will penetrate deep into the skin and color it completely from the inside. Hatem oil will finish the job and the color will turn into a beautiful black.
This is my experience in making Vinegarun - a black dye.
I shared with you the process I went through. If you have questions, ask, maybe I can answer them. But let me remind you that I am not an expert in this. I just tried what I found on the Internet. I don’t even use black when working—I tried it out of curiosity! (But maybe now I’ll use it - don’t waste a month and a half of work!) https://www.livemaster.ru/topic/335317-vinegaroon-c...el-dlya-kozhi-deshevo-i-mnogo?
How to care for painted leatherette items?
In order for your dyed items to please you for a long time, you need to follow simple rules for caring for artificial leather.
Try not to allow even minimal dust and dirt to pass through in time; use a damp cloth, or better yet, a sponge for cleaning; at the same time, you can wash off the dust with running water, which will clean the contaminated surface.
In addition, things after rain require good drying. To do this, you need to hang things on hangers and give it shape. So, for example, shoes can be stuffed with newspapers, this will help dry them better, and the bag can be hung up and allowed to dry naturally.
To summarize the above, things made of artificial leather will last you a long time if you follow the simplest rules of care. You learned how to properly paint faux leather items and what products to use to keep your old items looking attractive and gorgeous. If you follow all the rules, you will not distinguish them from new ones.
Dry powder with coloring pigment
This is another option to achieve the desired result. This common remedy is prepared as follows:
- Dilute the powder in warm water in the required ratio.
- Strain the resulting liquid and pour it into one or two liters of water.
- Place on the fire and bring to a boil.
- Allow the solution to cool, after which it is ready for use.
Important! In order for all the air to escape from the pores of the material, it is necessary to carry out some manipulation. Place the bag in water for several hours. It is very important that it is well soaked. All this is necessary for even coloring.
Drawing
The drawing is applied well to the skin with a simple soft pencil and wiped off with an eraser. If you don’t have much talent for drawing, you can use the technique of working through stencils - find ready-made ones or use any drawing you like from magazines, posters, etc. The drawing is glued onto cardboard and cut out along the contour.
If there are still some lines inside, you can cut out the outline again and so on several times.
You can glue the leaves of living plants onto cardboard, making an outline out of them, then dry them, carefully remove the bridges between the veins with a brush and again outline the design inside the leaf.
Selection of acrylic paints
There are no problems with paints for painting leather today. The choice of acrylic paints is very large - from those used for painting building facades to making miniatures on expensive materials. We study the instructions for the paint you like and buy it. It should be designed specifically for painting leather. Prices may also vary depending on the manufacturer and quality of the product. But any painter or artist who works with paints will advise working with acrylic of one series and one manufacturer for one painting. This condition allows you to mix multi-colored acrylic paints, achieving the desired color effect without problems or frustration.
Parting words for beginners
This video will help you start working with leather correctly.
Any work done with your own hands brings comfort and uniqueness to the house. And a person who has done not the simplest work by hand, for example, painting with acrylic paints, not only becomes a creator, but also reveals to the audience the wonderful world of his soul by choosing a design and color scheme.
It is no coincidence that children love old or homemade toys and things belonging to brothers and sisters more than standard, soullessly made factory consumer goods. The aura of warmth emanating from handicrafts is felt much more strongly by children than by adults. Therefore, go ahead, give free rein to the desire to create. Don't be upset if everything doesn't work out right away. Try again and again. Let your hands and head help you make, if not a masterpiece, then a completely interesting and useful thing.
Leather products - jackets, boots, sneakers, car interiors - even with careful use, over time they lose their former attractiveness. Defects appear (scratches, abrasions, cracks), the material requires repair. Restoring the appearance of shoes and other things is possible at home. To do this, you only need high-quality leather paint.