Types of products
The second name for the hardware option we are considering is ball guides, since the system moves on small balls, which ensure smooth running and durability of the structures. Let's figure out what product options are available, and then consider the model range presented on the market.
Main types
All telescopic options are divided according to the following characteristics:
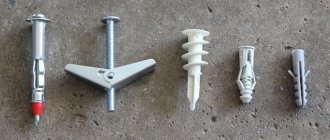
- Possibility of disassembly . There are both collapsible and non-dismountable options; the second option is not suitable, since the element in it cannot be disassembled and it is difficult to remove such a box. But the vast majority of options on the market are collapsible, so there will be no problems with repairs.
The design consists of three main components shown in the diagram
- Number of steps . Depending on the extension length, structures are divided into two-section and multi-section. If everything is clear with the first option, then the second is much more complex in design, so you should disassemble it more carefully. But as for the installation and removal process, there is no fundamental difference; if you understand the topic, you will be able to service all types.
Multi-section options extend to a much greater distance than two-section options
- Presence of a closer . This element makes the use of furniture more convenient, because the drawers themselves are pressed to the end and become the way they need to be. Of course, models with a closer are noticeably more expensive than simple options without this element. What you choose in the end is up to you, both solutions are quite reliable, there is not much difference in quality.
The closer is a special plastic block on the outer edge of the structure
The most modern solution is guides that open the drawer when you press it; they are often called “Push to open,” which characterizes the principle of operation. The design is similar to the version with a closer, only it has an additional block that slightly pulls out the drawer when pressed.
The guides also differ in the degree of extension of the elements; there are three main options:
| Illustration | Description |
| Partial extension systems . A standard solution in which the element does not come out completely; a small part of it remains inside the housing, as shown in the photo. These are the cheapest products, which are similar in operating principle to standard roller products, although in terms of reliability they are significantly superior to this analogue. Their use is justified if you do not need full access to the internal cavity. | |
| Full extension designs . This type allows full access to the contents of the drawer, which is very convenient. Naturally, the reliability of the system is an order of magnitude higher than that of the first option, since it must withstand higher loads. Most often this is a multi-stage system, since it is impossible to ensure a large guide stroke using two units. | |
| Super full extension telescopic guides . This option allows the drawers to extend beyond the surface of the furniture façade, providing the best access to the contents. Such fittings are usually used in high-capacity elements; they can withstand high loads, but are also significantly more expensive than the analogues described above. |
Guide dimensions
On sale you can find different sizes of telescopic systems:
| Illustration | Description |
Height 17 mm. The most compact option with the following characteristics:
| |
Height 27-30 mm. This option is more reliable and has the following characteristics:
| |
| Height 35 mm . According to the main characteristics, this type of fittings resembles the type described above, so it makes no sense to list all its main features. The only significant difference is the permissible load, here it is already 20 kg. | |
Height 45 mm. The most common and popular solution today, which has a number of advantages:
|
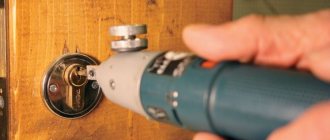
How to remove a drawer
Now let's figure out how to quickly remove the drawer in order to service the fittings or get things that have fallen behind the back wall. The work algorithm is described in detail below:
| Illustration | Description |
| We open the box we need . Everything is simple here - pull it towards you by the handle. | |
| Pulling out is done until it stops . The roll-out drawer extends until the guide stops it. We are interested in the end part of the element shown in the photo. | |
We find a plastic flag located inside the outer slot. Most often it is black, but it can have a different color, it doesn’t matter.
| |
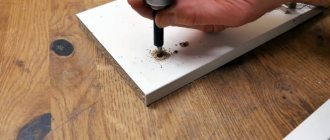
| The antenna must be squeezed out. To do this, it is most convenient to use a thin flat screwdriver; you need to press on the element and slightly pull the box towards you, it should come out a few more centimeters. Please note that the flag can fall in one direction on both sides of the box, or it can move down on one side and up on the other. You just need to press on it - if it does not go down, then move it up and vice versa. You shouldn’t press too hard, as the plastic can break, which will make pulling out the element problematic. | |
| The antenna extends beyond the outer end of the body as shown in the photo . There is no need to pull it out further, as the fittings may be damaged. It is important that the elements are brought into the same position as shown in the photo on both sides of the box. | |
| The antennae should be pressed with your fingers . Most often they go down, but there may be an option when on one side the element needs to be raised up. Everything is simple here: we try to lower the flag, if it resists, then it needs to be raised, you should not press the plastic through the resistance, everything moves easily and can be pressed without problems. | |
The box is carefully pulled out. If you have removed all heavy objects from it in advance, then this process will not take much effort. It is important to pull the section, simultaneously pressing the flags on both sides, then it comes out easily and the likelihood of deformation and damage is minimal.
| |
| You need to pull until the middle section comes out of the element attached to the wall of the box . Everything is simple here, the main thing is not to distort the structure so as not to bend the guides. | |
| This is what the guide looks like after removing the drawer . Now you can clean up the internal compartment or repair and replace damaged parts. It is recommended to check the condition of the balls; they must be lubricated so that the system operates smoothly and with minimal wear. If the balls are dry, they can be lightly greased with thick grease; the cheapest grease will do, the main thing is to apply it a little so as not to stain the furniture. |
Built-in
But it may be necessary to dismantle it during repairs. This is done like this:
- The door is removed. Typically, such lockers are designed in the form of a compartment, the doors in them are sliding on rollers, and the support can be either the lower or the upper one. To dismantle the door, you must carefully lift it so that the lower roller comes off the guides, then tilt it outward so that the upper roller comes off the rail. Then the door can simply be moved to the side.
- The shelves and sides of the internal sections are removed.
- If the remaining structure is light enough, it can be completely removed from the niche and pulled away (using rollers sold in hardware stores to move furniture or simply pieces of old thick wool fabric as a lining for a support so as not to scratch the floor). If it is still too heavy or you need to disassemble it alone, you need to continue dismantling.
- The back wall is removed. It is usually made of plywood or fiberboard, and is attached to small furniture nails. To remove it, carefully pry it up with the tip of a flat screwdriver or chisel, and separate it from the frame by gently pressing from the inside or lightly tapping it with a mallet.
- The frame itself is disassembled. It all depends on the design. If a tie was used on eccentrics, unscrew them; if the corners are used, unscrew the screws; if dowels are used, the elements are separated by gentle tapping.
- Upon completion of disassembly, the fittings are collected in a separate package, and the structural elements are marked so that when reassembling you know what is attached to what.
The video shows the process of disassembling a built-in wardrobe:
Some tips on how to assemble a bottle holder
Hello dear friends.
Today we will talk about how the lower modules of the kitchen unit, which should have a built-in bottle holder, are assembled.
In this example, we will install this fittings in boxes 150mm wide.
What do you need to know when installing such fittings?
By the way, a small digression:
Personally, I always try to purchase such accessories with side mounting (that is, telescopic guides are attached to the side of the module).
There are also fittings with bottom fastening (when it is attached to the lower horizon of the module). In my opinion, it is more difficult to adjust the facade to which it is attached, since in the fixed position it has more play.
So, to begin with, we must measure the distance between the guides (using the holes for their fastening). After this, we prepare it for “installation” and remove those parts of the guides that should be attached to the sides of the module.
One more point:
In terms of height, it is better to place the bottle holder in the module in such a way that it is not attached to the lower part of the facade (thus, “provoking” play in its upper part), since problems with its adjustment may arise.
But, on the other hand, it should not be placed too high in the box, since an appropriate distance (for bottles) must be maintained between its upper tier (intended for the same bottles) and the body slats of the box.
In a word, its position in the box is adjusted “by eye” (since the boxes themselves can have different heights).
When the height position of the fittings is determined, we can mark the side of the box in accordance with the dimensions between the guides (which we measured).
After this, you need to determine the position of the bottle holder based on the depth of the box.
There are two nuances here:
- The front edge of the fittings should not be flush with the front edge of the box. The fact is that such fittings do not have clear geometric shapes (since they are made of rod and are easily deformed). Therefore, aligning its front part flush with the front edge of the box is impossible in principle. Therefore, it needs to be placed a little “deep” into the box (10-15mm).
- Its back part should also have a gap with the back wall of the module into which it is built in to ensure its normal functionality (as, for example, is always done with the design of drawers).
In order not to “bother too much” with these points, you can install two chipboard strips along the entire height of the installed bottle holder in front and behind the bottle holder located on the side part of the module.
When it is set, we use a tape measure to measure the distance from the front edge of the module to its front edge, along which we draw a line on the side part with a pencil.
This is a depth limiter, according to which the guides themselves are attached to the side. Mark the position of the fasteners and secure them.
Here you need to do the markings very carefully, since the guides are immediately attached rigidly (without the possibility of subsequent adjustment), and adjusting them in a box whose width is 150mm simply will not work.
After the guides are secured, insert the bottle holder into them.
At the end, we assemble the box itself (with a bottle holder attached to its right side).
By the way, such fittings are attached only to the right side of the module, and there is no possibility of making two modules, which, for example, should be located on both sides of some box (as in my case) with a “mirror” fastening.
At the end, the back wall is placed on the module and that’s it.
All that remains is to secure the facade (not a very pleasant procedure with such fittings).
Mounting methods
Before moving on to choosing a specific bottle holder model, you need to decide on the piece of furniture into which it will be built or the place where it will be installed. Most models involve a hidden method of placement - inside a box (compartment) of furniture items. However, the type of fastening may vary.
Today the following installation and fastening principles are commonly used:
- inside the compartment (box) on its side wall; lower fastening (rigid or retractable) to the bottom panel of the closed compartment; frontal - to the inner surface of the opening door.
How to choose a bottle holder - a buyer's guide
How to choose a convenient and reliable bottle holder for the kitchen, a price review, photos of popular models of retractable cargo baskets and pro tips - here.
A bottle holder (cargo) is a retractable wire basket that is built into the upper or lower cabinets of a kitchen set. It extends thanks to telescopic guides, and its front side is covered with a furniture facade.
Quick navigation through the article:
- Review of prices and manufacturers
- Step 1. Select the bottle size
- Step 2: How many shelves do you need?
- Step 3. Choose a mounting method
- Step 4. Facade mounting angle
- Step 5. Additional options for convenience
- 6 useful tips from the pros
- If you have a washing machine in your kitchen, use a pull-out basket to store laundry detergents.
Inexpensive DIY foam mattress: simple technology
- Bottle holders are perfect for narrow kitchen units;
- This is a great opportunity to occupy an empty small space;
- This is a useful addition for a small area;
- Bottle holders are great for storing oil, vinegar, sauces;
- They can also be used to place containers with cereals and spices;
- Various boxes and other kitchen utensils can easily fit here;
- It is much more convenient to take objects out of a bottle bottle than from ordinary cabinets and drawers;
- If you have a washing machine in the kitchen, the bottle holder can be used as a pull-out section for storing powders, etc.
As you can see, this element has impressive functionality.
Bottlemakers go by another popular name. This is cargo.
There is only one significant drawback. This is a high price. But how high it is specifically for you depends on the person’s individual earnings.
What is the price
The cheapest Chinese-made bottle holders in Moscow online kitchen accessories stores cost from 2 thousand rubles. As a rule, these are simple models without closers with incomplete extension.
Cargo for the kitchen, made in Poland (Rejs) or Italy (Vibo), can be bought from 3 and 5 thousand rubles, respectively.
Narrow retractable systems from well-known brands from Germany or Austria (popular manufacturers - Blum, Hettich, Kessebohmer) are sold at a price of 10 thousand rubles. But you can find relatively inexpensive German-made models (Vault-Sagel), prices for which start at 6 thousand rubles.
The price of retractable baskets depends on the width of the facade, the number of shelves, and the presence of additional fittings.
Is it worth paying for the brand?
In more expensive cargo models, the price is paid not only for a big name, but also for a proven design, impeccable performance and long service life. Good fittings will last you 15 years, or even more.
There may be surprises when purchasing cheap accessories. For example, one of my friends decided to save money and was faced with the fact that bottles in a cheap basket fell every time when opened.
When ordering a kitchen in a showroom, keep in mind that the furniture manufacturer may add its own markup on fittings, and they may cost more than in online stores or construction hypermarkets.
6 more useful tips for choosing a convenient retractable bottle holder
- To make the bottles stand more stable and not touch each other, purchase special metal half-ring separators.
- When choosing a model, pay attention to the load for which it is designed. Narrow baskets, as a rule, can support up to 12 kg. Wider drawer systems can accommodate significantly more weight.
- More expensive fittings differ from cheaper ones not only in their design, but also in the quality of the shiny coating on the metal. The best option is if chrome plating is done by galvanic method. This coating lasts much longer, and its surface will be free of rust, scratches, chips and abrasions.
- Even if you decide to order a kitchen set with framed facades, if possible, it is still better to hide the pull-out sections behind smooth panels. It is easier to install fittings on flat facades.
- Fastening the basket to the facade is not always included in the kit. Sometimes you have to buy them additionally.
- Most baskets in the assortment of Moscow online stores are presented in chrome color. But if you ordered a kitchen set in a classic style with bronze fittings, try to find bottle holders in the same style. They look great with dark kitchens made of solid wood or MDF with oak, walnut or wenge veneer.
Bottle holder for the kitchen: purpose, types and installation
It's no secret that kitchen furniture, first of all, should be functional and practical. That is why, when designing it, various fittings are used, which are integrated into the drawers or stand alone, being part of the interior.
A device such as a bottle holder for the kitchen deserves special attention. It is a structure made of metal rods, which is designed for the convenience of placing various utensils of the appropriate size in it.
Typical fittings for a kitchen wall, designed for small dishes and containers for various purposes
Varieties and design
First of all, it is worth noting that there are several types of this fittings. They differ from each other in their sizes and methods of installation inside furniture. Moreover, each specific type may have its own separate purpose, not directly related to its name.
Pull-out panel 100 mm wide
Dimensions
Typically, the size of a bottle holder for the kitchen is chosen solely for the convenience of placing this device in the cabinet (see also the article on the size of kitchen cabinets).
However, some manufacturers pay special attention to it, suggesting that it will become not only auxiliary equipment for storing small utensils, but also the main storage for plates and other small utensils.
- Large boxes are usually made 200 mm wide. In this case, several shelves are located in the standard section. They are convenient for placing plates, cups, cutlery and a host of other kitchen items.
- Medium bottle holders are used for various boxes, jars, powders and other utensils. They have a lot of purposes and an optimal width of 150 mm. Moreover, this size can be considered the maximum when installing fittings using the side fastening method.
- The third most common bottle container width size is 100 mm. It is used in cases where it is necessary to save space in the volume of furniture. Moreover, its purpose justifies its name perfectly, since this device can only accommodate bottles, boxes of spices or small containers.
Advice! When choosing certain sizes, you must be guided by considerations of practicality and the possibility of placement in the wall. This will save space and get functional furniture.
Pull-out panel 200 mm wide
Side mount
This type of similar fittings uses a fastening that involves placing guides on the side panel inside the cabinet. In this case, it is best to use devices with a width of no more than 150 mm.
This allows you to place the maximum amount of necessary kitchen utensils and at the same time does not provide a lot of space to overload the load-bearing elements.
- First you need to choose a kitchen cabinet where the bottle holder will be placed. In some furniture models, a separate compartment is allocated for this, but if you make the set yourself, then you can use any box in which an additional partition is simply installed.
- After this, the guides are secured to the inner wall using fasteners that are included with the device. If they are not available, then you can use small self-tapping screws designed for working on wood no more than 1 cm long.
Standard installation instructions for installing retractable fittings with detailed indication of fastening elements and their fixation on the device
- Next, you need to install the bottle holder itself, as shown in the instructions for this model.
- After this, you need to attach a pre-prepared facade panel, which will serve as a kind of door.
- If desired, you can attach a small handle to the resulting door.
Advice! This bottle holder design is best used when saving space and installed in a ready-made box. At the same time, you should not overload it with various items, which may affect functionality.
Installation instructions for retractable fittings with side mounting on stationary guides
Bottom mount
This device is much more practical than the one that uses a side mount. However, its price may be much higher.
This is due to the fact that this design requires the presence of a special trolley with rollers, on which the bottle holder itself is placed.
- The choice of installation location also differs from the first model. This device does not require a separate cabinet for the kitchen, but rather is designed to be installed between them.
- Depending on the specific model, it is necessary to secure the guides or cart using the instructions or the photo included in the manual. It is worth noting that there are many options for this action, and all of them are closely related to the selected design. That is why it is impossible to select general instructions for this stage of installation.
- When the bottle holder is fixed, a facade panel is attached to it, which matches the interior of the kitchen.
- After this, a handle is mounted on the resulting door, with the help of which the opening will be carried out.
Advice! It is worth remembering that this type of device involves moving along the floor. That is why there should be no differences or protrusions on its surface that interfere with proper functioning.
Appearance of a bottle holder with bottom mounting on its own guides
Conclusion
After watching the proposed video, it becomes clear that a device such as a bottle holder is not just an innovation in modern furniture design, but also an essential item that helps organize the placement of kitchen utensils and saves space.
The bottle holder will also help fill the voids in the furniture caused by the elementary placement of standard cabinets.
Source: https://jkuhnya.ru/mebell/shkafi/1011-butylochnica-dlya-kuhni/