Reupholstery and restoration of the kitchen corner
For many people, purchasing a new kitchen corner always takes a backseat, as it is expensive and there are always more important and necessary things to buy.
In one or two days it is quite possible to update a worn-out soft corner and refresh the kitchen interior.
In such a situation, restoration and reupholstery of the kitchen corner becomes a good option. Of course, you can take the furniture to a specialized workshop or call a craftsman directly to your home, but you can also do this work yourself.
A comfortable soft sofa in the dining area pleases the eye and gives the entire kitchen a feeling of coziness.
Such furniture has a fairly simple design, so restoration can be done even by a person with no experience, who has never wondered how to reupholster a kitchen corner.
Selection of fabric for reupholstering the kitchen corner
Replacing upholstery material with another should be done without haste. It is recommended to choose the fabric and filling in advance; there should be no problems with choosing upholstery. Non-staining, wear-resistant materials are more suitable for the kitchen. Using leatherette will help create an expensive design.
Properly executed reupholstery of the kitchen corner will avoid the purchase of new furniture and save the family budget.
Suitable types of fabric for upholstering a kitchen corner:
- tapestry - characterized by density, wear resistance, the material retains its original appearance for a long time, a variety of tones and colors allow you to choose an option for any interior;
- velor - the main advantage is considered strength, fabric with dense pile looks stylish, over time the pile can wear out, as a result the upholstery does not look very presentable;
- flock - a dense material that is wear-resistant, waterproof impregnation simplifies the maintenance procedure;
- jacquard - looks stylish, but is not suitable for the kitchen due to rapid wear;
- PU leather - its characteristics resemble natural leather, it is wear-resistant, heat-resistant, elastic, ideal for upholstering kitchen furniture;
- eco-leather - polyurethane base provides such characteristics as elasticity, safety, hypoallergenicity, softness;
- PVC leather is considered the most popular material due to its affordable cost, the fabric is elastic, easy to care for, the only drawback is the release of harmful fumes into the atmosphere.
If necessary, you can also choose genuine leather for upholstery; regular care will help keep the material in good condition for many years.
Any material can be used to reupholster a kitchen corner.
Important! Furniture with genuine leather upholstery should not be placed near heat sources, this will help prevent its premature wear. When cleaning, it is recommended to use special detergents; they should not damage the integrity of the coating.
Selection of materials
The most popular types of material for covering a furniture corner for a kitchen are tapestry, velor, artificial or genuine leather. To increase service life, give preference to the most durable fabrics.
Choose good materials for upholstering the soft corner.
Genuine leather is an expensive material, but at the same time it is a very durable material that will last you a very long time. Foam rubber is usually used as a filler. It is advisable to use a denser and taller one, then the furniture will be more comfortable and voluminous.
In order not to rashly buy too much and update the corner at minimal cost, you need to carefully measure it and draw a pattern.
It is also worth preparing several pieces of plywood, as they may be useful for replacing damaged frame elements. In addition, prepare the glue that you will use to glue the filler.
Use high-quality filler to restore the soft corner.
Choosing the right material
Any material can be used to reupholster a kitchen corner. Restoration is especially useful for those who want to change the interior, add modern notes, and show imagination. Textile is the most popular upholstery material. You can choose the most suitable fabric in terms of color and characteristics. The most common include:
- Tapestry. Durable, attractive fabric. The advantages include long service life and a wide palette of colors.
- Velours. Very durable fabric. The downside is that over time the pile gets rubbed off, so it loses its presentable appearance.
- Flock. High-quality upholstery material, very durable, abrasion-resistant. Moisture-resistant impregnation will make it possible to easily wash and remove stains that often appear on furniture in the kitchen.
- Jacquard. A beautiful fabric, often used for furniture, but wears out quickly. Getting rid of dirty marks on it is quite problematic.
Tapestry
Jacquard
Flock
Velor
Often, to renovate a kitchen corner, people choose artificial leather. Externally, as well as in properties, it is not inferior to natural, the cost is much less. The disadvantages include the fact that leatherette does not “breathe”. In addition, thin material will soon wear out, crack or tear, so it is necessary to select it correctly. It is optimal to use the following fabrics:
- PU leather. It is durable, resistant to damage, and heat resistant. This is possible thanks to the three-layer structure. The first is cotton, which gives softness and comfort. The second layer is genuine leather with some defects. The third is polyurethane, which gives the material the selected color and texture.
- MF leather. Not cheap, it can be difficult to distinguish it from natural one. Resistant to damage, odorless, highly water resistant. Thanks to this, stains from the surface are easily removed.
- Eco leather. The material is made from safe and environmentally friendly polyurethane. It will not provoke an allergic reaction. The main advantages include elasticity and odorlessness.
- PVC leather. Quite often used in the manufacture of furniture. Has a more affordable price. Its performance characteristics are also excellent: strength, elasticity, ease of maintenance. The disadvantage is that polyvinyl chloride, if the production technology is disrupted, releases substances hazardous to health.
Types of corner kitchen cabinets, rules for choosing them
Genuine leather is the most expensive material. Fits perfectly into the kitchen interior and emphasizes the taste, style, and social status of the homeowners. In addition, she needs extremely careful treatment:
- should be located away from heat sources;
- needs delicate care with special detergents. It is also important to prevent mechanical damage, otherwise a complete replacement of the furniture may be necessary.
To cover furniture, you need to calculate the required amount of material. You should remove the old upholstery from the corner and measure the protruding parts. After this, you need to add up the resulting vertical dimensions and add about 20% for allowances. The required width of the material is determined by the widest part of the old upholstery.
In standard furniture options, foam rubber is usually used as a filler; it is cheap, but very quickly loses its elasticity. Sintepon has the same characteristics. A more expensive, but high-quality option is polyurethane foam. It will last several times longer than other fillers. To make the design of the kitchen corner brighter, you can use different materials and even contrasting colors for the back and seat, for example, black and white, yellow and blue. The choice is unlimited - even light-colored furniture can be practical if the right, easy-to-care fabrics are chosen.
PU leather
PVC leather
Genuine Leather
Eco leather
MF leather
Required Tools
To carry out the restoration and upholstery of the kitchen corner with your own hands, you will need the following tools:
- Anti-stapler and furniture stapler. They will be needed to remove the old upholstery and attach the new one. If you don’t have an anti-stapler, you can use a regular knife to remove staples;
- Scissors;
- Hammer;
- A set of open-end wrenches for disassembling the frame;
- Ticks;
- Pencil.
Only a professional approach will help you achieve a good result.
Of course, this is just the minimum required set; you may also need other tools, but this will depend on the complexity of the repair work.
Reupholstering sofas for the kitchen is done quite carefully and it is important to take this work with full responsibility.
What tools are needed
To restore the kitchen corner you will need the following tools:
- a knife or screwdriver to remove old staples; in the professional world, an anti-stapler is used;
- hammer;
- a painting or stationery knife designed for cutting foam rubber;
- keys, with the help of which the frame of the corner is dismantled until the final completion of the reconstruction of the upholstery;
- sewing machine - used for sewing new upholstery;
- furniture cardboard – ensures high-quality, even stitching of upholstery;
- stapler for paper clips - they are used to fasten the fabric to the frame;
- accessories - intended for additional decor;
- glue - used to attach foam rubber.
Stages of work
When reupholstering furniture, there are several stages that will be necessary in all cases with rare exceptions. Let's take a closer look at how to cover a kitchen corner with your own hands.
Removing the upholstery
To remove the upholstery, we need to gain access to the parts we need. If the back of the kitchen corner is covered with a fiberboard sheet, carefully remove it. Using an anti-stapler, remove the furniture staples that secure the old upholstery and remove it as carefully as possible, since we will need it later.
Use an anti-stapler to remove old upholstery.
The filler in kitchen corners is usually glued to the frame. Therefore, tearing it off the glue will not be difficult. If somewhere after this there are remains of filler on the plywood of the frame, remove them with a knife.
Cutting fabric and filling
First you need to prepare patterns for new upholstery on thick paper. This is where the old upholstery comes in handy. It needs to be straightened with your hands, and in case of a strong jam, ironed. After that, lay it out on paper and trace around the perimeter with a pencil, including all overlaps.
Choose high-quality foam rubber.
After this, cut out templates from paper, according to which you can begin cutting out the prepared material.
The foam rubber for the filler is cut out exactly according to the same principle.
Important! To keep the shape as long as possible, when cutting out the filling, add 1 cm from each edge.
Frame repair
Carefully inspect the frame of your kitchen nook with the upholstery removed. Clean the elements from dirt if necessary. Minor cracks can be filled with glue. If there are severely damaged elements, then you need to carefully unscrew them.
To disassemble the angle frame, open-end wrenches can be useful.
Measure the removed parts and cut new parts from the prepared plywood using the resulting dimensions. Drill holes for mounting in the required places. Assemble the frame with new parts.
Reupholstery and assembly
Glue is applied to the plywood base of the kitchen corner, onto which foam rubber is placed. Next, you need to cover the corner parts with material and use furniture staples and a stapler to secure the fabric.
Be careful when re-tightening the soft corner.
Work with the material slowly and carefully to avoid tears and distortions of the upholstery. If the kitchen corner consists of blocks, then first assemble the corner part, and then the side parts. Complete the kitchen nook assembly by attaching the fiberboard back wall.
DIY kitchen corner renovation
I recently had to renovate my kitchen corner.
In other circumstances, broken furniture would have found its place in a landfill, but shortly before the events described, the upholstery of our corner was updated by an invited master. I was almost going to redo the upholstery myself, but my wife easily convinced me that in this case the process would drag on until the start of the summer season, and I still won’t be able to sew leatherette smoothly. And she found a master on a popular Internet resource. But in general, I didn’t really want to do this... Kitchen corner after renovation As always, while helping the master, I also had to do a little work along the way. The furniture maker needed to take the corner part of the structure with him, and in order to take it out of the kitchen into the hallway, I had to move the refrigerator, and then help carry this part of the furniture outside up the stairs, since a new elevator was installed in our house, which does not fit anything. Due to these movements, the linoleum and wallpaper in the kitchen were torn. Kitchen corner before renovation
Whether long or short, the newly restored fragment was returned home, and the movement of the refrigerator and the lifting of the corner up the stairs were repeated. It would seem that the fairy tale has a happy ending. However, no! A day or two later, the news reaches me that the seat is broken and now I have to fix it.
Ads by
Required materials and tools
- Slotted screwdriver
- Pliers
- Big knife
- Roulette
- Jigsaw
- Hammer
- Glue Moment
- Stapler with staples No. 53, 6 mm
- Grinder with petal circle
- Masking tape
- Plywood (15 mm), sheet 1500 x 1500 mm
Progress
I unscrewed the broken seat from the kitchen corner frame.
Using a large slotted screwdriver, I pryed the staples, pulling out one corner almost to the end. Prying up the staples with a screwdriver. Then, using pliers, I took out the staples, carefully placing them in a plastic plate so that they do not damage the upholstery. Pulling out the staples with pliers Finally, I removed the staples along the entire perimeter of the fabric covering the bottom surface of the seat. All staples on one edge removed
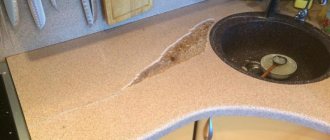
Having peeled back the fabric, I discovered a large transverse crack in the chipboard. Large crack in chipboard
Continued removing the upholstery. There were a lot of staples: they were driven in with a pneumatic tool almost every centimeter. First I pryed them all open with a screwdriver. To avoid inadvertently damaging the material, we had to work carefully. He held a screwdriver in his right hand, and with his left hand he held the edge of the seat and pressed the screwdriver with his thumb for a more confident removal.
So I worked with a screwdriver
Then I finally removed the staples with pliers. It just so happened that my pliers have a protective ridge on the handles. It served as a fulcrum for an improvised lever, making it easier to pull out.
Using pliers we act as a lever
Saturday morning had not yet turned into Saturday afternoon when all the staples were taken out. It was time to move on to the next step. Just in case, I took a photo of the inscription “BACK” in case it comes in handy.
I remembered: “Here were beds, covered with fluffy blankets like dog hair, on one side of which the word “LEGS” was woven in a factory way... Everything in house No. 2 struck the eye with its excessive modesty: and the furniture, which consisted exclusively of garden benches brought from Aleksandrovsky, now named after Proletarskikh Subbotniks, boulevard, and market kerosene lamps, and the very blankets with the frightening word “LEGS.” In the same way, my corner was striking in its excessive modesty, and there was an inscription and an arrow.
There's a back there somewhere
The foam rubber was glued to the chipboard. At first I tried to carefully pull it off with my fingers. (This is almost as fun as squashing bubble wrap.) Then I took a large knife and quickly and carefully separated the foam from the chipboard.
We separate the foam rubber from the chipboard with a knife
After cutting the seat, I measured the chipboard with a tape measure. This was not useful, since I still took this panel as a sample.
You can measure the dimensions of chipboard with a tape measure
I went to the dacha. There should have been pieces of chipboard of suitable size in the barn, but access there was impossible due to the snow. In the construction store closest to the dacha, I had to buy thick (15 mm) plywood for more than 1000 rubles (sheet 1500 x 1500 mm).
Transportation of plywood
At the dacha I laid chipboard on the plywood, marked it out and got the jigsaw ready.
Preparing to cut a piece of plywood
Shortly before these events, I learned that if you cover plywood with masking tape, it will split less when sawing. Just in case, I did so. It looks like it really works.
Sawing plywood with a jigsaw
I slightly rounded the corners at the ends of the plywood using a grinder with a petal circle. The next evening I smeared the plywood with the first (probably suitable) glue I found. He smeared it with a flat iron, laid it on the foam rubber and sat on top. After 15-20 minutes the glue should have dried.
The glue I used to glue foam rubber to plywood
Laying the seat on a flat surface and lightly pressing it with my knee, I secured the material with staples along the long side after about 10 cm. Then I did the same on the other side, trying to maintain an even line and the same tension of the fabric.
Carefully secure the fabric with staples
Next, I secured the material on the short sides and in the corners, then filled it with staples more often, every 2 cm. Then I laid the fabric in the center and secured it with staples every 10 cm along the entire perimeter.
The seat is almost ready - bottom view
I used staples No. 53, 6 mm.
The seat is almost ready - top view
Attaching to the mechanism is without any special features. As you know, it is better to start tightening a screw with a hammer.
Attaching the seat to the mechanism
It turned out better than it was. Everyone is happy!
Kitchen corner after renovation
PS In general, for me the most interesting thing in this story is testing a new cutter. From the remaining thick plywood I decided to cut a cutting board. I thought that I would use it to make grooves with a triangular profile, but somehow it didn’t work out. The groove had to be modified with a grinder.
Related Product
How to sew a cover yourself
To protect the upholstery, you can use a corner cover. First you need to choose the shape of the cover and fabric. Draw it yourself or find the appropriate pattern on the Internet. Take some old fabric, cut it according to the patterns and sew it.
You can use leather or fabric upholstery on the sofa.
Try the resulting draft on your corner. If any defects are found, correct them. If you are satisfied with how the trial version fits on the corner, then proceed to cutting out the main material. Sew in zippers and clasps if necessary. Decorate the case as you wish.
Choose the color of the fabric based on the interior design of the kitchen.
Place the finished cover on your kitchen corner. But don’t get carried away with decorating too much, because this is a cover designed for a kitchen corner, and an abundance of decorative elements will look inappropriate there.
The leather upholstered corner is easy to use and care for.
Advantages and disadvantages of self-upholstery
The advantages of this approach include the following:
- saving money;
- the ability to perform work in your free time;
- compliance of the new type of corner with your tastes and preferences;
- pride in independent work and the repair experience gained.
Synthetic fabric does not deteriorate during use, does not fade, tone and color remain unchanged.
In addition, during restoration it is possible to make some changes to the design of the furniture. You can give free rein to your imagination and come up with a completely new design for your old kitchen corner.
Restored upholstered furniture will breathe new life into kitchen gatherings, pleasing the eye with a harmonious design.
The disadvantages of repairing a kitchen corner with your own hands include the fact that due to the lack of experience in such work, it is not always possible to achieve a good result the first time.
A soft kitchen corner helps create a special atmosphere of coziness and comfort in the kitchen.
Deciding on design and construction
Furniture has characteristics such as color, design, size and configuration. Over the course of many years of use, the shape and color become boring; people want to make at least some changes to the interior. This is easy to do during the process of replacing the facing coating and filler.
Options for upgrading the product may be the following:
- Seats and backrests are finished in different colors. These can be materials that are contrasting or similar in shade.
- Upholstery of furniture in pieces sewn from different types of fabric. These can be stripes, squares, triangles.
- Using decorative buttons to create volume and give the soft part an original look.
- Changing the configuration of individual parts. This will require plywood, which is attached to places that are not subject to load. The backs and sides are complemented by protrusions of various shapes.
- Adding armrests trimmed with soft, removable pads.
In order for furniture reupholstery to bring the expected effect, you should create a sketch that depicts in color and size the interior of the room and the intended design of benches and ottomans.
Is it possible to reupholster other furniture?
You can reupholster the old upholstery on other furniture as well. Nowadays, there are many specialized companies offering restoration services for sofas, armchairs, chairs, stools, ottomans and other pieces of furniture.
In addition to the soft corner, you can also upholster other pieces of furniture with this fabric.
Thus, reupholstering a kitchen corner with your own hands will allow you not only to update the appearance of the furniture, repair damaged parts, but also to give a special individual style to your kitchen, while saving a significant amount of money.
Add bright colors to your kitchen to freshen up the interior.
Furniture decorated with your own hands will create a special atmosphere of home comfort, which is so important. After all, it is in the kitchen that the family gathers after a long day of work to eat, chat and share impressions; it is in the kitchen that close relatives and friends are often invited, who will be pleasantly surprised by the new thing.
Take care of your upholstered furniture to extend its life.
Re-upholstery - secrets of success
DIY upholstery
Even a beginner can cope with such work - with this solution you will not have to spend a lot of money on new furniture, because the price of new upholstery (if you choose inexpensive material) will not exceed 1000-1500 rubles.
But one important question arises - how to reupholster a kitchen corner with your own hands? Let's look at everything in order.
Tool
Reupholstering furniture is a simple matter, but it requires a competent approach. In order for everything to go smoothly, you need to have a reliable tool at hand:
- Anti-stapler (the same stapler, but it removes staples from furniture (you can get by with a simple knife));
- Painting knife (useful for cutting fabric);
- Hammer;
- Open-end wrenches (for dismantling the frame of the kitchen corner);
- Furniture cardboard (to create an even seam);
- Sewing machine (for making covers yourself);
- Furniture stapler (for attaching new upholstery);
- Material (usually fabric, leatherette, leather, leatherette, eco-leather are used);
- Foam rubber (sold in rolls at any hardware store);
- Special glue for foam rubber;
- Accessories.
Read also the article “A small sofa in the kitchen with a sleeping place - advantages and features.”
Let's look at the re-upholstery process step by step
Reupholstering kitchen corners at home is quite a scrupulous task, so try to approach the work responsibly. After all, the final result depends entirely on your perseverance and attention to detail.
Plan:
- The first thing to start with is to carefully remove your old shoes. To do this, you will need an anti-stapler (if you don’t have one, you can use a regular kitchen knife or a flat-head screwdriver). Remove all staples from the kitchen nook frame.
Getting rid of old upholstery
- We remove the old filler. Everything is simple here - you need to remove the old foam from the wooden seat cover (it can be glued, so removing it can take a lot of time);
- We sew covers. If you don’t have money for new material, you can use any old clothes as upholstery - old, worn jeans look quite cute as upholstery. This corner will fit perfectly into any modern design;
- So, we have sewn the covers, now we begin to “soften” the seats and backs. To do this, we will need a construction knife (scissors), pieces of pre-marked foam rubber and glue. We cut out pieces of foam rubber (or other softener) according to the size of the seats and backrests and glue them to the work surface using PVA glue, which is familiar to everyone;
Glue the foam rubber
- The most important step is reupholstering the kitchen furniture. In order for everything to work out beautifully, you should not rush. Pull the new covers over the seats and backrests, and secure them to several staples using a stapler. You don’t need jeweler’s precision here – just take a couple of steps back and visually evaluate the result. If everything is in order, completely attach the covers to the back walls of the kitchen corner;
Stapling the new upholstery
- That's basically it! Now you can be proud of your furniture maker skills, because you were able to decorate a kitchen corner with your own hands, without involving qualified specialists in this matter.
Read also about how to choose wall shelves for the kitchen.
The kitchen corner is like new!
After you have changed the upholstery of your kitchen sofa, it will serve you for many more years. The best part about the process is that you can choose the color of the sofa, its texture and the material itself. Create what you like and what will look best in your kitchen.