Sewing a cover for an ironing board is easy, the main thing is to know how to do it correctly and have a sewing machine. The need to replace the cover may arise if the old cover has worn out, lost its attractive appearance, or was accidentally burned through by a hot iron. During use, the old fabric gradually becomes clogged with dust, and after 10-15 years, when using a dirty board, you may encounter the problem of stains appearing on clean white linen.
Of course, you can purchase a ready-made, new case in the store. But, if you need to replace the fabric on an old-style ironing board that has long been discontinued, it may not fit. In addition, when buying a finished product, you may not be able to guess the dimensions even for a modern board. As a result, the cover will dangle, form wrinkles and complicate the ironing process.
Rules for choosing fabric for a cover
Cotton calico is considered the ideal option for upholstering an ironing board, although other types of fabrics can be used if desired. The main thing is that the material does not stretch. Otherwise, the new case will quickly become deformed.
When choosing fabric, you should also consider the following recommendations:
- The material must be resistant to shedding. When ironing using the steam mode, light-colored items may become dirty from the shedding cover and become unusable. To check whether the material is subject to shedding, you will need to wash it in a basin of warm, clean water. If the water remains clean after washing, then the fabric is suitable for sewing a cover, and vice versa.
- A cover that is too light in color will quickly become dirty and covered with yellow spots from the hot iron. Therefore, it is better to opt for darker colors. If you still like light-colored materials, then you can sew several removable covers and replace them periodically.
- The fabric used to cover the ironing board should not contain additives that will stick to the iron when it heats up. Firstly, you will have to constantly clean the soleplate of the iron so that it glides well on things. And secondly, a dirty sole can easily stain the item you are ironing.
We recommend: Basic rules for brushing teeth and important nuances of the process
Types and materials
There are several coverage options in different price categories. To save money, it’s easier to choose a simple and cheap option and change it as it wears out. But you can choose a coating that is more expensive and more functional. Modern, improved cases are considered expensive. Let's look at a few options:
- The cheapest is a cotton cover.
- A case made of synthetic fabric will cost a little more. It is waterproof, non-flammable and does not allow the iron to stick.
- Coverings with metal threads inside, which allow ironing more efficiently. The iron interacts with the metal, heating the fabric on both sides. This significantly improves the ironing process. An iron left on the ironing board can sit for up to 4 hours without burning.
- Option with a non-stick coating, which is made of cotton fabric impregnated with silicone. This impregnation helps protect clothes from burning and yellow spots. In addition, the effect of double ironing occurs, as it heats up from the iron.
- Teflon coated case. It allows you to iron any types of fabrics without burning or sticking, heating clothes on both sides at the same time.
- Another new type of cover of the highest quality, with fire-resistant properties.
Cotton cover - the most inexpensive and common
Do I need to change the substrate?
Replacing the lining located between the board itself and the fabric may be necessary in the following cases:
- If it became deformed or torn during the process of removing the old fabric.
- If the insulation is old, dirty and stains the laundry when ironing.
- If during use it has become leaky, resulting in the surface of the board becoming uneven.
To make the lining, any insulating material is suitable - foam rubber, synthetic winterizer or batting. You can also use felt or cut a lining from an old flannelette blanket.
Replacing the old cover
The removable cover can always be washed if it gets dirty. However, the fabric gradually becomes unusable, so from time to time the coating requires replacement. There are several ways to apply a new cover to your ironing board.
How to secure
You can sew it yourself by sewing elastic around the edge. If the board is metal or has a mesh surface, you can choose another method. You can insert a rope into the fold of the cover, with which you can tighten the cover on the board.
If the ironing board top is made of wood, it is simply wrapped in fabric, which is secured with furniture clips. This is, of course, the old way of putting a cover on a board, but the cheapest.
Should I remove the old coating?
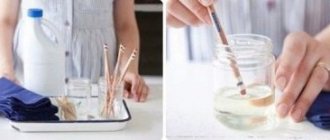
If the fabric is snow-white, then it is advisable to remove the old coating, as well as its gasket, to avoid contamination on the new cover. If you use colored fabric, this is not necessary. You will only need 0.6 meters of light fabric (cotton, calico) and light batting, their width should be 150 centimeters. Light shades are preferable to bright ones because they will not fade or ruin white items. Instead of a stapler, you can use nails that you can simply bend.
Materials for work
So, we have decided on the fabric for the top layer and backing, and now we need to prepare for the process of making the cover. To work you will need:
- Scissors.
- Long ruler or tailor's centimeter.
- A piece of sharpened chalk or soap, or a tailor's pencil specially designed for marking.
- Sewing machine.
- Tailor's pin.
- Threads in the color of the selected material.
- Elastic band or long braid.
- Small round nose pliers.
Cover for ironing board with elastic band
Practical in everyday life, you can put it on and take it off from the ironing base in one motion. What you will need:
- batting;
- textile;
- threads;
- tailor's scissors;
- linen elastic (15 cm long less than the perimeter of the board);
- safety pins;
- felt-tip pen or chalk (for marking);
- sewing machine.
Sewing instructions:
- Place the fabrics on the floor with the wrong side up. Place the ironing board on top, work side down. Outline it. From the resulting line, add 12 cm around the circumference for allowances.
- Cut out the base along the contour and use it to make exactly the same part from batting.
- Place the fabric base with the wrong side to the batting. Baste by hand or secure with tailor's pins.
- Fold the edges 2 cm (2 times 1 cm), secure with tailor's pins and machine stitch. Leave an area of 1 cm unsewn for elastic.
- Using a pin, insert the elastic into the drawstring.
- Pull the finished product onto the board, tighten the elastic so that the cover can be easily removed and put on. Tie it in a knot or sew both ends.
Recommendation! Do not sew the elastic together with the hem (drawstring), it should move freely along the entire border of the cover.
Removable cover
First you will need to remove worn out, old fabric from the ironing board. This procedure is performed using pliers. Using the sharp end of the tool, pry the bracket, clamp it and carefully pull it out. Thus, it is necessary to remove all the staples that secure the covering to the tabletop.
Next, you need to remove the top fabric and inspect the backing. If it is in good condition, then the material is carefully washed in warm soapy water, dried and ironed with a lot of steam.
Now we proceed directly to cutting and sewing the cover itself. The procedure is performed in the following order:
- We lay the old fabric removed from the tabletop on top of a new piece of material and trace the outline with chalk. If desired, you can turn the board upside down, place it on the fabric and draw the outline of the tabletop. If you need to replace the backing, you will also need to make a pattern from padding polyester or foam rubber. The substrate is immediately fixed to the tabletop with a stapler.
- We make a seam allowance into which we will later thread the elastic. To do this, parallel to the previously drawn contour on the cotton fabric, we lay a line, which should be located at a distance of 6 cm from our contour.
- We cut out the part and put it aside.
- Now we cut the bias tape 10 cm wide, fold it in half along its entire length and iron it.
- We turn the edges of the binding inward by 1 cm and iron it again.
- Next, you need to use a needle and thread to baste the binding around the perimeter of the main part so that an elastic band can be threaded into the resulting drawstring.
- Using a sewing machine, we sew a seam along the basting seam.
- Remove the basting thread and, using a tailor's pin, thread the elastic into the drawstring.
We recommend: 5 cheap products that can be used to whiten kitchen towels without bleach or boiling
If a cord is used instead of an elastic band, its ends are fixed with a special stopper. It can be purchased at any sewing supply store. This limiter is very convenient to use, as it is equipped with a locking button that allows you to tighten the cord as tightly as possible.
The cover for the ironing board is ready. All that remains is to put it on the countertop and start ironing the laundry.
Calculation of the pattern for the ironing board cover
Of course, the whole process begins with a pattern. But unfortunately, there is no ready-made pattern that would ideally fit all the boards, since all the boards are different sizes, so you will have to build it yourself.
To do this, you need to measure all the dimensions of the board:
I got 115 cm in length.
35 cm wide.
Here are the dimensions of my board, you will have your own dimensions, everyone has different ones.
It is advisable to write down all the dimensions on paper in the form of such a diagram so that you can easily navigate the construction.
Next, fold the length of the fabric in half and set aside half the width measurements. For example, if my widest part of the board was 35 cm, then I need to set aside half of this from the fold of the fabric, i.e. 17.5 cm. And the narrowest is 17 cm, which means I set aside 8.5 cm. Then I connect these points
Afterwards you need to measure the allowances. My piece of fabric remained uneven, so my allowances turned out different. For the length I got allowances of 9.5 cm on each side, but on the sides I had more fabric left and I didn’t cut it off, I got allowances of about 15 cm on each side.
It’s better, of course, if the allowances are the same, but I didn’t have enough fabric, but it’s not critical. At the corners I just had to level them and round them. It is important to round the edges of the corners, even if the allowances are the same.
Corners must be rounded on both sides
Is there a backing in the coating and what is it made of?
Most cases include narrow foam rubber from 2 to 8 mm thick. The lining in the form of foam rubber softens ironing and plays a role in the non-stick property of the board. More expensive cases can be impregnated with silicone, but they are not sold on our market. But not every company produces ironing board covers with a lining, so you should pay attention to this when purchasing. And if, for example, you sew to order or yourself, then do not forget about at least 2-4 mm of foam rubber - this will greatly improve the ironing process.
What type of fabric is best to use for an ironing board cover?
Cotton is the most common material used in ironing board covers. But the most artistic and graphic ironing board covers are usually made from low-quality cotton material and therefore do not last long.
Do not think that you cannot choose a beautiful coating from high-quality materials, but the choice will be simpler, but such coatings are more practical and do not deteriorate longer. They can also improve the aesthetics and appearance of the board. The following types of materials are often found: 100% cotton, 50% cotton + 50% polyester, 100% polyester.
But the most practical and improving ironing process are covers with non-stick and heat-reflecting properties. Such coverings are sewn from metalized thread and Teflon coating. This cover does not burn during ironing, protects clothes from sticking, and most of the steam and heat is reflected and returned to the clothes, which speeds up the ironing process. The option of purchasing a metallic coating is clearly not just a decorative accent, but rather a practical one. You can also find on sale combined versions of 50% metal thread + 50% cotton. This allows you to diversify the pattern on the coating.
Before purchasing, take measurements of the working surface of the ironing board, measure the width and length of the base. If the size of your board is 120*38 cm (the most common standard), then in addition to the exact size, a cover measuring 125*40 cm will also suit you. Pay attention to the nose of the ironing board; it can be blunt, sharp or conical. Check with the sellers to see if this or that coating is suitable for your board; not all manufacturers count on non-standard boards.
And don't forget, all the covers are removable, so they can be easily washed in a washing machine and give a fresh look. But over time, the cover wears out and, of course, requires replacement.