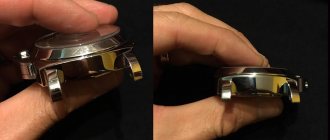
How to remove scratches from your phone?
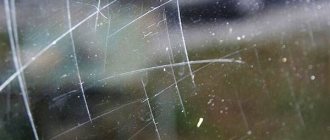
Car keys or an accidental drop are common causes of scratches and chips on your phone. Of course, the best (and safest!) way to remove those scratches on your iPhone, Android, or other mobile device is to replace the screen. If the warranty is expired, Apple will replace the screen for between $129 and $149. Although, you may find other third party companies that will replace the screen cheaper. If this method does not suit you, we would like to offer other methods for getting rid of minor scratches:
Before you try any of these methods, turn off your phone, remove the battery (if you can), and tape the phone's ports to prevent liquid from getting inside. If your screen has large scratches or cracks, you'll need to call a professional or replace the screen entirely yourself. But if you have minor scratches, here's what might help:
- Toothpaste
Sarah: “I was able to remove a scratch from my phone camera lens using toothpaste.”
Apply a small amount of toothpaste (not gel toothpaste, but regular toothpaste) to the edge of a cotton swab or clean, soft cloth. Gently rub the cotton swab or cloth in a circular motion across the screen until the scratch disappears. Afterwards, wipe the screen with a slightly damp cloth to remove any remaining toothpaste.
- Sandpaper
Brett: "Dropped my phone this weekend... Sandpaper helped smooth out the rough edges."
Using sandpaper is a drastic solution, but it can remove unnecessary scuffs from your phone. We do not recommend using this method on your phone screen. It is best used to smooth out scratches on the back of your phone. When using fine sandpaper, it is important to use the least abrasive material and apply gentle pressure to the phone.
Note. If you are not careful, this method may result in more scratches and damage.
Melamine surface cleaning sponge Mr.Clean Magic Eraser
These sponges are the right size to get rid of minor scratches on your phone. They are abrasive and are essentially wet sandpaper, so we advise being careful as with the previous method.
- Baking soda
Baking soda will also help remove scratches, but be careful not to let the water damage your phone. Mix baking soda and water in a bowl (2:1 ratio). Stir to form a thick paste. Dip the paste onto a clean, soft cloth and gently rub in circular motions into the scratches on your phone. After this, wipe the screen with a fresh, slightly damp cloth to remove any remaining baking soda.
- Baby powder
Just replace the soda with baby powder and do the same as in the previous option for removing scratches. Be careful: water can damage your phone.
- Vegetable oil
They say that for small, unnoticeable scratches, vegetable oil is a good temporary solution. One tiny drop of vegetable oil on top of scratches is a quick way to solve the problem.
- Egg and aluminum potassium sulfate
You will need a microfiber cloth, an egg, aluminum foil and alum (aluminum potassium sulfate, which can be purchased at the pharmacy). Mix one egg white and one teaspoon of alum in a saucepan. Preheat to 65°C. Soak a microfiber cloth in the egg and alum mixture.
Place the fabric on aluminum foil and then place it in a 350 degree oven until the fabric is completely dry. Remove the fabric from the oven and rinse it with cold water for 20-30 seconds. Repeat the above step three times and then let the fabric air dry for 48 hours. Use a cloth to remove scratches.
- Car scratch removal creams
Automotive scratch removal creams such as Turtle Wax, 3M Scratch and Swirl Remover can minimize and remove scratches. Simply apply the cream to a clean, soft cloth and gently wipe the screen with it.
- Brasso, Silvo or other polishes
Caution: Using polishes like Brasso and Silvo may, in some cases, remove the screen coating and cause larger scratches. Try this method at your own risk.
Pour the polish into a bowl. It is best to place a towel under the bowl. Dip a soft cloth into the varnish. Rub the cloth over the scratch in an up and down circular motion. After this, wipe the screen with another cloth to remove any remaining product.
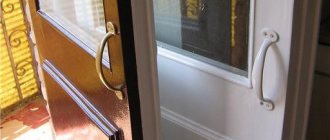
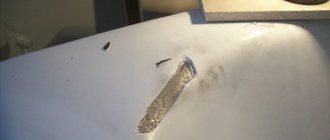
Removing scratches from a plastic laptop
Even a laptop with a plastic cover gets scratched, no matter how hard we scratch. try to prevent it, sometimes it seems inevitable. And while there are plenty of articles on how to remove scratches from aluminum laptops and Macs, the information on plastic laptops isn't as clear. If you have a plastic cover - a laptop, there are other methods that are more suitable than those listed above. Let's dig a little deeper to find out how to remove scratches from a plastic laptop.
As with aluminum laptops, even plastic laptops can have more or less "severe" scratches. Depending on the depth of the scratches, some methods will be more effective than others at removing scratches or at least significantly reducing their visibility.
Removing minor scratches from a plastic laptop:
For minor scratches, you can use moderately abrasive substances such as:
- Toothpaste
- Polish for plastic
- Baking soda
- Furniture polish.
Removing deep scratches on a plastic laptop:
Deep scratches are much more difficult to get rid of, but it can be done using:
- sheets of sandpaper
- magic erasers
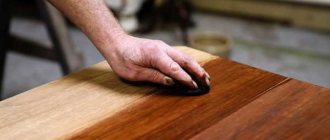
Use plastic polish
Probably the most common method is to use plastic polish, which is widely available in most stores. To remove scratches using plastic polish:
- Mix dishwashing detergent with water (preferably warm) and prepare a solution.
- Clean the surfaces of your laptop with the solution (the solution will help remove dirt and debris from the scratches you want to remove).
- Dry your laptop with a microfiber cloth.
- Apply a small amount of polish to a cloth and rub it into the scratches in a circular motion. If necessary, you can apply more polishes.
- Wait for it to soak in before wiping the laptop lid with a clean cloth.
Remove tougher scratches on a plastic laptop with sandpaper
If the scratches on your laptop are deep and won't go away with plastic polish or any other substance, consider purchasing several sheets of sandpaper of varying grits. Be sure to wet the sandpaper before using it on your laptop to prevent further damage. Additionally, you should fold a sheet of sandpaper down to the size of the scratch to avoid scratching the "clean" areas of your laptop.
- Apply gentle pressure and rub the scratch in a circular motion.
- Then wipe the area with a dry cloth.
- If you still see scratches, repeat the same process using a thinner layer of sandpaper.
- For better results, you may consider finishing off by applying a coat of polish to the entire surface of your laptop. This will help give it a better look and make it as good as new.
How to remove scratches in a car interior?
Products that remove scratches on cars are sold in retail outlets specializing in the sale of car parts, electronics, and cell phones.
You should select a drug to remove defects, taking into account the degree of damage and location.
For example, plastic car interiors are restored:
- construction hairdryer;
- polishing preparations;
- special pencils.
If they do not help, then you need to contact the services of specialists for professional repairs.
Hairdryer
Even a household appliance has enough power to remove small scratches and cobwebs. Heating will promote their screeding.
Sequencing:
- Pre-clean the surface with detergents.
- Direct a hot air stream to the dry panel where the problem areas are located. Set the hair dryer to low power.
- Monitor the condition of the plastic, if there is no result, add power, bring the device closer. The scratches will disappear or become smaller. This will make further polishing easier.
- Immediately after the procedure, do not touch the part; wait until it cools down.
Important!
Do not point the device at one point. To prevent excessive melting, distribute hot streams evenly.
Polishing
To polish out a scratch on plastic, prepare an abrasive paste specifically for this material.
Follow the following algorithm of actions:
- Clean the surface with detergents, remove particles of stubborn dirt, and dry.
- Apply the paste to the problem area and wait until it hardens (about 5 minutes).
- Polish with a rag in a circular motion until the product is completely removed.
- When finished, wipe the plastic surface with a soft cloth.
Important!
Do not use products designed for paint surfaces. Their composition is harmful to plastic.
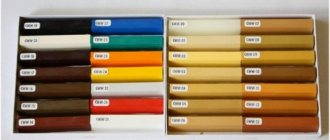
Masking pencils
Using masking pencils
- a simple and quick way to remove scratches, but not cheap.
When restoring multi-colored plastic surfaces, select the appropriate tone.
Basic rules for removing scratches from plastic using the product:
- Thoroughly clean the problem areas, removing dirt and dust with detergents, and allow the surface to dry.
- Fill in the damage with the sharp end of a pencil, wait time according to the manufacturer's recommendations.
- Remove any remaining compound and polish to level the entire surface of the part.
The product is suitable for repeated use, which compensates for the high cost.
On a note
. Pay special attention to color selection - this will help return the parts to their original appearance.
Major interior repairs
The method requires time and experience, and is also expensive.
However, the results cover the costs. In addition to completely eliminating the damage, there is a chance to update the interior of the cabin.
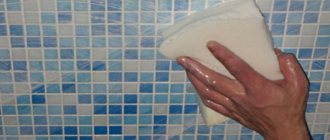
How to get rid of scratches on plastic:
- Thoroughly clean the item to be restored using detergents.
- Sand the damaged area with a special tool (for example, sandpaper), with the exception of raised parts.
- Apply primer to the prepared area. It is sold in special cans. Its composition should not react with the surface.
- After applying several primer layers, carry out a perfectly even polish with abrasive.
- Fill large cracks with putty.
- Once the repair is complete, paint the part with the appropriate color.
Important!
When coating with varnish, glare may appear - this can interfere with operating the machine.