How to restore enamel on a washing machine. Painting washing machine bodies
How to paint a washing machine
Painting a washing machine will allow the unit to be updated and, in addition, to fit perfectly into the created interior of the kitchen or bathroom. In principle, painting a washing machine is not so difficult; you can change its surface using a self-adhesive film or using a spray paint.
To change the surface of the washing machine, first decide what the external appearance of this household appliance should look like. Before painting, it is imperative to carry out a preparatory process in which you need to clean the surface of the unit from accumulated dirt and dust particles. Using clean napkins and detergents, thoroughly remove all grease deposits, especially the kind of cleaning recommended for those units that have been in and operating in the kitchen for a long time. If rust appears on the surface of the washing machine, you need to try using gentle movements to remove the old paintwork without damaging the structure itself. Thoroughly treat the surface from the front and sides with a can containing paint remover.
After this, the paint on the surface of the washing machine will begin to swell, it is necessary to remove its remains using a metal spatula. If in some areas the old paintwork has a death grip, we recommend repeating the spray can procedure. When removing old paint, you can use a special metal brush, but you can only work with it in those parts where you need to clean the metal surface, from which the paint has already been removed using new paint. If parts of the old paintwork remain in some places, you will not be able to evenly paint the surface of the washing machine with a new layer.
Before you start painting the surface of the washing machine, you need to thoroughly clean it of dust, dirt and grease particles, then let the surface dry thoroughly so that the moisture can completely evaporate. Degrease the dried surface of the washing machine with a regular solvent, then apply a primer to the entire surface of the unit, try to distribute the primer as carefully as possible so that the paint used in the future is as smooth as possible. The primer on the surface must be applied in as thin a layer as possible; according to the rules, there must be several layers. Each layer of the product must dry; in the worst case, the new paint, when it lays down, will begin to swell, which is highly undesirable.
Now you can safely apply new paint to the decorated surface, spray paint from an aerosol can. You can paint your washing machine in several colors; if you wish, you can show your imagination and use stencils to create original designs, for example, in the form of little mermaids, dolphins or sea waves.
What to do if you don’t want to part with your favorite things, but they have already lost their original appearance and become faded? There is only one way out; they can be repainted. The question is especially often asked on forums: how to dye jeans in a washing machine? This procedure scares some housewives, but it is worth saying that there is nothing complicated about it. The main thing is to choose the right paint for dyeing clothes and follow all the recommendations indicated on the packaging with the coloring composition.
How to clean an automatic washing machine inside and out
A washing machine is an indispensable attribute of every home. It is no longer possible to imagine life without this household appliance. The machine is designed to last for a long time, and to keep it that way, it needs regular maintenance – cleaning.
Today there are many different means that can be used to clean all parts of the machine. In addition to special means, you can also use folk ones. Helpers in the care process will be:
- Soda
- Acetic acid
- Lemon acid
- Chlorine bleaches
The rubber seal or cuff of the washing machine is a mandatory element of cleaning during the maintenance process. Rubber should be cleaned carefully, but efficiently, so that there are no leakage problems. Dirt and mold accumulate in this place - which is why it is important to clean regularly. Sediments in this area contribute to the appearance of unpleasant odors.
Any cleaning agent will help in the process, including regular baking soda. In some cases, if mold and a strong smell have already appeared, then it is worth using household chemicals:
- "Domestos".
- "Comet".
- “Whiteness” - it cannot be used often, as this leads to the destruction of the rubber seal. As a result, it will need to be changed.
The order for different means does not differ; it looks like this:
- Apply the product to the sponge.
- Carefully unscrew the cuff of the washing machine towards you.
- Wipe the metal elements of the housing.
- Clean the rubber itself. And not only in the lower part, where dirt accumulates the most, but throughout the entire diameter.
Important! Do not rub very hard so as not to damage the elastic band and other elements of the machine.
You also need to clean the car door. This can be done using a vinegar solution; you will need a 50% concentration of vinegar essence. It’s not difficult to prepare – just take equal parts of essence and water and mix well. All that remains is to wipe the glass and wipe it dry with a dry cloth. Gloves should be used when working with the solution.
The external elements of the washing machine should be wiped with a damp sponge; if necessary, you can use the existing cleaning agent.
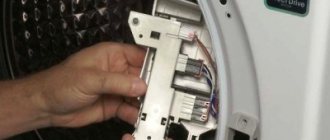
Before cleaning this component of the washing machine, it must be removed. If you don’t remember how to do this, it’s better to look in the instructions for the device so as not to break anything in the process.
If you can’t remove the tray (this happens), you can still clean it, but you will need to pre-soak it. There are many places in the tray that are difficult to reach.
If you managed to remove the tray, then everything is even easier. If residues of powder or other product are found inside, it should be removed. This element needs cleaning, as over time a coating of rust, powder and other products forms on it. The following will help in removing all this plaque:
- Soda-vinegar mixture - proportions 1:2.
- Hot water soda vinegar – you need 3 parts water, 1 part baking soda and 2 parts vinegar.
Having prepared the product, it should be applied to all elements of the tray and left for 2-3 hours. Only then start cleaning with a sponge (large elements) and a toothbrush (hard-to-reach places). All that remains is to rinse the tray under running water and let it dry or wipe it dry.
Advice! If you have a dishwasher, you can wash the tray in it. It will not help get rid of plaque completely, but after such preliminary cleaning it will be easier to remove dirt.
Cleaning the filter
The drain pump filter is an important part of the machine; if you do not pay proper attention to it, sooner or later a blockage will form and the washing machine will not drain water at all. There is no need to invent any complicated cleaning methods, everything is extremely simple. To do this, you will need a small container, a towel or rag, or any flat object that will help open the hatch.
The order is:
- Open the hatch to gain access to the filter drain hose.
- Before unscrewing the filter, lay down a rag (towel) and place a container - a small volume of water will flow out of the hole. Maximum - 0.5 l, very rarely more.
- After removing the lid (unscrewing it completely), you need to remove accumulated debris, dirt, sometimes there are coins, wool and other foreign objects.
- Wipe the hole, rinse the lid, reassemble in reverse order.
The washing machine also has a water inlet filter, which should also be cleaned. Over time, clogging with rust and sand occurs. If these deposits are critical, then an error appears on the machine screen, which can be interpreted as “water collection is impossible.”
Important! The hose located directly on the water supply should be cleaned no more than 2-3 times a year.
We invite you to familiarize yourself with automatic washing machines for cottages without running water
The process looks like this:
- Close the water supply tap to the device.
- Open access to the back cover; often the device needs to be unfolded.
- The water supply hose is located at the top right.
- You should unscrew the nut that secures it counterclockwise.
- You can see a mesh filter inside. It should be removed and washed with a toothbrush under running water.
- All that remains is to put the filter in place and screw on the hose.
The biggest enemy of the internal parts of the machine is scale. You can fight it with the help of special chemicals, or you can use citric acid.
The main object is the heating element or heating element. For him, scale has a detrimental effect. Citric acid will also effectively remove scale from all metal elements of the washing machine. The procedure is simple, you don’t even have to use a rag or sponge, it consists of the following steps:
- Free the device from all things.
- Pre-rinse the cuff and door glass.
- Pour citric acid into the powder compartment. For cars with a volume of 5 kg - 100 g, 6 kg - 120 g.
- Turn on the washing machine at 90⁰ and the longest program.
- Once the cycle is completed, the cleaning is also completed.
The main protection of heating elements is timely descaling.
Important! There are special products for removing scale, for example the domestic “Antinakipin” and “Doctor TEN”. To soften water and prevent scale formation, use Calgon or its cheaper analog Refine.
Citric acid not only removes scale, but also helps get rid of unpleasant odors and mold.
You can also descale your washing machine with vinegar. This method is extremely simple, very similar to the option with citric acid. The work will require 9% vinegar, which must be poured into the powder compartment in an amount of 100 ml. The machine should be started at the longest and highest temperature setting. When the water heats up, stop the cycle for 1.5 hours, then allow the process to complete.
The drum is easy to clean; to do this, you need to prepare a paste of water and soda. Apply it to the drum using a sponge and rub. After cleaning, rinse with water and wipe dry. Soda perfectly helps to cope with mold and fungi, which happily settle in such comfortable conditions. To prevent the formation of mold with this simple remedy, you should clean your washing machine at least once a week.
Advice! In a similar way, you can clean the drum inside the device with Domestos.
As already mentioned, you can use baking soda and citric acid to clean mold from your washing machine. Will also help:
- White. You will need to pour 1 liter of product into the compartment and turn it on at the highest temperature of at least 60⁰. When the temperature is at its maximum, stop the cycle for 2 hours. After this time, allow the cycle to complete. The use of this cleaning material should not be too frequent, as it has an aggressive effect on some parts of the machine.
- Soda Ash. The cleaning process is the same as usual, but it is worth remembering that this substance is aggressive, so you need to use personal protective equipment during the process. For prevention, it is recommended to add soda ash at each washing cycle.
Cleaning rust
Cleaning rust from machine parts can be done with citric acid or vinegar, but only if the extent of the “damage” is insignificant. Apply the substance to the rusty areas, leave for 1-2 hours, then scrub with steel wool.
Baking soda will also help in the fight against rust; apply a mixture of soda to the rust, rub it with a washcloth after 15-20 minutes and rinse with water.
There are also special rust removers, use them according to the instructions.
If the drum and external surfaces of the machine machine parts are heavily rusted, they must be replaced.
Important! After each wash, leave the door open for a couple of hours. This will help excess moisture evaporate, and the parts of the unit will not wear out so quickly.
The people who suffer most from pet hair near the washing machine are:
- Water level sensor, also known as pressure switch. After each cycle, it is systematically clogged with wool. To clean, disconnect the sensor tube and clean it under running water.
- Pump filter. Its cleaning is described above. You need to remember that if there are pets in the house, then it is advisable to clean this element after each washing cycle.
To avoid problems with hair deposits, items are cleaned of animal hair before putting them in the washing machine. Of course, you won’t be able to remove everything, but this procedure will still make the fate of the household appliance easier.
Useful tips
- During the washing process, use exactly the amount of powder, conditioner, and bleach that is needed. Excess will settle in the appliance, which can cause dirt and odors.
- Before washing, remove excess from all pockets.
- If dirty things are in the drum, then there is no need to delay the start. The same goes for removing washed laundry.
- For washing, use low and medium temperature modes more often - this also prevents the appearance of scale.
- If the water is hard, then an excellent method of prevention would be to use a magnetic filter in front of the water supply hose.
- After washing, leave the machine door open.
Preparing the surface to be painted
A washing machine whose body is covered with red spots greatly spoils the appearance of the room. Therefore, users are wondering how to return the “home assistant” to its previous appearance? Is it possible to paint over rust on a washing machine? How to perform cosmetic repairs at minimal cost?
First you need to prepare the surface for subsequent painting. The algorithm of actions will be as follows:
Zinc primer perfectly fights rust and stops corrosive destruction.
This completes the preparation of the washing machine body for painting. The primer perfectly protects the metal walls of the machine from moisture and prevents further appearance of traces of rust.
Painting
The easiest way is to restore the surface using aerosol paints. You can purchase special white enamel in stores, which is applied over the primer.
The process of painting with paint is similar to priming:
At a temperature of +25ºС, the enamel dries completely in 30 minutes, but it becomes fully ready to withstand temperature changes and exposure to aggressive environments (for example, powder and detergents) after two days.
After painting is completed and the enamel has completely dried, the tape and film are removed and you can continue to use the washing machine, without the risk of rust appearing on the treated surfaces.
White enamel for household appliances is specially created for the restoration of refrigerators, washing machines, freezers, etc. Another method for restoring a rust-damaged surface, although more complex, requires primary skills in using a grinding machine.
The problem areas of the washing machine must be washed and cleaned, then the rust must be removed using a cleaning wheel and a rust converter must be used. Use a 120-grit sander to sand all areas where there was rust. Then sand the entire part completely with 220-320 grit (so that after painting there is no freshly painted stain left).
After this, you can begin to apply acid primer - lessonal in one layer and after complete drying - the filler itself in two layers. The primed surface should be sanded with 500-600 grit using a machine, and then manually with 1000 grit. All that remains is to prepare the surface for painting - clean, degrease and remove dust. After painting, the surface is varnished.
Rust on the washing machine what to do
If there is a need to remove rust from a washing machine, then you cannot hesitate, otherwise the corrosion process will put an end to further washing and clean clothes.
Yellow spots, red stains, brown smudges inside or outside - all this should be a reason for a quick response and elimination of the plaque that is corroding the metal body. But you need to act wisely, otherwise it’s easy to aggravate the situation and completely ruin the machine.
To avoid mistakes and unpleasant consequences, it is better to find out in advance what and how to remove noticed rust. All details are in the article.
The easiest way to notice an unpleasant guest is from the outside when rusty spots appear on the external surfaces of the washing machine. To remove traces of corrosion, it is necessary to remove the corroded layer using toothpaste and a brush.
It is enough to apply the product to the damaged areas, gently scrub them with bristles or a sponge and rinse with water. Next, we inspect the “scene of the incident” and assess the damage caused: if the consequences are too obvious, it’s worth thinking about restoration.
How to eliminate corrosion on the outside of a washing machine
To get rid of rusty areas, you need to remove the corroded layer using toothpaste and a brush . The product is simply applied to the damaged area, and then carefully cleaned with a sponge and rinsed with water. Then you need to inspect this area and assess the damage: if the result is obvious, then it is best to do the restoration yourself.
Thanks to a special white enamel or zinc primer, you can cover up any pits that may arise . These products can be purchased at a specialized supermarket, telling the seller that the machine needs to be repaired. Then do the following:
- seal the area around the rusty spots with masking tape or polyethylene;
- using fine-grained sandpaper, clean off any remaining rust stains on the body;
- Remove remaining metal and dust with a dry cloth;
- treat the area to be restored with a degreasing compound ;
- shake the can of paint or primer and spray at a distance of 30 cm from the unit;
- if necessary, reapply the layer after half an hour;
- Leave for another half hour until the paint layer is completely dry.
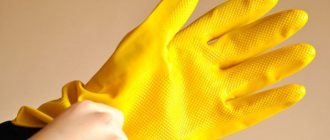
Don’t forget about safety precautions and be sure to wear not only safety glasses, but also gloves. When the paint has dried, remove the film and tape. You can smooth the joint using very fine grit sandpaper.
Why does a car rust?
Often, after rust appears on a washing machine, the owners do not even try to change the operating conditions of the unit and continue to use the machine in the same room and under the same conditions that caused the problem.
If the lid of the washing machine is rusty, this means that there is high humidity in the room. If you reduce it to normal, the cause of rust will disappear. When rust appears on the metal parts of the washing machine, the owner can independently understand the reason; he just needs to pay attention to where the excess moisture may be coming from.
Therefore, you should know that it is not recommended to use the washing machine in places where there are open water tanks, as well as in rooms where it is constantly too humid or where steam or condensation periodically appears.
How to avoid the appearance of berries?
Here are a few ways to protect your equipment from damage:
- If there is a problem with water acidity in the region, it needs to be cleaned, or, more importantly, to immediately install clean water. At first glance it seems expensive. In fact, if you fix the problems associated with the constant repair of equipment, water purification will pay off very quickly.
- In this case, if the reason for the appearance of water is the high humidity of the wind, the machine should be placed in a place where there are no open containers of water, so that you can ventilate the area where it is being used more often.
- If corrosion is detected on the internal parts of the device, it is important to check the connections and fastenings. Most often, rust in the middle of the body appears through the leakage of water from any connections. After troubleshooting, you need to clean the damaged surface and, if necessary, cover it with tarpaulin (after preliminary preparation).
- To prevent rust stains, use special paints for plastic and metal surfaces. Such products are sold in any department with everyday chemicals.
- After the skin cycle, it is necessary to clean the container for the powder, as well as the humic sealant and wipe all elements dry. This will not only prevent the appearance of yeast, but also the development of flowering fungi.
If it is corrosive, scale may build up in the machine. To avoid this, regularly carry out cold water without whitening with added citric acid.
How does rust appear?
The main reason for rust is the destruction of the protective layer of the housing, drum or tank. Destruction of the layer can occur due to physical or chemical effects on the surface of the parts. In addition to corrosion, on the surface of the drum, tank, and powder compartments, rust may appear in the form of a coating consisting of calcium and iron salts. But the main thing is that, no matter what the reason for the rust, it will not be possible to wash the clothes in such a washing machine until it is removed.
How to prevent corrosion
If the machine begins to rust, you need to understand the conditions of its maintenance. The situation may repeat itself if it is not urgently changed. Rust appears for several reasons:
It is very important to see rust in a timely manner and immediately begin to remove it. After all, at the first stage it is very easy to deal with corrosion using soda or toothpaste, which cannot be done in advanced cases. Then even special chemicals will not be able to help, you will have to buy new parts.
Ways to clean the outer casing
If rust appears on the body of the washing machine, but the body is not rusted through, then it will need to not only be cleaned, but also painted. Cleaning and painting is carried out as follows:
It is not uncommon to see traces of rust on the plastic parts of the washing machine. The appearance of brown spots and smudges can be either a sign of corrosion of the metal body or a consequence of poor quality water. You can clean your car from rust from plastic and return it to its original appearance using Domestos, Comet or Mister Muscle. Any product for cleaning the surface from scale and rust is suitable. Apply and rinse with a sponge after 5-10 minutes.
Where to begin?
In Soviet times, the range of clothing was not particularly diverse, so for our grandparents such a procedure as dyeing pants with their own hands was par for the course. Reliable and inexpensive means - blue and white - helped to stand out. It was then that the word “varenki” appeared, which was used to describe fashionably bleached jeans.
Modern clothing stores do not know the word “shortage”; you can find jeans in any colors and textures, with or without decoration. But even today, many needlewomen are happy to use grandmother’s proven recipes, wanting to extend the life of their favorite pants, with which they have gone through both fire and water.
So, how to dye jeans yourself? First of all, two questions need to be resolved:
- How can you dye jeans?
- How to do this - manually or using a washing machine?
Let's look at each of them in more detail.
How to paint household appliances - refrigerator, washing machine, microwave
Rating 5.00 (4 Votes)
| There are situations when an annoying scratch appears on the door of a new refrigerator. Or you bought a new kitchen, and the old silver dishwasher does not fit into the updated color scheme at all. Or maybe there is a young artist in your family who, in a fit of inspiration, painted the microwave with indelible transforming robots? For all such cases, they came up with special paints for household appliances - and we will now tell you how to use them. |
Preparing for work
The very first thing you need to do before painting a piece of household appliance is to decide for what purpose painting is actually required. It's one thing if you just wanted to have an updated refrigerator. It’s completely different if there are deep scratches on the refrigerator through which rust has begun to spread. The work schemes in these cases will differ: in the second case, anti-corrosion cleaning and additional primer for the paint layer will be required.
| The next important step is choosing the right paint. Today, manufacturers offer many types of paints that are also suitable for painting household appliances. However, the use of universal compositions may not bring the desired result: household appliances are heated and cooled, and are constantly exposed to moisture and detergents - not every paint turns out to be durable enough to maintain a fresh look for a long time in such conditions. For optimal results, we advise you to choose paints created specifically for household appliances. These are epoxy or acrylic aerosol compositions from the brands Decorix, Kudo, Bosny, Veslee and other manufacturers. High-strength aerosol paints in convenient small cans provide not only a fresh look to household appliances, but also high-quality protection from abrasions, damage and scratches. Also suitable for painting household appliances are paints for metal and paints for plastic in a wide variety of color variations: glossy or matte pure RAL shades, all kinds of metallic colors, paints with mother-of-pearl or hammer effect. |
In addition to paint of the desired color and quality, you will need: •
masking film and tape (to protect handles, rubber seals, panels from unnecessary painting); •
sandpaper for sanding;
•
solvent and detergents (to clean the surface from accumulated household dirt);
•
primer (for filling scratches and leveling the surface);
•
respirator and gloves to protect yourself from paint.
Preparing for work
| Place the household appliance in a well-lit room, on a flat surface, and unplug it from the power supply. The room must be ventilated. It is important that there is enough space around for normal access to all areas that require painting. Clean all parts from dirt, grease, stickers; Use sandpaper to remove the old enamel layer. Instead of sandpaper, you can use a special paint remover: for example, ABRO aerosol remover effectively removes any type of paint, including from hard-to-reach places. If your refrigerator/washing machine/microwave is new and you just want to paint it or completely change the color, there is no need to remove the enamel. |
Assess the surfaces to be painted for cracks, scratches and other damage affecting the metal: if any, carry out anti-corrosion treatment (for example, using a rust converter) and level the damaged areas with primer for painting. You can use separate acrylic primers (MOTiP, Veslee, Bosny), or take the Abro rust converter, which combines the properties of anticorrosive and primer. In addition, some ready-made colored enamels (notably Decorix and Rust-Oleum) also contain rust neutralizers. Pay attention to the color: for white, beige and other light paints it is better to use only white primer; for dark colors, gray and black primers are suitable. Cover with masking tape or film those parts that do not need to be painted: metal logos and nameplates, locks and rubber seals, control panels, handles and buttons. Do not use ordinary stationery tape for these purposes: its adhesive traces are very difficult to clean off later.
| Prepare the required amount of aerosol enamel: usually manufacturers indicate paint consumption based on the area. On average, one small can is enough for 1.5 sq.m. If your household appliances need a fancy multi-colored design, mark the sketch and attach stencils. Spray paint is applied evenly, from a short distance (30-40 cm). Keep the sprayer lever in one position - then the paint layer will be as uniform as possible. It is important to protect your respiratory system with a respirator: sprayed paint particles are unlikely to be beneficial to your bronchi and lungs, even if the paint has a non-toxic acrylic composition. Manufacturers advise applying paint for household appliances in 1-2 layers. Each layer of applied enamel must be dried - as a rule, modern aerosol enamel dries quickly. |
Why does a washing machine rust, what to do, how and with what to remove rust?
The washing machine is approximately 4 years old and shows signs of rust.
Why does this happen and what to do in this situation, how and with what to remove rust from the honeycombs of a washing machine?
Many users mistakenly assume that the best installation location for a washing machine is the bathroom.
This is not entirely true, the bathroom is a room with high humidity, this is steam, splashes that can fall on the machine, condensation, etc.
You need excellent ventilation, a working heated towel rail, a forced ventilation fan, ventilation holes at the bottom of the door leaf (in the bathroom, most doors have a threshold and there is no ventilation gap between the floor and the door leaf).
That is, the bathroom needs to be prepared for installing the washing machine + the correct distance from the source of moisture must be maintained, for example a sink faucet with a high spout (gander), moisture can constantly get on the body of the washing machine.
There may have been mechanical damage to the top protective layer (paint and varnish), for example during transportation, or during installation or connection.
A washing machine can rust both outside and inside.
The cause of rust inside is left with damp clothes in the washing machine.
Do not open the washer hatch for ventilation.
Rust in the area of the cuvette (powder tray), the tray must also be wiped and removed after each wash.
What to do depends on the situation; in some cases, if there is rust from the inside, nothing can be done; the rusted components need to be replaced.
First, eliminate the cause of the humidity in the room, clean the ventilation, etc.
If there is rust on the outside, then disconnect the washing machine from the communications.
You can remove the rusty panel, you can try to remove the rust locally by covering with masking tape those areas that will not be restored.
First, we clean the problem area with fine-grain sandpaper (to “live” metal), remove the dust after cleaning.
Next we degrease the surface.
The next step is a primer, for example, zinc aerosol primer is not a bad option (this primer stops the corrosion process), or immediately buy primer-paint, or “rust-proof” paint (3 in one).
Shake the can of primer and apply it evenly.
After the primer has dried, the surface is painted.
I bought this one
This, like a primer, is an aerosol enamel.
Shake the can and apply the first layer of paint, dry, then the second layer of enamel.
The washing machine rusts because it is made of ordinary metal, which is coated with paint on top, in most cases it is enamel.
During the operation of the washing machine, microcracks appear in the paint and moisture gets inside, where the process of metal oxidation occurs with the appearance of rust. This rust begins to lift the paint, forming bubbles, which further crack the coating and the lesion increases.
I personally became convinced from experience, firstly, that this is a problem for the most part of Russian, Chinese and other manufacturing countries that do not monitor the durability of their products, since I bought used washing machines from Germany several times, which were already at the time of purchase it was around 10 years, plus I had it in use for 5-7 years, there the rust appeared in small spots, but on the rest, once it appeared, it couldn’t be stopped.
Secondly, I tried several times to eliminate and stop the rust. From experience I was convinced that this is a useless exercise, although if everything is done with high quality and from good materials, then it may be enough for a year.
So, we remove the rusty cladding and start working with it.
1 - you need to remove all the paint in rusty places, going a few centimeters into places that are not touched by rust. First, do this mechanically, maybe with an old spatula, then take a paint remover.
2 - treat the entire surface with a rust converter and, after drying, thoroughly wipe with solvent and dry the lining.
3 - treat the entire surface with rust primer in 2-3 layers.
4 - buy car putty, you can even use universal putty and apply it in a thin layer over all places, followed by sanding. Ideally, of course, the entire panel would be immediately treated on both sides and putty applied to the entire surface.
5 - then all that remains is to prime and paint the panel, buy good car paint, not from spray cans, but from a selection shop, two-component with a hardener, a spray can will only last for a month..
Ideally, all this should be done in special rooms, especially painting in a chamber.
If you do everything well, then, as I indicated above, it will be enough for 1 year, but then it will rust to holes and you will not be able to restore the panels a second time.
Source
Rust inside the machine, how to fix the situation
A washing machine can become rusty not only on the outside, but also on the inside. This often happens if the operating conditions were violated or the manufacturer decided to save on the material from which the drum and bolts are made that secure the internal parts and therefore experience the aggressive action of water and detergents. You can get rid of rust on the drum or bolts, if they appeared due to the manufacturer using cheap low-quality materials, only by replacing these parts with higher quality ones.
Violations of operating conditions also include a discrepancy between the quality of water that flows from the tap and the requirements of the equipment manufacturer. This refers to the content of calcium, iron, phosphorus, etc. salts in water. Under the influence of high temperature, they are released from the water and settle on the walls of the drum, heater, tank, washing powder compartment, forming plaque. The first layer of plaque is dense, while the second and third are loose. It is formed not inside the drum, but on its outer side. During rotation, particles of the loose layer fly off and, together with water and detergents, fall on clothes. As a result, things become covered with brown traces of rust and scale.
Coloring agents
It’s easy to navigate the variety of fabric dyes if you know exactly what color you want to get and how durable it should be:
If you decide to add a bright color to your old favorite jeans, you can dye them yourself at home. In this way, you can inexpensively and simply update an item so as not to purchase a new one. At the same time, along with painting jeans in any color (blue, black or another), you can additionally decorate them with interesting and unusual accessories.
Product care. How to keep color longer
As soon as the jeans are dyed at home, you need to think about color preservation. To do this, you need to follow several principles:
- Do not wash the product in hot water.
- Using laundry soap for washing.
- Select a delicate washing mode in an automatic machine or gentle hand washing.
- Prohibition on the use of fabric softener.
- Wash separately from other items.
Dyeing jeans is not the most difficult process that anyone can do at home. The main thing is to carefully select the dye, follow the instructions and properly care for your pants after dyeing.
Complex types of pollution
It is not always possible to get rid of rust stains on clothes using the above method. If the washing machine has been used for a long time, but is rarely cleaned, and the operating instructions are not followed, then over time a lot of debris can accumulate inside it. Debris clogs the filter and outlet valve. As a result, the water slowly seeps out, and debris, including rust flakes, remains inside. You will have to clean the filter, tank, valve and cuff from dirt and debris. They can only be removed by disassembling the washing machine.
How to clean the drum of a washing machine at home from dirt, scale, rust and more
Has your washing machine started to work worse, and its appearance is no longer pleasing to the eye? This means that the washing machine drum needs to be cleaned from dirt. This simple preventive measure will not only improve the quality of washing, but also protect the household worker from serious damage.
Reasons leading to drum contamination
How nice it is to get clean, fragrant laundry out of the washing machine! However, not all contaminants are removed from clothes during washing - some of them settle outside and inside the drum.
Sand and dust
Sand and street dirt penetrate into the washing machine tank along with soiled items - children's clothes from the sandbox, sneakers or sneakers, various uniforms. Grains of sand and particles of rust from the water supply can also get into the device if a hard filter is not installed on the water supply hose.
During washing, solid particles combine with limescale impurities from the water, which gradually settle as plaque on the machine parts. The part of the washing machine drum that is visible to the eye can be cleaned of dirt manually, but the internal parts will have to be treated with special reagents.
It is much easier to prevent the machine from clogging with sand and street dust:
Signs of rust inside the machine
In addition to the appearance of characteristic brown spots on washed items, there are other signs by which you can determine that the washing machine, albeit slowly, is rusting from the inside.
One of the first signs of destruction of the machine from the inside is the appearance of an unpleasant odor. This occurs because debris accumulates inside the washing machine, which prevents excess moisture and detergents from being removed from it. As a result, an aggressive environment is formed inside the device, which leads to the oxidation of internal iron elements. If the drum is not made from a solid sheet of stainless steel, but only has a stainless coating, then if it is damaged, traces of corrosion may appear.
Cleaning the body, door and sealing rubber
The rubber seal or cuff of the washing machine is a mandatory element of cleaning during the maintenance process. Rubber should be cleaned carefully, but efficiently, so that there are no leakage problems. Dirt and mold accumulate in this place - which is why it is important to clean regularly. Sediments in this area contribute to the appearance of unpleasant odors.
Any cleaning agent will help in the process, including regular baking soda. In some cases, if mold and a strong smell have already appeared, then it is worth using household chemicals:
- "Domestos".
- "Comet".
- “Whiteness” - it cannot be used often, as this leads to the destruction of the rubber seal. As a result, it will need to be changed.
The order for different means does not differ; it looks like this:
- Apply the product to the sponge.
- Carefully unscrew the cuff of the washing machine towards you.
- Wipe the metal elements of the housing.
- Clean the rubber itself. And not only in the lower part, where dirt accumulates the most, but throughout the entire diameter.
Important! Do not rub very hard so as not to damage the elastic band and other elements of the machine.
You also need to clean the car door. This can be done using a vinegar solution; you will need a 50% concentration of vinegar essence. It’s not difficult to prepare – just take equal parts of essence and water and mix well. All that remains is to wipe the glass and wipe it dry with a dry cloth. Gloves should be used when working with the solution.
The external elements of the washing machine should be wiped with a damp sponge; if necessary, you can use the existing cleaning agent.
How to get rid of rust in a washing machine
If there is a need to remove rust from a washing machine, then you cannot hesitate, otherwise the corrosion process will put an end to further washing and clean clothes. Yellow spots, red stains, brown smudges inside or outside - all this should be a reason for a quick response and elimination of the plaque that is corroding the metal body. But you need to act wisely, otherwise it’s easy to aggravate the situation and completely ruin the machine. To avoid mistakes and unpleasant consequences, it is better to find out in advance what and how to remove noticed rust. All details are in the article.
Removing rust from the outside of the case
The easiest way to notice an unpleasant guest is from the outside when rusty spots appear on the external surfaces of the washing machine. To remove traces of corrosion, it is necessary to remove the corroded layer using toothpaste and a brush . It is enough to apply the product to the damaged areas, gently scrub them with bristles or a sponge and rinse with water. Next, we inspect the “scene of the incident” and assess the damage caused: if the consequences are too obvious, it’s worth thinking about restoration.
How to prevent rust
If rusty stains appear on the washing machine, this indicates that the water used is not of the best quality. You can’t even do laundry in such water, you can’t even wash dishes. This type of water requires cleaning.
To protect your household appliances, we recommend:
These recommendations should be followed at least once a year, but with caution, since many modern washing machines, especially imported ones, may have parts made of fragile and thin materials.
And under no circumstances should you rub rusted areas with powder - bacteria will grow in the scratches that appear. It wouldn’t be superfluous to tell everyone who uses a washing machine what and how to do to avoid breakdowns.
Source
“We put a barrier” to corrosion
It is within the power of each user to prevent the appearance of rust on the SMA. To avoid such an unpleasant phenomenon, it is necessary to maintain a normal level of humidity in the room where the machine is installed, and wipe the case daily with a dry cloth. In addition, it is recommended:
It is strictly forbidden to rub rusted areas of the machine body with powder or other aggressive means. This will damage the metal even more; harmful microorganisms will “settle” in the scratches. It is better to act “by science” - clean the stains with sandpaper, treat the areas with a special anti-corrosion primer and paint over them with enamel.
Source