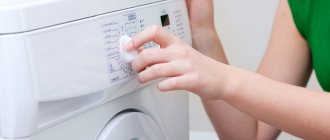
One of the important requirements for proper operation of a sewing machine is the timely lubrication of components and mechanisms with special sewing oil, the brand of which is indicated in the operating manual of the sewing machine. Lubrication and cleaning of the sewing machine should be carried out regularly, at least once every six months. Caring for a sewing machine includes not only regular lubrication and cleaning, but also proper storage and use of the sewing machine to sew the fabrics for which it is designed.
Recommendations for using the sewing machine
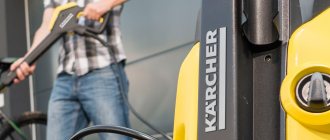
Proper operation of sewing machines is the key to many years of operation without breakdowns. Unfortunately, often we simply don’t even read the instructions to the end. We figured out how it works and that’s enough, let’s start sewing. However, based on experience, we can conclude that the main cause of sewing machine breakdowns is non-compliance with the operating rules clearly indicated in the manual. A sewing machine, be it a Chaika sewing machine or the latest model Singer with a computer control, is, first of all, a mechanism that sometimes requires lubrication and maintenance, and most importantly, it is designed for certain loads of components and parts.
Sewing thick and coarse fabrics using household seamstresses is the main reason for the breakdown and failure of many of them. Untimely lubrication or lack thereof at all is the second and improper storage of the sewing machine is the third.
How to choose a lubricant oil
Sewing machine oil has a viscosity index
. By using too thick, you risk not lubricating the internal parts of the mechanisms, which account for the main friction. Taking a more fluid one, you can again be left with nothing, because it will simply flow down, and the mechanisms again will not receive lubricant. Lubricant for the average household sewing machine should have a medium viscosity. Usually this indicator is indicated directly on the label. It is worth noting that oil for industrial sewing machines is sometimes not needed at all: high-quality professional units are equipped with an automatic lubrication system.
Which oil is the best? The one that comes with the machine. If it was not there initially, then choose a special lubricant of only the best quality. Its cost can start from 100 rubles and more. It may be sold with a special oiler
and in a simple plastic bottle.
Don’t even think about using car or vegetable oil - this is strictly prohibited, as it has a detrimental effect on the functioning of the entire system.
Experts do not recommend saving in this matter. Cheap oil may smell unpleasant, dry out quickly, or clump together. It is not recommended to store this oil for a long time after opening. You can use it only if nothing else is at hand.
Every person more than once in his life has encountered such a nuisance as metal corrosion, or, more simply put, rust. There are many ways to combat this scourge, but not all of them are quite effective. After trying several of the methods and not achieving the desired result, I found my own way to combat rust. At least I haven't seen anything like this in my search.
Lubrication of sewing machines is the main condition for good operation of the machine.
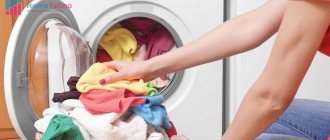
In many cases, repair of sewing machines will not be necessary if one of the conditions is met - timely lubrication and cleaning. If a seamstress takes care of her machine, then, therefore, she will protect it from overload during work. Don’t give it into “other people’s” hands, which means it will break less often. After prolonged work, you should periodically clean the shuttle compartment and other accessible places from dust, fringes, and oil stains. Sometimes you should clean the shuttle itself, the shuttle mechanism, with a stiff hair brush. See also How to properly lubricate a serger.
If you want to see how to properly oil your sewing machine, watch this video. You will learn how to lubricate all components and mechanisms of a sewing machine, including those located inside the body.
Lubrication Features
The biggest mistake is the idea that sewing machine oil needs to be applied in large quantities. In this situation, more does not mean better. During use, an impressive layer of dust accumulates on the internal parts of the device, which gets there along with the fabric. Over time, this may cause problems with the advancement of the canvas. In addition, deposits of dirt on moving elements create a serious load on the device drive. An excessive amount of oil, applied by the generous hand of an ignorant owner, accumulates tiny pieces of matter, scraps of thread, and dust. Falling into lumps, this mass accumulates in one place, causing problems with the sewing machine.
How to replace a light bulb in a sewing machine
The light bulb is located behind the front panel 1. To replace the light bulb, open the front panel. To do this, remove the protective cap 2 and unscrew the screw 3. The front panel may be mounted differently on your machine; sometimes it simply opens up like a door on hinges. When replacing a light bulb, unplug the sewing machine; the light bulb voltage is 220 volts. Light bulbs for modern sewing machines are usually two-pin. To replace it, you should slightly “drown” the light bulb, then turn it and pull it out. Screw-type bulbs are found in old-style cars and can be removed by simply unscrewing them. See also Lamps, lamps for sewing machines.
Video on how to replace a two-pin tab.
How to care for your sewing machine so that it serves you for a long time
All types and models of sewing machines require lubrication. Proper care and timely lubrication significantly improves the performance of both home and industrial sewing devices. In this article, we'll look at everything you need to know about sewing machine oil, and most importantly, we'll look at how to lubricate your machine yourself. We will also give some general tips on the ingredients you can use, lubricating the machine completely, and maintaining your sewing machine.
Traditionally, sewing machine oil is made from conventional petroleum-derived lubricants, but there are many other alternative sewing machine oils, both synthetic and natural, that are based on coconut oil.
Composition of oils for sewing machines
1. Petroleum products
Traditionally, all oil ingredients were obtained from petroleum-derived lubricants called petrochemicals. These lubricants are natural, composed of minerals and ingredients found in crude oil, kerosene. These chemicals, widely used as industrial lubricants, are also widely used in industry and at home, but excessive use of these products is now considered inappropriate. If you use such lubricants, avoid contact with skin and eyes.
2. Natural alternative to sewing machine oil
Various natural, safe household lubricants can be used as effective oils for sewing machines. Products such as olive, coconut, and silicone oils that are commonly used in the kitchen can be used alone or in a mixture to create an alternative lubricant that's right for you. These oils are natural and relatively inexpensive, so don't be afraid to experiment by trying different measures of each to see how your own machine reacts to them.
Oil for industrial sewing machines
The components of oils for industrial sewing machines are similar in composition to lubricants used for home sewing machines, however, many of them contain heavy minerals and other aggressive ingredients that are dangerous to humans and the environment. Many industrial greases and oils contain ingredients such as Teflon, paraffin and other harsh substances and should not be used at home.
Other options
Car oil and WD40 are not suitable for use.
How to lubricate a sewing machine
Before lubrication, it is necessary to study the ingredients of the oil or lubricant, as well as prepare the machine. Preparation includes cleaning, selecting tools and equipment, as well as additional parts/spare parts that may be needed. Always read your owner's manual, as many models have their own unique settings and warnings. If you don't have a manual, search online by visiting the manufacturer's website or searching by make and model. If the manual for your model states that the machine does not require lubrication, you do not need to lubricate it.
Gather the necessary tools
For cleaning, use a soft cloth, a vacuum cleaner and small, stiff brushes such as a lint brush or toothbrush. You should be able to reach small spaces inside the sewing machine without damaging it. Cleaning is an important step before lubricating the inside of the machine.
Tips:
- When making repairs, use only spare parts that are suitable for your sewing machine model.
- Additional tools include blowers or cans of compressed air to blow out hard-to-reach dirt and lint.
Clean the machine
- Remove the thread, needle plate, needle, bobbin and hook from the machine, and make sure the machine is unplugged from the power source. Use compressed air to blow dust and lint out from inside the device. It is important to remove small particles of dirt and debris before lubricating, as they will mix with and remain in the sewing machine oil. When using compressed air, hold the nozzle or can about 6 inches away from the parts you are cleaning, at a slight angle, to blow dirt away from the parts rather than pushing it deeper.
- Use a soft cloth or a special duster to clean large surfaces and spaces in the machine. You can dampen the cloth a little to wipe off the dirt, but after that, let the parts dry thoroughly.
Lubrication
Apply just a few drops at a time. Excessive oil can make cleaning difficult and can actually slow down your sewing machine components.
Add a few drops of oil to all moving parts of your sewing machine. If you don't know if a component requires lubrication, just consider whether it rubs against another part while the machine is in operation.
If you have poured too much oil, carefully and gently wipe off the excess with a dry cloth. Add a few drops of oil inside the sewing machine hook. Lubrication of the shuttle device is necessary to ensure that its small parts do not rub against each other and do not wear out. When lubricating each individual part, it is important to move each part by hand to ensure the oil is evenly distributed.
Hints
- Disassemble only a small part of the sewing machine at a time. There is no need to overcomplicate the process and risk breaking/losing machine parts.
- It is important to regularly clean, wipe and lubricate your sewing machine to ensure continuous operation.
Conclusion
Now we understand that sewing machine oils are obtained from a variety of natural and artificial ingredients, lubricants and minerals. How you clean your sewing machine depends entirely on the age and purpose of the sewing machine, as well as your personal preferences regarding the choice of ingredients. Regular lubrication is important to ensure the performance and longevity of your sewing machine. Follow your machine's manual, avoid industrial and hazardous chemicals, use common sense when caring for it, and your sewing machine will serve you well for a long time.
All the best to you and see you again!
Sewing machine care. Cleaning the Fabric Feeder
Before cleaning the machine, unplug it so as not to injure your hands with a needle from accidentally pressing the pedal. Using a screwdriver, remove the needle plate, presser foot and, just in case, the needle. By the way, it wouldn’t hurt to replace it in any case.
Run your fingernail along the tip of the needle; if the tip is bent, you will feel it. Remove all frays using a stiff brush, especially carefully clean the teeth of the rack.
Bobbin case device. Cleaning the bobbin compartment
1-Bobbin case. 2-Hook fastening levers. 3-Central rod for fixing the bobbin case latch. 5-Shuttle. 6-Shuttle guide. 7-Protrusion of the shuttle.
The bobbin compartment becomes dirty with fabric frays and thread fragments, which sometimes penetrate the bobbin case and are pressed onto its walls, interfering with the free movement of the bobbin. You should inspect it before installing it back and, if necessary, clean the walls from fringes with a stiff brush. In addition, it is necessary to disassemble the shuttle itself, as shown in the diagram. Be sure to lubricate the shuttle movement grooves with a small amount of oil.
In general, try not to waste too much oil in the shuttle compartment. Oil can get in as the thread moves upward and stain your product, even after a long time. If your machine has a horizontal shuttle, the grooves do not need to be lubricated. The shuttle is made of plastic and does not require lubrication. But the swinging shuttles are completely metal, so a little lubrication will do the trick.
When installing the hook back, position it as shown in the figure so that the hook guide 6 forms a crescent moon on the left side of the sewing machine. Holding the shuttle 5 by the central rod 3, position it so that it forms a crescent on the right side. Protrusion 7 shown in the figure will be at the bottom. Place bobbin plate 4 on top. Return levers 3 to their original position until they click.
Cleaning the internal elements
One of the most common causes of breakdowns is clogging of the internal mechanism, resulting in jamming. But expensive repairs can be avoided by remembering in time to remove dust. But wiping the casing and controls of the sewing machine with a cloth is not enough: you will also have to clean the internal elements from lint, thread fragments and small pieces of fabric. This is easy to do, and ideally, such cleaning can be carried out at least once immediately after completion of work. But all is not lost for the lazy: if the machine is not used too often, then you can take care of it 1-2 times every six months. What is the care at this stage?
Important!
If you often work with knitwear, fur or wool, you need to clean your machine more often, as these materials leave behind a large amount of lint that can quickly clog the mechanism.
- First of all, the machine must be turned off from the network, and for safety and ease of use, it is better to remove the needle.
- The needle plate must be unscrewed and the shuttle disassembled according to the instructions for your machine. It sounds difficult, but in fact, after the first cleaning you will understand that no special skills are required.
- First of all, you will have to clean the niche under the needle plate, the hook and the bobbin case from dust, since dirt mainly accumulates there.
- Dust is removed using hard and soft brushes, while for small and complex parts like a shuttle, a soft brush is preferable.
- Wound threads and large pieces of fabric can be removed with tweezers, and dust accumulations in the corners can be conveniently picked up with a needle. It’s just better to use a blunt end to avoid scratching the mechanism.
- Another rule of care when cleaning: do not use a damp cloth out of habit. Oil and dust can only be removed from parts with a dry cloth, otherwise rust, which already forms in small quantities, cannot be avoided.
We recommend: How do LED TVs differ from conventional LCD panels and are they worth the money?
Failure to clean may cause the fabric feed mechanism to malfunction and will also increase the load on the machine drive, which may lead to more serious damage.
Advice
Dust can also get inside through the sewing machine regulators, so cleaning them from dirt is equally important, although this is only a small part of caring for sewing machines.
In order to have to clean it as rarely as possible, it is recommended to store the machine in a special case: this way, dust will have virtually no access to the internal mechanisms. Well, to further secure the niche under the needle plate, before putting the machine in the case, place a thick fabric under the presser foot that will cover the needle holes.