Ironing can be a living hell if you don't have the right skills and knowledge.
At first glance, there is nothing complicated about this - put it on the ironing board and move the iron back and forth. Ah, no.
There are many nuances that can make ironing much easier for even the most experienced housewife.
Read in this article:
- Tips for ironing a guy
- How to iron a military uniform?
- Iron on polo shirt collar
- Tips for ironing army caps
- How to iron a school uniform?
How to stroke a penis - advice from experienced housewives
Let's start with a sore spot for many - with collars, namely with the collars that are worn under a sailor suit and are called guises. If you are interested in how to iron a guy, then this is done as follows.
First, iron the front side of the guy. At the same time, carefully ensure that creases do not form on the back side of the fabric - it is extremely difficult to get rid of them later.
Now fold the guy in half with the front side facing inward. Iron first on one side, then on the other.
After the manipulations have been completed, we turn off part of the guy on one side so that this part is approximately a quarter of the total fabric material. We iron the guy in this position. We turn the guy to the other side and bend part of the fabric in the same way, then iron it.
Ready! By the way, folds should be visible on the guy, so you can safely iron the bends. From now on, you know how to stroke your penis correctly and will do it without any problems.
Still don't know how to properly iron men's shirts? In our article you will find the most effective and, importantly, safe ways to iron products. Just study it and you can start working.
Not all clothes can be ironed. Naturally, in this case, you need to know what methods will help you smooth out all the wrinkles on things made of delicate fabrics. Here you will find the most useful tips.
How to iron trousers
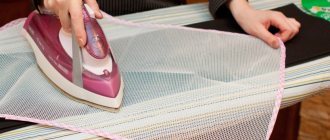
Start ironing from the inside out. Press all seams, lining and pockets. Turn the trousers right side out and, through moistened gauze, smooth the top of the item and the waistband, moving and pressing the iron. For convenience, turn the pockets inside out.
Fold the pants so that the side and inside seams match.
First iron the inside of the trouser legs, and then the outside, smoothing out the creases well. Iron the arrows. Press the iron onto the spread out pant leg at the top and bottom, then iron the rest of the leg between those points.
To make the arrows last longer, they are drawn from the inside with soap, and ironed from the outside through gauze lightly moistened with vinegar. In this case, the arrow is tapped with a brush.
Glossy areas of trousers must be ironed by first pouring a solution of one part water and two parts vinegar into the iron.
If the trousers are stretched out at the knees, the deformed areas need to be thoroughly moistened, and then covered with a piece of linen and the fabric ironed until the bubbles disappear, lightly applying a very heated iron to them. Satining should begin from the edges of the area, moving towards its middle.
After processing, hang the trousers on a hanger and let them cool.
Features of ironing military uniforms
The question of how to iron a military jacket worries more than one person. Surely there has been more than one dispute between husband and wife about who will do the ironing of such things. If such a fate has fallen on your fragile shoulders, dear ladies, do not despair, we will give you some advice that can help you in this difficult matter.
How to iron a military uniform:
- always follow the instructions on the label (at what temperature to iron);
- if we are talking about ironing a winter-type military uniform made of fabric called bologna, then it should be ironed only from the front side;
- military items made of acrylic should be ironed to a minimum, and to a greater extent due to steam, since high temperatures are detrimental to this material;
- If we are talking about ironing a helmet cover, which is made from a fabric called Greta, then you only need to iron it from the wrong side at a temperature of 60 degrees.
Many people are concerned about how to iron a flanka - a sailor's uniform shirt. There is nothing special in this process; you don’t need to be afraid of ironing just because you haven’t come across such a thing under the iron before. We adapt to the material from which the shirt is made, and get down to business.
If you are interested in how to iron a jacket, then here are slightly different instructions. To iron such a jacket, you must use a steam iron or spray water through gauze and iron it that way. In general, a jacket needs ironing only after serious washing; it is much better to keep it in good condition all the time by brushing. Just apply foam to the jacket and carefully walk over the fabric with a not very hard brush - it will be as good as new, and only superficial ironing will be required.
The question often arises of how to iron a collar on a jacket, because problems often arise with ironing collars in general. It's not that hard to do:
- It is necessary to iron the collar from the wrong side, that is, the one with which the collar is adjacent to the jacket;
- fold back the collar and run the iron over it;
- When ironing, use steam as much as possible;
- When the collar itself is ironed, fold it back and iron the fold.
From now on, you know how to properly iron a collar, and therefore this process will be easier and faster.
How to properly wash a winter jacket in a washing machine
If you are interested in how to iron a jacket, then here are slightly different instructions. To iron such a jacket, you must use a steam iron or spray water through gauze and iron it that way. In general, a jacket needs ironing only after serious washing; it is much better to keep it in good condition all the time by brushing.
Military uniforms are an integral attribute of military service, determining that military personnel belong to the Special Facilities Service under the President of the Russian Federation (hereinafter referred to as the Service), increasing their organization and discipline in the performance of military service duties.
The headdress is worn straight. A slight tilt is permissible only for berets or caps. The caps are aligned with the eyebrows, the visor should be at their level. Winter hats should be 2-4 cm above the eyebrows.
Before we tell you how to iron a doctor's cap, a little preparation is needed. Read our tips and you can get to work.
Learning to iron polo shirt collars
A polo shirt is a great summer outfit. You feel light and comfortable in it; many people play, say, golf or badminton in just such clothes. Difficulties only come when you think: how to iron a polo collar? Overall, this shirt is easy to iron as it has a light cut. However, it should be remembered that polo fabric does not hold its shape well, so you will need starch spray, which can be bought at almost any supermarket.
What to do with the unfortunate collar:
- we read the label and find information about the rules for ironing this fabric;
- turn the polo inside out to avoid color loss;
- spray a little starch on the inside of the collar;
- straighten the collar and iron it once or twice, while pressing the iron quite firmly;
- bend the collar back and iron out the fold.
How to Master the Art of Ironing Army Caps
How to straighten an army cap is a question that hundreds of people ask. We know the answer and agree to share it with you for a certain reward. Just kidding - free of charge, of course!
Many people don’t even understand why iron a cap? But such an action will not be superfluous; after ironing, the cap still looks much more aesthetically pleasing than usual. To iron an army hat, you must use the nose of an ironing board, if available. It's simple:
- we pull the cap over this very nose;
- iron it, treating it generously with steam;
- leave in this position for 15 minutes so that the material cools and the shape is fixed.
If your ironing board does not have the aforementioned nose or such a board is not available at all, no problem. For such purposes, a three-liter jar is often used. Yes, people are very inventive, there’s no arguing with that. You need to put a cap on the jar and steam it. The only disadvantage of this option is that you cannot use steam too much, as non-tempered glass may crack.
And remember that an army cap should not be ironed to terribly perfection, because no one will blow off specks of dust from it every evening and fold it neatly. Therefore, is it worth throwing away nerve cells left and right, trying to stroke a cap that will take on a wrinkled appearance in just a day or two? The answer is obvious.
To properly iron cotton, silk, wool and other natural fabrics, you need to set the temperature correctly. Remember to use damp gauze. And also read this article, which will definitely help you in the future.
Ironing trousers is an easy process. But only if you know all the secrets of ironing such products. Let's take a closer look at how to properly iron such items - all the tips are described here.
Some nuances
Before you wash your camouflage uniform, you need to look at the label. It will indicate the type of fabric and optimal washing conditions.
In order not to spoil your uniform, you need to consider some points:
- Water quality. This can be a serious problem. To purify tap water, various chemicals based on aluminum or chlorine are used. Even when using mild detergents, fabric often loses its original color. Installing filters on taps will help correct the situation. Hard water has the same effect. The powder dissolves in it with great difficulty and is difficult to rinse out. As a result, unsightly white streaks remain on the fabric. You will have to resort to repeated rinsing. Otherwise, the powder granules will cause serious irritation on the skin and may even cause poisoning of the body.
- Selection of detergents. It's big enough. Camouflage can be washed with any soft powder or delicate liquid detergent. You can choose the best option for any wallet.
- Type of fabric dyeing. For a single-color form, so-called “wet” fabric dyeing is used. For washing, powder marked “Color” is suitable, which helps preserve color. Several types of paint are applied to camouflage. The drawing is printed. To wash such fabric, use any available soft powder. If the image was transferred to fabric from paper, then it is better to take a product with a color preservation function.
- Membrane fabric. It requires a gentle temperature regime (no more than + 30 degrees) and delicate machine wash. In this case, exclusively liquid gels are used. No rinse aids needed. As for automatic spinning, it is better to abandon it altogether. Uniforms made from membrane fabric dry naturally.
If you follow all the rules and recommendations, cleaning your military uniform will not be difficult. The main thing is that she doesn’t sit down. The ceremonial uniform of the police or the Ministry of Emergency Situations deserves special attention. It is washed using the most gentle cycle. Hot water will cause the fabric to shrink at least two sizes. Therefore, it is better not to experiment, but to immediately take the item to the dry cleaner. The everyday uniform is more durable and wear-resistant, so it is not so difficult to care for. When ironing, it is convenient to use a steamer instead of a regular iron. That's all the wisdom. By following simple tips, you can easily keep the shape clean without compromising the color.
Child goes to school - mother takes care of the iron, or how to iron a school uniform
When choosing what to wear to work, the priority often turns out to be those things that do not need to be ironed. But this won’t work with a school uniform for a child, because you can’t send a child to school in a sweater with the argument “Because you don’t need to iron it!” This means that we need to learn how to iron a school uniform, which is what we will do now.
Absolutely no-frills, but we give you practical tips on how to iron a school uniform:
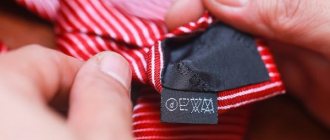
- be sure to read the inscriptions on the label; it should indicate the temperature conditions suitable for ironing a particular item;
- All mothers recognize ironing a jacket as the most difficult; it must be ironed through a damp cotton cloth so that the jacket does not acquire an unaesthetic shine;
- If after washing the seams on the jacket are wrinkled, apply damp cotton cloth to them and iron them, pulling the fabric from the corner;
- When ironing a skirt, there is one little secret: sweep away the folds with large stitches, this will make ironing much easier, and after ironing the stitches, of course, will need to be removed;
- Untidy bulges often appear on school trousers after washing, which can be eliminated by placing a damp cloth over them and ironing until these bulges disappear;
- When ironing blouses and shirts made of cotton fabric, you need to use a lot of steam.
Yes, everything is not as scary as you thought. Of course, you will have to spend a decent amount of time ironing a school uniform, but if you do it competently, you won’t feel poor and helpless standing in front of a child’s shirt.
Ironing is not at all as difficult as it might seem at the beginning, therefore, if your husband threw you a jacket with the words “Iron it for tomorrow,” you don’t need to panic and think about how to iron your jacket so that your lover is satisfied with everything. We remember that to iron a jacket you need to use steam, re-read the instructions given above and proceed directly to ironing.
Stroking a guy is like crossing the sea, there’s nothing to be afraid of, you just have to fold it correctly a couple of times and iron it – it’s a matter of a few minutes. If you have been entrusted with ironing a military or naval uniform, you should first familiarize yourself with the characteristics of the fabric that you will be ironing, and then begin the process using our tips. Ironing a school uniform is time-consuming, but not difficult, you just need to adapt and learn some secrets.
We also made a very unexpected conclusion - an army cap needs ironing, and nothing more than a three-liter jar can help with this. Arm yourself with an iron and go into battle with things!
Sometimes ironing can turn into a living hell if you don't know the basic rules for caring for things. It would seem - well, why these rules, take the iron and move it back and forth over the fabric. However, this is not at all true. Ironing linen, clothes, and household items is such a specific task that one awkward movement and the material is irrevocably damaged.
How to stroke a sailor's dick
A guy is a working sailor collar that is worn around the neck separately from the suit. This piece of clothing is characterized by a blue color and three white stripes along the edge. Sometimes it can be characterized by other signs, especially when it comes to festive clothing. In this case, not only the shade and number of stripes may differ, but also the sewing material.
A variety of materials can be used in the manufacture of iron, so ironing rules can vary significantly for different products.
The first thing you need to do is study the product label. If it is missing, then you can only be guided by generally accepted standards, which are designed for different types of material.
For example, cotton or linen fabric can be ironed at maximum temperature, from the wrong side. Both steaming and additional moistening using a sprayer on the iron are appropriate here.
Silk products are ironed exclusively at the minimum temperature. This is usually a mode for delicate fabrics such as silk, nylon, satin, etc. Steam and humidification are not used.
Viscose, crepe-satin, and gabardine are considered durable materials, but they must be carefully cared for. Guys made from these fabrics are ironed at medium temperature, without using steaming. In addition, when ironing, it is better to place a gauze cloth to prevent “burn” on the surface of the sailor collar.
Guys made from tweed, polyester and all types of synthetic materials can be ironed at maximum temperature. But don’t rush to set the maximum heat right away. It is better to first try ironing the product at medium heating power, and if the material does not iron, then only increase the temperature. Such collars should also be ironed through gauze or any other thin fabric. Steaming is acceptable, but it is better to avoid moisturizing, as this can cause streaks and stains.
Perhaps, these are all the basic rules that will help you iron your sailor’s guy efficiently and quickly. Try to treat the fabric with care and avoid exposure to hot temperatures for too long, and then this piece of clothing will retain its appearance for a long time.
Ironing things will be an overwhelming challenge if you don’t know the rules and nuances, here’s an example: how to iron a guy? This is an important question, because the condition of naval, military and any other clothing is an important part of the appearance of its wearer. Is it pleasant to communicate with a person whose suit looks like it was chewed and spat out by a cow? And supervision over military uniforms should be even stricter, if only because a military man can be punished for ignorance and inability to care for his own clothes.
A guy is a military uniform and must be perfectly ironed
Sloppiness in clothing is, first of all, disrespect for the people around you, and also disrespect for yourself. D.S. Likhachev
Usually, taking care of military clothing is simple - it does not require specific knowledge and expensive products, but there are still several nuances. To put things in order, it is not enough to perform a banal chain of actions: take a uniform, put it on the ironing board and iron it. The purpose of this article is to remove the veil of secrecy that hides the specifics of caring for clothes, ironing and washing them.
How to iron clothes
It is necessary to iron only clean linen; even the most previously invisible stains will appear on stale ones. Also, before ironing, you should mend all the holes so that they do not crawl under the iron.
All colored linen (with the exception of men's shirts) is ironed from the inside out so that the clothes do not get iron marks - stripes.
Before ironing, for convenience, sort your laundry into groups (shirts, T-shirts, T-shirts, towels, underwear, duvet covers, pillowcases, sheets, etc.).
First, iron small details - sleeves, cuffs, collars, frills, embroidery, pockets, lace. You need to iron from right to left and from the wide part of the product to the narrow, away from you, along the length of the item (along the longitudinal thread).
Bed linen - duvet covers, sheets, pillowcases, towels are ironed right side out.
Crepes and products with a convex pattern should be ironed dry and not very hot.
Dry laundry is difficult to iron, so you should spray it with a spray bottle or use the “Steam” function, if available on the iron. Wet laundry should not be stored for too long (longer than 12 hours) before ironing; it may develop damp stains that are difficult to remove.
Items made from synthetic fiber do not need to be ironed at all. If the product is wrinkled, it can only be ironed with a slightly warm iron.
Linen and cotton are ironed with a hot iron while wet and on the right side - the fabric will acquire its original shine.
The comb can only be ironed when completely dry; it must not be sprayed to prevent stains from forming on the fabric.
You need to iron things until they are completely dry, otherwise they will wrinkle after ironing during folding and storage.
The bias cut is ironed along the grain of the fabric - this way the product is not deformed.
Woolen items are ironed both from the inside and from the face, but be sure to iron them from the front through a damp cloth.
The lace needs to be starched (3 tablespoons of starch per 5 liters of water), and then gently ironed with the front part (nose) of a moderately heated iron. Do not forget that synthetic lace is afraid of a hot iron.
Products made from taffeta, which is made from artificial silk, are ironed while they are still damp with a warm iron from the inside out.
The flounces should be ironed first along the edge, after which the frill is ironed.
Products made from white natural silk should be ironed slightly damp and only from the inside out, with a not very hot iron.
Velvet and velor should be ironed practically on their weight. You should spray it from the inside out and move the iron lightly (from the inside out) so that the hot steam straightens the lint.
Before ironing your trousers, you need to run a sponge, after moistening it in a solution of water and vinegar, over the dirty areas. Start ironing the trousers by ironing the seams from the wrong side, after which the trousers need to be turned inside out and ironed through a damp cloth. On convex parts, you should not hold the iron for long - iron marks will remain, just iron the problem area several times.
Embroidery on items is ironed from the inside out on a soft mat with a hot iron.
Blouses and men's shirts are ironed first on the right sleeve, then on the collar, top back and left sleeve, then on the back and side seams and front. Light blouses and shirts should be ironed on the front side, dark blouses and shirts should be ironed on the back.
Woolen dresses of dark colors should be ironed from the inside out, pockets and pleated items should be ironed from the front side through a damp cloth. First iron the collar, then the ruffles, pleats, then the sleeves, and the side seams on the inside. Once everything is ironed with wide movements, the dress is ironed along the length. An ironed dress should be hung on hangers only after it has cooled completely, otherwise it will wrinkle.
All items that should be ironed while wet must be thoroughly dried with an iron when ironing.
The thinner the product, the thicker the bedding should be when ironing. If the iron is not hot enough, it can leave unsightly yellow streaks on damp white laundry.
For shiny streaks that appear when ironing the product, wet it with a slightly damp swab and iron it through the fabric.
Ironed linen is placed in the closet after it has cooled completely - after ironing with a hot iron, it is still damp for some time.
Ironing guy
A guy or blue collar, decorated with three white stripes, is without a doubt a distinctive part of a sailor's suit, a symbol of naval brotherhood and victories of the Russian fleet. Keeping it clean and tidy is a matter of honor. Below are brief instructions on how to iron it correctly:
- The collar is laid out face up on the ironing board. The final result of the work depends on how carefully it is straightened before ironing - will it be necessary to start all over again due to creases on the other side that were not noticed in time, or not? Therefore, before proceeding to the second stage, it is worth checking and double-checking everything carefully.
- The front side is ironed, paying attention to every bend that occurs.
- Fold the collar with the outside in, straighten the resulting half and iron first on one side and then on the other.
- The collar is bent again: the upper half is folded to a quarter of its length and ironed, after which the same is done with the other part of the collar.
- This completes the task. You can straighten the guy and admire the result.
Guys should be ironed face up
Ironing recommendations
You need to be able to iron clothes correctly and know how to do it. This work can be simplified if you first starch the suit, but this trick can only be applied to cotton fabric. The advantages of this method are that after it the clothes wrinkle less and it will be easier to wash off the dirt from them.
- First, they purchase (or take out from the shelf) the ingredients. You will need regular potato starch, which can be found in any store, and cold water in the ratio: 2 tablespoons per liter of liquid. To soak the mold you will need a bucket of this liquid.
- The resulting whitish solution is stirred until even the smallest lump remains in it. Then the diluted product must be left to sit for at least one hour, after which the water and starch will have to be thoroughly mixed again.
- Only a suit that has already been washed and wrung out of excess moisture is starched. Then the clothes are poured with a solution of starch so that they are completely immersed in the liquid and saturated with it.
- The mold is soaked for 5 minutes, after which it is rinsed in the same solution, wrung out and transferred to an ironing board. It’s not scary if there are grayish stains on the fabric - they can be easily removed with a wet sponge or cloth;
- The method of ironing a starched suit is no different from ironing any other clothing.
Ironing and washing clothes is not difficult, you just need to know the rules and secrets of care, and the ability to take care of yourself and your uniform is the direct responsibility of a military man.
The basic rules for ironing military uniforms are also suitable for other suits: police, work, school, office.
To watch online, click on the video ⤵
How to iron and hem a uniform for summer using the example of Barvikha Read more
Cook's clothing | Unboxing Cooks | How much is Shmot Read more
How to hem a collar to a collar? How to file in the Army. More details
Starching and ironing military uniforms. More details
How to properly hem a collar (hem) on a cadet’s camouflage (field uniform). More details
How to iron trousers correctly, how to iron them like a professional tailor? More details
How to file properly in the army Read more
Sewing a collar collar to a collar (hemming to a collar) for the summer service period Read more
Chef's uniform, full review Read more
ARMY LIFE HACK ABOUT CHEVRONS Read more
How to make a collar yourself! Hemming. More details
From major to lieutenant colonel in 5 minutes. How to properly sew shoulder straps onto a jacket (real time) More details
How to properly attach stripes and emblems to shoulder straps? More details
Hemming. How to neatly and beautifully “hem” or how to sew on a collar Read more
How to fold a jacket correctly and quickly Read more
Tver conscripts are sent to serve in the Presidential Regiment Read more
Source


