How to properly put buttons on clothes with your own hands, and what tools are needed for this? Is it possible to repair accessories on clothes with your own hands? Similar questions are of interest to everyone who has at least once in their life encountered broken fittings on their favorite things.
Buttons, fasteners, rivets and other elements of clothing really bear the heaviest load, because we unbutton and fasten them at least twice a day. And some manufacturers use low-quality products that quickly become unusable. But there is good news - you can repair the fittings yourself at home.
Types of buttons
To understand how to put a button on clothes at home, you need to understand the type of element. For the manufacture of outerwear, different types of accessories are used, which differ in the method of production and fixation:
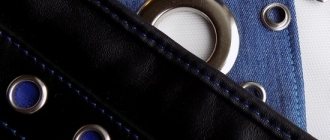
- Ring. One of the most common types of fasteners, which are shaped like a circle or ring.
- Alpha (S-shaped). Spring-type buttons can be sewn on or have elements for fastening.
- Shirts. Unlike other button options, it consists not of one pin, but of several sharp petals. They are used in thin products, knitted or knitted, and are often sewn onto children's clothes.
- Magnetic. Similar elements can be seen more often on wallets or bags, less often on outerwear.
- Holstered. The fasteners are designed in two parts and look like a small screw. It is screwed into clothing or haberdashery using a screwdriver.
- Block (clasp) At the top of the button there is a fastening in the form of a ring, and when fastened you can see the fastening elements on the reverse side.
Depending on the method of fastening, buttons can be punched or sewn. To install the first type of elements, you will need special tools that allow you to securely fix them in the fabric. The sewing elements are attached using threads and a needle with neat overlock seams, so working with them is much easier.
The material from which buttons are made is metal, ceramics, plastic or alloys. The service life of the fittings depends on several factors, including the quality of the material and the reliability of the fixation. Some items can last for many years, while others fall out or fall apart after just a month of use, requiring the buttons to be reinstalled on the clothing.
What do the numbers mean?
The numerical designations refer to the size of the teeth: they show the width in millimeters when the zipper is closed. Markings are applied to the slider from the inside. The shape of the upper part of the tongue depends on the type of links.
Metal teeth come in 3, 5, 8, 10 millimeters, the top of the slider has a triangular shape. Molded plastic teeth (tractor) - 3, 5.7, 8, 10 millimeters, oval or trefoil-shaped runner. Twisted plastic links (spiral) - 2, 3, 4, 5, 6, 7, 9, 10 millimeters, the slider resembles an oval. The longer the teeth, the stronger the connection against tearing and stretching.
Metal fasteners
The teeth of a metal zipper are made of flat brass or nickel wire. The shape of the links is asymmetrical: on one side there is a protrusion, on the other there is a recess. The connection with the braid is two-way. The quality of the clutch is high, but due to the misalignment of the teeth, the slider may “stick.”
Tractor zippers
The fastener consists of wide plastic teeth attached to a thick band on one side. The shape of the links resembles a caterpillar track. The advantage of such a zipper is the wear resistance of the links. But in terms of the fastening method, it is inferior in strength to metal and twisted fasteners.
Twisted clasps
A zipper is made from a fishing line rolled into a spiral. The fiber is wound or sewn onto the braid. The adhesion is formed by the fiber protrusions on both sides.
Required tools for installation
In workshops and manufacturing, installation of fasteners uses equipment to punch holes and secure the elements. Before fixing the button, the master marks its place, brings the fabric to a special area and presses the tool to create a smooth, beautiful hole. After this, a press is used, with the help of which the fittings are looped and securely fixed in the fabric.
It is possible to put a button on clothes without a press at home, but it requires care, patience and the use of tools, which include:
- punch;
- hammer;
- side cutters or nippers;
- mini anvil (can be replaced with a second hammer or a flat wooden board);
- chalk or a piece of soap.
In addition, you will need the button itself. The most common types of ring fittings consist of 4 parts - two form the head, and two more are fixed on the opposite side. You can buy it at any store, but in order not to make a mistake with the diameter, it is better to take with you the thing that needs to be repaired, or an old button.
What glue is suitable for repairing truck awnings?
The awning is a canvas made of synthetics, banner fabric, tarpaulin, PVC. For the repair of these materials, only certain compositions are suitable, ensuring reliable connection of several spare parts with each other.
Special glue for PVC “Winstik”
Winstik adhesive solution for PVC allows you to create a strong and transparent seam that is resistant to the influence of liquids, while maintaining its elasticity. The composition dries within a couple of days at room temperature.
"Desmokol"
Polyurethane adhesive "Desmokol" is intended for repairing PVC fabrics. The solution is transparent, so it does not leave marks or streaks after drying. Due to its easy flammability, contact of the substance with heating appliances or open fire should be avoided during operation. After application, the solution provides a strong connection of the surfaces, without the risk of displacement and tearing of the patch from the awning structure.
"Cosmofen"
The Cosmofen mixture has universal characteristics, which allows it to be used with any materials. Quick-setting cyanoacrylate adhesive is easy to apply and requires tight compression of the treated area with a press for a strong connection. The solution endures ambient temperatures of up to +80 degrees, so the seam should not be exposed to more heat to prevent the glue from melting. Due to the release of toxic components when using Cosmofen, it is necessary to repair the car awning in a constantly ventilated area.
Rapid
The thermoplastic composition of the Rapid brand reliably eliminates defects on the awning, maintaining the tightness of the canvas in the damaged area. The adhesive must be used in combination with a hardener and heated before application. The solution is suitable for repairing fabric awnings.
Is a punch necessary?
Replacing or putting a button on something without a punch is extremely difficult. If you make a hole with scissors, it will spread and the button will quickly fall out. In specialized stores you can buy a manual punch, which also allows you to make beautiful holes for buttons. It looks like a metal cylinder and is often equipped with nozzles of different diameters.
If you don’t have professional tools, you can use a Phillips screwdriver or an awl, but using them to make a perfectly straight hole is extremely difficult. A hand punch is a useful household item that allows you to quickly and efficiently put a button on a trigger or other clothing, so you shouldn’t save money on buying one. The procedure is carried out step by step, with mandatory preparation of the product and marking of the fabric.
For those who are going to start sewing or constantly repair clothes, it is better to acquire professional tools - a press or tongs. These are tools that make it easier to fix buttons because they do almost all the work. There is no point in saving on such devices - cheap models often have handles that break, causing them to become unusable.
How to install a button on clothes with your own hands?
The fastener can be installed either in a new place or as a replacement for old fittings that have become unusable. The procedure in both cases is approximately the same, with the exception of a few steps.
- Punch a hole in the fabric using a punch, being careful not to tear the textile.
- Insert the button into the hole and attach the fixing ring. It should be installed away from you along the convex edge of the fittings.
- Insert a punch into the leg and divide it into parts, then press the petals into the textile by hitting them with a hammer. The surface on which the work is performed must be fairly hard, but not metal, otherwise the fittings will bend. There is no need to use brute force, especially if plastic or plastic buttons are installed - they can break from strong impacts.
- The lower part of the fastener is fixed in a similar way. It is most convenient to do the work on a wooden block with a small recess, which is slightly larger in diameter than the size of the part.
- Tap the bottom of the hardware with a hammer to secure it into the fabric, then check the functionality of the new fastener.
It is best to purchase several buttons at once - the petals that secure the button in the fabric are fragile and often break, as a result of which the work has to be started all over again. This is a normal phenomenon that even masters who work with a professional press encounter. In a similar way, you can install other types of buttons (tendril, S-shaped), as well as denim buttons.
The most difficult thing to install buttons on children's clothing with small details is on items made of thick textiles such as jackets or coats. In this case, you will need a good, high-quality tool with several attachments, a little patience and accuracy.
To install sewing buttons you will need thread, a needle and chalk (soap) for marking. First, sew on the upper part of the structure using dense overlock stitches, several in each hole, after which they move to the bottom.
How to repair a rivet on clothing?
Buttons are often found on clothes: blouses, sweaters, overalls, trousers, etc. This is a very convenient device. Easy to fasten and unfasten. Even a child can handle such a fastener. But, unfortunately, rivets are not the most reliable material. They often come off the item of clothing. Instead of a convenient fastening, you get either a hole or an empty space on the fabric.
Repairing buttons is not easy. This will require time, effort and patience. The easiest way is to have your clothes repaired by a professional.
Are you looking for someone to trust with clothing repairs in Krasnodar? Come to the New Image studio at st. Kotlyarova, 17. Our technicians will fix any problem in a short time! You can find our prices here.
Have you decided to repair the button on your clothes yourself? Then follow the instructions.
To get started, we will need the following devices:
- Spare button.
- Wire cutters.
- Awl.
- Phillips screwdriver.
- Hammer.
- Electric drill.
- A small block.
To make the process of repairing rivets on clothing faster and easier, you can purchase a punch. This hand tool is used to make small holes in leather, metal, cardboard and other materials.
Let's take a closer look at the device of the button itself. The rivet consists of 4 parts. The two upper parts that form the hat are fastened together on one side of the garment. The other two are attached to the inner flap.
Have you collected everything you need? Get started:
- Carefully remove the old hardware with wire cutters. Be careful not to damage the fabric.
2. Prepare a place on the fabric for the rivet.
If you don't have a punch, an awl will do the job. We do not recommend using scissors. The hole will be too large and the edges will be uneven. Over time, the fittings will fall out.
3. Take the button. Let's install its front part. Insert the rivet into the hole, put on the spring part.
Secure it using a hammer and a Phillips bit. Tap exactly on the leg of the rivet (inner part), not on the decorative side. Otherwise, the button will lose its appearance. Tap the part over its entire diameter.
4. Assemble the lower part of the button.
We take a block and make a hole with a slightly larger diameter than the area on the fabric. The hole in the block must be drilled with an electric drill. Place the button in the hole made on the block.
We pass the second part through the fabric. Hammer the halves into a single whole. Don't have an electric drill? Instead of an anvil, use a second hammer or a metal surface on hand.
Congratulations! You did it!
Written simply, clearly and easily. In just 3 steps you will restore fastenings on any item of your wardrobe. But there are always pitfalls. What can go wrong when repairing a rivet on your clothing?
- You don't have a spare button. Not all manufacturers care about their customers. Few people will give you a spare tire. Perhaps the manufacturer is so confident in the quality of the product that he doesn’t even think about any breakdown. If this is your case, then you will have to go to the store and purchase a whole set of accessories. Found similar rivets? What a score! With another option, you will need to rearrange all the rivets.
- There are not enough tools to install the button. You can borrow equipment from friends, or spend money on everything you need yourself. Purchasing tools will not be cheap. But there is also a plus - a screwdriver, hammer and wire cutters will come in handy later.
- There is no patience, desire, time, energy. In this case, only the master will save you.
How to replace a broken button?
Before installing new hardware, the old button must be removed manually. This is done using side cutters or nippers, which are used to squeeze the structure from the reverse side and carefully turn it, pushing it out. Do not try to tear out the button or cut it with scissors, as this will destroy the fabric.
The advantage of this process is that you don't have to make the hole yourself - the new hardware is inserted where the old fastener was, and then all the necessary steps are followed.
Video: how to install buttons on clothes at home?
How to strengthen the button on a jacket so that it does not unfasten?
How to strengthen the button on a jacket so that it does not unfasten? The button on the jacket keeps coming undone, is there anything I can do?
toshiba
Achievement received 05/17/2019
The clothes button consists of two halves, one of which contains a protrusion in the form of a sphere, followed by a narrowing. Externally, this protrusion is very similar to the top of a chess pawn. The second half has a cavity in the form of a blind hole, inside of which there are two pieces of steel spring wire. During the fastening process, the spherical protrusion pushes the spring wires apart. This continues until the expanded antennae reach the point of narrowing. In a narrow place, the wires come closer together, which ensures a reliable connection of both elements of the fastener. During unfastening, the process is repeated in the same order.
There are only three reasons for button “incontinence” and all of them can be easily eliminated. The first reason is that on the half of the button where the spherical protrusion is present, there is too little difference between the widest part of the sphere and the narrowed part. The closed wire whiskers, with the slightest pull, immediately disengage, barely moving apart. The defect is eliminated either by sawing out a deeper groove at the point where the protrusion narrows (if the thickness of the metal allows), or by forming a more prominent recess by compressing the protrusion of the button using ordinary metal cutters. The main thing is not to overdo it and not to bite off the protruding element completely. Therefore, the operation should be performed without unnecessary effort, without trying to perform it in one step. It is better to make several light compressions, distributing them evenly over the entire diameter.
The second reason lies in the response part of the button with spring wires. They may initially be spread too widely. You can bring them closer and reduce the distance between them using round pliers with narrow jaws, tweezers or tweezers from a ladies' cosmetic bag. If the button uses low-quality wire that does not restore its shape well, then the procedure will have to be repeated regularly as the fastener loosens. The risk of breaking the wire tendrils is low, since the wire only breaks at sharp bends.
Reason number three is disguised as an extraneous inclusion, again in the response part of the button. An extraneous inclusion may be debris that has accidentally accumulated in a blind hole, for example in the form of fabric fibers from clothing. This debris significantly reduces the tenacity of the fastener. Firstly, it prevents the wire springs from fully closing. Secondly, the speck prevents the protrusion of the button from completely penetrating deep into the hole in the mating part. Even if the springs are of high quality, they simply do not reach the place where they are supposed to connect and arrive in a half-open state. In this case, the problem can be resolved by simply cleaning the counter part of the button and removing the blockage using a thick sewing needle.
I first encountered the problem of weak buttons in the early nineties, when shuttle merchants imported leather jackets from Turkey in huge quantities. The buttons haven't gotten any better since then. I managed to restore the functionality of several dozen buttons with my own hands. Everything works fine.