Types of glue
Which mosaic glue to choose? It is important that the composition is resistant to moisture, has good adhesion, and dries quickly. Depending on the degree of transparency of the tile, the color of the solution is also relevant. If the base has slight differences, then attention is paid to elasticity, leveling ability and degree of shrinkage.
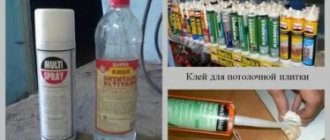
What to glue the mosaic onto? The main criterion for a material is the binder (base). So, there are 3 main types:
- cement (sold dry);
- dispersion (ready-made mosaic adhesive with the addition of acrylic);
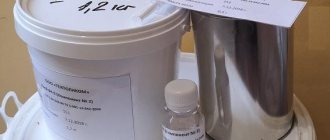
- two-component adhesive or reactive (epoxy or polyurethane based, prepared before use).
The dry mixture is made on the basis of white or gray cement. The glue is diluted to the finished consistency using water or latex. If the tiles are laid on a static base (concrete, brick), then the mortar is brought to a thick state. For dynamic surfaces (with temperature fluctuations), a more elastic adhesive is recommended.
Dispersion adhesive for laying mosaics is sold in sealed plastic containers. The paste mixture is ready for use and hardens within 40 minutes. This composition is recommended for use for complex work regarding shapes (architectural structural elements) and adhesion (has high performance).
The reactive composition is waterproof. Therefore, it is used for cladding rooms with high humidity (in the bathroom or swimming pool). A smooth base made of metal, glass or plastic is allowed. This material is also suitable for gluing natural stone mosaics. Setting time is limited to approximately 3-5 minutes.
If you need to glue transparent glass tiles, you can use an epoxy or polymer compound. They are distinguished by an almost colorless base.
Adhesives with two components
Such mixtures include epoxy resin, hardener or polyurethane. If you mix all these ingredients, you get a strong structure that is very difficult to tear off.
If you are going to lay mosaics on a marble, glass, plastic or metal surface, professionals advise using just this kind of adhesive.
It is also advisable to use epoxy products for gluing tiles on wood surfaces.
Due to its water resistance, this product is widely used in swimming pools, baths, saunas and other similar establishments. The only drawback is its high cost.
TOP 5 best glues
What is the best mosaic adhesive? Trusted brands, numerous customer reviews and discussions on forums allow us to highlight several specific compositions.
UNIS 2000
Russian glue is suitable for both ceramic and glass mosaics. It has leveling ability (up to 15 mm) and is used for work inside and outside the building. Has high adhesion to all materials, including natural stone. The finished solution can be used for 3 hours, the tiles can be adjusted within 3 minutes. Walking is allowed after 24 hours. The seams are rubbed out after 2 days.
Ceresit CM 115
German brand of domestic production. The main advantage is the perfectly white color of the glue. In addition, they have an environmentally friendly composition, elasticity (you can lay “warm floors”) and water resistance. The working time of the finished mixture is 2 hours, it begins to harden after 20-25 minutes. The layer is limited to 4 mm. The base must be carefully leveled.
Litocol Litoplus K55
Italy supplies adhesive for mosaic tiles on a white cement-based grid for laying transparent, colored mosaics and natural stone. A wide range of permissible temperatures (from -25°C to 60°C) allows the composition to be used inside any room and outside the building. Walking is possible within 24 hours, but full operation is possible only after 14 days. The working time of the solution is 8 hours, adjustments are possible within 40 minutes.
Axton
Russian glue is made on the basis of gray or white cement. The scope of application has no restrictions. Laying on concrete and brick, as well as on plasterboard, is allowed. If the solution is prepared with the addition of latex, then you can create open water storage facilities (swimming pool, tank). Working time is 2 hours with adjustments up to 15 minutes.
Lacrysil
One-component white adhesive from Ukraine based on acrylic is sold in finished form. Suitable for all types of mosaics. It is not afraid of dynamic loads, water and serves for a long time without losing its characteristics. You can lay tiles on the wall, floor and ceiling. Cladding of thermal insulation boards (expanded polystyrene, hardboard, MDVP) is allowed.
Preparing the base for mosaic tiles
We have already mentioned that the tiles lie on a perfectly flat surface. Often walls are leveled with plasterboard - quickly, evenly and cheaply. We strongly do not recommend using drywall to level bathroom walls. Its main drawback is low physical strength. Under medium loads, for example, while washing you lean on the wall, it will bend. As a result, the tile will fall off. Drywall is used by construction companies, thus they significantly increase the speed of work and, accordingly, their profits. As always, the customer pays for everything.
Drywall in the bathroom
If you are finishing the bathroom with your own hands, then do not be too lazy to plaster the walls with cement-sand mortar. We will give step-by-step instructions for laying ceramic tiles specifically for this option.
Step 1: Check the condition of the wall. In most cases, after ordinary plaster it will have to be leveled. Check with a straight, long staff or level, apply it in different places and at different angles. Look at the gaps. It is much easier to detect irregularities with a light bulb. Place it on the floor, the light rays will indicate unevenness.
How to check the evenness of walls
How to make a surface suitable for laying mosaic tiles?
- Prepare the putty solution and primer. Choose high-quality material, do not try to save money.
Putty for wet rooms
- Carefully coat the surface with primer. The fact is that putty that is thin in thickness will fall off if there is insufficient adhesion. Prime twice in transverse directions. Use a deep penetration primer; it will serve as additional protection against moisture.
Deep penetrating primer CERESIT CT 17
Dilute the primer in the proportions indicated on the canister. If there are concerns about its quality, then reduce the amount of water by about 15%. But in no case is it recommended to increase the percentage of water; even minor violations of the material preparation technology significantly reduce its effectiveness.
The diluted primer mixture adheres better and sets faster. However, the deeply penetrating product performs better when undiluted.
It is better to prime with a brush rather than a roller. A brush can thoroughly rub the liquid into the surface, but a roller will only wet it. In addition, all hard-to-reach places can be treated with a brush, which cannot be done with a roller.
Primer of walls
- While the primer dries, prepare the plaster. First, water is poured into the container, and then the dry mixture is added in portions. To stir, it is better to use a mixer; if you don’t have one, you will have to stir by hand. Let the solution sit for about five minutes, after this time, stir it again.
- You need to plaster with a large flat spatula, rub the solution into the plaster with maximum force. Go through each place several times. Do not pay attention if you still have traces from the spatula, over time you will gain experience and the surfaces will be smooth.
Applying plaster with a spatula
In extreme cases, after drying, the marks can be removed with sandpaper. It is better to fix it on a flat board or trowel, sand it in a circular motion, do not press it too hard.
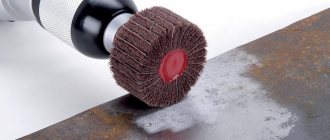
Tool for polishing surfaces after plastering
If there is no sanding paper and the marks are small, then you can smooth them out with a metal smoothing iron.
Stainless steel smoother
Press it firmly against the wall surface at an angle and move it across the surface several times in different directions. In most cases, this alignment is sufficient.
- Clean the surface from dust, preferably using a vacuum cleaner.
Step 2. Measure the area of the walls, purchase the appropriate amount of glue and tiles.
A good mosaic is packaged not only in a box, but also in individual film
The reserve for tiles can be kept small, 5% is enough. The fact is that it is easily cut to the required sizes at the seams, the amount of waste is minimal. These common tiles can cause chips or uneven edges and increase waste.
Calculation of the number of tiles
Step 3: Apply primer very carefully twice. Do not miss this operation, we have already mentioned that mosaic tiles do not tolerate deviations from technology.
Soil preparation
We apply priming with a roller
Distributing soil along the wall
Step 4. Consider the placement of the tiles. If you plan to make a decorative mosaic border, then decide on its height and cladding material.
Markup tip
Mosaic border in the bathroom
Step 5. Draw lines for laying borders and tiles on the wall. If you have little experience, then draw lines every three rows of tiles, this will make it possible to constantly monitor its position. The fact is that glued mosaic sheets are large in size, and the larger the size of a unit of material, the more difficult it is to eliminate defects when the gap between them is broken.
Don't miss: How to optically enlarge a small apartment
Step 6. Prepare the glue. The technology is indicated on the packaging; follow the manufacturer's advice. Are there any concerns about its quality? Add a little primer to the diluting water, approximately 10-20% of the total amount. You will have the primer left over from previous operations.
Preparation of tile adhesive
Important. The consistency of the glue requires very careful attention. For ordinary tiles this is not so important; they are laid from the bottom up, a cross is inserted into each seam to maintain a gap. The same cross prevents individual tiles from slowly falling down over time. It is useless to use for a mosaic cross; they will not keep it from lowering. This means that the glue should be thick, but not so thick as to impair the adhesion coefficient to the wall and tiles.
How to check the quality of the solution
Glue consumption when laying mosaics
Step 7. Start working from the bottom row and far corner. The glue should be applied twice. First with a flat spatula, and then with a comb. The height of the ridges is within 3–5 mm, choose the appropriate spatula and give it the proper slope. The better the glue rubs in, the more securely each individual tile will stick. This is especially true for tiles on paper. The reinforced mesh increases the reliability of fastening; it is deeply immersed in the glue.
Tools for applying tile adhesive
Applying glue to a notched trowel
Applying glue with a trowel
Applying adhesive to the wall
Practical advice. We have already said that maintaining the distance between the tiles will have to be done by eye; this is very difficult for inexperienced builders. To make inevitable flaws less noticeable, lay it in a checkerboard pattern. Using a construction knife, cut one whole sheet into two parts, start the first row with half, and the next with a full sheet.
Step 8. Carefully place the first sheet horizontally. If you need to trim it a little, then slowly move it with the palms of both hands. With significant or incorrectly directed efforts, the mosaic tiles will fold like an accordion. To ensure a tight fit of all tiles, use a trowel; the larger it is, the better. Every 3-4 sheets, check their position in different directions with a long staff or level. If you have a laser level, great. Its lines are not covered with glue, so you can work faster. Do not allow gaps; it is very difficult to correct them later.
It is important to know that it is not recommended to completely remove the glued sheet; you can only correct the position on the wall. The removed sheet is difficult to prepare for reuse, especially if it is paper-based; the paper may become wet and tear during removal.
Gluing the first sheet
Lightly press the mosaic with a smoothing iron
Mosaic laying
Video - Laying mosaics
Practical advice. Pay great attention to the exit points of pipelines. Here it is better to put more glue than less. The leftovers will be removed, no problem.
Continue working in the same way over the entire surface of the bathroom wall.
Step 9. If your sheets of mosaic tiles were paper, then they should be removed. You need to start removing only after the glue has completely hardened; the time is indicated on its packaging, in most cases it is 24 hours. Wet the paper with a damp sponge; there should be enough water. Do not leave dry areas so that it can be easily removed; the entire area should be well wet. The paper must be removed entirely and at once, otherwise the remains will be difficult to remove. Wetting time is approximately 2-3 minutes, there are missing places - do not tear off the paper, but repeat soaking again. If everything is done correctly, the ceramic tiles will easily release from the top paper.
Stages of laying mosaics on a paper basis
For tiles on a reinforcing mesh, this operation is not needed, which greatly simplifies the work process.
Step 10. Grouting the joints.
Calculation of the amount of grout
As you might guess, mosaic tiles have a lot of seams. Practice shows that grouting takes no less time than installation. Moreover, it is rarely possible to do everything efficiently the first time; you have to repeat the operation. For grouting, use bactericidal plastic materials. They are not cheap, but then redoing the wall cladding will cost even more. If the surface of all the tiles is smooth, then it is easier to work. Using a large rubber spatula, rub the mixture into the seams, apply considerable force, and do not allow any gaps.
Applying grout
Applying grout
The mass should come out at the edges, this indicates that the seam is filled to its full depth. After a few hours, the residue is removed with a damp cloth, but not wet! You can use any soft materials.
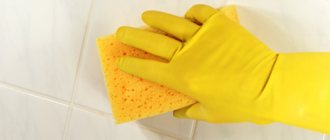
We wipe the surfaces
Washing the wall
The surface has dried - check the quality of work. Any gaps found must be refilled with mass and then cleaned.
Some apartment owners, in order to improve the appearance of the bathroom, cover certain sections of the walls in the bathroom with decorative mosaic tiles with rough edges or tiles of unequal height. There is a lot of fuss with them; you will have to grout and then clean each tile separately. It is impossible to predict how long this will take.
Video - Tips for laying mosaics
What should be the surface for laying
On what surface can mosaics be glued? The facing material is small in size. Therefore, all unevenness of the base will be emphasized by the facing material. If this is what the designer intended, then you should choose adhesives with high adhesion rates and a short hardening time. The thickness of the mosaic adhesive is small in order to avoid “floating” the tiles. It is also important to take into account the fact that the seams should be left unfilled until the glue has completely dried.
When designing a plane, the surface must be pre-leveled. Mortars for laying mosaics may have filling ability without shrinkage, but leveling the mosaic with a large layer of glue will be inconvenient.
It is worth noting that cheap materials lose the volume specified by the master during drying. This leads to the fact that the tiles will not give an even plane.