General information
Most likely, many women have encountered a problem when their favorite trousers become too big.
There may be several reasons for this:
- – a woman’s non-standard figure, which does not allow her to purchase an ideal factory product and has to purchase larger size trousers,
- - change in figure after losing weight,
- — at the time of purchase, the appropriate size was simply not available, but I really liked the style,
- - improper washing of the product, which can lead to stretching.
Trousers are more difficult to sew than other items of clothing:
- Without full cutting, trousers can be reduced by a maximum of two sizes, otherwise there is a risk of the trousers being skewed.
Important! If you reduce the size of your trousers by more than two sizes, they must be completely recut. It’s quite difficult to do it yourself, but having a professional do it is expensive. Sometimes in this case it is easier to buy new trousers.
- With the correct size reduction, the trousers are sewn in at once along all seams - side and inside.
Important! Only the outer seam of the trousers is sewn in case you need to adjust the hip line, and not reduce the entire size!
How to reduce the waist of jeans, master class with photos
Probably, many women have encountered such a problem when purchased denim shorts fit almost perfectly except for the slack in the waist area along the seat seam of the back of the shorts. The reason for this may be a very thin waist, and also, most often, a kinky figure.
Be that as it may, shorts with such a fit require minor repairs, which can be done with your own hands at home, without the help of craftsmen from an atelier.
To sew jeans at the waist (or shorts), first of all, you need to carefully try them on and note by what amount you need to reduce the volume of the back halves in the waist area along the seat seam (you can pin them). Then you need to put control marks (with soap or chalk) on the pins on the wrong side of the product.
Then you should carefully open the seat seam just below the place where the new line should end, as well as the waistband of the shorts (about 6-8 cm on either side of the seat seam) and the waist loop.
Process description
Where should you start to reduce your trouser size at home? First of all, you need to decide in which area you need to sew the trousers (only at the hips, at the waist, completely along the entire length, etc.).
When this is done, the item should be washed and ironed. Next, we try on the product and use pins to mark the places where, in your opinion, the fit of the trousers is imperfect. Afterwards, you need to manually sweep the trousers to the places marked with pins and try them on again. If you are satisfied with everything, you can make the seam using a machine. Everything seems simple.
Pay attention to the recommendations that will help you when altering your trousers:
- - it is worth noting that not all styles of women's trousers can be altered, especially independently - due to the complex style, this procedure may simply be impractical,
- - when drawing on fabric, you should use a dried piece of laundry soap, since after washing it will not leave any traces,
- — it is advisable to do basting on any fabric with white threads, since they definitely will not fade and will not leave any marks on the clothes,
- - the edges of the fabric should be processed with overlock or zigzag,
- - All seams should be done on top of the trousers.
Important! When working with trousers, it is necessary to transfer all changes as accurately as possible from one leg to another to avoid skewing the product!
After finishing the work, the trousers should be ironed well.
Let's take a step-by-step look at individual options for reducing trouser sizes:
- How to sew in trousers only on the sides:
- - try on the product “inside out”, reduce the size using pins,
- - walk around, squat in trousers,
- - if you do not experience discomfort, draw a seam line,
- - undo the belt,
- - sweep along the intended line of the trouser leg,
- - turn the pants inside out and try them on again,
- - if you are satisfied with everything, sew the seams using a sewing machine along the marked lines along the entire length of the trouser leg,
- - cut off excess fabric from the seam (leaving approximately 1.5 cm), trim the cut edges,
- - sew on a belt,
- - Iron the seams well.
- If, due to the decor on the legs, it is not possible to sew the side outer seams, sew the product only along the inner seams. For this:
- - try on the product “inside out”,
- - mark the places of supposed seams with pins,
- - separate the belt,
- - the product is cut from the back and a new seam is applied,
- - trim off excess fabric, trim the edges,
- - stitch the trousers with a sewing machine,
- - sew on the belt,
- - iron the seams of the product.
- If there is a need to sew in trousers at the waistband, then use one of the following methods:
- sewing along darts is the most common method, in which either new darts are added or old ones are ripped out; the main thing is to avoid distortion of the product, so that the darts do not rest against the side seams of the trousers. At the same time, the belt is cut on the sides, the excess is cut off and carefully sewn to the “sewn” product.
- suturing along the back seam - the belt is torn off after fitting and cut in half; the middle seam is ripped open, sutured and processed. The belt is reduced and sewn to the product.
— complete alteration is the most labor-intensive process, which it is better not to resort to without appropriate preparation.
How to sew jeans in the hips
Before shrinking jeans at the hips, you need to pre-wash and iron them. This will help smooth out any unevenness in the fabric, as well as determine exactly how many centimeters along the side seam need to be removed. In the future, the procedure is carried out taking into account some features.
Algorithm of actions:
- Turn the jeans inside out.
- Put them on like this, and use pins to mark the places along the side seam where you need to reduce the volume.
- Take off your jeans and lay them out on a horizontal surface.
- Draw a line with chalk along the pinned pins, which will allow you to determine where you need to make a new side seam and how much to close the product.
- Make sure that the width of the allowances on both legs is the same, which will avoid curvature.
- Initially, hand sew the jeans along the sides along the chalk line.
- Turn the product inside out and try it on, then walk around the room and sit down.
- If discomfort is felt during these manipulations, then the basting needs to be done in a new way.
- After the fitting was successful, you can begin the final sewing of the jeans.
- Open the bottom part of the waistband and the side seam to the required length.
- Trim off excess fabric, leaving a seam allowance of 1.0-1.5 cm.
- Sew along the marked side seam using a sewing machine.
- Using an overlocker, finish the edges of the fabric to prevent threads from spilling out. If it is missing, you can sew a zigzag stitch.
- Smooth the side edges so they don't bulge.
- Turn the jeans inside out and finish the right side along the side seam, making it as close as possible to the factory version.
- After you have sewn the jeans along the side seam, you need to remove the extra centimeters of fabric in the waistband and stitch the ripped area.
- Iron the product completely.
We recommend reading: Compression stockings for varicose veins: how to wash and dry
The other pant leg should be sewn in the same order. When finished, remove excess threads, iron the trousers, ironing the side seams well, and then try on the finished jeans.
Important! All markings must be made on the wrong side.
You can also sew jeans on the inside of the thigh. In this case, the actions are carried out slightly differently. This method will allow you to sew in the trousers not only at the hips, but also to narrow the legs.
Procedure:
- Turn the jeans inside out and try them on.
- Use pins to mark the new inside side seam.
- Carefully remove the trousers and lay them out on a horizontal surface so that there are no creases.
- Use chalk to draw a dotted line from the center seam and along the side inseam to the bottom of the legs.
- Sew by hand on the inside side seam along the marked line.
- Try on jeans and adjust markings if necessary.
- Open the bottom and side inner seams.
- Cut off excess fabric, leaving seam allowances (1.0-1.5 cm) along the chalk line.
- Fold both pant legs and duplicate the markings.
- Sew the jeans using a sewing machine along the inside side seam.
- Finish the edges with a zigzag or overlock to prevent threads from spilling out.
- Sew along the bottom edge.
- On the front side of the product along the inner side seam and at the bottom, make a contrast stitch identical to the factory one.
- Iron the product completely.
Using these methods, you can sew jeans along the inner and outer side seams without even having professional tailor skills. The main thing is to strictly adhere to all recommendations and cut off extra centimeters only after careful fitting of the product.
You can clearly see how to properly sew in the sides of jeans in the video at the end of the article.
Results
The difficulty of reducing the size of trousers depends not only on their style, but also on the fabric. The tips listed above apply to trousers made from regular classic fabric. If you have trousers made of thin (silk, fine knitwear) or, on the contrary, thick (for example, wool) fabrics, then you should take on altering them only if you have the skill to alter ordinary trousers.
The problem of changing pants to a size smaller can arise for various reasons. Firstly, the new thing may not fit your figure so perfectly. The non-standard figure of girls pushes them to undergo this operation in the pursuit of beauty. For example, height, fatness or thinness. Most often the length is shortened.
Secondly, the product may stretch if washed incorrectly. Most often this is non-compliance with the temperature or spin conditions. The length or width of the trouser legs is altered.
Thirdly, my favorite thing became too big after losing weight. You will have to change the width of the trouser legs, at the waist, at the hips. Fourthly, the purchase was made under the influence of a moment of weakness. I liked the model, but didn't have the right size. But upon closer examination, it was decided to sew in or alter the product.
Clothes that suit your figure: stylish and neat
Jeans are one of the favorite things of the entire beautiful (and not only) half of humanity, and all because they are practical, fashionable and perfectly emphasize the advantages of the silhouette. But at the same time, they have one drawback - all models are sewn, as they say, with the same brush, i.e. according to standard body shape standards. To correct this injustice, you just need to sew up your favorite jeans in some places. To do this you will need a little patience, determination and a sewing machine at hand.
Problem 1. How to sew jeans in at the waist?
In order to make jeans one size smaller at the waist, you need to prepare a tape measure, scissors, tailor's pins (sold at any sewing store), a sewing machine and thread to match the material. There are two ways to sew jeans in at the waist - simple and more complicated. We'll look at both.
How to sew pants by hand
Initially, you should decide in which directions you need to sew your trousers. So, you can sew in the length of the product (shorten), the width of the trouser legs themselves, along the hips (at the waist or along the entire length), remove flares, and adjust the waist.
It is necessary to stitch evenly from the side and from the step (internal) seam.
Sometimes you can do without a pattern. This applies to small adjustments to things. For example, changing the length, inserting small darts, narrowing the bottom of the trousers. And sometimes a pattern is required. This applies to adjusting clothing around the waist. The less you change, the easier it is to change.
Preparation
First, the product is washed. For example, cotton and wool shrink the product and can fit to size.
Then the trousers are ironed. This is necessary to prevent errors and irregularities. Trying on pants. Excess fabric is marked with pins.
It is always advisable to have chalk or soap on hand for marking, a sewing ruler, scissors, pins, thread, and a sewing machine. It is better not to draw with a pen or pencil, otherwise marks will remain.
How to sew bell-bottom pants into straight ones
A flare is a slight extension of fabric onto items. The expansion can be smooth and large. It can start from the hip, knee, or mid-thigh.
- Initially, you try on your pants and need to twirl in front of the mirrors.
- The fit of clothes is examined from different angles.
- Excess fabric on the wrong side is marked with sewing pins or needles with knobs. It is recommended that someone do this to avoid curvature.
- We attach the needles with the point down so as not to prick.
- You can measure on both legs at once, but in the end they should be the same. Or then measure the processed one and transfer it to the second one.
- The product is carefully removed without touching the needles.
- The product is laid out on the table. The edges are aligned.
- First, all the work will be done on one trouser leg, then on the second.
- Using tailor's chalk, we mark with dashes the places marked with pins. If you choose a pen or pencil, you will have to scrub for a very long time.
- We take out the pins.
- Straighten the pant leg again.
- We draw a straight line.
- Mark a second line on the side seam 1-2 cm.
- We baste the seam along the first line.
- Try it on. Checked for measurement error, curvature, comfort.
- The thing is removed. Adjustments are made if necessary.
- Trying it on again.
- Excess fabric is trimmed.
- Ironed.
- The product is turned inside out if it was previously done on the front side.
- Levels out.
- The ends are processed separately or together. Preferably using a machine using a zigzag or machine foot.
- The product is stitched on a sewing machine. Ready.
How to properly sew in the sides of men's and women's jeans
Often people make purchases in a hurry and only later notice that the item is partly the wrong size. In such cases, it is quite possible to adjust the purchased jeans to your figure and height at home. This can be done by any craftswoman with minimal sewing skills.
It is more difficult to make jeans smaller than regular trousers, although the repair technology is the same.
To facilitate the work process, you will need knowledge of the features of denim material:
- the finishing stitches are made with a contrasting color thread, it will be difficult to choose the right texture and color;
- not all home sewing machines can sew thick thick fabric, so in difficult places you will have to sew by hand;
- It’s wiser to imitate a complex denim seam;
- Jeans should only be reduced by 1-2 sizes for the sewing to be successful.
Now, if you have free time, a sewing machine and the necessary tools (sharp scissors, color-matched threads, tailor's pins, a tape measure, an iron), then you can start working.
How to sew in jeans that are too big on the sides:
- Put your trousers on inside out and pin the areas that are too big with safety pins. Do this on both legs from the inside and outside.
- Remove the trousers, lay them out on a smooth surface, and level them well with your hands. Using chalk, mark a straight line along which the stitching will run. Leave an allowance of 1.5-2 cm for shrinkage. If the material stretches, then there is no need to leave additional centimeters.
- Make a mark along the marked line.
- Try on and make sure that the pants fit and do not restrict movement.
- Trim off excess material by 1-1.5 cm from the hand seam.
- Sew the product using a machine, finishing the edge with a zigzag stitch or using an overlocker.
How to tape your trousers at home
There is nothing difficult in creating such beauty. Open the bottom edge (hem). Iron the product. Try on the pants from the wrong side. Spin around the mirror. Mentally estimate how much it needs to be narrowed.
Adjustment on one side is made subject to slight narrowing. Then it looks more practical (internal or external). Is there any decor?
Mark excess material on the material with pins. You have to be careful here. This may affect stretch fabric. The fabric will stretch a little and the stitching will be crooked. If the fabric is non-stretchy, your legs should fit comfortably into the pant leg. The main thing is not to overdo it.
- Remove carefully and spread on the table.
- Align. Draw a line with chalk along the marked areas. Draw a 2nd line for the seam.
- Baste with threads along 1 line.
- Try it on again and check the comfort.
- Adjust as necessary.
- Trim off excess fabric.
- Seal the edges.
- Machine sew trousers.
Adjustments on both sides are made under the condition of large narrowing. The same actions are performed, only on both sides at an equal distance. Otherwise it will be crooked. Finish hem and iron.
Taper jeans with decor
This method is suitable for more experienced dressmakers. This is how jeans look original; if you choose leather or suede in contrasting shades for inserts, the finished product will also become fashionable.
Here is the action plan you need to follow to get excellent results:
- Turn the product inside out and try it on in front of the mirror.
- Use pins to mark the required leg width. Take off your jeans.
- Draw a line along the pins using chalk.
- Measure the seam allowance, no more than 1 cm, and set the items aside.
- Cut a triangle from another contrasting fabric. Its base should be 6-11 cm, and its height should be the distance from the tapering point to the end of the leg.
Important! If you decide to use cotton or linen fabric for the inserts, you should wet and dry it and iron it before starting. The fact is that some fabrics can shrink when washed and otherwise you will have to redo the entire product again.
- Sew the fabric between the parts of the trouser leg, iron the finished result and remove excess threads.
How to properly sew in the sides of trousers with your own hands
If the trousers are too large due to lack of volume in the hip area, then suturing can be done along the outer seam.
- Turn the product inside out.
- Try it on. Squat, walk around.
- The places to reduce how much are indicated with pins. Everything is distributed equally to avoid curvature.
- Draw a straight line with chalk.
- Manually sweep the marked areas.
- Turn it onto your face and try it on.
- Rip out the factory seam.
- Sew along the seam you have marked. For the entire length of the trouser leg, so that there are no distortions.
- Cut off the excess pop of the material and process the edges.
- Sew on the waistband and bottom edge of the trouser leg.
- Don't forget about the 2nd leg. Both should be the same length.
Sometimes the external seams are not touched due to decoration or other reasons. And they stitch along the inside line. This stitch is used for problems with the waist.
Instructions:
- The product is turned inside out.
- The excess is tried on and noted.
- The product is removed and placed on the table.
- The belt is separated. Cut in half from the back.
- Using a thread and a needle, a new seam is applied to the 2 halves of the item.
- The excess is trimmed and the edges are processed.
- It is being stitched.
- The belt is sewn on.
There are times when it is necessary to use internal and external seams. This applies to sewing up a couple of sizes, trousers with flares from the hip. Manipulations are performed as when sewing a side seam, only it is distributed over all seams.
How to sew your own shorts at home
You can reduce the size of shorts without recutting if you sew them in slightly, by a maximum of 2 sizes. This will be a little more difficult to do, unlike altering a skirt or dress.
Important! Lack of confidence in your skills is a reason to turn to a specialist in the studio.
Materials and tools needed for remodeling
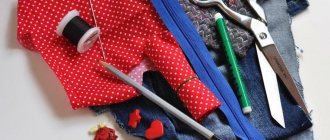
The qualifications of a craftsman are determined by his tools. Not a single seamstress will save on technical equipment and various devices. If you don’t have an electric or industrial machine at home, you can make do with improvised means. List of required tools:
- sewing thread and needle;
- needles and pins for basting;
- contrasting color threads for basting;
- threads to match the fabric;
- large and small scissors;
- tape measure;
- chalk or soap for marking.
A thimble will help avoid punctures if the fabric of the item is thick enough and you plan to sew by hand. If you have a machine in the house, it will be much easier to remake the product.
Options for reducing the size of shorts: stitching at the waist, hips, along the entire leg
Before you sit down to alter your shorts, carefully measure the excess fabric that needs to be removed. Try on your favorite wardrobe item and pin the area for the trim. Move a little, sit down. You need to make sure that after alteration the item remains comfortable and beautiful.
It will not be possible to sew shorts only on the sides. For proportionality, it is necessary to reduce the product on the sides and inside. There are several options for suturing:
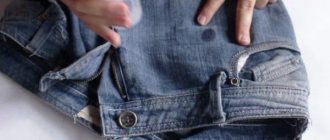
Waist
We tuck the belt at the back of the product and pull out part of the elastic. Having secured its part, you need to make sure that the shorts fit perfectly at the waist. We cut the elastic and sew it in. After this, we close the hole in the fabric. The greater the difference in size, the more visible the fold on the back of the waistband will be.
How to sew trousers in a belt
There are several ways to make your pants smaller around the waist.
Stitching along undercuts
The item is tried on and how well the product will be sutured is assessed. Most often, excess matter will be reduced due to undercuts. Either the old ones are torn apart, or new ones are added.
The pants are ironed and then tried on. Excess fabric is marked on the trousers. The edges of the darts may butt up against the side seams, but avoid this. Otherwise, unsightly folds and distortion of the product are possible.
The harness and belt are unraveled. The necessary seams are basted. Excess is cut off. The darts are sewn using a sewing machine.
How to shorten pants
You need to try on the item. Fold the excess fabric and secure the length with needles. It is advisable to carry out this to a third party. This way there will be no curvature or length errors on the product. If this is a female model, then you need to take into account the heel. Also, the length depends on the model of the pants. If they taper towards the bottom, the edges should be just above the heel.
Place the product on the table and spread it out. Draw straight lines using chalk along the marks. The first is the desired length, the second with a hem. It will be 1-2 cm for women, 4-5 for men.
It is necessary to go through with a needle and thread to secure the desired result. Try it on again. Spin around the mirror. Then remove. If necessary, make adjustments.
Place the product on the table. Trim off excess material. Finish the edges. Sew on a machine.
It is not always necessary to cut off excess fabric if the excess fabric is small. You can simply hide them in the hem. Or use double-sided sewing tape at the hem. But after each wash you will have to re-attach it.
It is often recommended to sew on the braid. It will prevent the edges from fraying. The shade of the braid is selected to match the tone of the product.
It is better to sew it on a product that has never been worn. But the edges have already been treated to prevent fraying. The middle of the braid should run along the final length of the product. It is necessary to baste there.
On the inner side seam we bend the free end so that the beginning is closed. Fold the braid in half. It should remain inside and stick out from below by a couple of mm. We stitch on a machine. We process the hem of the product.
How to sew sweatpants
With this action, the material (knitwear), edge processing (straight, with elastic, with ties), and the tailoring itself are taken into account. These can be with an oriental motif, tight, straight pants. In a tight model, almost the entire model is most often altered. In the eastern ones, the side and crotch seams are altered.
So, the pants can be too wide in the elastic at the waist, too big in the leg, and in length. If the sweatpants are too big at the hips, you will have to sew them in at the side seams. Reduces material in equal proportions along all seams. Sometimes the middle seam is also connected when adjusting the seat height.
- Try it on.
- Mark excess material with pins. Remove the product.
- Turn inside out. Gently straighten it on the table.
- Draw a line. Leave to process the edges.
- Baste along this line.
- Try it on and compare the difference. Take off.
- Open the waistband and the bottom edge of the trouser leg.
- Open the edges of the side seams, the step seam, and the isch seam. Especially if the model should fit the figure. Most often, you can only sutured on the sides.
- It is stitched by machine.
- The edges are processed.
Excess material on the belt is trimmed. The edges on it are processed and sewn back. If there is an elastic band, then it looks according to the situation (how it fits on the figure and what kind of elastic). If there is a lot of material, it is better to trim it. Everything should look aesthetically pleasing.
If the problem is the length, then it is shortened. The elastic bands are altered onto the shortened product, taking into account their height.
How to sew wide-leg trousers along the entire length
Most often this concerns suturing on the sides, affecting the waist. This method is possible when suturing 2 sizes. The side, step, and ischial seams are altered. The material is removed evenly. The belt is also affected. This is described above.
If you need to alter an item to a larger size, you will have to redraw everything, build a sketch, transfer it to fabric and cut it, grind it and then sew it together.
Any thing can be sutured, but you need to clearly understand whether anyone can handle it. Most often, complex adjustments are required. And there is a risk of messing up. If you are not sure, you should take it to the studio. It would be a shame to ruin a good thing. It is worth considering one more nuance. Not all trouser models can be sewn in due to the peculiarities of tailoring.
How to suture by hand
At first glance, the procedure for reducing a trouser size seems quite simple. However, in reality, when carrying out it, it is worth considering many nuances.
Preparation
First of all, it is important to properly prepare for the procedure. To do this, the item should be washed and ironed.
Wash
It is recommended to wash the item first. Some fabrics, such as wool or cotton, shrink frequently. As a result, they can fit to size.
Ironing
After washing, trousers should be ironed. Thanks to this, you will be able to avoid mistakes or irregularities. You should try on clothes and mark any excess with pins.
Additional tips and tricks
To sew women's or men's trousers, you need to have the necessary skills. For the procedure to be successful, it is worth considering the following features:
- Not all models can be altered.
- When cutting, you should use a bar of soap or chalk.
- Basting is best done with white threads, as they do not fade.
- If you don't have an overlocker, it is recommended to finish the edges with a zigzag. You can also use a special attachment called an overlock paw.
- You should start suturing the product from the top.
- If there are decorative seams, the lines are laid with the same stitch length even on the inside.
- Finally, the product should be ironed.
Downsizing your pants size isn't very difficult. To do this, you need to have basic skills and strictly follow the recommendations of specialists.
Is it possible to go a size or two smaller?
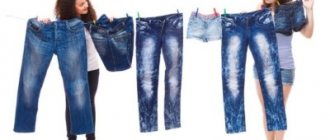
Over time, your favorite jeans lose their shape and stretch. But you shouldn’t say goodbye to them, because at home you can reduce them by a size or even two.
To sew jeans yourself at home, you need to prepare a sewing machine, a measuring tape, threads, needles, scissors and pins. Stock up on free time.