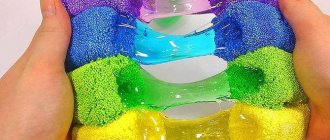
Without PVA glue and sodium tetraborate
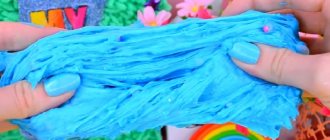
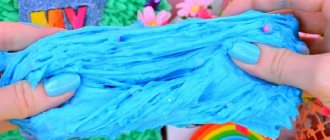
During industrial production, various chemical elements that are unsafe for humans are introduced into the composition of slimes. To prevent your child from coming into contact with harmful substances, you can make cool real slime at home from scrap materials. Such a thing will be very inexpensive and will not take up much of your time, but will make your baby sincerely rejoice. Our recipes are suitable even for beginners.
Slime made from soap and paste
To make it, you will need 25 grams of any (even the most budget-friendly) toothpaste. To measure the required amount, visually divide the tube into several parts. You will also need a similar amount (25 g) of liquid soap and 5 teaspoons of wheat flour. You will also need containers - a large metal container.
The slime making process is as follows:
- Squeeze the toothpaste into the container.
- Pour liquid soap there.
- Mix the ingredients, adding wheat flour little by little. At first the mass is sticky, so you can stir it with a spoon or a wooden stick, and when the dough thickens, use your hands. The mass should become solid.
- Moisten the slime a little with water and give it the desired shape.
As you can see, the recipe is very simple, and at the end you will get a toy that is not inferior in characteristics to a store-bought one. If you want bright slime rather than white, add food coloring to the mixture.
Slime made from baking soda and dish soap
It's easy and quick to make a toy from ingredients that can be found in every kitchen: regular baking soda powder and cutlery washing liquid. To get a beautiful color, drop a little of any dye into the workpiece.
Let's look at the process of how to properly make homemade jelly slime:
- Take an arbitrary amount of detergent (such as Fairy or Persil) and pour it into a deep container.
- Continuously stirring the mixture, add soda in small pinches.
- If the slime turns out to be too tight, dilute the mixture with ordinary clean water so that it stretches, becomes softer, but does not tear.
- If desired, add 3-5 drops of food coloring until the desired shade is achieved.
This recipe does not indicate exactly how much detergent is needed to make the slime. The fact is that the consistency varies from manufacturer to manufacturer. Therefore, in order to get a toy that holds its shape well, does not melt in your hands and does not tear, you will have to make several attempts. If the mixture is too thin, add more baking soda. And if it’s too thick, add dish soap or water.
What detergents can you use to make slime?
A good slime from dishwashing detergent can be made from any brand of detergent. Here you can buy both expensive and cheap products. However, for safety reasons, it is better to give preference to organic formulations that contain natural ingredients. Even children with allergies can play with this slime. The main thing is that the product must have a current expiration date.
Dishwashing detergents
Fairy detergent is simply ideal; it has a fairly thick consistency and moderate foaming. You can also take Gala, Sarma, Morning Fresh, Denkmit (Nordic berry), “Freken Bock” and others.
Soft slime Fluffy and cloud slime
Slime Fluffy is a special type of slime made from hypoallergenic materials. The fluffy slime has an airy structure, stretches well in your hands, sticks perfectly to any surface and just as easily comes off. This little thing will appeal to children and adults. In addition, it is easy to make it yourself.
To make a “fluffy” slime, you will need only 3 ingredients and no more than 5 minutes of free time.
To make a cute toy you need:
- 1 bottle of PVA glue (Luch), which schoolchildren use in labor lessons;
- strong saline solution - 2 tablespoons;
- shaving foam - 1-2 cups.
If you want, you can add food coloring. “Fluffy” slimes in delicate shades: light blue or pink look especially interesting.
The technology for making slime is simple:
- Pour all the glue into a plastic bowl. If you plan to make colored slime, add paint now.
- Once you have achieved the desired shade, pour the saline solution into the container and mix the components thoroughly.
- Add shaving foam. The more of this ingredient, the larger the slime will be. The best option is 1.5 cups.
- Mix the ingredients until the slime hardens. At first it will be sticky, then it will become harder and thicker. Continue working with your hands until it reaches the desired consistency. At the end it becomes stringy.
If you want to make a colorful toy, make several batches of different colors and combine ready-made slimes. To do this, stretch each slime and place another next to it. Then stretch them and twist them together so that the colors mix, but do not merge into one.
Another popular slime is cloud slime (cloud slime). The main difference from other similar toys is the presence of artificial snow. Crispy cloud slime has the following advantages:
- Leaves hands clean.
- Does not stain surfaces.
- Develops fine motor skills in children.
- Helps relieve stress in adults.
- You can carry it with you everywhere.
- If you are tired of slime, you can use it to clean hard-to-reach surfaces, such as a computer keyboard.
To make cloud slime you will need:
- 1 bottle (100 grams) of PVA glue. Pay attention to the expiration date of the product. If it comes to an end, it won't make a good toy.
- thickener - you can buy it at the pharmacy without a prescription. Different names: borax, boron, sodium tetraborate. But the formula of the drug is one - Na₂B₄O₇. To make slime you will need 2-3 drops of the product;
- water - will be needed to make transparent slime;
- dye - if the toy is colored. You can take acrylic paint, gouache, food coloring;
- artificial snow - sold in stores specializing in organizing holidays, or in handicraft departments;
- a little foam or shaving cream (20 ml). The brand doesn't matter;
- foam for washing - 5 ml;
- hair mousse - 5 ml;
- baby oil - 5 ml.
First, glue is poured into a deep container. Then the remaining components are added, except water and snow. Everything is mixed well. If you need to thin the mixture, add more water.
The artificial snow packaging contains instructions for use. Pour the required amount of water into the powder and wait until it increases in volume. Then add “snow” to the main mass. To avoid overdoing it, spread it in small portions, kneading and stretching the slime with your hands. When the structure of the mucus becomes pleasant, the slime is ready. If desired, add a little dye.
How to make slime
We wrote about the beneficial properties of soda here. Now let's learn how to make magical fun for children at home. They say that there are more than 20 ways to make a toy; let’s focus on the most popular and proven options from the list.
Glue and baking soda recipe
To make slime from glue and soda, you will need the following components and tools:
- bowl (other container),
- kneading stick,
- regular soda,
- plain water,
- PVA glue (pay attention that the product is not expired),
- napkins,
- food coloring.
PVA glue produces a strong and elastic substance, the main thing is that it is suitable. It is also important to shake the product thoroughly so that the liquid is homogeneous. Then pour the mixture into a bowl. Add dye. You can take any, as long as it is edible. Egg dye, cake dye, even natural beet juice, for example, will also be good for adding color to a toy. Now you should mix the first two ingredients well. Then pour the previously prepared soda solution into the mixture (a cup of water and a tablespoon of baking soda). The final stage is meticulous kneading. That's it - the soda slime is ready, you can take it out and get rid of excess liquid by transferring it to a thick napkin.
Want to surprise your children even more? Read on to learn how to make a huge snake using baking soda!
Video: soda slime recipes
Miracle jelly should be stored in a cool plastic bag/tightly sealed box/container. You can start playing already 20 minutes from the moment of its “birth”.
Worth paying attention! If you drop a little essential oil or flavoring into the mass, the fun will also smell nice.
Slime made from soda and shampoo
This technique is popular, but be prepared for the fact that the toy will last about 3 days, however, due to the ease of its manufacture, this may not be considered a minus.
Components:
- shampoo,
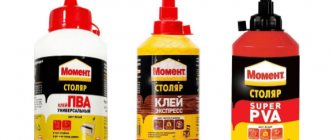
- glue "Titan",
- soda.
Pour 3 parts of glue and 2 parts of shampoo into a plastic bag. Add a spoonful of sodium bicarbonate. Shake the composition directly in the bag into a homogeneous mass, the main thing is that there are no lumps. Have you reached this consistency? You can play! If the mixture seems runny, just add more glue. Store in an airtight container.
Fairy and soda option
This technology is the leader in price, since it has the cheapest manufacturing cost. Even a cheap detergent is suitable for the recipe, but experts still advise not to skimp on the famous “Fairy” composition, then the handgam will last longer.
Prepare the following:
- mug,
- spatula (spoon),
- "Fairy"
- sodium bicarbonate,
- dye.
Pour a spoonful of soda into a mug, pour in half the volume of detergent and dye. Now mix the mixture thoroughly. The composition thickens quickly, but craftsmen who make slime still advise letting it sit in the refrigerator for several hours - then you will protect your hands from excessive stickiness, and this is important, since not all detergents are safe for the skin: it is better to minimize their penetration into the dermis.
For vibrant color, use food coloring.
Composition of soda and salt
This is also a fairly simple recipe for creating a handgam.
For the toy you need:
- capacity,
- kneading stick,
- sodium bicarbonate,
- shower gel,
- salt.
Pour a few spoons of gel into the container. Add a spoonful of baking soda, and then, stirring continuously, slowly add salt until the product reaches the desired density.
By the way, salt is an excellent resuscitator for all types of slimes. If the toy is torn, dried out, or damaged in any other way, simply place the handgam in a saline solution and add a little cream (the cheapest one will do). After such a bath, the slime will be as good as new.
Soap and baking soda recipe
Many children like the proven and safe shampoo-based composition. There is only one drawback - you have to keep the product in the cold before you start playing with it.
So what should you prepare?
- bowl,
- liquid soap (to give the slime a pleasant smell, it is better to choose scented options),
- soda,
- salt.
Combine a couple of tablespoons of soap with baking soda (a spoon) and salt (add until the composition becomes thick). Stir the mixture until smooth and wait until it hardens in the refrigerator, most often this takes an hour, sometimes an hour and a half.
Soap-based slime should be allowed to cool in the refrigerator.
Toy made of glycerin and soda
Borax with glycerin or in medical “speak” - sodium tetraborate in glycerin can now be easily found in any pharmacy; as a rule, the product is sold in a glass container of 30 ml. This one container will be enough to create slime.
Mix a bottle of the product with the same volume of PVA or office glue. Add a spoonful of baking soda and a little coloring. It is better to knead on the table, at the same time you will be guided by the consistency: if the mass is too thick, add water.
This is important to know! As you can imagine, without sodium tetraborate and glue, the toy would be less toxic. But if you choose this option (which, by the way, in operation is as similar as possible to the factory type), then make sure that the child does not put either the slime or his fingers in his mouth during the game.
Video: experiments with glue for slime
Slime made from plasticine and shampoo
Plasticine can be found in every home where there are children. This material can be used not only for making independent crafts, but also as a component for slime.
So, you will need:
- 2 bags of “air” plasticine;
- some warm water;
- shampoo - 1-2 teaspoons;
- shaving foam - 2-3 tablespoons.
Transfer the plasticine to a separate container, add water, add shampoo and stir well until smooth. At the end, add shaving foam and mix everything thoroughly again. The finished slime should stretch easily, be airy and tender. If the toy is too dense, add more water and shampoo.
Magnetic, glowing slime
This slime can no longer be called simple. Children simply adore him. This toy glows in the dark and “runs” after a magnet. It looks really funny. However, to make such a slime you will need a little more ingredients:
- borax – 1/2 teaspoon;
- glue – 30 g;
- dye (glow in the dark paint);
- iron oxide;
- water – 1.5 cups;
- neodymium magnet.
At first, everything is done in the same way as in the case of making a regular slime from borax. In separate containers, thoroughly mix borax with a glass of water, and in the second - glue with half a glass of water.
At this stage, you need to add luminous paint to the glue already mixed with liquid. Then carefully pour in the borax solution. You need to pour it slowly, stirring the mixture constantly. It is not necessary to pour out the entire borax solution. This must be done until the mixture reaches the required consistency.
After this, the finished mass must be laid out on a flat surface and leveled. Pour iron oxide into the center and knead like dough until the finished slime acquires an even gray color. The toy is ready to fulfill its direct duties. If you bring a magnet to it, the slime will be drawn to it.
Well, in the dark it will, of course, glow slightly.
Slime with the addition of sodium tetraborate and glue
Let's look at the most basic recipe for making slime based on a thickener and silicate glue. Ingredients:
- glue - 50 grams;
- sodium tetraborate - ½ teaspoon;
- water - ½ cup;
- any liquid dye;
- utensils and equipment for mixing ingredients.
Take two cups. Pour water into one and mix it with sodium tetraborate. Pour glue into the second cup and add a little dye to it. Then start pouring the adhesive mixture little by little into the thickener cup. When the procedure is completed, knead the mass thoroughly until smooth. Take the toy out of the dish and work with it with your hands. If the slime is too thick, dip it in water. It is recommended to store slime in a container with a tight-fitting lid.
What to do if nothing works out
From the given recipes it is clear: soap is an excellent auxiliary component, but it cannot replace the base 100%. You can make a full-fledged slime from liquid soap only by adding glue and a reliable activator.
If the composition and ingredients are working, but the slime does not work out, first of all you need to determine the problem:
- there is no stickiness - you should remove excess water (to do this, you can knead the mass in a plastic bag) and add a sticky component (glue, shaving foam);
- excessive stickiness, the slime cannot be kneaded - you need to add a little thickener, and when kneading, dip your hands in a soda solution or (for flour or starch compositions) in vegetable oil;
- the toy is slimy or soapy - leave the slime in the air for 1-3 hours. Also, the slippery texture can be corrected by adding glycerin;
- the mass is too soft and watery - you need to add a little salt to the container with the slime, close the lid and put it in the refrigerator for 12 hours;
- hard and inelastic texture - you can add toothpaste (start with a pea). If the slime hardens over time, you can pour water into the container and put it in the refrigerator;
- small volume of mass - depending on the composition, it is treated with water, glue or shaving foam. Then the slime will have to be “thickened”.
If the slime has decreased in size over time, it should be kept in water for 3 hours. If after the “water procedure” the slime becomes crumbly, you need to add salt and hand cream or body lotion.
The smell of freshly made slime may not be very pleasant - this can be easily corrected by adding food flavoring, essential oil or vanillin. If an unpleasant odor appears on a toy that is older than 3 days, it is better to throw it away.
Chewing gum slime
The main disadvantage of the recipe is its high cost. To make butter slime that is convenient to hold in your hands, you will need 10-20 bars of chewing gum or 5-8 balls, sold in a special machine. The more gum you use, the larger the toy will be.
To make slime, you only need two ingredients: chewing gum (you can use absolutely any gum, but the softer one is better) and warm water.
The first step is to soften the chewing gum bars. The easiest way is to chew it directly in your mouth. Rinse the resulting mass under cold running water and place it in a glass of warm water for about 10 minutes. Then take out the resulting clot and begin to knead it with your hands. When exposed to warm liquid, it will become soft and easily extensible. At this stage, you can add dye to the mixture: food coloring or gouache. If you want to make the toy even more unusual, then add dry glitter, foam balls, multi-colored coconut flakes or confectionery sprinkles to it.
Slime made from silicate glue and liquid detergent
Probably the fastest, easiest and most reliable way to make such a toy.
We will need:
- Silicate glue (1 bottle)
- Liquid concentrated detergent in gel form
- Dye
- Container and spatula
We take a container, pour about 1 tablespoon of glue into it, add dye, mix well, then take the washing gel and pour a teaspoon into our container. All this must be mixed thoroughly again. The result is a viscous substance, take it in your hands and knead it well until smooth. Our slime is ready.
Video of how to quickly make slime from silicate glue and liquid laundry detergent
Method number 2
Slime made from glue and toothpaste
In this recipe, the slime consists of only two components. And if you take a bright gel toothpaste, you won’t even need additional dyes!
Take a tube of PVA glue and pour it into a deep container. Add toothpaste. The amount of ingredients is taken “by eye”: the more, the more voluminous the slime will be. Stir the mixture until it begins to thicken and easily pulls away from the sides of the dish. Then put the container in the refrigerator for 20 minutes. After the allotted time has passed, remove the container and remove the slime from there. Start kneading it until the mass becomes homogeneous. The toy is ready! At first it will have a strong mint smell, but after a few hours it will dissipate.
What to do if the slime has dried out or become too liquid?
If your pastry has become a little dry, pour some warm water over it and knead it again.
And if the slime has become blurry, add any thickener to it, which we wrote about below. Add also in small doses, mixing until it reaches the desired state.
We have discussed in detail how to make slime from dishwashing liquid. We hope you find our tips and guide helpful. Remember the main thing, whatever you do - take a good mood with you, and you will definitely succeed!
[Total: 0 Average: 0/5]
Ekaterina Fedorova
Irina Fedorova: pediatrician and young mother. At one time, I was faced with the problem of developing hand motor skills in children and began searching for new interesting methods. Slime has become very popular among children, as it is bright, pleasant to the touch and you don’t want to let go of it. But often manufacturers add harmful or low-quality ingredients, so the idea came to make something similar yourself. This process turned out to be so fun and the result exceeded all expectations! The number of slime recipes made from natural ingredients is constantly growing, so I created a personal blog to share them with everyone.
Slime made from flour
To prepare the toy you will need the following ingredients:
- flour;
- shampoo or shower gel;
- hydrogen peroxide;
- deep container and equipment for mixing ingredients.
The technology for making slime from flour is quite labor-intensive, but the result is worth it. Squeeze out shampoo and hydrogen peroxide in the following proportion: 2 parts detergent to 1 part peroxide. Stir the mixture vigorously until it turns into a thick foam. Place the container in the freezer compartment of the refrigerator for a few minutes. Then take it out and start adding flour little by little, without stopping stirring. The mixture will stick to your hands - this is normal. After this, cover the container with a lid or cling film and leave the mixture alone for a day. At the end of the allotted time, moisten your hands with oil and take out the mass. Mash it well to the desired consistency.
From starch and water
This is perhaps the simplest answer to the question of how to make slime at home. It is also popular because the resulting toy will be absolutely safe for the child. And it’s very interesting - when you crush this slime in your hands, it’s hard, but as soon as you unclench your palm, it spreads.
It consists only of:
- water – 200 ml;
- starch – 200 g.
All you need to do is mix the ingredients. Now the toy is ready. This manufacturing method, in essence, answers the question of how to make slime from water. True, such a slime will turn out to be quite primitive. Also, it won't be bright, just a whitish gray.
To add color to the toy, but maintain safety, you can add any natural food coloring to the resulting mixture. However, this will be discussed a little later, at the very end of this material. And one more nuance. A slime made of starch and water is completely incapable of jumping. So if this is a critical function, then you need to look for other options for its manufacture.
From glue and starch
A more interesting version of starch slime is obtained by using glue during the manufacturing process. However, for this you need starch, which is used to starch linen.
And how to make slime from PVA glue? Easily! For this you will need:
- liquid starch used for washing – 70 ml;
- glue, exclusively PVA – 25 g;
- any dye;
- tight package.
Glue for slime should be taken only white, made not very long ago. So it will not be superfluous to look at the manufacturing date on the packaging.
Now about starch. If you don’t have liquid starch, you can use regular starch. You can make it “liquid” by diluting the product with water in the proportion of 1 part starch to 2 parts water. In order to make a toy, you need to pour starch into a bag, add a little dye and pour in PVA.
First, shake the bottle of glue thoroughly. When all the ingredients are in the bag, tie it and shake the contents thoroughly until a clot forms. This, in fact, is slime. All that remains is to drain the excess liquid, blot the newly made toy with a napkin and you can give it to the child.
Many parents, when making slime for the first time, add too much starch (then the slime turns out too hard) or use glue (then the toy sticks to the palms). In this case, the entire procedure must be repeated, adjusting the dosages of the ingredients.
The slime obtained in this way should be stored in a closed container. You can play with it for about a week. Well, then you'll have to make a new one.
After familiarizing yourself with the simplest slimes, you can move on to more “advanced” ones. This toy is almost identical to its store-bought counterpart. And not only in consistency, but also in composition. At production sites, slimes are made from borax (sodium tetraborate) with the addition of the polysaccharide guar gum and some other chemical materials.
From paper
Ingredients:
- dishwashing liquid;
- toilet paper;
- flour.
Tear the toilet paper into small pieces (a couple of pieces). Pour plenty of dishwashing liquid onto the toilet paper and mix everything thoroughly. Add 1.5 tablespoons of flour and mix again. If the slime is too dry, add dishwashing liquid; if it is too runny, add flour. When the slime is formed in a bowl, knead it with your hands for 5-7 minutes.
Slime paints and more...
In fact, natural dye can be made from almost any vegetable or fruit. Moreover, the color of the dye will correspond to the color of the product. Moreover, jam, herbs and even seasonings have good coloring qualities.
Red dye
The easiest way to use beet juice as a red dye. Although juices or jams made from fruits such as raspberries, strawberries, and cranberries are also suitable. True, fruit paint will be quite expensive. So beets are the best option.
To obtain the dye, you need to grate 1 root vegetable, put it in a saucepan with water, add half a teaspoon of citric acid and cook for about an hour. When ready, strain the broth. The dye is ready.
Orange dye
Here the product option suggests itself. Of course, carrots. You can get a good orange color if you grate the carrots and simmer for 5-10 minutes in a frying pan in melted butter. During this time, the oil should acquire the desired shade. All that remains is to cool the mixture and squeeze the oil through cheesecloth. By the way, oil and carrots should be taken in equal quantities.
Yellow dye
The easiest way to get a yellow color is to dilute turmeric in warm water. But you can get such paint from lemon. To do this, just grate the zest on the finest grater and squeeze out the juice.
Green dye
And for this dye you will have to stock up on spinach. It needs to be rubbed through a sieve or crushed in a blender, and then boiled in a small amount of water (about 30 minutes). Strain the resulting mixture.
Children's toy with sugar
There are definitely components for such a toy in every home. We are talking about a slime made from shampoo and sugar.
Ingredients:
- shampoo “Pantin Provi” - ½ tbsp.;
- granulated sugar – 2 small. spoons.
Manufacturing:
- Pour the main ingredients of the future toy into a glass container convenient for mixing.
- Add all the granulated sugar to the mixture at once.
- Mix the ingredients very thoroughly.
- Refrigerate the mixture for 40 hours.
Knead the finished product. After this, you can use it to play.

