Usage
The main purpose of frosted glass is protection from prying eyes, which often appears.
For example, for organizing a protected and intimate environment in the bedroom, when organizing separate compartments in a common room, or for making partitions in sanitary rooms. When planning an office space, dividing walls with frosted glass will become indispensable.
Often, matting is used in everyday life, making parts of glazed doors, edging mirrors, dishes and lighting fixtures from it. You can purchase ready-made frosted glass from glass workshops or make it yourself.
The process is carried out in the following ways:
- Mechanically.
- Using chemicals.
- Using a sandblasting machine.
The technology of mechanical processing (with special pastes) is quite simple. Using chemicals at home is risky. And the use of sandblasting requires special equipment and makes it possible to transform mainly thick glass, and processing using this method turns out to be rough.
To install frosted glass in all-glass products, it is tempered.
Knowing how to frost glass can also help the home craftsman. Often, kitchen cabinet doors are made using frosted glass. Restoring furniture is expensive, it will be cheaper and more convenient to make it yourself.
Frosted mirrors in the interior
If in the recent past the process of working with glass was reduced to ordinary cutting, now this is only the initial stage of all possible work. In addition to using sand to give a matte finish, glass is bent and tempered. The use of chemical etching techniques allows us to obtain a satin mirror surface, which can be used in the following designs:
- Stained glass.
- Office partitions.
- Cabinet furniture.
- Shelves.
- Stairs.
- Tabletops and screens.
A frosted mirror can be used in various rooms - bathroom, hallway or living room. If you show a little imagination, you can successfully play up the space in the room by slightly hiding certain elements. Matting mirrors allows you not to “tightly” cover objects and interior items, but only slightly shade them with your coating, through which silhouettes and outlines are clearly visible.
Mirror surfaces can be placed along the hallway wall, adding spotlights. This will allow you to visually expand the space and also improve the overall appearance of the room.
Advantages of frosted glass
What is so good about the frosted glass surface? This solution has its advantages:
The space will be separate. This is appropriate when it comes to glass on doors or windows. With frosted glass, no one will see you. The design can be very diverse. The frosted glass itself looks elegant, original and beautiful. The methods allow you to frost not only glass, but also other glass surfaces. There are several glass frosting techniques, so you can choose the most optimal method for yourself. The frosted glass surface becomes less of a mark.
If you decide to experiment, then let's look at the available techniques for creating a mat on a glass surface.
2
Mattifying paste - tips for application and preparation
Before you start, purchase: matting paste, alcohol, rubber gloves, a plastic or rubber spatula, a stencil for creating a design, aerosol glue, sponges and napkins. We prepare the work surface - degrease the glass with alcohol and wipe it with a microfiber cloth. If you are applying a design to glass, prepare a stencil in advance. You can purchase it in a store or make your own pattern using Oracal film as a base. To prevent the stencil from moving while working, treat it on the reverse side with aerosol glue. It will fix the film well and will not leave marks; use masking tape if necessary. To be safe, place parchment paper on top of the stencil and smooth everything out again.
We recommend: How long does it take for polyurethane foam to dry?
Applying paste to glass
Now let's move on to the matting itself. Apply the paste in a thick layer to the stencil and distribute it evenly over the entire surface, leaving it to soak in for 10–15 minutes. After this time, the glass will be etched and a design will be imprinted on it. We remove the top layer of paste and place it back into the container, and wash off any small residues with water, remove the stencil and wipe everything dry with microfiber. If you don't want to buy matting paste from the store, you can make your own. For the first option, take liquid glass and mix it with a small amount of distilled water and a pinch of tooth powder. To create a colorful design, add a dye such as red lead or ultramarine.
For the second option, prepare 2 parts sodium or potassium fluoride, 1 part gelatin and mix them with 25 parts distilled water. Apply the resulting mass to the glass, and after it dries, pour 6% hydrochloric acid on top and leave it for a chemical reaction for a minute. We work with gloves and with the window open. As a result of this interaction, hydrofluoric acid is formed, which will etch the glass. At the end, as with using store-bought paste, thoroughly rinse the glass with water.
Preparation of matting paste
Attention!
Since making your own paste requires working with chemicals, everything must be done with protective gloves and a gown. There are several “recipes” for matting paste. Made using hydrofluoric acid or liquid glass.
For hydrofluoric acid paste you need:
Sodium fluoride. Gelatin. Distilled water.
Add the components in a ratio of 2:1:25 and mix well. The finished mixture is applied to the glass surface with a roller; after treatment, they are washed off with clean water.
After this, the glass is dried and kept in 6% hydrochloric acid for 60 seconds. Frosting of glass using this method is done using hydrofluoric acid. It cannot be used to form a pattern - the mixture will penetrate under the stencil.
Liquid glass must be mixed with distilled water, after which a small amount of tooth powder is added to it, and the composition is mixed well. Pigments are sometimes added to the paste, for example, ultramarine or red lead. The washed glass surface is coated with paste using a roller, and after drying, washed with water.
We recommend: How to remove grout from tile joints? (video)
Glass with frosted surface
An interesting design element would be the use of a matte plexiglass surface. Thanks to its ability to diffuse light, many lighting designers have successfully used it in lamps and night lights. If you are planning to create a comfortable sconce lamp for the bedroom or a night light with dim diffused light with your own hands, then you will need to watch a video on how to make the polymer matte.
How to make frosted plexiglass at home? Very simple. Take medium-grit sandpaper and start sanding the surface until it becomes matte. If you have the desire and opportunity, you can also treat the surface on the other side.
If you don’t like this option, then you can opt for chemical treatment of the surface - etching it with an acid solution, which is not very desirable for an apartment. But there will be no need to use physical force. Still, it is better to carry out processes using chemical compounds outside.
Positive properties
The main positive properties of marked glass are:
Review of simple ways to sharpen old scissors at home
- You can create a separate space invisible to prying eyes;
- A variety of design styles, elegant and beautiful frosted glass products;
- Variety of materials for processing;
- Various technologies for glass matting;
- Universal use of frosted glass.
But along with this, there are also some negative qualities of these materials. The main thing is a slight roughness on which dust can collect. To eliminate this flaw, you can use a special glass varnish.
Artistic frosting of glass
In addition to the above glass processing methods, matting is also used. Frosted glass does not transmit much sunlight, it is practically opaque, but is used quite often for artistic purposes.
Artistic frosting of glass is often carried out chemically using hydrofluoric acid. It involves the application of complex or simpler ornaments and designs on a sheet of glass or mirror.
The sandblasting method can also be used for matting. Sand ejected under pressure creates a variety of patterns and makes the artistic product complete and original.
Matting can involve either processing individual areas of the glass surface or the entire product. Depending on this, the processing method is chosen - chemical or sandblasting.
Both transparent glass with a frosted pattern and frosted glass with a transparent pattern can be produced. To process the first, sand is used, for the second, chemical solutions are used.
A special protective layer is applied to those areas that need to be left transparent. After this, the product is immersed in acid and etched.
Artistic frosting of glass allows you to create real works of art, original and complete.
At the World of Glass exhibition you will be able to get acquainted with new options for using art glass, including frosted glass.
How to make glass frosted yourself: creating an opaque exclusive
Glass is frosted in two cases. First: they want to get rid of transparency, this is what they do most often with window or door inserts, partitions in showers. Second: they want to give it some originality, in this case we are talking about ordinary and furniture mirrors, dishes, lamps and other products made from this material. Information on how to make frosted glass yourself at home will certainly be useful to those who do not want to resort to the expensive services of specialized workshops.
Content:
How to make a matte pattern on glass: working with stencils
Before we begin to describe methods for partially or completely matting glass, it is worth separately considering the methods of applying matte patterns and inscriptions. In the professional sphere, engraving is sometimes used for these purposes. This method requires special tools and certain skills, and therefore is not suitable for everyone. It is much more convenient to use stencils at home.
Stencil selection
There can be three options here:
- purchase a reusable stencil of suitable size from those available for sale (you will need aerosol glue for it);
- buy a disposable stencil on self-adhesive film;
- download on the Internet (draw in a special program) any drawing with closed contours, transfer it to the appropriate scale, redraw it on oracal film and cut it out with a stationery knife (as an option, order drawing and cutting with a plotter).
In the first case, apply glue to the stencil, wait a few minutes, place it on the marked place and press it against the glass with blotting movements with a dry, clean cloth.
In the second and third cases, the backing is removed from the film, the stencil is glued onto degreased and wiped dry glass, smoothed with a plastic spatula, if there are bubbles, they are pierced and the air is released.
Tip: it is more convenient to transfer a “self-adhesive” stencil onto glass using a transparent mounting film: it allows you to stick the design without distortion or displacement of its parts. The “mounting” is removed immediately before matting.
If the self-adhesive stays on the glass for at least a day, considerable effort will have to be made to remove it. Therefore, the stencil is removed as early as possible: after the paint has hardened or the matting paste has been washed off. We’ll talk about how to make a matte pattern on glass with your own hands in different ways a little later.
We recommend reading what superstitions prohibit keeping a monstera in an apartment.
Read: how to make your own home air freshener.
Imitation glass frosting
These methods are considered the simplest and at the same time the safest to use. They allow you to obtain a glass that is not truly frosted (with a change in the structure of its smooth surface), but creates an opaque layer on it.
The method is ideal for those who want to make frosted glass with their own hands “cheap and cheerful.” It is only suitable for products with a flat surface or with a slight rounding angle that will be used in a dry room. After purchasing a special self-adhesive film of the appropriate size from a hardware store, follow the instructions for the product:
- prepare the glass - clean it with detergents, wipe it dry;
- try on and cut the film, if necessary, cut decorative elements from it;
- carefully remove the protective coating, moisten the film and glass with a soap solution from a spray bottle;
- apply the self-adhesive to the glass, “drive out” excess moisture and air bubbles with a rubber spatula or soft cloth.
Important: in the case of several decorative elements, you need to remove the protective layer from them (as well as gluing them) one by one. It is better to mark their outer contours on the glass in advance with a marker (after finishing the work, it is carefully removed with a cotton swab dipped in acetone or alcohol).
When using this method, you need to remember that such a matte surface does not have the properties of glass - when exposed to sharp objects and abrasive materials, the film may break through. Such a defect cannot be corrected.
Matting method using paint
Today on sale you can find acrylic waterproof paint for matting in spray cans, which is also called aerosol frost (by analogy with the resulting effect). The method is convenient in that the opacity of the glass can be removed at any time using ordinary acetone, and a smooth surface can be obtained again.
Most often, this paint is used to make matte drawings on glass with your own hands. Here you will need the stencils discussed above. After gluing them, it is also recommended to protect all free areas of glass from accidental staining using masking tape. After the preparatory work, spraying is done, following the manufacturer’s recommendations. After the paint has dried (usually about half an hour), the stencil is removed.
How to make frosted glass using chemical etching?
You can make glass frosted using chemicals that destroy its glossy surface. For these purposes, use purchased or self-prepared pastes.
Important: on the Internet you can find several recipes for matting compositions based on the use of the properties of hydrofluoric acid. Their use at home is impossible due to their high toxicity: the skin, mucous surfaces, respiratory tract and even teeth can be damaged!
Ready-made matting pastes
Today, many manufacturers of paints and varnishes offer special pastes for etching glass. Working with them is simple and convenient:
- prepare the glass: degrease it with alcohol and dry it;
- if a drawing is intended, then a stencil is pasted according to the algorithm outlined above;
- Place the paste in small mounds with a rubber spatula on the stencil near the areas to be matted (do not skimp and do not get it into open areas);
- rub the composition over the open glass with quick, confident movements and leave for the time specified by the manufacturer (usually from 3 to 15 minutes);
- remove the paste from the surface and put it back into the jar (it will retain its properties until the expiration date);
- wash off the remaining composition with water (use a foam sponge), remove the stencil (if there was one), rinse again and wipe dry.
Advice: although certified matting pastes are not as hazardous to health as self-prepared compounds, it is recommended to work with them using rubber gloves and in a well-ventilated area.
Matting with liquid glass
You can prepare a matting indelible composition yourself using ordinary silicate glue. In industry and chemistry, this familiar stationery is called liquid glass. When it gets on ordinary glass, it violates its surface integrity, firmly “adheses” (due to its similar nature) and forms an indelible matte layer.
We advise you to find out how to clean linoleum after repair.
Read: how to store bags in the kitchen so that they don’t take up much space.
Find out how to restore the shape of a sweater that has shrunk after washing.
As practice shows, you can make glass frosted using silicate glue almost without much effort:
- liquid glass is slightly diluted with water (distilled if possible);
- add a little finely sifted chalk or tooth powder: you should get a mixture whose consistency resembles liquid sour cream;
- if desired, the composition is tinted with water-soluble paints: red lead, ocher, ultramarine, mixed thoroughly to achieve color uniformity;
- the roller is dipped into the mixture, rolled over a board or tray (to avoid smudges), after which the clean, dry glass is carefully painted;
- After the glue has dried, the operation is repeated.
The second layer of the composition is the finishing layer; after drying, the frosted glass can be washed with ordinary water and put into operation.
Important: with this method it is impossible to apply matte designs using stencils, since during the polymerization of the glue their edges will be sealed into the glass.
How to make glass frosted using mechanical methods?
Despite the strength of glass, with certain efforts it can be scratched, then the surface loses its glossy properties. This means that one of the mechanical processing methods can be used to achieve matte finish.
Matting using a sandblaster
The method is that sand is applied to the surface of the glass under high air pressure, which makes microscopic potholes. It’s a stretch to call the technology “homemade”, since its implementation requires a sandblasting machine (or a gun, as it is also called). With certain skills and abilities, you can build it on your own, but it’s hardly worth bothering so much about frosting one or two glasses.
Important: the sandblasting method can only be used in isolated rooms (a real sandstorm arises) and on glass with a thickness of at least 5 mm.
Using Diamond Paste
The problem of how to make glass frosted at home can also be solved using an abrasive lapping paste. The complexity of the method does not allow it to be used on large surfaces, but it is appropriate for applying patterns or matting small products.
The algorithm of actions is as follows: apply a fine-grain paste to the surface of the glass or to the area separated by a stencil and rub it in a circular motion using a small glass. Despite the relative cheapness of the method, it has disadvantages: it takes quite a long time to rub, and it is difficult to achieve a uniform matte finish.
Start small
All of these technologies make it possible to implement a wide variety of ideas for transforming glass products. But before you start matting using any of the methods, you need to really assess your strength. You should not immediately take on a large amount of work: it is better to first practice on a small glass product.
(average rating: 5.00 out of 5)
Glass matting technology with paste
- We need a working surface - glass or mirror.
- Special paste.
- Latex gloves.
- Alcohol.
- Rubber spatula.
- Foam sponge.
- Water (preferably running water).
- Good air circulation (open a window or vent).
- Special film for making stencil designs.
Let's get started:
- You must come up with a drawing. If you haven't decided yet, go to the Internet and choose a drawing. Choose a vector drawing in which all the lines will be closed. If you can’t do this, go to a designer, he will make the desired drawing and use a special tool - a plotter - to cut out a stencil for you.
- As mentioned above, in the preparatory stage, we degrease the surface with alcohol.
- Glue the finished stencil onto the glass/mirror, try to glue without distortion. Be careful, avoid moisture, water can become our enemy.
- Gently smooth the film so that there are no air bubbles. If they appear, carefully pierce them with a thin needle and smooth the surface.
- To prevent the small details of our stencil from moving, smooth it out carefully, holding it with your hand. You can put paper on top and smooth it out without it.
- Carefully remove the film.
- Next we work with gloves. Take the paste and apply it to the free areas. We try not to splash the paste so as not to get it on the glass, where matting is not intended.
- If you accidentally drop a little paste into an unnecessary place on the glass, remove the excess with a spatula.
- Quickly spread the paste over the surface and leave for 15 minutes. The paste should be well etched.
- Afterwards, remove the excess paste and put it back into the jar.
- Wash off the residue with running water and wipe with a foam sponge.
- Then you need to carefully remove the stencil, take a sharp knife and pry up the edge of the stencil.
- If you don't do this right away, the film may stick to the surface forever.
- If the film is difficult for you, heat it a little with an ordinary hair dryer.
- After removing the stencil, you need to wash the surface with water and wipe it.
Methods of frosting glass and mirrors
Among the matting methods, there are several main, most frequently used:
- Frosting of glass using various acid-containing preparations.
- Sandblasting glass surface.
- Chemical matting, which also includes glass processing with special pastes.
Thanks to these methods, it is possible not only to frost the glass, but also to perform artistic processing (to obtain a drawing). Speaking from an economic point of view, the most economical is matting using pastes. They are inexpensive and you can even make them yourself. Working with pastes also does not require a specialized workplace.
The disadvantages of this method include divorce, which is clearly not suitable for you if you hope to turn your work with glass and mirrors into a profitable business. Here we can advise you to purchase special matting liquids. It is more expensive, but does not leave streaks and is more suitable for working with large surfaces.
It is also important to understand that even when using matting liquids (not to mention pastes), you need to choose imported manufacturers whose quality is much higher.
There is another way of matting - sandblasting matting of glass and mirrors. This method requires the presence of special equipment: a sandblasting machine itself, as well as specialized protective equipment, since during operation a huge amount of dust is released. This excludes the use of this method at home, that is, a well-equipped workplace is also necessary.
The advantage of the method is the wide scope for the master: the device allows you to create relief images of various thicknesses. It is also important that the speed of sandblasting is much higher - this speeds up the glass processing process.
However, you also need to be responsible about the abrasive material, which, if you do not find enough sand, you will have to purchase.
The biggest disadvantage is the high costs of purchasing everything you need, and then of electricity, purchasing abrasives, and creating stencils if you are not a professional artist.
Conclusion: the sandblasting matting method is justified when we are talking about a well-established business in terms of clients, otherwise the costs may exceed the possible income.
It is possible to frost glass and mirrors using acid-containing solutions. The main types of acids are hydrofluoric acid, as well as ammonium bifluoride and ammonium fluoride.
The method consists of applying an insoluble protective layer to the working surface, then removing areas intended for matting, direct acid etching, then curing and washing.
After removing the protective layer, you can rinse again. The method requires a responsible attitude and safety, even greater than when working with a sandblasting machine.
But, taking into account the average speed of such glass processing and the relative cheapness of acids, we can say with confidence that this method can be successfully used for frosting glass and mirrors.
Special types of glass
In addition to the standard one, glass in the game, thanks to various mods, can take on any shape and properties.
- Colored glass. The method for obtaining it is quite simple: all you need is ordinary glass and dye.
- Liquid glass. Appeared in the game thanks to the Forestry mod. In it you can craft various electronics and obtain glass in liquid form.
- X-ray glass. It is the most interesting option for amateur miners, as it allows you to see everything that is underneath it, dozens of blocks below. It is a very expensive luxury, as eight diamonds are needed to produce X-ray glass.
- Additionally, thanks to the Fancy Glass mod, glass can be turned into a purely decorative block, like a brick. Thus, ordinary glass has turned into a building material, and a house consisting entirely of this material can now be built with one’s own hands.
Glass production technologies in Russia
Glass production technology is based on processes such as:
- preparation of raw materials;
- formation of the charge;
- glass melting;
- cooling;
- product formation;
- annealing and processing.
Glass production stages
The main components in glass production include substances such as silica, SiO2 and Na2CO3. Silicon dioxide in industrial glass contains about 40-80 percent, and in quartz - 96-100%. During glass melting, quartz sand is often used as silica. If necessary, it can be further enriched.
For clarification, substances such as sulfate, sodium chloride, ammonium nitrate and others are used. Before starting glass melting, all components are thoroughly sifted, dried and thoroughly mixed until a homogeneous mass (powder) is obtained. If necessary, they are further crushed.
The next step is placing the charge into a glass melting furnace. After it has heated up, hygroscopic and chemically bound water particles evaporate from it. At the stage of silicate formation, all components decompose. Initially they look like a sintered conglomerate.
As the temperature rises in the furnace, individual silicates begin to melt. When they dissolve, they form an opaque mass. This stage ends when the temperature reaches 1200ºС, when the remainder of the charge has already dissolved and the melt has become transparent.
Glass production in Russia does not end there. Vitrification is the process of dissolution of quartz grains in a silicate melt. As a result, a homogeneous glass mass is formed. This process proceeds much more slowly, preventing silicate formation, and takes up to 90 percent of the charge’s boiling time. In the process of melting glass melt at a temperature of 1500-1600 degrees, residual gases are removed from it.
Glass production in Russia includes one more stage - clarification. Here, to speed up the process, clarifiers are added, which also reduce the surface tension of the glass melt. Using fireproof mixers, the entire melt is thoroughly mixed. Also, compressed air or gas can be passed through it.
In parallel with clarification, there is also a process of homogenization. At this stage, the resulting glass mass is averaged by composition while mixing.
Glass production in Russia ends with such a glassmaking stage as cooling (chilling). At the same time, the viscosity of the glass melt is maintained, which will subsequently allow the formation of finished products. Basically, this temperature is about 700-1000ºС. At this stage, the most important thing is to lower the temperature very slowly.
The production of any glass is determined by established technological standards. The formation of finished products from the resulting glass melt occurs mechanically (pressing, rolling, blowing, etc.) on special glass-forming equipment.
The next step is annealing. Here a certain temperature is maintained at which the glass is slightly soft. This allows you to relieve the stress in the glass that appears during rapid cooling.
Options for creating frosted glass
Matting methods are quite simple, so everyone can do it with their own hands. So what are these methods? Below is the list:
- gluing matte film;
- applying matting paste to the surface;
- using a sandblaster.
Matting glass with film
This method can rightfully be called the most accessible and simple. There is a special matting film sold on the market that will help you when working with glass. You just need to stick it on the glass from the back side. It's all work. But there is one drawback - although the surface becomes opaque, it cannot be called a full-fledged mat. If you want to get a truly matte texture, then use the following options.
Matting glass with paste
This is no less complicated method. All you need is a glass matting paste, which is easy to buy in the store. It is produced by different companies. The glass matting process itself is very simple:
That's all, now your glass has become truly frosted. We mentioned stencils above. This is a great opportunity to make an original gift for family or friends. The work is practically no different from the previous one. You can buy or make a stencil with the desired pattern on it. You can even order products with inscriptions and congratulations
Then all that remains is to carefully glue the stencil onto the glass surface and smooth it, starting from the center, moving towards the edges
If the design is small and the glass area is larger than the stencil, then cover the unprotected areas with masking tape so as not to mat the unnecessary surface. Then the process is identical: apply the paste, smooth it over the surface with a layer of 4 mm and wait 20-30 minutes. All that remains is to wash off the paste, rinse everything with hot water and remove the stencil. The drawing is ready.
You can find detailed instructions on matting with paste in this video:
Matte glass with sandblaster
This is the method used in production. It is the most reliable and high quality. But it’s difficult to call it affordable. After all, sandblasting equipment costs a lot of money. If you have such a unit, then that's good. Some people rent it or look for people they know with such a device. A sandblasting machine can make matting of any depth and density. And for processing large surfaces it is simply irreplaceable.
Advice! You shouldn’t immediately start trying to frost the glass on your work surface. It's better to practice on unnecessary glass.
The disadvantage of this method is not only the mandatory presence of equipment, but also the fact that the glass after processing will lose about 3 mm in thickness. This is why it is recommended to use glass with a minimum thickness of 5 mm. In addition, you will need sand and a respirator for work.
The process of creating a mat on glass is as follows:
- First, clean your work surface.
- In the case when you want to create a pattern on the surface of the glass, stick a stencil in the desired location. Glue it carefully, as sand under high pressure can penetrate inside.
- Now you need to take care of security: protect the premises, as well as yourself. Use gloves to protect your hands, a respirator or mask to protect your face and respiratory organs, and goggles to protect your eyes. It is advisable to carry out the work in a protective suit, as the unit will create a small sandstorm.
- Perform a test run on scrap glass to ensure proper spray quality.
- Press the pump against the glass and, using circular movements, evenly process the glass surface. Repeat the process several times. The longer you work, the larger the layer will be.
- Finally, tear off the stencil and wash the glass.
That's all, now you know how to make glass frosted. You can choose any option that suits your budget, strength and capabilities. You can find detailed instructions on matting with a sandblasting machine in this video:
Purposes of matting
Frosting of glass is rarely done, but most often this happens when:
- They want to get rid of transparency. This is typically done for door inserts, windows, and shower screens.
- Add originality to old products. This is usually done on furniture mirrors, lamps, dishes and other products.
If you are interested in how to make ordinary glass frosted with your own hands, you are unlikely to want to resort to expensive services. In our article you will find several proven methods that will help you do this inexpensively and with your own hands.
Care of frosted glass
On frosted glass, dirt, stains and fingerprints are more clearly visible than on regular glass. Therefore, they need more careful care. The easiest way is to remove dirt immediately after detection; to do this, just wipe the product with a slightly damp (or dry) microfiber cloth. If there is serious contamination on the surface, then it is necessary to use special products that are sold in supermarkets or specialized stores.
It is important to know that matte surfaces are harmful to cleaners that contain fluorine or silicone.
You also need to remember to periodically care for the matte product. To do this, you need to wipe it with a piece of natural suede. In addition, it can also be washed with hot water and vinegar. After such prevention, the surface should be dried immediately using the same napkin.
There is another way to clean a matte surface: add a couple of spoons of chalk powder crushed into a glass of water. This composition is applied with a rag to a matte surface, and when it dries, the dirt must be removed using newsprint.
If serious contamination appears, you can get rid of it with ammonia. But at the same time, the room must be well ventilated, since ammonia has a strong odor. Whether purchased or made by a home craftsman, frosted glass can be a work of art, and if properly cared for, it can retain its beauty for a long period of time.
Technologies for obtaining a matte surface
In everyday life, glass objects with an unusual effect that were manufactured industrially are most often used. The following technologies are used in production for matting:
- changing the structure using a sandblasting machine;
- exposure to chemicals;
- mechanical processing.
Sandblasting machines are more often used in industrial production, but if you have the skills to handle such equipment, you can use it to create a matte effect yourself. The remaining two technologies for changing the structure of the glass surface can be successfully used even by novice craftsmen.
Adding a matte effect using sand
Here, to make glass opaque, you will need a special machine or sandblasting machine. On the machine, a stream of fine sand and water is used to treat the surface to obtain the desired effect. The result is a matte, rough texture that lasts for a long time.
The sandblasting machine uses dry sand rather than wet sand for processing. It is supplied under high pressure to the surface being treated. As a result of this treatment, about 3 mm is removed from the surface of the material. Therefore, the use of this technology is allowed only for glass with a thickness exceeding 5 mm.
You can use a sandblasting machine only in a specially prepared room, completely protecting your body from glass dust. This matting method consumes a lot of electricity. Another disadvantage is the special requirement for the quality of the sand used. All grains should be small and the same size. Otherwise, the glass can be easily damaged.
The procedure for matting with a sandblasting machine:
- The working surface is cleaned of dirt and degreased.
- If you need to create some kind of design on the glass, stick a stencil onto the area to be treated.
- Turn on the device and treat the desired area, pressing the pump against the glass. They pass over the surface several times to obtain the desired depth of treatment.
- Remove the stencil and wash the glass.
Chemical exposure
This technology is more accessible for home use. Here, various aggressive substances are applied to the surface, changing its structure. This technology is also called etching. To make frosted glass with your own hands, it is better to use non-toxic pastes and solutions. By experimenting with the concentration of the reagent used and the exposure time, different degrees of opacity are obtained.
Usually, to change the structure, a matting paste based on liquid glass or hydrofluoric acid is used. It is applied to the glass object in a thick layer and left for several minutes. An option for this treatment is to spray a special paint over the surface and then dry it in an oven.
Mechanical restoration
In this case, the glass is processed by engraving or grinding. The result is a beautiful surface. It retains its acquired appearance for a long time:
- During grinding, the surface is treated with a special wheel and fine sand. To reduce dust formation, water is added to the sand.
- Engraving is used to apply designs or inscriptions. A mark remains on the glass after exposure to it with a special tool.
Classification of frosted plexiglass
There are several types of frosted plexiglass:
- Colored. The composition contains a coloring component, and the surface can be either smooth or rough.
- Satin. The matte effect is achieved due to the roughness of one or both sides, while there may be no dye in the material itself. Minor damage is almost invisible.
- Glossy. Both sides are smooth. The material itself is milky in color, its saturation can vary from slightly transparent to opaque. It looks attractive, but chips and scratches are clearly visible on the surface, as well as grease and dirty handprints.
- Grooved. There is a distinct raised pattern on one side. Can be white or colored.
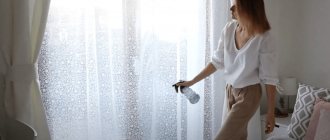
How to make a window opaque?
I live on the 1st floor, the window faces the courtyard, next to the entrance door. I want to make the glass opaque so that I can't be seen from the outside. I thought about sticking a regular matte film, but I read on the Internet that there are some sprays for frosting glass. I don't know which is better. How do you think?
Woman.ru experts
Find out the opinion of an expert on your topic
Zinovieva Natalya Yurievna
Psychologist. Specialist from the site b17.ru
Dyachenko Elena Vladimirovna
Psychologist, Gestalt therapist in training. Specialist from the site b17.ru
Slobodyanik Marina Valerievna
Psychologist. Specialist from the site b17.ru
Nikulina Marina
Psychologist. Specialist from the site b17.ru
Sheludyakov Sergey
Psychologist, Clinical psychologist. Specialist from the site b17.ru
Trifonova Maria Anatolyevna
Psychologist. Specialist from the site b17.ru
Gundertailo Yulia Danilovna
Psychologist. Specialist from the site b17.ru
Vyacheslav Potapov
Psychologist, consultant. Specialist from the site b17.ru
Wrzecinska Eva
Psychologist. Specialist from the site b17.ru
Natalya Maratovna Rozhnova
Psychologist. Specialist from the site b17.ru
I took the film and peeled it off. and you will be scrubbing off the spray for 3 months
There is tinting, I don’t know the technology. But I ordered windows so that from the outside they would reflect almost like a mirror, but from the inside you could see everything as usual. Maybe some company can tint the existing windows.
Definitely film. It can be removed at once and leaves no traces (tested on myself), and besides, you can choose not just matte, but some kind of stained glass (with a pattern) - it will be even better!
Paint over it with oil paint, as they used to do in hospitals.
Stained glass. You can paint it yourself. There are colors. You can buy stained glass film. No problem. The Germans and Austrians do a lot.
Related topics
The film does not stick. It just sticks and comes off easily. No glue.
Mirrored windows are good during daylight hours; in the evening, when the lights are on, everything in the room is visible. Maybe hang fabric roller blinds on the glass? The choice of fabrics is huge, as are the designs. Choose something light but thick so that the room is not dark. You can order ready-made frosted white glass. They are made by plastic window companies. I did this on the loggia, the light passes through, but the “image” does not!
Are the curtains or curtains available?
Lay with glass bricks
Recommendations for glassmaking
Making glass with your own hands at home requires care and attention - in the absence of experience, such a process can be difficult, especially at the final stage. For the first attempt, you should not prepare large volumes of melt
To simplify working with such material, you can use the recommendations of experienced glassblowers:
- As a substitute for quartz sand, sifted white river sand is used.
- Large granules of the charge components are thoroughly crushed in a mortar before heating.
- Pieces of failed products can be added to the batch - this saves material.
The annealing temperature to complete the product ranges from 400°C to 600°C. The indicators depend on the refractoriness of the mixture used. Cooling of the finished glass depends on the size of the ingot and its thickness - large objects need gradual cooling. After completion of the work, the product is strengthened by glazing or lamination.
Frosted glass by mechanical means
Despite the fact that glass is a durable material, under certain conditions it can be scratched, in which case it loses its glossy properties. This means that matte finish can also be achieved mechanically!
Matting with sandblasting material
The essence of the method is that sand falls onto the glass surface under high air pressure, which creates microscopic depressions. This technology can hardly be called “homemade”, since to perform it you will need at least a sandblasting tool. With some skills, you can make such a device with your own hands, but to frost a couple of glasses, you shouldn’t bother so much.
Please note that this method can only be used in isolated rooms and on glass with a thickness of at least 0.5 cm.
Matte with diamond paste
The problem of how to make frosted glass at home can be solved using an abrasive lapping paste. Since the method is labor-intensive, it is not suitable for large surfaces, but it is appropriate for applying a design or matting small areas.
The steps are simple: apply a fine-grain paste to a glass surface or stencil and, using a piece of glass, rub it in a circular motion. Despite the fact that the method itself is not expensive, there is also a drawback: it takes a long time to rub, and it is also difficult to achieve uniformity.
Start small. All the technologies that we described above make it possible to implement many ideas. But before you start doing anything, evaluate your strength. Don’t take on large volumes right away: it’s better to practice on small glass items.
Colored glass
This type of glass is most often used in apartment design, and for a minimalist style, where the surface is almost entirely made of plastic and glass, this choice will be a godsend. Shelves, a coffee table, frames, and lamps made of colored plexiglass will look great. Of course, today such glass can be ordered ready-made, painted, but doing it yourself is more interesting. Therefore, you need to think about what to paint glass with? In any case, only a small element can be painted at home.
For painting, a special alcohol-based paint with the addition of dyes is suitable. Dilute alcohol and dye in a ratio of 100 to 0.14. You can use stain, you can mix different colors. Standard painting procedure includes:
- Preparation of the solution;
- Surface painting;
- Polishing.
Liquid plexiglass
Thanks to the low melting point (about 170 degrees), you can easily organize the smelting of the polymer plastic parts you need. It is enough to follow simple rules:
- Everything you are going to work with will need to be dried to avoid bubbles.
- If your material does not exceed 5mm in thickness, then you only need to heat it on one side; if it is thicker, you will have to heat it on both sides, turning it over.
- It is not necessary to melt the glass to a liquid state; you can work wonders with a soft product.
- Transfer the softened material into the mold and wait for it to cool, do not try to speed up the process by cooling the product with water
With the help of such simple manipulations, you can revive any product in your home, come up with a lamp or shelf, or create your own unique decorative item. Plexiglas will always be in fashion, changing slightly; it has been taking part in our design for decades, helping in the construction of buildings, and winking with illumination from billboards.
Important! Under no circumstances should you try to set up a smelting workshop in your home or apartment; remember that polymer vapors are toxic. Plastic can only be melted in a specialized room with forced supply and exhaust ventilation.
Don’t forget about personal protective equipment – gloves, overalls and a respirator.
How to matte with your own hands?
Anyone can make frosted glass at home, the main thing is inspiration and the desire to create, because the final result will depend on this. Purchasing matte surfaces is quite expensive; there is no need to pay when you can achieve the desired effect with your own hands.
Aerosol
It’s worth saying right away that matting with spray paint is one of the least durable methods. A spray is applied to the surface, creating an opaque film. Surprisingly, the advantage of this option lies in its disadvantage.
At any time, you can wipe off the coating and apply a new one, refreshing the look.
Step-by-step instruction:
- dip a cotton pad in pharmaceutical alcohol, and then thoroughly wipe the glass;
- We apply a template prepared in advance from stencil film with easily removable glue to the surface and try to press the stencil to the product as firmly as possible;
- if there are areas on the glass that, according to the plan, should remain untreated, they can be covered with unnecessary wallpaper;
- shake the spray bottle thoroughly before applying, and then spray (keeping a distance of about 30 cm);
- After finishing the process, remove the stencil and protective paper.
Paste
Matting the surface with a special paste is a very easy way to transform old glass. Despite the safety of the product, it is still advisable to carry out the work with gloves, and it would not hurt to ventilate the room in advance. It is worth warning about one thing in advance - the liquid changes the structure of the material, so correcting errors is unlikely to be possible.
Step-by-step instruction:
- Using a cotton pad soaked in alcohol, we degrease the glass - there should not be a speck of dust on the surface;
- glue the stencil onto the product (places that are not planned to be matted can be covered with paper);
- take a spatula and apply the mixture to the stencil;
- maintain the time (the instructions of each paste manufacturer indicate the exact exposure time);
- remove excess paste from the glass or window into a container (the substance can be used more than once);
- for complete cleansing, “walk” over the surface with a sponge;
- remove the stencil.
The product is ready for use.
Matte film
Frosted film for glass is perhaps the simplest and least expensive solution. If the frosted film is applied evenly and beautifully, no one will even be able to distinguish the frosted glass from a fake. But this is only a temporary solution.
The most popular types of films include matte white and matte gray varieties. On average, the price of film does not exceed 1,000 rubles per meter.
Step-by-step instruction:
- carefully clean and dry the glass;
- after taking measurements of the product, cut off the required amount of film;
- We separate the material from the substrate (slow movements);
- We place the material from the corner and evenly;
- Using a dry cloth, carefully level the canvas to remove bubbles.
Stickers
Consumers really like self-adhesive film – of course, because in a matter of minutes you can create glass like in a fashionable interiors magazine. The film comes with a floral pattern, decorative 3D, imitating frosted glass.
Step-by-step instruction:
- first of all, we clean the glass from dust and dirt (for this you can use a special product or use soap shampoo);
- after measuring the glass, cut out the film (additionally leaving 2-3 cm on each side);
- Apply a soap solution to the glass;
- apply the film to the top edge of the glass and gently smooth it;
- moisten the outer side of the film with the same product as glass;
- we expel water and air from under the film, smoothing the product gently on the surface;
- After a while, using a knife, we cut off the material where it turned out to be unnecessary.
Glass manufacturing and melting technologies
Glass manufacturing technology acquired a scientific approach thanks to M.V. Lomonosov in the 1750s thanks to his famous work “The Science of Glass”. It contains data on laboratory practice and methodological principles that have become classic, which are almost no different from modern ones.
Glass manufacturing technology today consists of the following stages:
- To begin with, all components of the raw materials from which glass melt will be made are weighed with high accuracy.
- The raw materials are sent to the furnace, where the temperature is over 1500°C, allowing all components to melt and, with uniform stirring, turns into a homogeneous glass mass.
- Next, according to the modern float (melting) method, the glass melt is lowered into a tin bath at a temperature of about 1000°C, cooling and floating to the surface in a perfectly flat form.
- When leaving the bath, the temperature drops to ~600°C, and the glass is sent for further cooling along the conveyor to 250°C. In this case, cooling is carried out gradually so that the material does not crack.
- At the end, the glass is checked for quality and processed to the desired shape before being packaged for sale.
This is a brief description of modern glass production that most glass factories follow. But if the production technology of different types of glass does not differ so radically, then the composition and melting methods can sometimes differ significantly.
Glass melting technologies differ in the composition of the glass melt being prepared, which entails providing different conditions (temperatures) for it so that it acquires the desired viscosity and has the opportunity to brighten.
The composition of glass mainly includes silica, the percentage of which, depending on the desired type of glass, can range from 40 to 95%.
No less important components are metal oxides of various types. Calcium oxide, which has the second largest weight in the raw material, provides glass with chemical resistance and adds shine. Next come the oxides of potassium and sodium, which facilitate the melting and processing of glass.
The different ratios of these components provide glass with special properties, such as electrical conductivity, heat resistance and strength, which makes it possible to use in highly specialized areas of production.
Glass melting consists of the following sequence of steps:
- A batch is created consisting of a certain proportion of raw materials necessary to obtain glass with the desired properties.
- Next, the mixture is loaded into a pot-shaped furnace, where heating begins. During the heating process, complex physicochemical transformations occur, during which silicate formation, glass formation, degassing (lightening) and homogenization (transition to a homogeneous state) occur.
- The first stage of silicate formation begins when heated to 800-900 degrees. The moisture evaporates and the components react with each other, forming silicates.
- Having heated to 1100-1200 degrees, the stage of glass formation begins, indicated by the end of the reactions for producing silicate and heterogeneous gassed glass mass.
- At a temperature of 1400-1500, due to a decrease in viscosity, degassing begins, which is accompanied by clarification of the glass mass; in parallel with this, homogenization of the composition occurs due to mixing with air bubbles.
- The final stage is cooling the mass to 1100-1200°C, which provides the required viscosity for further production of glass melt.
Equipment for glass melting at various factories differs mainly in the device for loading components, the size and productivity of furnaces of various types, and the design of the common production pool areas.
How to make frosted glass yourself?
Working with a stencil
Before you start doing anything, it’s worth considering popular glass frosting techniques, as well as methods for applying drawings and inscriptions. In the field of professional matting, engraving is occasionally used. This method requires additional tools and skills, and this is not suitable for everyone. At home, stencils will come to the rescue.
Choosing a stencil
There are three options here:
- Buy a reusable and suitable stencil (you will need aerosol glue for it).
- Buy a stencil for one-time use on self-adhesive film.
- Download the stencil on the Internet, transfer it to the desired scale, redraw it on film like an “oracle” and cut it out with scissors or a utility knife.
Glue and remove the stencil
If we talk about the first case, then you should apply glue to the stencil, wait a couple of minutes, and then stick it in the desired place and press the stencil to the glass with a dry, clean cloth using blotting movements. In the last two cases, we remove the backing from the film, glue the stencil onto the glass (which first had to be degreased and wiped dry), smooth it out with a rubber spatula, and if bubbles have formed, we pierce them and let out the air.
If the self-adhesive film stays on the glass for more than a day, it will be difficult to remove. For this reason, we advise you to remove the stencil from the glass as soon as possible after washing off the matting paste or drying the paint. We will talk about how to make a drawing with your own hands in other ways later.
We imitate dullness
How to make frosted glass at home in the easiest and safest way? We will talk about it further. I would like to note that this method will make it possible to obtain not a dull finish (in which the surface structure changes), but to create an opaque layer.
Pasting with film
This method will be a real salvation for those who want to frost glass cheaply and cheerfully. It is suitable only for flat products, or those that have a small rounding angle and will be used in dry rooms.
After you buy the film of the size you need at the hardware store, follow these instructions:
- Preparing glass - clean the surface with detergents and wipe dry.
- Try on the film, after which you need to cut it, if necessary, cut out decorative elements from it.
- Carefully remove the coating, moisten the film and surface with soapy water (this is easiest to do with a spray bottle).
- Apply the film to the glass, “drive out” excess moisture and air bubbles with a soft cloth or napkin.
If you use this method, remember that matte surfaces do not have the same properties as glass - when exposed to abrasive substances and sharp objects, the film can easily tear. Such a defect cannot be corrected.
Matting with paint
Today you can find on sale waterproof acrylic paint for matting, which is produced in aerosol cans; it is also called aerosol frost (by analogy with the effect obtained). The method is quite convenient in that the opacity effect can be removed at any time using acetone, and a smooth surface will be available.
This paint is most often used not to make glass matte, but to apply matte designs on it. This is where the stencils we talked about earlier come in handy. Once they are applied, we recommend using masking tape to prevent accidental painting of other areas and surfaces. After preparation, spraying is done, and the manufacturer’s recommendations should be followed. Once the paint has dried (usually within 30 minutes), the stencil can be removed.
How to do it at home?
Preparing paints at home should only be based on natural materials. Such compositions will be environmentally friendly, which will eliminate the possibility of their negative impact on the environment and the human body. You can prepare paint based on water-soluble nigrosin
, which is a blue-black uniform powder. One liter of water requires 30 grams of powder.
Before using paint, it is necessary to thoroughly treat the surface
. Using an ordinary brush, it is cleaned of dust and dirt. After this, the composition is applied to the surface using a brush.
You can use Swedish technology
for preparing the composition. 250 grams of table salt are added to 6 liters of pre-boiled water. It is also necessary to add copper sulfate in the amount of 500 grams. In a separate container, mix rye flour with water until a paste is obtained. Both compositions are mixed. Next you need to add 300 grams of drying oil. At the next stage, you need to add the coloring pigment and mix thoroughly. This composition is used for painting a variety of surfaces. Paint is applied to the surface using a brush or roller.
Preparing paints at home is a responsible procedure. To ensure long-term operation of the composition, it is necessary to strictly adhere to the proportions. Also, a person must correctly select the components of the paint in accordance with the surface that will need to be painted.
If you want to give a product a noble shine, you cannot do without chrome plating. Covered with a layer of chrome, the products look very impressive, and…
If you need to create a relief, add texture gel and structural paste to the paint. Over time, you will learn to easily achieve the desired result.
Additives can make acrylic paint thick or thin, transparent or, conversely, opaque, shiny or matte. There are also additives that affect how quickly paint dries.
Acrylic paint becomes even more versatile if you mix it with one or more additives, widely available in specialty stores.
There are six main types of supplements. Since acrylic paints are a relatively recent invention, the names of the additives may vary depending on the manufacturer. To make the right choice, read labels carefully and consult with the seller.
Acrylic paints, squeezed directly from a tube, after drying acquire a so-called semi-matte gloss, characteristic of, say, an eggshell. To make the color shine, you need to add a glossy gel to the paint, bringing it to a liquid consistency. With enough gel, the paint becomes so transparent that the underlying colors can show through. Attention: water impurities impair the shine!
Gloss gel is ideal for applying thin layers of color. With it, the paint acquires depth and glow (qualities inherent in watercolor), without losing its durability. The glossy gel looks like milk, but when it dries, it forms a transparent shiny film.
To achieve the desired result, try adding different amounts of gel to the paint. Remember: too much of it will make the paint layer more transparent, but the color saturation will be lost.
This gel also makes the color layer thinner and the paint itself thinner, but gives it a matte finish. If you want a semi-gloss finish, add equal parts gloss and matte gels to the paint.
Both gels dry out very quickly, so always keep your brushes in a container of water! Otherwise, after a couple of minutes after applying the paint, the brush will become hard and unsuitable for further use.
It dilutes acrylic paint, giving it maximum fluidity and transparency. Unlike water, the thinner does not blur the color or reduce the durability of the paint, so it is indispensable in cases where large areas of the canvas need to be painted evenly.
Tip
Mixing paints with additives
Squeeze the paint onto the palette and make a hole in the middle of the resulting puddle. Add one or more gels little by little, thoroughly stirring the mixture with a palette knife. If necessary, dilute the paint with water and immediately apply to the canvas. If you need to use a mixture of colors and an additive, mix the colors first and only then add the gel.
As a rule, by the names of the additives you can understand what they are intended for. Although be prepared for the fact that to achieve the desired effect you will have to experiment with different gels.
The thinner, unlike matte and glossy gels, does not change the appearance of the paint after drying. (Although if you add too much, the paint will foam and bubbles will form on the painted surface.) A good alternative to thinner is dish soap. Typically mix one or two parts thinner or dishwashing detergent and 20 parts paint. Moderator
Acrylic paint dries very quickly. A retarder is a clear gel that extends the drying time of acrylic paints and generally does not affect their consistency or color. Depending on the amount of retarder added, paints can dry from half an hour to a day. A retarder is indispensable if you need to carefully work with color, for example, to achieve smooth transitions between skin tones in a portrait. When experimenting with retarder, remember that there should be no more than one part retarder per three parts paint, otherwise it will negatively affect the consistency.
Sometimes it is called a gel medium. It thickens the paint without changing its color. The texture gel is ideal for thick strokes. In addition, it increases the durability of paint, which is why artists love to use it when creating collages. Texture gels for acrylic are designed to facilitate work in the impasto technique. They come in four types (ceramics, fiber mixture, natural sand, resin) and have different textures and gloss. Texture gels can be mixed with paint on a palette or applied directly over a dry area of the painting.
This thick white paste is sold in tubes or jars. It lightens the paint, which must be taken into account. The consistency of the structural paste resembles putty and thickens paints more than gel. If you apply this paste to a hard surface (wood or thick cardboard), you will get a very rough primer. It is best to apply the mixture of structural paste and acrylic paint in several thin layers. Before you start applying each new one, you need to let the previous one dry. If you make one thick layer, the paste will crack when it dries. To make the stasis paste more uniform and liquid, it is diluted with a glossy or matte gel. This mixture is prepared in a 50:50 ratio. Can be applied to elastic surfaces, such as canvas.
Water-based gloss paint, as well as other materials that provide the finished surface with a smooth texture and characteristic shine, are used quite widely. They have a whole list of advantages, and therefore, when decorating apartments and houses, very often glossy compositions are chosen as the main ones.
Below we will tell you what you need to pay attention to when buying such paints, as well as what are the most fundamental differences between matte and glossy finishes.