Parquet is one of those types of flooring that have a very deep history. It has been actively used for flooring since around the 15th century, and only in the mid-20th century did alternative types of materials begin to appear. It is not surprising that when buying housing on the secondary real estate market, people usually purchase apartments that have Soviet-era parquet flooring. Of course, over so many years, despite the durability of the coating, the material has lost its appearance. And in the event of flooding, the freshly laid coating may require replacement. In general, dismantling parquet may be necessary both in old apartments and in new ones. How does this procedure occur, what determines its complexity?
Parquet dismantling
Removing parquet flooring in an apartment
Parquet is a fairly strong and durable material. It is distinguished by high performance and decorative qualities, although it requires regular and somewhat complex maintenance. However, everything comes to an end, including the impeccable appearance of the coating.
This parquet will definitely have to be replaced
Reasons for dismantling parquet:
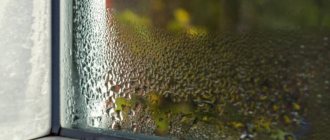
- flooding of the premises;
- infection of parquet floors with mold;
- the appearance of insect colonies;
- loss of appearance of the coating;
- repair and replacement of the coating with a new one;
- creaking floors;
- mechanical damage.
Fading of parquet
On a note! However, dismantling this type of flooring is not so easy. Much depends on what type of material is laid, how it is secured, etc.
Method of laying block parquet with glue
Factors influencing the labor intensity of parquet dismantling are given below.
- Coverage type. Parquet can be panel, piece, or made in the form of a parquet board. Each type of material requires certain requirements not only for installation, but also for dismantling.
Types of parquet
- Mounting method . This is also an important factor, since parquet can be attached to the base using different methods - this is the use of fasteners, such as nails, and adhesives.
- Type of subfloor or base . Parquet can be laid on plywood, ordinary wooden boards, fibreboards or concrete screed.
Old parquet - photo
The complexity and speed of removing the old finishing material will depend on all this together. The cost of dismantling work will also depend on this, but, fortunately, you can remove the old parquet yourself.
Removing parquet with a chisel
In general, the entire process of dismantling this flooring includes the following sequential steps:
- removing the parquet itself is the most labor-intensive and dusty stage;
- removal of the base on which the parquet lay;
- removing the resulting debris and cleaning the concrete screed from it.
The main differences, depending on the type of coating and its fasteners, will be observed at the first stage. Let's consider the dismantling of each type of parquet, and also study general information regarding preparatory work.
Removing old parquet floors
Tarquette parquet
What to do if the floor begins to creak a lot
Old parquet flooring can start to creak for several reasons:
If voids have formed under the planks;
If the spacer wedges are sagging;
If the planks become loose.
To find out the cause, first of all, the baseboards are removed and the wedges are inspected. They may dry out, as a result of which they will no longer perform their functions. New wedges are installed in their place and the sounds of the floor are observed for a week. If the squeaks do not disappear, the problem is something else.
If certain elements creak, this indicates that a void has formed underneath them. Then a hole is drilled in the center of the plank through which glue is poured under the plank (until it stops being absorbed). This area is pressed down with something heavy and dries for 3 days. When the mixture has completely hardened, the hole is completely filled with putty.
If creaking is observed throughout the flooring, the above methods will not help. This defect can be eliminated by completely re-laying the parquet.
As can be seen from all that has been said, during operation, parquet flooring gradually loses its original qualities. However, they are very easy to repair, so any acquired defect can be removed and you can continue to enjoy the beauty of the natural coating.
Parquet is a very durable coating. But sooner or later it may also require replacement. The reasons for this can be very different - from flooding by neighbors to infection by fungus or insects. The procedure for dismantling old parquet is not particularly difficult. However, it takes quite a lot of time.
The technology for removing parquet primarily depends on its type. The most difficult thing to remove is the piece one. We’ll talk about how to properly dismantle parquet without damaging it below.
Preparing to dismantle parquet
Before you begin dismantling the parquet, you need to carefully prepare. It is important that during this procedure there is nothing unnecessary in the room - all furniture is removed to another room before starting work. The one who will carry out the work should also take care of comfortable, but at the same time unnecessary clothes that you don’t mind getting dirty. It is advisable that clothing be dustproof. You should wear gloves on your hands and a Panama hat or other headdress on your head. It would be good if you bought safety glasses. It is also advisable to use a respirator, as the dust generated can be quite caustic.
All furniture must be moved to the next room
Various containers can be used for garbage, but plastic bags are not helpful here. It is better to use bags (as for storing potatoes) or boxes, or other types of containers. The main thing is that they are roomy and strong, since when dismantling parquet flooring there is a lot of debris and it is quite heavy. Especially if we are talking about a completely outdated coating.
During dismantling there will be a lot of garbage
It is convenient to use bags for garbage
It is also important to disconnect power to the room, as in some rooms wiring may run along baseboards or under the floor. There should be a fire extinguisher in the room where work is being done in case of fire.
Dismantling parquet begins with removing the baseboard along the walls - this decorative element can simply be pryed off with a crowbar and it will come off. The same applies to thresholds, if any.
Removing skirting boards
On a note! If only part of the covering will be dismantled (and this happens if only damaged parquet needs to be replaced), then it is important to cover the rest of the part from dust and debris with plastic film and be sure to secure it (the film) well. Work along the edges of the dismantled area should be very careful not to damage the panels, which should remain intact and unharmed.
Replacing damaged parquet boards with new ones
Carrying out preparatory activities
Before you begin dismantling the parquet, you should take care of your own means of protection. Bring dust-proof clothing, a pair of gloves, a hat and hard-soled shoes. In addition, there must be a working fire extinguisher in the room where dismantling work is carried out.
As a result of dismantling the old coating, a lot of garbage will accumulate, therefore, it is necessary to prepare special containers and bags to ensure removal of the accumulated garbage.
Actions to remove old parquet begin with preparatory activities in the room:
- The room is completely emptied: of furniture, equipment and all other things.
- Before you start dismantling an old wooden floor, you need to put on clothes, shoes and protective equipment prepared for this work.
- Start dismantling the baseboards.
Tools for work
To carry out the work you will also need a set of tools. Some of them must be present, and some can be neglected, but much will depend on the chosen dismantling method.
Tools for dismantling parquet
So, the tools that may be useful for dismantling parquet flooring:
- chisel, chisel - for prying off parquet blocks;
- crowbar (crowbar) – also for prying up individual elements;
- hammer;
- a nail puller or, again, a crowbar - for removing nails;
- ax – used as a last resort;
- grinder - for sawing individual elements;
- narrow spatula - for removing debris, glue, parquet residues from the floor.
grinder makita
If the parquet is glued to the base using resin, you may need a hair dryer - it will help soften the adhesive component.
The process of dismantling parquet
Movable dies
Movable dies require replacement of fastening points.
First step of replacement: make holes for new nails using a drill (use a thin drill bit).
Second stage: hammer the nails so that the heads are buried in the wood.
Repair of creaking parquet floors. Make holes with a diameter of 5-8 mm between the dies, maintaining an angle of 45°.
Carefully place wooden choppers coated with PVA (wood glue will also work) into the holes. The length of the chop is determined by the thickness of the parquet. Your task: use a chopstick to secure the die and the backing for secure fixation.
Grind the protruding edges of the chopsticks level with the floor.
Dismantling block parquet
Block parquet consists of a large number of small strips attached to the base. This is probably the most labor-intensive type of flooring in terms of dismantling. And piece parquet is much more difficult to install than other types, and this process will also be lengthy, because each small plank is attached independently. As a rule, block parquet is glued to the base, which complicates the removal process.
Block parquet
On a note! During the dismantling of block parquet, a lot of debris is generated, since individual strips are usually not completely removed - they break, delaminate and crumble.
Block parquet boards
Such parquet is rarely removed manually, since the easiest way to do this is to use a sanding machine if you have one on hand (or rent one). The process with it goes very quickly - pieces of parquet are simply separated from the floor.
Attention! If the parquet is fixed not with glue, but with nails, then it is not recommended to use this machine, since there is a high risk of damaging the equipment with fasteners.
Parquet scraping
The manual method of dismantling is carried out using a chisel, a crowbar, a hammer, or, less often, a larger tool. Before starting work, it is necessary to tap the floor surface with a hammer - this way, it will be possible to identify the area where the parquet strips move away from the base as much as possible - the sound will be dull. You need to start from this area. It is advisable that it be located opposite the window opposite the exit from the room.
If the parquet parts are attached to the base with nails, then it is necessary to use a nail puller (crowbar). If the parts are glued, then dismantling can also be done using a crowbar, although some manage to use shovels or other tools with a strong flat tip that is used to pick up the parquet. A hammer drill or a jackhammer can also be used for these purposes.
Removing parquet with a shovel
Important! When dismantling parquet using a hammer drill or jackhammer, you must use safety glasses, because debris and chips flying from under operating equipment can damage your eyesight.
Video - Dismantling parquet and laying tiles
Laminate problems
Laminate can be used as a cheap analogue of parquet. It is much cheaper, durable, resistant to various damages and looks nice. However, he is not unfamiliar with all the problems of floor coverings. Laminate, just like parquet, can swell, become deformed, scratches and chips appear on it, locks may come apart, etc. However, in most cases these problems can be solved. It is much more difficult to choose a material that would fit the existing laminate. However, repairing laminate flooring is much easier than parquet flooring.
- Most scratches can be masked using a special wax pencil. This is sufficient if only the top laminated layer is damaged. The product is selected to match the floor.
- To repair laminate flooring yourself, you may also need putty if the scratches are deep.
- If the damage is significant, the entire lamella will have to be replaced. To do this, you will have to disassemble the floor covering, replace the damaged area and lay everything back.
In order for the locking connection to be easily unfastened, it is necessary to lift the panels at an angle of 45 degrees.
No sanding or varnishing is required anymore, so laminate is easier and cheaper to maintain than parquet.
Features of panel board removal
Panel parquet consists of square modules with a base made of wood or chipboard, on the front side of which small strips are glued. This type of parquet is somewhat easier to remove than piece parquet. As a rule, dismantling in this case begins from the wall opposite the window, from the last installed panel, which has an open groove. One module is pryed up with a crowbar and torn off from the base. The remaining shields are removed in the same way.
Advice! If each shield is separately secured with nails, then they are removed with a nail puller.
Panel parquet
You can also use a chisel or hammer drill to remove panel parquet. Dismantling the panel covering occurs quickly, even though previously this type of parquet was often laid on resin and held up very well.
What can panel parquet be like?
Table. How to remove panel parquet with your own hands.
| Steps, photo | Description of actions |
| Step 1 | Using a grinder, a cut is made in the parquet flooring between several adjacent panels. |
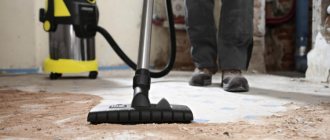
| Step 2 | The resulting debris is immediately collected with a vacuum cleaner - then there is less risk of getting very dirty. |
| Step 3 | With the help of a crowbar, the parquet board is raised - the crowbar is driven between it and the base. The shield is removed. |
| Step 4 | If the crowbar does not fit well into the gap between the shield and the base, you can use a hammer or hit it with your hand (depending on the required effort). |
| Step 5 | The required number of parquet panels are removed or the covering is completely dismantled, depending on what needs to be achieved - minor repairs to the floor or a complete replacement of the covering. |
| Step 6 | Each new section is sawed with a grinder. Further dismantling is carried out according to points 2-5. |
| Step 7 | Remains of parquet that are not removed immediately are cleaned off additionally. |
| Step 8 | The base, if it is installed on self-tapping screws, is easiest to remove - to do this, the fasteners are unscrewed and the base sheets are removed. |
| Step 9 | You can also, if you don’t mind the base, simply tear it off the joists using a crowbar. |
Parquet board
Another option for parquet flooring is parquet board. The material is somewhat reminiscent of laminate both in appearance and in the method of installation/disassembly. This coating can usually be removed quickly and easily, without even damaging the planks.
The structure of the parquet board
On a note! Parquet boards, as well as other types of parquet, if they are removed carefully, can be reused by covering the floor in another room. Therefore, some people take parquet with them when they move to another apartment, especially if the material is of high quality and was very expensive for its owner. However, this is only possible if no glue was used during installation of the coating.
Parquet board in the interior
Fortunately, the parquet board is usually not fixed to the base, and its dismantling is quick and easy - just carefully remove the locks.
Parquet board
Recycle or reuse
Do not throw away the parquet strips after dismantling: they can be reused or recycled. Find people who will buy or take away whole planks or boards for free. They are cleaned and used in finishing, making household items, or at least as fuel. The tree grows too long to send such valuable material to a landfill.
Furniture, fencing and other useful things are made from reclaimed wood.
Partial removal of parquet
Sometimes a homeowner may face the problem of partially removing a parquet board. This is usually necessary if one of the parquet strips has been hopelessly damaged - for example, broken. Here you should act according to the instructions.
Table. Removing part of the parquet with your own hands.
| Steps, photo | Description of actions |
| Step 1 | The area to be replaced is covered around the perimeter with masking tape. |
| Step 2 | Using a grinder, an incision is made along the marked perimeter. |
| Step 3 | Coating cuts parallel to each other are made across the entire area of the designated area. The first row is parallel to the previously made cut, the cuts of the second run diagonally to the first. |
| Step 4 | The resulting debris is collected with a brush or vacuum cleaner. |
| Step 5 | Using a small spatula, the resulting pieces of parquet are removed. |
| Step 6 | Small debris is collected with a vacuum cleaner. |
| Step 7 | Remains of glue or pieces of parquet that could not be removed the first time are removed. |
| Step 8 | The boards that will be used to replace the damaged area have the locking joints removed from all sides. |
| Step 9 | The boards are tried on in their intended place. |
| Step 10 | An adhesive composition for parquet boards is applied to the base. |
| Step 11 | The edge of the cut area is coated with glue. The boards are placed in place and pressed by hand. |